
Complete SCCM Windows 10 Deployment Guide
Founder of System Center Dudes. Based in Montreal, Canada, Senior Microsoft SCCM Consultant, 8 times Enterprise Mobility MVP. Working in the industry since 1999. His specialization is designing, deploying and configuring SCCM, mass deployment of Windows operating systems, Office 365 and Intune deployments.

Benoit Lecours
PresidentTable of Content
- SCCM Windows 10 Deployment Guide
-
Part 1 | Windows 10 Resources
- GENERAL DOCUMENTATION
- WINDOWS 10 NEW FEATURES
- WINDOWS 10 IMPROVEMENTS
- EDUCATION
- UPDATE YOUR DEPLOYMENT SKILLS
- DEVICE MANAGEMENT
- WINDOWS 10 SERVICING
- DOWNLOAD WINDOWS 10
- PREPARE FOR DEPLOYMENT
- UPGRADE TO WINDOWS 10 WITH SYSTEM CENTER CONFIGURATION MANAGER
- WINDOWS 10 CUSTOMIZATION
- WINDOWS 10 SERVICING USING SYSTEM CENTER CONFIGURATION MANAGER
- WINDOWS 10 REPORTS
- Part 2 | OVERVIEW SCCM WINDOWS 10 DEPLOYMENT
- Part 3 | CREATE SCCM WINDOWS 10 TASK SEQUENCE
- Part 4 | CREATE SCCM WINDOWS 10 BUILD AND CAPTURE TASK SEQUENCE
- Part 5 | MONITOR SCCM TASK SEQUENCE USING THE CONSOLE
-
Part 6 | SCCM WINDOWS 7 TASK SEQUENCE UPGRADE
- WHEN TO USE WINDOWS 7 IN-PLACE UPGRADE SCENARIO ?
- POSSIBLE UPGRADE PATH WHEN USING SCCM WINDOWS 7 TASK SEQUENCE UPGRADE
- REQUIREMENTS
- UNDERSTANDING THE IN-PLACE UPGRADE PROCESS
- CREATE SCCM TASK SEQUENCE UPGRADE WINDOWS 7 TO WINDOWS 10
- EDIT THE SCCM TASK SEQUENCE UPGRADE
- DEPLOY THE SCCM WINDOWS 7 UPGRADE TASK SEQUENCE
- LAUNCH THE UPGRADE PROCESS
- Part 7 | SCCM WINDOWS 10 CUSTOMIZATION
- Part 8 | SCCM INJECT LANGUAGE PACK WINDOWS 10
- Part 9 | WINDOWS 10 DEEP LINK ENROLLMENT
-
Part 10 | Windows 10 KMS Server
- PREREQUISITES FOR WINDOWS 10 KMS
- LOCATE YOUR KMS SERVER
- LIST LICENSED PRODUCTS ON A KMS SERVER
- THRESHOLD FOR KMS SERVER ACTIVATION
- ADD WINDOWS 10 KMS KEY TO A KMS SERVER
- ADD OFFICE 2016 KEY TO KMS SERVER
- KMS CLIENT SETUP KEY
- INSTALL VOLUME ACTIVATION MANAGEMENT TOOL (VAMT)
- CHANGE WINDOWS 10 ACTIVATION METHOD WITH VOLUME ACTIVATION MANAGEMENT TOOL
- EVENT VIEWER FOR KMS ACTIVATION
- ENCOUNTERED ISSUES
- Part 11 | SCCM WINDOWS 10 UPGRADES
- Part 12 |SCCM WINDOWS 10 SERVICING PLANS
- Part 13 | SCCM WINDOWS 10 TASK SEQUENCE UPGRADE
- Part 14 |SCCM UPGRADE READINESS CONNECTOR
-
Part 15 |WINDOWS 10 SECURITY BASELINE
- PREREQUISITES
- WINDOWS 10 SECURITY BASELINE FILES
- HOW TO USE WINDOWS 10 SECURITY BASELINE
- ADD TEMPLATES TO CENTRAL STORE
- IMPORT GPOS
- KEY POINTS THAT PROVIDE CHALLENGES
- HARDENED UNC PATH
- INTERNET EXPLORER PROCESS ONLY COMPUTER GPO
- USER ACCOUNT CONTROL
- CREDENTIAL GUARD
- SMB V1
- ISSUE WITH BITLOCKER ON WINDOWS 10 1709
- WHAT TO DO WHEN A NEW VERSION OF SECURITY BASELINE IS AVAILABLE?
- BONUS TIP
- Part 16 | SCCM Windows 10 USMT
-
Part 17 | SCCM WINDOWS 10 2004 UPGRADE
- CHECK PREREQUISITE SCCM WINDOWS 10 2004 UPGRADE
- WINDOWS ADK
- UPGRADE METHOD – TASK SEQUENCE OR SERVICING PLAN?
- IMPORT SCCM WINDOWS 10 2004 OPERATING SYSTEM
- DISTRIBUTE YOUR SCCM WINDOWS 10 2004 OPERATING SYSTEM IMAGE
- ADD OPERATING SYSTEM UPGRADE PACKAGES
- DISTRIBUTE YOUR OPERATING SYSTEM UPGRADE PACKAGES
- CREATE SCCM TASK SEQUENCE FOR WINDOWS 10 2004
- EDIT THE SCCM WINDOWS 10 2004 TASK SEQUENCE UPGRADE
- DEPLOY THE SCCM WINDOWS 10 2004 UPGRADE TASK SEQUENCE
- LAUNCH THE UPGRADE PROCESS ON A WINDOWS 10 COMPUTER
- CREATE SOFTWARE UPDATE GROUP
- IMPORT ADMX FILE
- BONUS RESOURCES
-
Part 18 | SCCM DESKTOP ANALYTICS
- WHY USE SCCM DESKTOP ANALYTICS
- WINDOWS ANALYTICS VS DESKTOP ANALYTICS
- PREREQUISITES BEFORE USING DESKTOP ANALYTICS AND SCCM INTEGRATION
- CREATE A DESKTOP ANALYTICS WORKSPACE IN AZURE
- CONNECT SCCM WITH DESKTOP ANALYTICS
- Desktop AnaVERIFICATION
- ENROLL DEVICES
- CREATE DEPLOYMENT PLANS
- DESKTOP ANALYTICS LOGS FILES
- REPORTING


Share


Get the latest insights and exclusive content delivered to your inbox
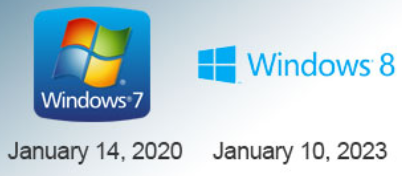
This blog post is a complete SCCM Windows 10 Deployment Guide. It contains all you need to know for a successful Windows 10 Deployment. The race to update Windows 7 computers from your environment is entering its home stretch. Microsoft has ended Windows 7 support on January 14th, 2020. If you still have Windows 7 computers in your company, it’s time to seriously plan your migration. If you’ve been reading our blog for a while, you may have seen a couple of posts regarding Windows 10 migration. We thought that regrouping all posts in a single one would save you time finding all needed SCCM Windows 10 deployments resources to start.
If you are still running SCCM 2012 and have plans to deploy Windows 10, we recommend starting with part 2 of this guide. (Hint: Deploy SCCM Current Branch).
If you’re already running SCCM Current Branch, start by creating a Windows 7 Upgrade Task Sequence. Upgrading Windows 7 to Windows 10 is not a complicated task, but it needs proper planning. You can use Desktop Analytics to help you with the applications and driver’s compatibility.
We will update this post as we add more parts to our SCCM Windows 10 deployments guide on our blog.
The PDF file is a 211 pages document that contains all you need to know for a successful Windows 10 Deployment.. Use our products page or use the button below to download it . |
SCCM Windows 10 Deployment Guide
- Part 1 | Windows 10 Resources
- Part 2 | Prepare your environment
- Part 3 | Create SCCM Windows 10 Task Sequence
- Part 4 | Create SCCM Windows 10 Build and Capture Task Sequence
- Part 5 | Monitor SCCM Task Sequence Progress
- Part 6 | Upgrade Windows 7 to Windows 10 using SCCM
- Part 7 | Windows 10 Customization
- Part 8 | Inject Language Pack with DISM
- Part 9 | How to use Windows 10 Deep Link Enrollment
- Part 10 | Windows 10 KMS Activation and Management using Volume Activation Management Tool
- Part 11 | Manage Windows 10 Upgrades using SCCM (Windows as a Service)
- Part 12 | Upgrade Windows 10 using SCCM Servicing Plans
- Part 13 | Upgrade Windows 10 using SCCM Task Sequence
- Part 14 | Configure and Enable Windows Upgrade Readiness
- Part 15 | How to use the Windows 10 Security Baseline
- Part 16 | Refreshing A Windows 7 Computer To Windows 10 Using Usmt And SCCM
- Part 17 | SCCM Windows 7 To Windows 10 1909 Upgrade Guide
- Part 18 | Connect SCCM with Desktop Analytics
Part 1 | Windows 10 Resources
Before starting a Windows 10 migration project, it’s always a good idea to be informed. There was so much information about Windows 10 in the past year: the OS itself has a couple of new features that you need to first understand. Your infrastructure needs various updates before you can start managing Windows 10 devices. The Windows 10 servicing options are also a huge chunk to understand. This can be overwhelming at first so we decided to compile a list of documentation that we found helpful during our multiple deployment projects.
Come back often as this list will continue to grow with time as Microsoft releases interesting documentation on a weekly basis.
GENERAL DOCUMENTATION
Huge compiled list of documentation provided by Microsoft about various topics :
Introduction to the new Windows 10 device management strategies:
Windows 10 release are frequent, it may be hard to follow. This page keep track of all update history :
An overview of requirements, editions, and languages available for Windows 10 :
WINDOWS 10 NEW FEATURES
Find out what’s new in Windows 10 and get an overview of key features for IT professionals :
- Credential Guard
- Device Guard
- Device management
- Enterprise Data Protection
- Enterprise management for Windows 10 devices
- Microsoft Passport
- Provisioning packages
- Windows 10 browsing options
- Windows spotlight on the lock screen
- Windows Store for Business
WINDOWS 10 IMPROVEMENTS
Learn about the improvements in Windows 10 :
EDUCATION
Take advantage of free, online training courses from Microsoft Virtual Academy and walk through the latest features and functionality.
- Getting started with Windows 10 for IT professionals
- Preparing your enterprise for Windows as a Service
UPDATE YOUR DEPLOYMENT SKILLS
Familiarize with the latest deployment strategies, and download free tools to ease the deployment process.
DEVICE MANAGEMENT
Learn new policies for devices that are running Windows 10. This post include new GPO and MDM policies
WINDOWS 10 SERVICING
This post is the post to go if you need to understand CBB and LTSB editions. It’s also an absolute must to understand the different Windows 10 servicing options :
DOWNLOAD WINDOWS 10
Links for downloading a Windows 10 media to get started :
- Download a free 90-day evaluation of Windows 10 Enterprise
- Download the Windows 10 deployment and management lab kit
PREPARE FOR DEPLOYMENT
There are specific infrastructure requirements to deploy and manage Windows 10 that should be in place prior to significant Windows 10 deployments within your organization. Information about Deployment tools (MDT, SCCM), Management Tools (AD, GPO, WSUS) and Activation tools (KMS) :
- Windows 10 infrastructure requirements
- Windows 10 KMS Activation and Management using Volume Activation Management Tool
Begin the process of evaluating the impact of application compatibility in your deployment project :
Understand the different ways that it can be deployed, especially now that there are new scenarios to consider. Choosing among these scenarios, and understanding the key capabilities and limitations of each, is a key task :
UPGRADE TO WINDOWS 10 WITH SYSTEM CENTER CONFIGURATION MANAGER
Learn how to upgrade to Windows 10 using MDT and Configuration Manager :
- Upgrade to Windows 10 with System Center Configuration Manager
- Managing Windows 10 with SCCM 2012
- SCCM Windows 10 Deployment | Prepare your environment
- Windows 10 Deployment | Create SCCM Windows 10 Build and Capture Task Sequence
- Refreshing a Windows 7 Computer to Windows 10 using USMT and SCCM
WINDOWS 10 CUSTOMIZATION
Read about Windows 10 customizing options by reading our blog posts :
- Customize your Windows 10 deployment using SCCM Task Sequences
- Windows 10 | Inject Language Pack with DISM
WINDOWS 10 SERVICING USING SYSTEM CENTER CONFIGURATION MANAGER
Everything you need to know to manage Windows 10 as a service :
- Manage Windows 10 Upgrades using SCCM (Windows as a Service)
- Upgrade Windows 10 using SCCM Servicing Plans
- Upgrade Windows 10 using SCCM Task Sequence
WINDOWS 10 REPORTS
Use our report to has better visibility of Windows 10 devices in your organisation :
In the first part of this blog series on how to deploy Windows 10 with SCCM, we will prepare our environment for Windows 10. If you’re already deploying other operating systems with SCCM 1511, adding Windows 10 is just a matter of adding a new WIM (which our post covers in part 4). If you’re new to deploying operating system with SCCM, follow this post which will covers all steps needed before you can deploy your first systems.
Part 2 | OVERVIEW SCCM WINDOWS 10 DEPLOYMENT
- Upgrade to SCCM 1511
- Enable PXE Support
- Prepare your boot image
- Prepare your Operating Systems
- Create your SUG
- USMT Packages
UPGRADE TO SCCM 1511
It’s possible to manage Windows 10 with SCCM 2012 but when it comes to deploying Windows 10, if you want to use the full features, you need SCCM 1511 and further. Follow our guide to upgrade your SCCM server and make sure that you are upgrading your Windows ADK version which is included in the upgrade process.
ENABLE PXE SUPPORT
Follow these steps if you want to deploy your images using PXE boot (recommended)
- Open the SCCM Console
- Go to Administration / Site Configuration / Servers and Site System Roles
- Select your distribution point and right-click on the Distribution point role on the bottom, select Properties

- Select the PXE tab
- Enable the Enable PXE support for Clients check-boxandanswer Yes when prompted about firewall ports (UDP ports 67, 68, 69 and 4011 )

- Check the Allow this distribution point to respond to incoming PXE requests check box
- Check the Enable unknown computer support check box
- Ensure that the Respond to PXE request on all network interfaces is selected
- Click Ok

Your distribution point will now install Windows Deployment Services (if not already installed) and will copy the necessary files on the distribution point.
You can monitor this process in the SCCM Console :
- Go to Monitoring / Distribution Status / Distribution Point Configuration Status
- Click your distribution point on the top and select the Details tab on the bottom
- You will see that the distribution point PXE settings has changed

PREPARE YOUR BOOT IMAGE
[su_box title=”Important note” style=”glass” title_color=”#F0F0F0″]If you have created any custom boot images in previous version, you won’t be able to manage it (customize, add drivers, ect…) through the SCCM console. The only manageable version would be PE10 images. Other version could still be used but you’ll have to manage them outside the console using DISM.[/su_box]
DRIVERS
Before launching your first boot image you must include your Windows 10 drivers into the boot image. Our rule of thumb about drivers is to try to boot a certain model and if it fails, add the drivers. Do not add all your NIC drivers to your boot image, it’s overkill and unnecessary increase the size of the boot image.
To add drivers to the boot image :
- Open the SCCM Console
- Go to Software Library / Operating Systems / Boot Images
- Right-click your Boot Image, select Properties
- Select the Drivers tab

- Click the Star icon
- Select the desired drivers and click OK

- The selected drivers are added to the boot image, once you click OK, SCCM will inject the driver in your boot image

Windows 10 CUSTOMIZATION
We will now make a couple customization to the boot image to enable command support (F8) and add a custom background image to the deployment
- Open the SCCM Console
- Go to Software Library / Operating Systems / Boot Images
- Right-click your Boot Image
- Select the Customization tab
- Check the Enable command support checkbox. This allows to have the F8 command line support during deployment
- Specify a custom background if needed by checking Specify the custom background image file checkbox

- If you’re using a PXE-enable distribution point, select the Data Source tab and check the Deploy this boot image from the PXE-Enabled distributon point checkbox

- Click Apply and Yes to the warning, close the window

DISTRIBUTE YOUR BOOT IMAGE
Since you’ve upgraded your ADK to version 10 and made modifications to your boot image, you need to redistribute it to your distribution points.
- Right click your boot image and select Update Distribution Points

PREPARE YOUR OPERATING SYSTEMS
We will now import the Windows 10 WIM file for Windows 10 deployment.
[su_box title=”Important” style=”glass” title_color=”#F0F0F0″]You’ll see both Operating System Images and Operating System Upgrade Packages. One is to import .WIM files and the other one is for Full Media. We will need both for different scenarios. In the case of a vanilla deployment or after a build and capture, you use Operating System Images to import the WIM files. In an Upgrade task Sequence, you will need to have the Full media imported in Operating System Upgrade Packages.[/su_box]
We will start by importing the default Install.Wim from the Windows 10 media for a “vanilla” Windows 10 deployment. You could also import a WIM file that you’ve created through a build and capture process.
- Open the SCCM Console
- Go to Software Library / Operating Systems / Operating System Images
- Right click Operating System Images and select Add Operating System Image

- On the Data Source tab, browse to your WIM file. The path must be in UNC format

- In the General tab, enter the Name, Version and Comment, click Next

- On the Summary tab, review your information and click Next

- Complete the wizard and close this window

DISTRIBUTE YOUR OPERATING SYSTEM IMAGE
We now need to send the Operating System Image (WIM file) to our distribution points.
- Right click your Operating System Image, select Distribute Content and complete the Distribute Content wizard

We will now import the complete Windows 10 media in Operating System Upgrade Packages. This package will be used to upgrade a Windows 7 (or 8.1) device to Windows 10 using an Upgrade Task Sequence.
- Open the SCCM Console
- Go to Software Library / Operating Systems / Operating System Upgrade Packages
- Right click Operating System Upgrade Packages and select Add Operating System Upgrade Packages

- In the Data Source tab, browse to the path of your full Windows 10 media. The path must point on an extracted source of a ISO file. You need to point at the top folder where Setup.exe reside


- In the General tab, enter the Name, Version and Comment, click Next

- On the Summary tab, review your information and click Next

- Complete the wizard and close this window

DISTRIBUTE YOUR OPERATING SYSTEM UPGRADE PACKAGES
We now need to send the Operating System Upgrade Package to your distribution points.
- Right click your Operating System Upgrade Package, select Distribute Content and complete the Distribute Content wizard

CREATE SOFTWARE UPDATE GROUP
One important thing in any OSD project, is to make sure that every machines deployments are up to date. Before deploying Windows 10, make sure that your Software Update Point is configured to include Windows 10 patches.
Once Windows 10 is added to your Software Update Point, we will create a Software Update Group that will be deployed to our Windows 10 deployment collection. This way, all patches released after the Windows 10 media creation (or your Capture date) will be deployed during the deployment process.
To create a Windows 10 Software Update Group :
- Open the SCCM Console
- Go to Software Library / Software Updates / All Software Updates
- On the right side, click Add Criteria, select Product, Expired and Superseded
- Product : Windows 10
- Expired : No
- Superseded : No

- Select all patches and select Create Software Update Group

- Once created, go to Software Library / Software Updates / Software Update Groups
- Right-click your Windows 10 SUG and deploy it to your OSD deployment collection
USMT PACKAGE
If you are planning to use USMT to capture and restore user settings and files, you need to make sure that the USMT package is created and distributed.
- Open the SCCM Console
- Go to Software Library / Application Management / Packages
- Right-click the User State Migration Tool for Windows 10 package and select Properties
- On the Data Source tab, ensure that the package is using the ADK 10 – Which is per default C:\Program Files\Windows Kits\10\Assessment and Deployment Kit\User State Migration Tool
- Right-click the User State Migration Tool for Windows 10 package and select Distribute Content

That’s it ! You have everything that’s needed to create your first Windows 10 deployment. Read the next parts of this blog series to successfully deploy Windows 10.
Part 3 | CREATE SCCM WINDOWS 10 TASK SEQUENCE
In the second post of this blog series about Windows 10 Deployment using SCCM, we will show you how to create a SCCM Windows 10 Task Sequence and deploy it. Complete the preparation of your environment before reading this post.
This task sequence will help you deploy what we call a “vanilla” Windows 10 using the default Install.wim from the Windows 10 media. This means that you’ll end up with a basic Windows 10 with the SCCM client and nothing else.
You will be able to edit this task sequence later to customize it to your environment.
- Open the SCCM Console
- Go to Software Library \ Operating Systems \ Task Sequences
- Right-click Task Sequences and select Create Task Sequence

- On the Task Sequence wizard, select Install an existing image package

- On the Task Sequence Information pane, enter the desired Name, Description and Boot Image

- On the Install Windows pane, select the Image package and Image index you imported in part 1
- Leave the check box beside Partition and Format the target computer before installing the operating system
- For this example we will remove the Configure task sequence for use with Bitlocker
- Leave the Product key blank, if you are using MAK keys, read this post on how to handle that in your Task Sequence. (TL;DR: Even with MAK key, you need to leave the Product key blank)
- Enter an Administrator password

- In the Configure Network pane, you can select to Join a workgroup or domain. If you select Join a domain, enter your domain information, OU and credentials

- On the Install Configuration Manager Client pane, select your Configuration Manager Client Package and enter your installation properties

- On the State Migration pane, we will remove all checkbox as we don’t want to use User State Migration at this time

- On the Include Updates pane, select the desired Software Update task
- All Software Updates will install the updates regardless of whether there is a deadline set on the deployment (on your OSD collection)
- Mandatory Software Updates will only install updates from deployments that have a scheduled deadline (on your OSD collection)
- Do not install any software updates will not install any software update during the Task Sequence

- On the Install Applications tab, click on the Star Icon to add any application that you want to be installed during your deployment. Only applications will be listed. If you need to add packages, you can add it by editing the task sequence later. Theses applications will be deployed each time the task sequence is executed.

- On the Summary tab, review your settings and click Next

- On the Completion tab, click Close

DEPLOY WINDOWS 10 TASK SEQUENCE
Now that your Task Sequence is created, we will deploy it to a collection and start a Windows 10 deployment.[su_box title=”Warning” style=”glass” title_color=”#F0F0F0″]Be careful when targeting the deployment. This task sequence will format and install a new OS to targeted devices.[/su_box]
- Open the SCCM Console
- Go to Software Library \ Operating Systems \ Task Sequences
- Right-click your Windows 10 Task Sequence and select Deploy

- On the General pane, select your collection. This is the collection that will receive the Windows 10 installation. For testing purposes, we recommend putting only 1 computer to start

- Select the Purpose of the deployment
- Available will prompt the user to install at the desired time
- Required will force the deployment at the deadline (see Scheduling)
- In the Make available to the following drop down, select the Only media and PXE. This will ensure that you do not send the deployment on clients. This is also useful to avoid errors, using this options you *could* send the deployment to All Systems and no clients would be able to run the deployment from Windows

- On the Scheduling tab, enter the desired available date and time. On the screenshot, we can’t create an Assignment schedule because we select Available in the previous screen

- In the User Experience pane, select the desired options

- In the Alerts tab, check Create a deployment alert when the threshold is higher than the following checkbox if you want to create an alert on the failures

- On the Distribution Point pane, select the desired Deployment options. We will leave the default options

- Review the selected options and complete the wizard


PXE BOOT
Now that we’ve created our task sequence and that it’s deployed. We can start the deployment on the machine. Make sure that your system is a member of your deployment collection and start the device. For this example, we will be using a virtual machine running on Hyper-V.
- The machine is booting and waiting for the PXE to respond

- Our SCCM Distribution point is sending the boot image to our VM

- The Welcome to the Task Sequence Wizard pops-up. This is because of the Available purpose in the Deployment Settings. If we had a Required deployment, the task sequence would start right away. Click Next

- All the available task sequence are listed. In our example we have only 1 deployment on our collection so only 1 task sequence is available. Select the task sequence and click Next

- The Task Sequence starts

MONITORING
See our blog post on this topic which covers the various ways to monitor your Task Sequence progress.
Part 4 | CREATE SCCM WINDOWS 10 BUILD AND CAPTURE TASK SEQUENCE
In the third post of this blog series about Windows 10 Deployment using SCCM, we will show you how to create a SCCM Windows 10 Build and Capture Task Sequence and deploy it. Complete the preparation of your environment before reading this post. You will be able to edit this task sequence later to customize it to your environment.
The goal of a build and capture task sequence is to capture a reference machine OS in order to redeploy its configuration multiple time. As a best practice, we recommend not to add too much software and customization to your reference image. Rather, use the task sequence steps to customize your deployment which decrease management operation tasks in the long run.
For example, if you want to include Adobe Reader to your reference image because all your users need it, do not install it on your reference machine and do your capture. Instead, use the Installed Software step in the capture task sequence. When a new version of Adobe Reader will be released, it will be a matter of a couple of clicks to replace the old version with the new one.
- Open the SCCM Console
- Go to Software Library \ Operating Systems \ Task Sequences
- Right-click Task Sequences and select Build and capture a reference operating system image

- On the Task Sequence Information tab enter a task sequence Name and Description
- Select the desired boot image

- On the Install Windows pane, select the Image package and Image index you imported in part 1
- Leave the Product key blank, if you are using MAK keys, read this post on how to handle that in your Task Sequence. (Hint : Even with MAK key, you need to leave the Product key blank)
- Enter a password for the local Administrator account

- In the Configure Network pane, select to Join a workgroup. There’s no reason to join a domain when creating a build and capture task sequence. You’ll still be able to join a domain when creating a task sequence to deploy this image

- On the Install Configuration Manager Client pane, select your Configuration Manager Client Package and enter your installation properties

- On the Include Updates pane, select the desired Software Update task
- All Software Updates will install the updates regardless of whether there is a deadline set on the deployment (on your OSD collection)
- Mandatory Software Updates will only install updates from deployments that have a scheduled deadline (on your OSD collection)
- Do not install any software updates will not install any software update during the Task Sequence

- On the Install Applications tab, click on the Star Icon to add any application that you want to be installed during your build and capture deployment. These applications will be part of the reference image, we recommended adding only software that need to be included in every deployment… and even there, I prefer add it to a deployment task sequence rather to include it in my image. The reason is pretty simple, if you need to make an application change, you only have 1 step to change to your task sequence rather than redo the whole build and capture process and then modify your task sequence with the new image. Some likes to add Office or other big applications that every users needs to reduce deployment time.

- On the System Preparation tab, click Next

- On the Image Properties tab, enter the desired information

- On the Capture Image tab, select the path where you want to save the .WIM file
- Enter the account to access the folder. This account needs write permission

- On the Summary tab, review your choices and complete the wizard


DEPLOY WINDOWS 10 BUILD AND CAPTURE TASK SEQUENCE
Now that our Task Sequence is created, we will deploy it to a collection and start a Windows 10 Build and capture. It’s strongly recommended to deploy a build and capture on a virtual machine.
Be careful when targeting the deployment. This task sequence will format and install a new OS to targeted devices.
- Open the SCCM Console
- Go to Software Library \ Operating Systems \ Task Sequences
- Right-click your Windows 10 Build and Capture Task Sequence and select Deploy

- On the General pane, select your build and capture collection. This is the collection that will receive the Windows 10 installation and be captured to create the new WIM file

- Select the Purpose of the deployment
- Available will prompt the user to install at the desired time
- Required will force the deployment at the deadline (see Scheduling)
- In the Make available to the following drop down, select the Only media and PXE. This will ensure that you do not send the deployment on clients. This is also useful to avoid errors, using this options you *could* send the deployment to All Systems and no clients would be able to run the deployment from Windows

- On the Scheduling tab, enter the desired available date and time. On the screenshot, we can’t create an Assignment schedule because we select Available in the previous screen

- In the User Experience pane, select the desired options

- In the Alerts tab, check Create a deployment alert when the threshold is higher than the following checkbox if you want to create an alert on the failures

- On the Distribution Point pane, select the desired Deployment options. We will leave the default options

- Review the selected options and complete the wizard


PXE BOOT
Now that we’ve created our task sequence and that it’s deployed. We can start the deployment on the machine. Make sure that the system you want to capture is a member of your deployment collection and start the device. (See this Technet article to know how to import a computer).
For this example, we will be using a virtual machine running on Hyper-V.
- The machine is booting and waiting for the PXE to respond
- Our SCCM Distribution point is sending the boot image to our VM
- The Welcome to the Task Sequence Wizard pops-up. This is because of the Available purpose in the Deployment Settings. If we had a Required deployment, the task sequence would start right away. Click Next

- All the available task sequence are listed. In our example we have our deployment and our build and capture task sequence. Select the Build and Capture task sequence and click Next

- The Task Sequence starts

MONITORING
See our blog post on this topic which covers the various ways to monitor your task sequence progress.
Part 5 | MONITOR SCCM TASK SEQUENCE USING THE CONSOLE
When deploying Windows 10 operating system using SCCM, you will need to monitor SCCM task sequence progress. This allows us to track task sequence start, end time and most importantly errors (if any). Our post will show 4 different ways to monitor SCCM task sequences. Each of them has its own benefits and drawbacks.
You can view the progress of a task sequence using the SCCM console. This method is simple and easy but permit to see the status of only one machine at the time. If your deployment staff don’t have access to the console or view deployment status, this option is not for you.
- Open the SCCM Console
- Go to Monitoring / Deployments
- Search and right-click the deployment linked to your Windows 10 task sequence
- On the menu, select View Status

- In the Deployment Status screen, select the In Progress tab for a running task sequence or the Success tab to review a completed task sequence
- At the bottom, click the Asset Details pane, right-click your device and select More Details

- On the Asset Message screen, click the Status tab
- You can view all task sequence Action Name with their Last Message Name

CONSOLE STATUS MESSAGE QUERIES
You can use Status Message Queries in the SCCM console to filter only task sequence messages. This method is useful to have messages from multiple devices instead of targeting a specific computer like in the previous methods. This method is a bit trickier to implement.
- The first step is to get the DeploymentID of your task sequence deployment
- Go to Monitoring / Deployments
- Add the DeploymentID column by right-clicking the top row. Note your DeploymentID, in our example 1002000B

- Go to Monitoring / System Status / Status Message Queries
- Right-click Status Message Queries and select Create Status Message Query

- On the General tab, enter a desired Name and click on Edit Query Statement

- On the Query Statement Properties window, click on Show Query Language

- Enter the following query in the Query Statement window
[su_box title=”Query” style=”glass” title_color=”#F0F0F0″]select SMS_StatusMessage.*,SMS_StatMsgInsStrings.*,SMS_StatMsgAttributes.*,SMS_StatMsgAttributes.AttributeTime
from SMS_StatusMessage
left join SMS_StatMsgInsStrings on SMS_StatMsgInsStrings.RecordID = SMS_StatusMessage.RecordID
left join SMS_StatMsgAttributes on SMS_StatMsgAttributes.RecordID = SMS_StatusMessage.RecordID
where SMS_StatMsgAttributes.AttributeID = 401 and SMS_StatMsgAttributes.AttributeValue = “1002000B” and SMS_StatMsgAttributes.AttributeTime >= ##PRM:SMS_StatMsgAttributes.AttributeTime##
order by SMS_StatMsgAttributes.AttributeTime DESC[/su_box]
- Change the SMS_StatMsgAttributes.AttributeValue to reflect your DeploymentID

- Click OK
- In the Status Message Queries node, find your newly created Query, right-click on it and select Show Messages

- Select the desired Date and Time and click OK

- All messages from your selected deployment will be displayed for all devices that run it

SCCM BUILT-IN REPORTS
There’s 28 built-in reports concerning task sequence in SCCM. The majority of the reports focus on statistics about overall deployments. To monitor progress, we refer to the 2 following reports :
- Task Sequence – Deployment Status / Status of a specific task sequence deployment for a specific computer
- This report shows the status summary of a specific task sequence deployment on a specific computer.

- Task Sequence – Deployment Status / History of a task sequence deployment on a computer
- This report displays the status of each step of the specified task sequence deployment on the specified destination computer. If no record is returned, the task sequence has not started on the computer.

As you can see, readability is easier using the console but keep in mind that reports can be accessible without having console access.
OUR SCCM OSD REPORT
We offer a report for you to buy to keep track of your Windows 10 deployment. The report gives you all the information needed to keep track of a deployment.
You can find the report on our product page or directly on the SCCM Windows 10 Report product page


SMSTS.LOG
Last method we want to cover to monitor Windows 10 task sequence deployment is using the SMSTS.log file. This is the method you’ll want to use when you have a failing task sequence. The SMSTS.log file contains every details about every steps in your task sequence. It’s the first place to look to troubleshoot a problem with a specific deployment.
The downside of this file is that it’s stored locally on the computer (by default). Another downside is that this file location change depending on the stage you are at :
| In Windows PE – Before the hard disk is formatted | X:\Windows\Temp\Smstslog\Smsts.log |
| In Windows PE – After the hard disk is formatted | X:\Smstslog\Smsts.log and C:\_SMSTaskSequence\Logs\Smstslog\Smsts.log |
| In Windows – Before the SCCM client is installed | C:\_SMSTaskSequence\Logs\Smstslog\Smsts.log |
| In Windows – After the SCCM client is installed | C:\Windows\Ccm\Logs\Smstslog\Smsts.log |
| In Windows – When the Task Sequence is complete | C:\Windows\Ccm\Logs\Smsts.log |
- Connect on the computer you want to troubleshoot
- Press the F8 key. A command prompt will open. If you have no command prompt by pressing F8, consult our Preparation post to enable Command Line support in your Boot image
- In the command windows, enter CMTrace to open the log viewer (it’s included by default in the latest WinPE version)

- Browse to the location when the file reside (see above table)

- The SMSTS.log opens and you can search for errors

There’s also methods to redirect your SMSTS.log automatically to a network share which could help :
- Using SLShare variable (MDT Integrated)
- Using the _SMSTSLastActionSucceeded variable
We hope this post will ease your Windows 10 deployments. Leave your comments and questions in the comment section.
Part 6 | SCCM WINDOWS 7 TASK SEQUENCE UPGRADE
In the fourth post of this blog series about Windows 10 Deployment using SCCM, we will show you how to upgrade Windows 7 to Windows computer 10 using SCCM task sequence upgrade.
The goal of an upgrade task sequence is to upgrade an existing operating system to Windows 10 without loosing any data and installed software. This post assumes that you are running SCCM 1511 or SCCM 1602 and that you completed the preparation of your environment for Windows 10.
If you are running SCCM 2012 R2 SP1, the product team has release important information about SCCM task sequence upgrade that you can find in this blog post.
In the past, an in-place upgrade scenario was not a reliable and popular option to deploy the latest version of Windows. With Windows 10, it’s now reliable and features an automatic rollback in case something goes wrong. This scenario can also be considered faster than the wipe and reload deployment scenarios, since applications and drivers don’t need to be reinstalled.
WHEN TO USE WINDOWS 7 IN-PLACE UPGRADE SCENARIO ?
Consider using SCCM upgrade task sequence if :
- You need to keep all existing applications and settings on a device
- You need to migrate Windows 10 to a later Windows 10 release (ex: 1511 to 1607)
- You don’t need to change the system architecture (32 bits to 64 bits)
- You don’t need to change the operating system base language
- You don’t need to downgrade a SKU (Enterprise to Pro). The only supported path is Pro to Enterprise or Enterprise to Enterprise)
- You don’t need to change the BIOS architecture from legacy to UEFI
- You don’t have multi-boot configuration
Windows 10 is now managed as a service, this upgrade process can also be used to migrate Windows 10 to a later Windows 10 release or you can use the new Windows 10 servicing feature in SCCM 1602 and later.
POSSIBLE UPGRADE PATH WHEN USING SCCM WINDOWS 7 TASK SEQUENCE UPGRADE
- Windows 7, Windows 8 and Windows 8.1 can use this method to upgrade to Windows 10
- You can’t upgrade a Windows XP or Windows Vista computer to Windows 10
- Windows 10 is the only final destination OS (You can’t upgrade a Windows 7 to Windows 8.1 using this method)
REQUIREMENTS
- As stated in the start of this blog post, you need at least SCCM 2012 R2 SP1 (or SCCM 2012 SP2) to support the upgrade task sequence
- You cannot use a custom image for this scenario, you must start from the original WIM from the Windows 10 media
[su_box title=”Device using disk encryption” style=”glass” title_color=”#F0F0F0″]Devices using Bitlocker can be upgraded to Windows 10 using this method. If you are using third-party disk encryption product, it can be done but you need far more effort.[/su_box]
Three major vendors have supported workarounds documented on their support sites :
UNDERSTANDING THE IN-PLACE UPGRADE PROCESS
If you want to understand all the phases in the upgrade process, we strongly recommend watching the Upgrading to Windows 10: In Depth video from the last Microsoft Ignite event.
CREATE SCCM TASK SEQUENCE UPGRADE WINDOWS 7 TO WINDOWS 10
Enough writing, let’s create a SCCM task sequence upgrade for a Windows 7 deployment.
- Open the SCCM Console
- Go to Software Library \ Operating Systems \ Task Sequences
- Right-click Task Sequences and select Upgrade an operating system from upgrade package

- In the Task Sequence Information tab, enter a Task Sequence Name and Description

- On the Upgrade the Windows Operating System tab, select your upgrade package by using the Browse button. If you don’t have imported an upgrade package yet, use the step provided in our preparation blog post

- On the Include Updates tab, select the desired Software Update task
- All Software Updates will install the updates regardless of whether there is a deadline set on the deployment (on your OSD collection)
- Mandatory Software Updates will only install updates from deployments that have a scheduled deadline (on your OSD collection)
- Do not install any software updates will not install any software update during the Task Sequence

- On the Install Applications tab, select any application you want to add to your upgrade process

- On the Summary tab, review your choices and click Next

- On the Competition tab, click Close

EDIT THE SCCM TASK SEQUENCE UPGRADE
Now that we have created the task sequence, let’s see what it looks like under the hood:
- Open the SCCM Console
- Go to Software Library \ Operating Systems \ Task Sequences
- Right-click your upgrade task sequences and select Edit
As you can see, it’s fairly simple. SCCM will take care of everything in a couple of steps :

- The Upgrade Operating System step contains the important step of applying Windows 10

DEPLOY THE SCCM WINDOWS 7 UPGRADE TASK SEQUENCE
We are now ready to deploy our task sequence to the computer we want to upgrade. In our case, we are targeting a Windows 7 computer.
- Go to Software Library \ Operating Systems \ Task Sequences
- Right-click Task Sequences and select Deploy

- On the General pane, select your collection. This is the collection that will receive the Windows 10 upgrade. For testing purposes, we recommend putting only 1 computer to start

- On the Deployment Settings tab, select the Purpose of the deployment
- Available will prompt the user to install at the desired time
- Required will force the deployment at the deadline (see Scheduling)
- You cannot change the Make available to the following drop-down since upgrade packages are available to client only

- On the Scheduling tab, enter the desired available date and time. On the screenshot, we can’t create an Assignment schedule because we select Available in the previous screen

- In the User Experience pane, select the desired options

- In the Alerts tab, check Create a deployment alert when the threshold is higher than the following check-box if you want to create an alert on the failures

- On the Distribution Point pane, select the desired Deployment options. We will leave the default options

- Review the selected options and complete the wizard

LAUNCH THE UPGRADE PROCESS
Now that our upgrade task sequence is deployed to our clients, we will log on our Windows 7 computer and launch a Machine Policy Retrieval & Evaluation Cycle from Control Panel / Configration Manager Icon

- Open the new Software Center from the Windows 7 Start Menu
- You’ll see the SCCM upgrade task sequence as available. We could have selected the Required option in our deployment schedule, to launch automatically without user interaction at a specific time

- When ready, click on Install

- The following warning appears

[su_box title=”Warning” style=”glass” title_color=”#F0F0F0″]The When you install a new operating system, all the existing data on your computer will be removed warning is not true. This issue will be resolved in future release.[/su_box]
- Click on Install Operating System
- The update is starting, the task sequence Installation Progress screen shows the different steps


- The WIM is downloading on the computer and saved in C:\_SMSTaskSequence


- You can follow task sequence progress in C:\Windows\CCM\Logs\SMSTSLog\SMSTS.log

- After downloading, the system will reboot

- The computer restart and is loading the files in preparation of the Windows 10 upgrade

- WinPE is loading

- The upgrade process starts. This step should take about 15 to 30 minutes depending of the device hardware


- Windows 10 is getting ready, 2-3 more minutes and the upgrade will be completed

- Once completed the SetupComplete.cmd script runs. This step is important to set the task sequence service to the correct state

- Windows is now ready, all software and settings are preserved

Part 7 | SCCM WINDOWS 10 CUSTOMIZATION
In this post we will describe how to customize your windows 10 image to personalize it to your company. There’s an infinite amount of customization that can be made but i’ll try to cover the more frequent one, those that are asked 95% of every Windows 10 projects I was involved in. You could also do all those modifications through group policies if you want to enforce those settings.
Before we begin any customization, we will create a Windows 10 Customization package that we will use in our task sequence. It will be empty to start but we will create the folders and scripts during this blog post.
- Open the SCCM Console
- Go to Software Library / Application Management / Packages
- Create a new package
- On the Package tab, enter a Name, Description, Manufacturer and Source folder (this is where all scripts will be stored)

- On the Program Type tab, select Do not create a program

- On the Summary tab, review your choices and complete the wizard

FILE ASSOCIATION
The first item we will be covering is file association. By default, Windows 10 uses Microsoft Edge to open every PDF files and HTTP links. For this post, we will redirect PDF files to Adobe Reader and HTTP/HTTPS to Internet Explorer. You can redirect any extension to any software. You just need to make sure that the application that you associate is installed during your Windows 10 deployment (or in your image).
The first step is to make the association manually, we will then export the configuration to a XML file and we will use DISM in our task sequence to import the configuration.
- Log on a Windows 10 machine
- Open Control Panel / Programs / Default Programs / Set Associations

- Navigate to .PDF and click on Change Program

- Select Adobe Reader and click OK

- Your .PDF files are now associated to Adobe Reader
- For Internet Explorer association, select HTTP Protocol, .HTM and .HTML files, change program to Internet Explorer
Now that our associations has been done, we need to export the associations to a XML file using DISM :
- Open an elevated command prompt
- Run the following command : Dism /Online /Export-DefaultAppAssociations:C:\Temp\SCDAppAssoc.xml
- (Change the XML file name and path if desired but make sure that the directory exists or you’ll get an error code 3)

The XML file can be opened using any text editor. You can see our modifications has been made. It’s possible to change manually in this file but it’s a bit tricky to find ProdId and ApplicationName.

- Copy the XML file to your Windows 10 customization package in the FileAssociations Folder

- Open the SCCM Console and browse to Packages
- Right-click your Windows 10 Customization package and select Update Distribution Point

- Go to Software Library \ Operating Systems \ Task Sequences
- Right-click and Edit your Windows 10 task sequence
- Select Add / General / Run Command Line
- Name : Set File Association
- Command line : Dism.exe /online /Import-DefaultAppAssociations:FileAssociations\SCDAppAssoc.xml
- Check the Package box and specify your Windows 10 customization package
- Position this step after the Windows image has been deployed

SETTING THE DEFAULT WINDOWS 10 WALLPAPER
We will now change the default Windows 10 wallpaper to a corporate one.
- The default Windows 10 wallpapers are stored in the C:\Windows\Web\Wallpaper\Windows\ folder
- Windows 10 also support 4K wallpapers which are stored in C:\Windows\Web\4K\Wallpaper\Windows


For our post, we will delete the 4K wallpapers and overwrite the default img0.jpg file. If you need to support 4K wallpaper, just place them in the 4K folder before updating your distribution points and the script will copy it to the right location.
By default, you can’t modify those files, we will use a PowerShell script to change the security of the folder and overwrite the wallpaper file. We will grant access to the SYSTEM account since it’s the account used during the SCCM task sequence.
- Create a new WallPaper\DefaultRes and WallPaper\4K folder in your Windows 10 customization directory
- Rename your wallpaper to img0.jpg copy it in the WallPaper\DefaultRes directory
- If 4K support is needed, copy your files in the WallPaper\4K Directory
Create a new Powershell script in the root of the Wallpaper directory and copy this code into it :
Powershell Script
takeown /f c:\windows\WEB\wallpaper\Windows\img0.jpg
takeown /f C:\Windows\Web\4K\Wallpaper\Windows\*.*
icacls c:\windows\WEB\wallpaper\Windows\img0.jpg /Grant ‘System:(F)’
icacls C:\Windows\Web\4K\Wallpaper\Windows\*.* /Grant ‘System:(F)’
Remove-Item c:\windows\WEB\wallpaper\Windows\img0.jpg
Remove-Item C:\Windows\Web\4K\Wallpaper\Windows\*.*
Copy-Item $PSScriptRoot\img0.jpg c:\windows\WEB\wallpaper\Windows\img0.jpg
Copy-Item $PSScriptRoot\4k\*.* C:\Windows\Web\4K\Wallpaper\Windows
You’ll end up with the following structure :

- Open the SCCM Console and browse to Packages
- Right-click your Windows 10 Customization package and select Update Distribution Point
- Go to Software Library \ Operating Systems \ Task Sequences
- Right-click and Edit your Windows 10 task sequence
- Select Add / General / Run PowerShell Script
- Name : Set Wallpaper
- Script Name : Wallpaper\ChangeWallpaper.ps1
- PowerShell execution policy : Bypass
- Position this step after the Windows image has been deployed

CHANGE LOCK SCREEN IMAGE
The lock screen image is the image you see when the computer is locked. To change it, we must copy our image locally on the computer and then modify a registry key to read it.
- Create a new LockScreen folder in your Windows 10 customization directory
- Create a new LockScreen.cmd file and copy the following code
LockScreen.cmd
xcopy LockScreen\LockScreen.jpg C:\SCD\LockScreen\ /Y /S
reg import LockScreen\LockScreen.reg
reg import LockScreen\LockScreen.reg /reg:64
- Create a new LockScreen.reg file and copy the following code (watch out of the “” when copy/pasting)
LockScreen.reg
Windows Registry Editor Version 5.00[HKEY_LOCAL_MACHINE\SOFTWARE\Policies\Microsoft\Windows\Personalization] “LockScreenImage”=”C:\\SCD\\LockScreen\\LockScreen.jpg”
- Copy the image you want to set as the lock screen. For this blog post we will call it LockScreen.jpg. If you rename this file, make sure to change the script to fit this name.
You’ll end up with the following structure :

- Open the SCCM Console and browse to Packages
- Right-click your Windows 10 Customization package and select Update Distribution Point
- Go to Software Library \ Operating Systems \ Task Sequences
- Right-click and Edit your Windows 10 task sequence
- Select Add / General / Run Command Line
- Name : Set File Association
- Command line : cmd.exe /c LockScreen\LockScreen.cmd
- Check the Package box and specify your Windows 10 customization package
- Position this step after the Windows image has been deployed

DISABLE MICROSOFT CONSUMER EXPERIENCES
The latest Windows 10 feature upgrade includes a new feature that automatically installs a few apps from the Windows Store. Some apps like Candy Crush and Minecraft gets installed, we don’t think that belong to a work environment so we’ll delete it.

The good news is that it’s quite simple to disable. You need to disable a function called Microsoft Consumer Experiences. We will do this using a registry modification :
- Create a new ConsumerExperience folder in your Windows 10 customization directory
- Create a new DisableConsumerExperience.reg file and copy the following code :
DisableConsumerExperience.reg
Windows Registry Editor Version 5.00[HKEY_LOCAL_MACHINE\SOFTWARE\Policies\Microsoft\Windows\CloudContent] “DisableWindowsConsumerFeatures”=dword:00000001
You’ll end up with the following structure :

- Open the SCCM Console and browse to Packages
- Right-click your Windows 10 Customization package and select Update Distribution Point
- Go to Software Library \ Operating Systems \ Task Sequences
- Right-click and Edit your Windows 10 task sequence
- Select Add / General / Run Command Line
- Name : Disable Consumer Experience
- Command line : Regedit.exe /s ConsumerExperience\DisableConsumerExperience.reg
- Check the Package box and specify your Windows 10 customization package
- Position this step after the Windows image has been deployed

CREATE CUSTOM START MENU
We will now create a default Windows 10 start menu that will be used on every Windows 10 machine by default. If you add shortcuts to applications, make sure that you’ve include them in your task sequence or you’ll end up with a start menu looking like swiss cheese. (empty spots)

- Log on a Windows 10 machine
- Manually configure the Start Menu
- Create a new StartMenu folder in your Windows 10 customization package
- Start an elevated PowerShell and run the following command : Export-StartLayout -Path “C:\Temp\StartMenu.bin”
- Copy the StartMenu.bin file to your Windows 10 customization package in the StartMenu folder

- Open the SCCM Console and browse to Packages
- Right-click your Windows 10 Customization package and select Update Distribution Point
- Go to Software Library \ Operating Systems \ Task Sequences
- Right-click and Edit your Windows 10 task sequence
- Select Add / General / Run Command Line
- Name : Set Start Menu Layout
- Command line : Powershell.exe Import-StartLayout -LayoutPath StartMenu\StartMenu.bin -MountPath C:\
- Check the Package box and specify your Windows 10 customization package
- Position this step after the Windows image has been deployed

SET WINDOWS 10 PINNED TASKBAR ITEMS
Windows 10 permits to “pin” program on the task bar for easy access. Here’s how to create a standard task-bar for your Windows 10 users.

- Create a new PinTaskBar folder in your Windows 10 customization directory
- Log on a Windows 10 computer
- Manually pin all the desired program using the Pin to taskbar option

- Copy the links from %AppData%\Microsoft\Internet Explorer\Quick Launch\User Pinned\TaskBar to your Windows 10 customization package in the PinTaskBar directory. This directory is hidden, so be sure to show Hidden Items


- Open Registry Editor
- Export the HKEY_CURRENT_USER\Software\Microsoft\Windows\CurrentVersion\Explorer\Taskband key to Win10Taskbar.reg

- Copy the Win10Taskbar.reg file to your Windows 10 customization package in the PinTaskBar directory
- Edit the Win10Taskbar.reg file using a text editor and replace the beginning of the first line
- Replace HKEY_Current_User to HKEY_LOCAL_MACHINE\defuser

- The final string will be : HKEY_LOCAL_MACHINE\defuser\SOFTWARE\Microsoft\Windows\CurrentVersion\Explorer\Taskband
- Create a new Win10Taskbar.cmd file in your Windows 10 customization package in the PinTaskBar directory and copy the following code :
Win10Taskbar.cmd
Reg.exe load HKEY_LOCAL_MACHINE\defuser C:\users\default\ntuser.dat
Reg.exe import “PinTaskBar\Win10Taskbar.reg”
Reg.exe unload HKEY_LOCAL_MACHINE\defuser
Xcopy PinTaskBar\*.lnk “C:\Users\Default\AppData\Roaming\Microsoft\Internet Explorer\Quick Launch\User Pinned\TaskBar” /Q /Y /I

You’ll end up with the following structure :

- Open the SCCM Console and browse to Packages
- Right-click your Windows 10 Customization package and select Update Distribution Point
- Go to Software Library \ Operating Systems \ Task Sequences
- Right-click and Edit your Windows 10 task sequence
- Select Add / General / Run Command Line
- Name : Set Taskbar Pins
- Command line : cmd.exe /c PinTaskBar\Win10Taskbar.cmd
- Check the Package box and specify your Windows 10 customization package
- Position this step after the Windows image has been deployed

CONCLUSION
If you correctly follow this post, you’ll end up with this structure in your Windows 10 Customization package :

And you’ll have 6 new steps in your Windows 10 task sequence :

You can now deploy your Windows 10 task sequence to a test machine and all customization should be there. See our post on how to monitor your task sequence if something goes wrong or simply if you want to track the progress.
We hope this post will help you out for your Windows 10 customization. Feel free to post your customization using the comment section. We will update this post on a regular basis when we have more to share.
Part 8 | SCCM INJECT LANGUAGE PACK WINDOWS 10
Injecting language pack into Windows 10 WIM images can be achieved in many different ways. MDT has a module to easily import image. SCCM can do it within a task sequence while the image is offline/online. You will also be able to do it by using DISM from the Windows ADK.
In this post, we will detail the process of injecting language packs into a Windows 10 WIM images using DISM.
Injecting a language pack with DISM provides a modified Install.wim that can later be used as a standalone solution to deploy Windows 10 from a media (DVD, USB) or as a Windows OS source for MDT or SCCM. This solution can also be used with our previous post as we explained how to create and capture a custom Windows 10 image.
PRE-REQUISITES
You must install few tools and plugins, before you get there.
- Windows ADK for Windows 10 (Download)
- Windows 10 1511 Enterprise ISO file
- Language Pack for Windows 10 same Current Branch version
PREPARATION
- Create a folders structure like this one below

- Copy the extracted Windows 10 ISO files to EN-FR-fr folder
[su_box title=”Note” style=”glass” title_color=”#F0F0F0″]This will be the updated Windows 10 after we inject the language pack. (EN-US with language pack FR-FR).[/su_box]
- Mount your ISO language packs

- Browse to the needed language pack folder

- Copy your language folder (FR-FR) into the LangPack folder This folder must contain only one file (LP.cab)

INJECT LANGUAGE PACK WINDOWS 10
To use DISM command lines, we need the Deployment and Imaging Tools Environment from the Windows 10 ADK.
- Right click on Deployment and Imaging Tools Environment icon and select Run as administrator

- Type dism /get-mountedimageinfo to validate if any other WIM are mounted
- You can see that we don’t have any mounted image. If you have any, unmount it first before proceeding to the next steps

- We now need the information from the Install.WIM from the Windows 10 1511 EN-US
- Run the following command : (change to the path where you copied your sources files in the first steps)
[su_box title=”Command” style=”glass” title_color=”#F0F0F0″]Dism /Get-ImageInfo /ImageFile:E:\Sources\SCCM\Windows10\EN-FR-fr\sources\install.wim[/su_box]

- You must have at least a Windows 10 Enterprise Technical Preview installed to advanced
- Run the following command to mount the image :
[su_box title=”Command” style=”glass” title_color=”#F0F0F0″]Dism /Mount-Image /ImageFile:E:\Sources\SCCM\Windows10\EN-FR-fr\sources\install.wim /name:”Windows 10 Enterprise Technical Preview” /Mountdir:E:\Sources\SCCM\Windows10\Mount[/su_box]

- This will mount the WIM file to the Mount folder.

[su_box title=”Note” style=”glass” title_color=”#F0F0F0″]Close the folder after you take a look.[/su_box]
- Run the following command to inject the language pack into the mounted WIM
[su_box title=”Command” style=”glass” title_color=”#F0F0F0″]Dism /image:E:\Sources\SCCM\Windows10\Mount /Scratchdir:E:\Sources\SCCM\Windows10\Scratch /add-package /packagepath:E:\Sources\SCCM\Windows10\LangPack\fr-fr\lp.cab[/su_box]

- At this point, the language pack is injected into the mounted WIM
- Now we need to commit changes, run the following command :
[su_box title=”Command” style=”glass” title_color=”#F0F0F0″]Dism /commit-wim /Mountdir:E:\Sources\SCCM\Windows10\mount[/su_box]

- Once changes are commited, WIM must be unmounted.
- Run the following command :
[su_box title=”Command” style=”glass” title_color=”#F0F0F0″]Dism /unmount-wim /mountdir:E:\Sources\SCCM\Windows10\Mount /Discard[/su_box]

After the unmount is completed, take look at the Install.wim within EN-FR-fr folder. The modified Install.wim will be slightly bigger and modified date will be modified.
- Install.wim EN-FR-fr folder

LOGS AND MORE INFO
If you experiment this problem with any of the command line from DISM, you can use the log file located in C:\Windows\Logs\DISM

Even if not up-to-date, this Technet article can help with DISM Command lines options.
INJECT INSTALL.WIM WITH LANGUAGE PACK
We now have a source media with 2 languages in it. It can be used to install Windows 10 from a media source (manual install), for MDT and SCCM.

BONUS : UNATTEND.XML
In order to prevent the choice of language to prompt at first boot, an Unattend.xml file must be configured to answer the question from the Out-of-the-box experience (OOBE).
To create or modify an Unattend.xml file we need Windows System Image Manager, from the Windows ADK.
In the Unattend.xml file, the Microsoft-Windows-International-Core_neutral must be configured in the Specialize and OOBE System phase.
The 2 settings that needs to be configured for language packs are UILanguage and UILanguageFallback.
It must be configured the same way for both sections.
In the example bellow, FR-FR would be the default language, and EN-US would be the Fallback language.

More information on Windows System Image Manager here
Part 9 | WINDOWS 10 DEEP LINK ENROLLMENT
Starting with Windows 10, version 1607, you can create a deep link to launch the Windows 10 enrollment app using an URI link. This allows to send a user-friendly display text to your user to simplify their device enrollment. You can use this link in an email sent to your users or add this link to an internal web page that users refer for enrollment.
The URI link must use the following format :
- ms-device-enrollment:?mode=mdm
At the time of this writing, the only supported mode value is mdm.
Starting with Windows 10, v1607 deep linking is only supported for connecting devices to MDM. It will not support adding a work or school account, joining a device to Azure AD, and joining a device to Active Directory.
USER EXPERIENCE
When clicking the link, Windows 10 will launch the enrollment app in a special mode that only allows MDM enrollments.
For example, you could send the following link to your users : Click here to enroll your Windows 10 device
This is fairly straight forward, no need to explain to the user how to find the enrollment app. (This process is similar to the Enroll into device management option in Windows 10, v1511).

If the device finds an endpoint that only supports on-premises authentication, the page will change and ask for the user password. If the device finds an MDM endpoint that supports federated authentication, the user will be presented with a new window that will ask additional authentication information. Users may also be prompted to provide a second factor of authentication if your IT policy requires it.
After you complete the wizard, your device will be connected to your organization’s MDM.
LOG FILES
If anything goes wrong, you can collect logs by going to :
- Settings / Accounts / Access work or school
- Click the Export your management logs under Related Settings section
- Click Export and follow the path displayed to retrieve your log files

See this Technet article for further details about MDM enrollment and Windows 10 deep link enrollment.
Part 10 | Windows 10 KMS Server
The KMS server was first introduced with Windows Vista as an easy activation service for IT pros. Since then, each new release of Windows and Office provided a necessary update to KMS server, in order to keep offering activation keys to Windows and Office clients. The release of Windows 10 KMS activation and Office 2016 activation is no different then previous versions.
In this post, we will covert how to use an already configured KMS server for activation of Windows 10 and Office 2016.
PREREQUISITES FOR WINDOWS 10 KMS
Your existing KMS server will most probably be good to manage licenses for Windows 10 and Office 2016.
Minimum OS requirement :
- Windows 7 and up
- Window Server 2008 R2 and up
Mandatory :
- Mandatory KB3079821 for Windows 7 and Windows server 2008 R2 to support Windows 10
- Mandatory KB3058168 for Windows 8/8.1 and Windows Server 2012/R2 to support Windows 10
- Microsoft Office Volume License pack to support Office 2016
Optional :
- Windows ADK 10 for Volume Activation Management Tool (VAMT) – Version 3.1
- SQL server 2008 or later required (SQL Server Express supported)
LOCATE YOUR KMS SERVER
It is most probably been a long time since you’ve played around your KMS server. To find which server is acting as your KMS :
- Go to the DNS console / Forward Lookup Zones / <domain> /_TCP
- Look for the _VLMCS entry to get your KMS Server name

LIST LICENSED PRODUCTS ON A KMS SERVER
Run the following command line on the KMS server to retrieve all installed licences :
- cscript c:\windows\system32\slmgr.vbs /dli all >> c:\temp\KMS.log

- In the KMS.log file, look for License status : Licensed to retrieve which product is supported by your KMS

THRESHOLD FOR KMS SERVER ACTIVATION
Each Microsoft product supported by KMS server activation has a threshold to be an active KMS server. This mean that until the minimum concurrent activation request is met, the KMS server is not offering licenses for Windows and Office client.
- A minimum of 25 Windows 10 must be running and asking for KMS activation concurrently to enable the KMS server for Windows 10
- A minimum of 5 Office 2016 must be running and asking for KMS activation concurrently to enable the KMS server for Office 2016
[su_box title=”Important Note” style=”glass” title_color=”#F0F0F0″]
When you’ll try to add your Windows 10 KMS key to your KMS server, you might have the following issue : Error 0xC004F015 when you try to activate Windows 10 Enterprise on a Windows Server 2012 R2 and Windows Server 2008 R2 KMS host. This will force you to use the Windows Srv 2012R2 DataCtr/Std KMS for Windows 10 key from the Volume licensing site.
This key is good for Windows 10 and Windows Server 2012R2. Because of this, it will likely result in meeting the minimum requirement for this key, as you probably already have 5 Windows Server 2012 R2. Once the key is activated, the first Windows 10 will be able to get an activation key from the KMS server. No need for the 25 Windows 10 threshold. [/su_box]
For more information, read the Technet article.
ADD WINDOWS 10 KMS KEY TO A KMS SERVER
KMS key for Windows 10 is the same no matter which branch you are using.
- Run a command line as administrator
- Run the following command
- slmgr /ipk <yourkey>
- Product key installed successfully

- To validate the key is installed, run the following command :
- slmgr /dlv 20e938bb-df44-45ee-bde1-4e4fe7477f37
- The long GUID is the Activation ID for Windows 10, which is generic

[su_box title=”Note” style=”glass” title_color=”#F0F0F0″]
You server is not yet licensed as we didn’t had 25 up and running Windows 10 computers at this time.[/su_box]
ADD OFFICE 2016 KEY TO KMS SERVER
All Office 2016 client volume editions products are pre-installed with a Generic Volume License Key (GVLK) key, which supports automatic activation for both KMS and Active Directory-Based Activation, so you will not need to install a product key.
- Execute the Microsoft Office Volume License pack

- Check the Accept Terms checkboxand click Continue

- Enter the KMS key from the Volume Licensing website, Click OK

- Once installed, we need to activate on the Internet, click Yes

- Confirmation of installed and activated

- To validate the key is installed, run the following command :
- slmgr.vbs /dlv 98ebfe73-2084-4c97-932c-c0cd1643bea7

- Results :

[su_box title=”Note” style=”glass” title_color=”#F0F0F0″]Most of the time , Visio and Project should use the same KMS key to be activated.[/su_box]
KMS CLIENT SETUP KEY
KMS client setup key are the default key to redirect Windows to find a KMS server on the network. Those should be use only on a Windows 10 client to redirect them to KMS server if they were activated by a MAK key.
By default, Windows will look for a KMS server automatically if no key is specified in the setup or after Windows installation.[su_box title=”Warning” style=”glass” title_color=”#F0F0F0″]Never use your KMS key from the volume licencing site on your Windows clients. This will generate a new KMS server on your network.[/su_box]
| Operating System Edition | KMS Client Setup Key |
|---|---|
| Windows 10 Professional | W269N-WFGWX-YVC9B-4J6C9-T83GX |
| Windows 10 Professional N | MH37W-N47XK-V7XM9-C7227-GCQG9 |
| Windows 10 Enterprise | NPPR9-FWDCX-D2C8J-H872K-2YT43 |
| Windows 10 Enterprise N | DPH2V-TTNVB-4X9Q3-TJR4H-KHJW4 |
| Windows 10 Education | NW6C2-QMPVW-D7KKK-3GKT6-VCFB2 |
| Windows 10 Education N | 2WH4N-8QGBV-H22JP-CT43Q-MDWWJ |
| Windows 10 Enterprise 2015 LTSB | WNMTR-4C88C-JK8YV-HQ7T2-76DF9 |
| Windows 10 Enterprise 2015 LTSB N | 2F77B-TNFGY-69QQF-B8YKP-D69TJ |
| Windows 10 Enterprise 2016 LTSB | DCPHK-NFMTC-H88MJ-PFHPY-QJ4BJ |
| Windows 10 Enterprise 2016 LTSB N | QFFDN-GRT3P-VKWWX-X7T3R-8B639 |
Those keys can be used with the following command :
- slmgr /ipk <key>
This will force the computer to look for a KMS server instead of a MAK key.
Read the Technet article for more information.
INSTALL VOLUME ACTIVATION MANAGEMENT TOOL (VAMT)
The Volume Activation Management Tool is designed to help administrator management licenses for Windows and Office products. You can inventory licenses, manage MAK activation and KMS activation. This is an optional step and it can be installed on any computer on your network.
- Start the Windows 10 ADK installation (If you already have Windows 10 ADK installed, you can change it from Program and Features in Control Panel)
- Select Volume Activation Management Tool, click on Change

- Select Volume Activation Management Tool from the start menu

- Select the SQL server where you want the VAMT database to be created or install SQL Server Express locally using the link in the Database Connection Settings screen
- Our server will be the local server with default instance name and we will create a new database called VAMT

- VAMT is installed and connected to the database

CHANGE WINDOWS 10 ACTIVATION METHOD WITH VOLUME ACTIVATION MANAGEMENT TOOL
When you have the minimum 25 concurrents Windows 10 on your network, you can use VAMT to change the activation method of clients remotely instead of using the manual process describe earlier in this post.
When changing the activation method from MAK to KMS with VAMT, Windows 10 clients will be activated with KMS client setup key. This will force a new try to find a KMS server for Windows 10 on the network. Once 25 computers is reached, KMS server will be up and allowing further activation.[su_box title=”Note” style=”glass” title_color=”#F0F0F0″]Changing Office activation to use KMS can be done the same way as for Windows 10.[/su_box]
To change a Windows 10 from MAK to KMS :
- Open VAMT, right-click on Products and select Discover products

- We need to find our Windows 10 computers :
- This can be done using an LDAP query, IP Address, Name or in a Workgroup
- For this post, we will only find one computer. A full Active Directory search will take time. Manually entering your 25 Windows 10 computers, separated by a comma, might be a good idea.

- Our computer is found


- When the computer is found, VAMT will not know the license status until we query it. To query the license, right click on the computer and select Update license Status
- If you use current credential, you must be local administrator of the remote computer
- Computer must be accessible on the network to update the license status

- The computer will return one row per product found. In our case, the computer is running Windows 10 and Office 2016

- We now take a look at the Product key type column, we see that our Windows 10 is using a MAK key, while Office 2016 is already using the KMS

[su_box title=”Note” style=”glass” title_color=”#F0F0F0″]GVLK is the acronym used for KMS client setup key.[/su_box]
- Under Products / Windows
- Select one or more computers to change from MAK to KMS activation
- Right-click on it and choose Install Product Key

- Select Automatically select a KMS client key (GVLK) and click Install Key
- You do not need to specify any key. The GVLK are generic and known by VAMT

- Wait for the Action Status to show Successfully installed the product key

- The computer now flagged as Non Genuine

[su_box title=”Note” style=”glass” title_color=”#F0F0F0″]At this point, the client remain activated using a MAK key.[/su_box]
- Go back to Products / Windows and select the computer again
- Right-click and select Volume activate / Activate
- This will force the computer to try to activate using the KMS server

- Computer is now activated on the KMS server

- Activation is also visible in the Event Viewer

- In VAMT, the client is now Licensed and Genuine

EVENT VIEWER FOR KMS ACTIVATION
You can see all activation requests that goes to this KMS server in the Event Viewer of the KMS server.
- Open Event Viewer / Applications and Services Logs / Key Management Service
- All activation requests are listed

On the client, you can also use Event Viewer to see activation requests :
- Open Event Viewer / Application Logs
- Looking for events number 12288 and 12289
- Here’s how to read 12289 events :

- Here’s how to read 12288 events :

Read the Technet article for more information on troubleshooting KMS.
ENCOUNTERED ISSUES
Here’s a couple of support article that may comes handy. We encountered the following issues in various environments :
- Cohost Office 2016 KMS with an Office 2013 KMS
- Error : 0x80072EFE when activation
- Check your internet access
- Check your proxy configuration
- Error : 0xC004F015 for Windows 10 KMS key
- You are not using the right Windows 10 KMS key
- Follow the instruction using this support article
Part 11 | SCCM WINDOWS 10 UPGRADES
Windows as a service provides a new way to think about building, deploying, and servicing the Windows operating system. Microsoft will releases new builds two to three times per year rather than the traditional upgrade cycle. Instead of doing traditional Windows deployment projects, you will need a continuous updating process which will reduce the overall effort required to maintain Windows 10 devices in your environment.
SUMMARY
This post will look at the available tools in SCCM to manage and deploy Windows 10 upgrades. We have broken down the post in 4 different sections :
- Windows 10 Servicing Dashboard
- What’s missing in the Windows 10 Servicing Dashboard
- Windows 10 reports
- Windows 10 Collections
SCCM WINDOWS 10 SERVICING DASHBOARD
The Windows 10 servicing dashboard provides information about Windows 10 computers in your environment, active servicing plans, compliance information, and so on. Let’s get a look at the different dashboard tiles:

- Windows 10 Usage tile (1): Provides a breakdown of Windows 10 builds. Windows Insiders builds are listed as other as well as any builds that are not yet known. The Service Connection Point is responsible of this data.
- Windows 10 Rings tile (2): Provides a breakdown of Windows 10 by branch and readiness state . The LTSB segment will be all LTSB versions (For example : Windows 10 LTSB 2015). The Release Ready segment corresponds to Current Branch (CB), and the Business ready segment is Current Branch for Business (CBB)
- Create Service Plan tile (3): Provides a quick way to create a servicing plan
- Expired tile (4): Displays the percentage of devices that are on a build of Windows 10 that is past its end of life. The computers in this category should be upgraded to the next build version. We’ll talk about the available options later in this post. (Task Sequence and Services Plans)
- Expire Soon tile (5): Displays the percentage of computers that are on a build that is near end of life (within about four months), similar to the Expired tile
- Alerts tile (6): Displays active alerts
- Service Plan Monitoring tile (7): Display servicing plans that you have created and a chart of the compliance for each. This gives you a quick overview of the current state of the servicing plan deployments. If an earlier deployment ring meets your expectations for compliance, then you can select a later servicing plan (deploying ring) and click Deploy Now instead of waiting for the servicing plan rules to be triggered automatically
- The Windows 10 Builds tile (8): Display is a fixed image time line that provides you an overview of the Windows 10 builds that are currently released and gives you a general idea of when builds will transition into different states.
WHAT’S MISSING IN THE WINDOWS 10 SERVICING DASHBOARD
The Windows 10 Servicing Dashboard is a good starting point but it lacks important functions to be able to do your work to update Windows 10 as tiles are not clickable :
- What if I need to have the list of Windows 10 devices per rings or versions ?
- What if I need to have the list of Windows 10 that are Expired or Expiration Soon
- In our example 33% of my devices are in the Expiration Soon state. Great, but how many devices is that ? A simple tooltip showing the number would have been a nice idea.
For those reasons, we decided to make your life easier by developing tools to help with your Windows 10 upgrades deployments.
WINDOWS 10 REPORTS
Unfortunately, there’s no built-in report to track your Windows 10 devices. Some report in the Upgrade Assessment may help you but some of those reports are limited to Windows 7 and Windows 8. We decided to create our own Windows 10 report. Similar to the Windows 10 dashboard visually but which can easily list machines in different support state and their inventory.
See our Asset – Windows 10 report page to see the complete feature list.

WINDOWS 10 COLLECTIONS
As for any other deployments, you will need to create your own device collections in order to deploy your Windows 10 service plans or task sequences. Our Set of operational collections contains 67 collections which contains 9 Windows 10 collections to begin with :

SERVICE PLAN VS TASK SEQUENCES
Once you’ve targeted your Windows 10 devices to upgrade, it’s a matter of deploying a service plan or a task sequence to those machine to keep them in the right support state. To decide which methods suits your organisation needs, read our complete step-by-step post which guide you thought the whole process :
Using a combination of the tools provided in this post, you should be set to start your Windows 10 as a service management. Feel free to provides tips and other tools that make your life easier using the comment section.
Part 12 |SCCM WINDOWS 10 SERVICING PLANS
With the introduction of new Windows 10 service branches, you will need to upgrade your Windows 10 devices at a much faster pace. Hopefully, SCCM Current Branch (1511 and higher) has built-in features to help you fulfill this task. You can choose between Upgrade Task Sequence or the new Windows Servicing feature. This post will describe how to use SCCM Windows 10 servicing plans to upgrade Windows 10 devices.
If you are running SCCM 1511 we recommend using the Upgrade Task Sequence over servicing plans. SCCM 1511 has an issue that makes all Windows 10 languages and editions to be downloaded to the device when the ADR runs. This is fixed in SCCM 1602, using a new filter you can exclude unwanted languages and editions.
If you are running SCCM 1602 or later, it’s really a matter of preference of which process to use. Each one has their own advantages, the new servicing features is using the ADR/Software Update engine, the Task Sequence one is using Task Sequence engine. The Task Sequence method allows to run additional tasks after the upgrade or install new applications. Read both our post before making your decision or use both if needed.
In this post, we will be upgrading a Windows 10 1511 to Windows 10 1607 using SCCM 1606 serving plans. You can use this method to upgrade any upcoming Windows 10 release. You can’t use servicing plans to upgrade Windows 7 or Windows 8 computers.
REQUIREMENTS
Before using Windows 10 servicing plans you need:
- An Active Software Update Point
- Enable Heartbeat Discovery – Data displayed in the Windows 10 servicing dashboard is found by using discovery
- Install WSUS hotfixes and follow the required manual installation steps that are outlined in the KB3159706 article
- Install WSUS hotfix to enable WSUS support for Windows 10 feature upgrades
- Enable Windows 10 product and Upgrade classification in your software update point
Once the first 4 steps are completed, let’s bring Windows 10 upgrade packages to your software update point :
- Open the SCCM Console
- Go to Administration \ Site Configuration \ Sites
- On the top ribbon, select Configure Site component and Software Update Point

- In the Products tab, select Windows 10

- In the Classifications tab, select Upgrades

- Accept the prerequisite warning. Go back and install these hotfixes if you haven’t done it before

- Close the Software Update Point Component properties window
- Go to Software Library \ Windows 10 Servicing
- Right-click Windows 10 Servicing, select Synchronize Software Updates

- As for any Software Update synchronization process, follow the action in Wsyncmgr.log in your SCCM installation directory
- Once completed, go to Software Library \ Windows 10 Servicing \ All Windows 10 Updates
- You should have Windows 10 Upgrade packages listed

FEATURE UPDATES VS UPGRADES
After your synchronization, you’ll notice 2 types of packages. This is a bit confusing. As you can see in the screenshot, for Windows 1607 Enterprise, we only has Feature Update to Windows 10 Enterprise we don’t have an Upgrade to Windows 10 Enterprise package for 1607… yet.

Why ?
The short story : At the time of this writing, the 1607 build is in the Current Branch readiness state. (listed as Feature Update). When this build falls into Current Branch for Business (Approximately 4 months), a new release will be available in Windows Update and then in SCCM (listed as Upgrade).
- Feature Upgrade : New build at the time of the release
- Upgrade : Feature Update + Servicing Update (Patches) since media first published

In this post, we’ll be using Feature Updates. During our tests, we also tried the Upgrade package on a 1507 computer (1507 -> 1511) without issues. If you have both available at the time of creating your servicing plan, use the Upgrade package since it includes Servicing Updates.
Long Story : If you want the Microsoft version, refer to the complete Technet documentation.
The 2 key phrases from this documentation are:
- Feature upgrades that install the latest new features, experiences, and capabilities on devices that are already running Windows 10. Because feature upgrades contain an entire copy of Windows, they are also what customers use to install Windows 10 on existing devices running Windows 7 or Windows 8.1, and on new devices where no operating system is installed
- Approximately four months after publishing the feature upgrade, Microsoft uses Servicing Branch #1 again to republish/updated installation media for Windows 10 Pro, Education, and Enterprise editions. The updated media contains the exact same feature upgrade as contained in the original media except Microsoft also includes all the servicing updates that were published since the feature upgrade was first made available. This enables the feature upgrade to be installed on a device more quickly, and in a way that is potentially less obtrusive to users.
CREATE SERVICING PLANS
Now that we have Windows 10 upgrade packages in SCCM, we can create a servicing plan for our Windows 10 devices. Servicing Plan and Automatic Deployment Rules shares the same engine so you won’t be disoriented by servicing plans.
Servicing plans are designed to upgrade Windows 10 from one build to another build only. You can’t use that to upgrade Windows 7 to Windows 10. If you need to upgrade your Windows 7 to Windows 10 use the Upgrade Task Sequence instead.
Looking at the Windows 10 Servicing dashboard, our 3 Windows 10 1511 are near expiration (Expire Soon).

- Go to Software Library \ Windows 10 Servicing \ Servicing Plan
- Right-click Servicing Plan and select Create Servicing Plan

- In the General Pane, give a Name and Description, click Next

- On the Servicing Plan tab, click Browse and select your Target Collection

- In the Deployment Ring tab :
- Specify the Windows readiness state to which your servicing plan should apply
- Specify how many days you want to wait before deploying

- In the Upgrade tab, specify the Language, Required and Title of the upgrade packages you want to deploy. This is a nice addition to the SCCM 1602 release, in 1511 all languages were downloaded

- Use the Preview button to ensure that you are targeting the right version (We are targeting Windows 10 1607 Enterprise en-us devices that are Required)

- In the Deployment Schedule tab, select the desired behavior

- In the User Experience tab, select the desired options

- In the Deployment Package tab, select Create a new deployment package and enter your Package Source path

- In the Distribution Points tab, select your distribution point

- In the Download Location tab, select Download software updates from the Internet

- In the Language Selection tab, select your language

- In the Summary tab, review your settings and close the Create Servicing Plan wizard


- Right-click your newly created Servicing Plan and select Run Now

- You can see that the deployment gets created in the Monitoring / Deployments section

SERVICING PLAN DEPLOYMENT
Now that the deployment are triggered for clients, we will launch the installation manually using software center.
- Log on your Windows 10 computer
- We verify that we are running Windows 10 Enterprise version 1511 (Build 10586.218)

- Open the Software Center, under Updates, Feature Update to Windows 10 Enterprise 1607 is listed

- Select it and select Install

- Accept the warning by clicking Install Operating System. (Your data won’t be lost)

- Installation is running

- The computer will restart after about 5 minutes
- The whole upgrade process takes about 30 to 45 minutes and your device will be rebooted several time

- Once completed, log on the computer using your account. Windows is happy to tell you that it’s updated

- We are now running Windows 10 Enterprise version 1607 (Build 14393)

- Back in the Software Library \ Windows 10 Servicing \ Servicing Plan node
- Our machine is now listed as version 1607 and is no longer listed as Expire Soon
- The Service Plan Monitoring section can be used to monitor compliance and you can use the Deploy Now button to deploy the same service plan to a new collection

Use the comment section to tell which upgrade method you are preferring.
Part 13 | SCCM WINDOWS 10 TASK SEQUENCE UPGRADE
With the introduction of new Windows 10 service branches, you will need to upgrade your Windows 10 devices at a much faster pace. Hopefully, SCCM Current Branch (1511 and higher) has built-in features to help you fulfill this task. You can choose between Upgrade Task Sequence or the new Windows Servicing feature. This post will describe how to upgrade Windows 10 using SCCM Upgrade Task Sequence.
If you are running SCCM 1511 we recommend to use the Upgrade Task Sequence over the new servicing features. There is an issue in SCCM 1511 that make all Windows 10 languages and editions to be downloaded to the device when the ADR runs. This is fixed in SCCM 1602, using a new filter you can exclude unwanted languages and editions.
If you are running SCCM 1602 or later, it’s really a matter of preference of which process to use. Each one has their own advantages, the new servicing features is using the ADR/Software Update engine, the Task Sequence one is using Task Sequence engine. The Task Sequence method allows to run additional tasks after the upgrade or install new applications. Read both our post before making your decision or use both if needed.
In this post, we will be upgrading a Windows 10 1511 to Windows 10 1607 using SCCM 1606. You can use this method to upgrade any upcoming Windows 10 release. Refer to our other blog post if you’re looking to upgrade Windows 7 to Windows 10 using task sequences.
REQUIREMENT
In an upgrade task sequence, you will need to have the full Windows 10 1607 media imported in Operating System Upgrade Packages node in SCCM :
- Open the SCCM Console
- Go to Software Library \ Operating Systems \ Operating System Upgrade Packages
- Select Add Operating System Upgrade Packages

- Select the path where you extracted the Windows 10 ISO

- In the General tab, edit Name, Version and Comment fields, click Next

- In the Summary tab, review your choices and click Next

- Your operating system upgrade package is imported and ready to use in an upgrade task sequence

DISTRIBUTE OPERATING SYSTEM UPGRADE PACKAGES
- Select your newly imported operating system upgrade packages and select Distribute Content

Send it to all your distribution points where you will be doing Windows 10 upgrade
CREATE WINDOWS 10 UPGRADE TASK SEQUENCE
- Open the SCCM Console
- Go to Software Library \ Operating Systems \ Task Sequences
- Right-click Task Sequence and select Create Task Sequence

- Select Upgrade an operating system from an upgrade package, click Next

- In the Task Sequence Information tab, modify the Task sequence name and description if needed, click Next

- In the Upgrade the Window Operating System tab, click Browse and select your imported package, click Ok then Next

- In the Include Updates tab, we’ll select Do not install any software updates

- In the Install Applications tab, add any applications you want to install after the upgrade, click Next

- Review your choices, click Next and close the Create Task Sequence Wizard


- If you right click your newly created task sequence and select Edit, you’ll notice that the task sequence is really simple. You can add additional steps if required

DEPLOY THE TASK SEQUENCE
- Right click your newly created task sequence and select Deploy

- In the General tab, click Browse and select a collection that contains your Windows 10 devices to be upgraded. At this point, we recommend to select a collection containing a couple of devices to test your deployment. Click Next

- In the Deployment Settings tab, select the Purpose (Available or Required). For this post we will select Available, click Next

- In the Scheduling tab, select the desired date and time, click Next

- In the User Experience tab, select desired options and click Next

- In the Alerts tab, decide if you want to create alerts for the deployment and click Next

- In the Distribution Points tab, select desired options, click Next

- Review your settings, click Next and close the wizard


DEPLOY THE TASK SEQUENCE ON A DEVICE
Now that our task sequence is targeted to our Windows 10 device, we need to open the Software Center to initiate the upgrade process.
Before launching, let’s look at our current Windows 10 version :
- Open a command prompt and enter ver
- We are running Windows 10 1511 (Build 10586)

- In the Start Menu, select Software Center. We are using the new Software Center, your screens may differ if you’re not.
- Browse to Operating Systems and select your task sequence

- Select Install

- Accept the warning by selecting Install Operating System (No, your data won’t be lost !)

- The installation process starts. You can monitor the progress in C:\Windows\CCM\Logs\SMSTSLog\SMSTS.log


- The computer will restart after about 5 minutes
- The whole upgrade process takes about 30 to 45 minutes and your device will be rebooted several time


- Once completed, log on the computer using your account. Windows is happy to tell you that it’s updated

- Open a command prompt and enter ver
- We are now running Windows 10 1607 (Build 14393)

Use the comment section to tell which upgrade method you are preferring.
Part 14 |SCCM UPGRADE READINESS CONNECTOR
Upgrade Readiness (formerly Upgrade Analytics) enables you to assess and analyze device readiness with Windows 10. You can integrate Upgrade Readiness with SCCM to access client upgrade compatibility data in the SCCM admin console. You are able to target devices for upgrade or remediation from the device list.
Support for integrating Upgrade Analytics (now Upgrade Readiness) was introduced in SCCM 1610. With the 1706 release, there’s an improved integration of SCCM and Azure Services. These improvements streamline how you configure the Azure services you use with Configuration Manager. We thought this was a good opportunity to describe how to configure SCCM with the Upgrade Readiness Connector.
You must connect Upgrade Readiness to the top-tier site in your hierarchy. If you connect Upgrade Readiness to a standalone primary site and then add a central administration site to your environment, you must delete and recreate the OMS connection within the new hierarchy.
PREREQUISITE
This post assumes that you have the following:
- Have a valid Azure Subscription
- An OMS Workspace
- SCCM 1706+
CONFIGURATION STEPS
To connect SCCM to Upgrade Readiness the following steps are required :
REGISTER SCCM AS WEB APPLICATION IN AZURE AD
This step will create an application in Azure AD for the SCCM Upgrade Readiness Connector.
- Open the Azure Management portal (https://portal.azure.com)
- Select Azure Active Directory / App Registrations

- click New Application Registration

- Enter the following information :
- Name: Specify a name for the application
- Type: Web app / API
- Sign-on URL: Specify any URL. (This URL doesn’t need to resolve)

- Click Create at the bottom to create the application
- Select your application and click on All Settings
- Click on Keys, enter a name, select a duration and click Save. The key will be created after clicking Save and can only be retrieved on this page

- Copy the Key and Application ID from this page. It will be needed later.
- Still in your application, click on General / Properties and copy the App ID URI

GIVE SCCM APPLICATION PERMISSION
We will now provide the Azure AD App permissions to access the Upgrade Readiness service.
- Go to Ressource groups, select the resource group in which you create your OMS Workspace
- Select Access Control (IAM)
- Click Add
- Select the Contributor Role and select your application, click Save

UPGRADE READINESS CONFIGURATION
We will now add the Upgrade Readiness solution to your Operation Management Suite portal.
- Log to your OMS portal
- In the Home pane, select Solution Gallery

- Locate Upgrade Readiness and click on it

- Select Add

- Once the setup is completed you’ll see the upgrade statistics in your OMS portal. You can see your Commercial ID Key by clicking the Solution Settings button. This key will be needed in the deployment script that you’ll be sending to your client.


CONFIGURE THE SCCM UPGRADE REDINESS CONNECTOR
To create the connection, you’ll need the information of the Azure AD App you just created.
- Open the SCCM Console
- Go to Administration / Cloud Services / Azure Services
- Right-click Azure Services and select Configure Azure Services

- On the Azure Services tab, name your connection and select Upgrade Readiness Connector

- On the App page, select your Azure environment and click Import

- On the Import Apps page, specify the following information :
- Azure AD Tenant Name: Specify any name
- Azure AD Tenant ID: Specify the Azure AD tenant – You can find this information under Azure Active Directory / Properties

- Application Name – Specify your application name
- Client ID: Specify the Application ID of the created Azure AD app. You can see where to find this information in the previous steps
- Secret key: Specify the Client secret key of the created Azure AD app. You can see where to find this information in the previous steps
- Secret Key expiry: Specify the expiration date of your key
- App ID URI: Specify the App ID URI of the created Azure AD app. You can see where to find this information in the previous steps
- Click on Verify then Ok

- On the configuration page, the information will be pre-populate once the Azure AD app has enough permissions on the resource group. If the fields are empty, your application doesn’t have the necessary rights.

- On the Summary page, click Next

- On the Completion page, click Close

RUN AND DEPLOY UPGRADE READINESS SCRIPT
The computers that you want to evaluate needs to run a script to send their data.
To do so :
- Download the Upgrade Readiness deployment script
- Extract the zip file
- Edit .\ UpgradeAnalytics092816\Deployment\RunConfig.bat file
- Change the following values :
- LogPath : Where you want the logs to be saved
- CommercialIDValue : Enter your commercial key
- Logmode : 1

Save the script, create a package and deploy it to your Windows 7 or 8 computers.
VERIFICATION
Once run, it can take betweek 24 to 48 hours for the first number to show in your OMS workspace and another 24-48h to show up in the SCCM Console. Be patient!
After the configuration is completed you can view the numbers in Monitoring / Upgrade Readiness.

Part 15 |WINDOWS 10 SECURITY BASELINE
Microsoft has been releasing Security baseline since the Windows XP days. Windows 10 is no exception to this, except now there’s a new release of security baseline following each major build of Windows 10. The concept of the Security Baseline is to provide Microsoft guidance for IT administrators on how to secure the operating system, by using GPOs, in the following areas :
- Computer security
- User security
- Internet Explorer
- BitLocker
- Credential Guard
- Windows Defender Antivirus
- Domain Security
Implementing the security baseline in GPOs is not a complex or long task. The challenge that the security baseline provide is that it will expose areas of the environment that are not secure.
This means that to follow all Microsoft security guidelines, it would be required to fix many other systems outside of Windows 10 to achieve this.
In this post, we will describe what is the Security baseline, how to use them and key points that will most likely be challenging for other systems in the environment
PREREQUISITES
- Download the Security Baseline zip file that matches the Windows 10 version
- A new version is released for each Windows 10 major build. First in draft and then for production, in the same link
- Baselines are backward compatible, newer version provides mostly new GPOs to support Windows 10 newest features

- Security access for Group Policy Management
WINDOWS 10 SECURITY BASELINE FILES
- The downloaded zip file contains all the required bits to help implement the baseline in your environment.

- Documentation folder contains a large Excel file with all the details of every configuration part of the baseline

- GP Reports folder contains HTML report of GPO templates available as part of the Windows 10 Security Baseline

- GPOs folder contain the actual GPO files that can be imported in the Group Policy Management console

- Local_Script folder contains a script to install the security baseline into the local policy for Windows 10
- this is more for testing the actual configuration

- Templates contain ADML and ADMX files for additional settings in the GPOs

- WMI Filters folder contains two WMI filters: Windows 10 and Internet Explorer 11

HOW TO USE WINDOWS 10 SECURITY BASELINE
ADD TEMPLATES TO CENTRAL STORE
- Copy the ADMX from the Templates to the GPO Central Store

- Copy the ADML from the templates to the GPO Central Store EN-US subfolder

Important Info
If you are not familiar with the Central Store for GPO, please see Microsoft documentation
IMPORT GPOS
- Create a new blank GPO

- Right-click on the GPO, and select Import Settings

- Click Next

- Click Next, no need to take a backup of a new blank GPO.

- Browse to the GPOs folder and click Next

- Select the GPO to be imported, based on the name and click Next

- Click Next

- Select Copying them identically from the source and click next

- Click Finish

- Click the Settings tab to see all the configuration imported

Once the GPOs are imported, testing is key!
No magic trick here, start with test computers and then IT users/pilot users prior to applying this to production.
KEY POINTS THAT PROVIDE CHALLENGES
Here are some configurations that are part of the baseline that should be looked at up front as they might provide issues with your environment. The idea here is to have a better understanding of what is going on. Don’t go and change those settings to avoid issues. The issues should be fixed at the other end for better security.
HARDENED UNC PATH
This setting is likely to give the following error when trying to process GPO on Windows 10.
Error
The processing of Group Policy failed. Windows attempted to read the file \\yourdomain.fqdn\sysvol\yourdomain.fqdn\Policies\{GPO GUID}\gpt.ini from a domain controller and was not successful.
The configuration Computer/Administrative Template/Network/Network Provider/Hardened UNC Path

Review the following post by Lee Stevens for details on the UNC hardening path to help define this setting for your environment
INTERNET EXPLORER PROCESS ONLY COMPUTER GPO
If you have user GPO for Internet Explorer, in the Security Zone, adding the baseline for Internet Explorer will prevent those settings to be applied.

Two options are available if this causes issue:
- Move your Internet Explorer configuration to computer GPO instead of user GPO
- Change the configuration back to Not Configured for this GPO
More details on this KB from Microsoft
USER ACCOUNT CONTROL
The user account control (UAC) is configured to the maximum level with the Security Baseline.

The default Windows 10 level is set to Notify me only when applications try to make changes to my computer (level 3 out of 4)

This is configured by a local security policy

To modify the GPO, under the Windows 10 Computer GPO Computer/Windows Settings/Security Settings/Local Policies/Security Options/User Account Control

CREDENTIAL GUARD
Having Credential guard in Windows 10 is categorized as a quick win solution as the requirement and setup is easy.
The default configuration as part of MSFT Windows 10 and Server 2016 – Credential Guard GPO is configured in a way that is likely to crash the computer or have an undesired requirement for future needs if applied as is.

We strongly recommend to carefully read the Help section of the Computer/Administrative Templates/System/Device Guard/Turn On Virtualization based security GPO
To take advantage of Credential Guard safely, this would be the required configuration.

SMB V1
This topic is the most important of all key points. With Windows 10 v1709, SMB v1 is disabled by default. But what if you still need this in your environment?
Let me make this clear, we do not recommend enabling SMB v1. It has been proven to be one of the most critical security hole as of late with malware like WannaCry.
On the other hand, sometimes we don’t have much choice to go against security.
So to leave SMB v1 enabled as part of the security baseline GPO, we suggest reading the following blog post by Aaron Margosis
The GPO settings for SMB v1 are under Computer/Administrative Templates/MS Security Guide

ISSUE WITH BITLOCKER ON WINDOWS 10 1709
The MSFT Windows 10 RS3 – BitLocker GPO contains a setting to Disable new DMA devices, that broke some computer.
See the following blog post by Aaron Margosis for details on the issue.
The setting Computer/Administrative Templates/Windows Components/BitLocker Drive Encryption/Disable new DMA devices when this computer is locked, should be reviewed prior to being applied.

WHAT TO DO WHEN A NEW VERSION OF SECURITY BASELINE IS AVAILABLE?
A new version of Security baseline usually come out at the same time as a Windows 10 build goes RTM.
Microsoft has always released them as a DRAFT version that goes on for a couple months and then release the FINAL version.
Here’s a checklist for what to do when the new version is available :
- Start by reviewing the Excel file to see what’s new to the baseline
- Most of the new settings in the baseline will be in line with new features as part of the Windows 10 release

- Update ADMX in the Central store with the ones from the latest Windows 10 build prior to adding new settings
- New settings should then be added to your environment by one of the following :
- Import the new GPOs
- Add new settings to current GPO
Follow us on Twitter to get a notification when a new version of the Security baseline is released.
BONUS TIP
The Policy Analyzer is a great tool to compare current GPOs against the ones from the Security Baseline.
This can give an idea of the conflicting settings as well as additional settings from the Security Baseline

Part 16 | SCCM Windows 10 USMT
Since SCCM 1511, you can use the new upgrade task sequence to easily upgrade a Windows 7 computer to Windows 10. But what if you want to upgrade a computer from a 32-bits operating system to Windows 10 64-bits ? You can’t use the upgrade task sequence for this specific scenario. Another reason would be that your company decided to use the wipe and reload option in your Windows 10 migration project. In those cases you will need to use USMT to capture data and settings from the users profiles before applying the new operating system.
This post will describe how to upgrade a 32-bits computer to Windows 10 64-bits using USMT and SCCM. This post will be using hard-links without using a State Migration Point. Continue reading if you are not familiar with those terms, we will explain it later.
Since you’re at the step of deploying Windows 10, we assume that you already installed at least SCCM 1511 and the latest Windows ADK before reading this post. If not, read our related posts :
USMT BASICS
Let’s start by giving a couple of facts about the User State Migration Tool :
- Latest USMT version is 5.0
- Latest Windows ADK 10 includes the latest version
- Supports capturing data and settings from Windows Vista and later (including Windows 10)
- Supports restoring the data and settings to Windows 7 and later (including Windows 10)
- Supports migrating from a 32-bit operating system to a 64-bit operating system, but not the other way around
WHAT GETS MIGRATED
By default, USMT migrates many settings (user profile, Control Panel configurations, files, and more). The default configuration files that are used in Windows 10 deployments are MigUser.xml and MigApp.xml. These two configurations files migrates the following data and settings:
- Folders from each profile (My Documents, My Video, My Music, My Pictures, desktop files, Start menu, Quick Launch settings, and Favorites folders)
- USMT templates migrate the following file types: .accdb, .ch3, .csv, .dif, .doc*, .dot*, .dqy, .iqy, .mcw, .mdb*, .mpp, .one*, .oqy, .or6, .pot*, .ppa, .pps*, .ppt*, .pre, .pst, .pub, .qdf, .qel, .qph, .qsd, .rqy, .rtf, .scd, .sh3, .slk, .txt, .vl*, .vsd, .wk*, .wpd, .wps, .wq1, .wri, .xl*, .xla, .xlb, .xls*.
- Operating system component settings
- Application settings
If needed, you can create a custom configuration files to includes more files types or settings. See the following Technet post for detailed instructions.
For more details on what USMT migrates, see this Technet article. For more information on the USMT overall references, see this Technet article.
WHERE TO STORE THE USER DATA AND SETTINGS
You can capture USMT data locally (Hard-links) or remotely using a State Migration Point in SCCM (File Copy).
- Hard-link migration takes advantage of advanced features of the NTFS file system that allow files to physically remain in-place and intact even after the drive is wiped (not formatted). When restored, pointers to the files are restored, so the files never physically have to be copied or moved outside the machine. To use hard-linking, select the Capture locally by using links instead of copying files option in the Capture User State task
- File copy: If hard-linking is not selected, the traditional file copy method for storing user state is used. This file copy method literally copies all identified user state data to an alternative location requiring extra disk space and extra time to complete the copy
[su_box title=”Warning” style=”glass” title_color=”#F0F0F0″]You cannot use a State Migration Point and use hard-links to store the user state data at the same time.[/su_box]
- To store the user state data on a state migration point (File Copy), you must first Configure a state migration point to store the user state data
- To store the user state data on the destination computer for update deployments (Hard-Link), you must :
- Add Capture User State steps to your task sequence and configure it to use local folder using links
- Add Restore User State steps to your task sequence and configure it to restores the user state using those links
The user state data that the hard-links reference stays on the computer after the task sequence removes the old operating system. For that reason, you cannot format and partition a drive if you are using USMT. The disk is will be wiped during the Apply Operating System step of the task sequence. If you must format and partition but still want to use USMT, consider using user state migration points, which is network based.
This post will focus on the hard-links option and will not describe how to customize the task sequence to use the state migration point.
VERIFY SCCM WINDOWS 10 USMT PACKAGE
To store the user state locally or on a state migration point, you must create a package that contains the USMT source files that you want to use. This package is used in the Capture User State step of the migration task sequence.
- Open the SCCM Console
- Go to Software Library / Application Management / Packages
- Right-click the User State Migration Tool for Windows 10 package and select Properties
- On the Data Source tab, ensure that the package is using the ADK 10 – Which is per default C:\Program Files\Windows Kits\10\Assessment and Deployment Kit\User State Migration Tool
- Right-click the User State Migration Tool for Windows 10 package and select Distribute Content

- If you have no User State Migration Tool for Windows 10 package, just create (without any programs) and distribute it
CREATING THE CAPTURE AND RESTORE USER STATE DATA TASK SEQUENCE
To capture and restore the user state, you must first create a new task sequence, but before, we’ll explain the different options in the User State Menu :

- Request State Store : This step is needed only if you store the user state on the State Migration Point
- Capture User State : This step captures the user state data and stores it on the State Migration Point or locally using hard-links
- Restore User State : This step restores the user state data on the destination computer. It can retrieve the data from a user state migration point or from hard-links
- Release State Store : This step is needed only if you store the user state on the State Migration Point. This step release this data from the State Migration Point
When you create a new task sequence from the latest SCCM version, the wizard takes care of the essential steps. Let’s create it and see what are the options :
- Go to Software Library \ Operating Systems \ Task Sequences
- Right-click Task Sequence and select Create Task Sequence
- Select Install an existing image package

- On the Task Sequence Information tab, enter your Task sequence name, Description and Boot Image

- On the Install Windows tab, uncheck Partition and format the target computer and Configure task sequence for use with Bitlocker
- If a format and partition of the disk is selected, it would wipe all data on the drive, including the USMT data. Instead, the Apply Operating System task will delete of all files and directories occurs on the drive minus protected USMT folders

- On the Configure Network tab, select to join your domain and specify the account to use

- On the Install Configuration Manager Client tab, select your client package

- On the State Migration tab, check Capture user settings and files, select your USMT Package
- Select Save user settings and files locally and check Capture locally by using links instead of by copying files
[su_note note_color=”#e56e6e” radius=”8″]This is the important part of the post[/su_note]
- If needed check the Capture Network Settings and Capture Windows Settings. See the attached links for more information about these options

- In the Include Update tab, select the desired update behavior

- On the Install Applications tab, select any applications that you want to include in your task sequence

- On the Summary tab, review your choices, click Next and complete the wizard

- Now that the task sequence is created, we’ll edit it and review the steps
- Right-click your newly created task sequence and click Edit
- You’ll notice 3 USMT steps has been created :
- Set Local State Location : This step specify the directory where the local state will be saved. We are using the builtin variable OSDStateStorePath and set the value to %_SMSTSUserStatePath% but you can use a specific location if needed

- Capture User Files and Settings : This is the step when USMT will run the ScanState command. You will see this command in SMSTS.log when monitoring your task sequence. (By default : C:\_SMSTaskSequence\Packages\<YourPackageID>\amd64\scanstate.exe C:\_SMSTaskSequence\UserState /o /localonly /efs:copyraw /c /hardlink /nocompress /l:C:\Windows\CCM\Logs\SMSTSLog\scanstate.log /progress:C:\Windows\CCM\Logs\SMSTSLog\scanstateprogress.log /i:C:\_SMSTaskSequence\Packages\<ID>\amd64\migdocs.xml /i:C:\_SMSTaskSequence\Packages\<ID>\amd64\migapp.xml)

- Restore User Files and Settings : This is the step when USMT will run the LoadState command. You will see this command in SMSTS.log when monitoring your task sequence (By default : C:\_SMSTaskSequence\Packages\<YourPackageID>\amd64\loadstate.exe C:\_SMSTaskSequence\UserState /ue:<computername>\* /c /hardlink /nocompress /l:C:\WINDOWS\CCM\Logs\SMSTSLog\loadstate.log /progress:C:\WINDOWS\CCM\Logs\SMSTSLog\loadstateprogress.log /i:C:\_SMSTaskSequence\Packages\<ID>\amd64\migdocs.xml /i:C:\_SMSTaskSequence\Packages\<ID>\amd64\migapp.xml)

ADD SUPPORT FOR WINPE
Now that we created a basic task sequence for USMT, we suggest to add a step to support offline capture. If you start your task sequence from PXE, you will need this new step because the step we just created will fail in Windows PE. We will add a step and condition to run depending of the environment in which the task sequence is ran.
- Right-click the task sequence you just created, select Edit
- Select the Capture User Files and Settings step
- Duplicate the task by doing CTRL-C, CTRL-V
- A new Capture User Files and Settings step is created, select the Capture in Off-line mode (Windows PE only) check box and rename the step to add (WinPE) at the end
- Rename the other Capture User Files and Settings step to (FullOS)
- You’ll end up with 2 similar Capture User Files and Settings step. One for Online mode (FullOS) and one for Offline mode (WinPE)


- Select the Capture User Files and Settings (Full OS) step and click on the Options tab
- Select Add Condition, Task Sequence Variable
- Variable : _SMSTSInWinPE
- Condition : Equals
- Value : False

- Select the Capture User Files and Settings (WinPE) step and click on the Options tab
- Select Add Condition, Task Sequence Variable
- Variable : _SMSTSInWinPE
- Condition : Equals
- Value : True

- Click Apply and Ok to close the task sequence
DEPLOY SCCM WINDOWS 10 USMT TASK SEQUENCE
We are now ready to deploy our Windows 10 USMT task sequence to the Windows 7 computer we want to upgrade.
- Go to Software Library \ Operating Systems \ Task Sequences
- Right-click your USMT Task Sequence and select Deploy
- On the General pane, select your collection. This is the collection that will receive the Windows 10 upgrade using USMT. For testing purposes, we recommend putting only 1 computer to start
- On the Deployment Settings tab, select the Purpose of the deployment
- Available will prompt the user to install at the desired time
- Required will force the deployment at the deadline (see Scheduling)
- You cannot change the Make available to the following drop-down since upgrade packages are available to client only
- On the Scheduling tab, enter the desired available date and time. On the screenshot, we can’t create an Assignment schedule because we select Available in the previous screen
- In the User Experience pane, select the desired options
- In the Alerts tab, check Create a deployment alert when the threshold is higher than the following check-box if you want to create an alert on the failures
- On the Distribution Point pane, select the desired Deployment options. We will leave the default options
- Review the selected options and complete the wizard
TESTING ON THE TARGET COMPUTER
For the sake of this post we created a VM with Windows 7 32 bits. We will run our newly created task sequence to upgrade to Windows 10 64 bits.
I also created multiple files in the user profile to shows the USMT actions. We simply created text documents in the various libraries and on the desktop.

- We open the Software Center, select our task sequence and click Install

- The computer will launch the USMT action before rebooting in Windows PE and install Windows 10


- Once the process completed, we have a brand new Windows 10 migrated with my files where I left them. Even the psycho tortoise wallpaper has made the move.

We hope this post will ease your Windows 10 migrations. Leave a comment if you have any questions.
Part 17 | SCCM WINDOWS 10 2004 UPGRADE
Support for Windows 7 ended on January 14, 2020. If you are still using Windows 7, your PC may become more vulnerable to security risks. Microsoft published the Windows 10 2004 feature update (aka Windows 10 May 2020 Update) on VLSC. If you haven’t planned your Windows 7 migration to Windows 10, this post will help prepare your SCCM Server to deploy it.
You may also need to deploy Windows 2004 to your Windows 10 computer to stay supported or to benefits from the new features. Before deploying a new Windows 10 feature upgrade, you need to have a good plan. Test it in a lab environment, deploy it to a limited group and test all your business applications before broad deployment. Do not treat a feature upgrade as normal monthly software updates. Treat it as a new operating system as if you were upgrading Windows 7 to Windows 10.
You can also follow our complete Windows 10 Deployment blog post series if you’re unfamiliar with the whole upgrade process.
This blog post will cover all the task needed to deploy the new SCCM Windows 10 2004 Upgrade :
- Check if you have an SCCM Supported version
- Upgrade your Windows ADK
- Import the OS in SCCM to use with your deployment Task Sequence
- Create a Windows 10 Upgrade Task Sequence for Windows 10 (and Win 7 or 8.1 computers)
- Update your Automatic Deployment Rules and Software Update, groups
- Import your ADMX
CHECK PREREQUISITE SCCM WINDOWS 10 2004 UPGRADE
For Windows 10 2004 May 2020 Update, you need at least SCCM 2002 in order to support it as a client. See the following support matrix if you’re running an outdated SCCM version and make sure to update your site.

WINDOWS ADK
Before capturing and deploying a Windows 10 2004 image, make sure that you’re running a supported version of the Windows ADK. Windows recommends using the Windows ADK that matches the version of Windows you’re deploying. If you’re already running an ADK version on your SCCM server, see our post on how to install a new version.

UPGRADE METHOD – TASK SEQUENCE OR SERVICING PLAN?
You can’t use servicing plans to upgrade Windows 7 or Windows 8 computers. So you must use an upgrade task sequence.
In order to upgrade an existing Windows 10 to Windows 2004, you have 2 choices: You can use an upgrade Task Sequence or you can use Servicing Plans.
There a strong debate over which is the best method. We prefer to use Upgrade Task Sequence for the simple reason that it’s more customizable. You can run pre-upgrade and post-upgrade tasks which will be mandatory if you have any sort of customization to your Windows 10 deployments.
For example, Windows 10 is resetting pretty much anything related to regional settings, keyboard, start menu and taskbar customization. Things are getting better from one version to another but if you’re upgrading from an older build, let’s say 1511, expect some post-configuration tasks… and the only way to do that is using a task sequence.
Servicing Plan has the simplicity, you set your option and forget, as for Automatic Deployment Rules does for Software Updates. We yet did not have any client that doesn’t want any control over Windows 10 upgrade in their organization. We totally understand the point of Servicing Plan and they’ll be useful in a couple of releases when Windows 10 upgrades will be an easy task… but for now, it’s not, unfortunately.
IMPORT SCCM WINDOWS 10 2004 OPERATING SYSTEM
We will now import the Windows 10 2004 WIM file for Operating System Deployment. If you don’t have the Windows 10 ISO, you can download it from Microsoft Volume Licensing Site.
We will be importing the default Install.wim from the Windows 10 media for a “vanilla” Windows 10 deployment. You could also import a WIM file that you’ve created through a build and capture process. This WIM wile will be used for new computers, to upgrade an existing Windows 10, you need to import an Operating System Upgrade Packages. We will cover this in the next section.
- Open the SCCM Console
- Go to Software Library / Operating Systems / Operating System Images
- Right-click Operating System Images and select Add Operating System Image
- On the Data Source tab, browse to your WIM file. The path must be in UNC format
- You can now select to import only a specific index from the WIM file. We selected the Windows 10 Enterprise index
- Select your Architecture and Language at the bottom and click Next

- In the General tab, enter the Name, Version and Comment, click Next

- On the Summary tab, review your information and click Next
- Complete the wizard and close this window
DISTRIBUTE YOUR SCCM WINDOWS 10 2004 OPERATING SYSTEM IMAGE
We now need to send the Operating System Image (WIM file) to our distribution points.
- Right-click your Operating System Image, select Distribute Content and complete the Distribute Content wizard
ADD OPERATING SYSTEM UPGRADE PACKAGES
We will now import the complete Windows 10 media in Operating System Upgrade Packages. This package will be used to upgrade an existing Windows 10 or a Windows 7 (or 8.1) device to Windows 10 using an Upgrade Task Sequence.
- Open the SCCM Console
- Go to Software Library / Operating Systems / Operating System Upgrade Packages
- Right-click Operating System Upgrade Packages and select Add Operating System Upgrade Packages
- In the Data Source tab, browse to the path of your full Windows 10 media. The path must point to an extracted source of an ISO file. You need to point at the top folder where Setup.exe reside
- You can now select to import only a specific index from the WIM file. We selected the Windows 10 Enterprise index
- Select your Architecture and Language at the bottom and click Next

- In the General tab, enter the Name, Version, and Comment, click Next

- On the Summary tab, review your information and click Next and complete the wizard
DISTRIBUTE YOUR OPERATING SYSTEM UPGRADE PACKAGES
We now need to send the Operating System Upgrade Package to your distribution points.
- Right-click your Operating System Upgrade Package, select Distribute Content and complete the Distribute Content wizard
CREATE SCCM TASK SEQUENCE FOR WINDOWS 10 2004
Let’s create an SCCM task sequence upgrade for a computer running a Windows 10 device. Once again, this Task Sequence could be used for Windows 7 or 8.1.
- Open the SCCM Console
- Go to Software Library \ Operating Systems \ Task Sequences
- Right-click Task Sequences and select Upgrade an operating system from upgrade package

- In the Task Sequence Information tab, enter a Task Sequence Name and Description

- On the Upgrade the Windows Operating System tab, select your upgrade package by using the Browse button
- Select your Edition Index depending on the edition you want to deploy. If you select just 1 index as per our indication in previous steps, you’ll see just 1 index to select from.

- On the Include Updates tab, select the desired Software Update task
- All Software Updates will install the updates regardless of whether there is a deadline set on the deployment (on your OSD collection)
- Mandatory Software Updates will only install updates from deployments that have a scheduled deadline (on your OSD collection)
- Do not install any software updates will not install any software update during the Task Sequence
- On the Install Applications tab, select any application you want to add to your upgrade process
- On the Summary tab, review your choices and click Next and click Close
EDIT THE SCCM WINDOWS 10 2004 TASK SEQUENCE UPGRADE
Now that we have created the upgrade task sequence, let’s see what it looks like under the hood.
- Open the SCCM Console
- Go to Software Library \ Operating Systems \ Task Sequences
- Right-click your upgrade task sequences and select Edit
As you can see, it’s fairly simple. SCCM will take care of everything in a couple of steps :

- The Upgrade Operating System step contains the important step of applying Windows 10
- Ensure to choose the right Edition

DEPLOY THE SCCM WINDOWS 10 2004 UPGRADE TASK SEQUENCE
We are now ready to deploy our task sequence to the computer we want to upgrade. In our case, we are targeting a Windows 7 computer.
- Go to Software Library \ Operating Systems \ Task Sequences
- Right-click Task Sequences and select Deploy

- On the General pane, select your collection. This is the collection that will receive the Windows 10 upgrade. For testing purposes, we recommend putting only 1 computer to start

- On the Deployment Settings tab, select the Purpose of the deployment
- Available will prompt the user to install at the desired time
- Required will force the deployment at the deadline (see Scheduling)
- You cannot change the Make available to the following drop-down since upgrade packages are available to clients only
- On the Scheduling tab, enter the desired available date and time. On the screenshot, we can’t create an Assignment schedule because we select Available in the previous screen

- In the User Experience pane, select the desired options
- In the Alerts tab, check Create a deployment alert when the threshold is higher than the following check-box if you want to create an alert on the failures
- On the Distribution Point pane, select the desired Deployment options. We will leave the default options
- Review the selected options and complete the wizard
LAUNCH THE UPGRADE PROCESS ON A WINDOWS 10 COMPUTER
Everything is now ready to deploy to our Windows 10 computers. For our example, we will be upgrading a Windows 10 1909 to Windows 10 2004. This task sequence can also be used on a Windows 7 or 8.1 devices to install Windows 10 2004.
- Log on our Windows 10 computer and launch a Machine Policy Retrieval & Evaluation Cycle from Control Panel / Configuration Manager Icon
- Open the new Software Center from the Windows 10 Start Menu
- You’ll see the SCCM upgrade task sequence as available. We could have selected the Required option in our deployment schedule, to launch automatically without user interaction at a specific time
- When ready, click on Install
- On the Warning, click Install

- The update is starting, the task sequence Installation Progress screen shows the different steps
- The WIM is downloading on the computer and saved in C:\_SMSTaskSequence
- You can follow task sequence progress in C:\Windows\CCM\Logs\SMSTSLog\SMSTS.log
- After downloading, the system will reboot
- The computer restart and is loading the files in preparation for the Windows 10 upgrade
- WinPE is loading
- The upgrade process starts. This step should take between 60-90 minutes depending on the device hardware
- Windows 10 is getting ready, 2-3 more minutes and the upgrade will be completed
- Once completed the SetupComplete.cmd script runs. This step is important to set the task sequence service to the correct state
- Windows is now ready, all software and settings are preserved

CREATE SOFTWARE UPDATE GROUP
One important thing in any OSD project is to make sure that the deployment of every machine is up to date. Before deploying Windows 10 2004, make sure that your Software Update Point is configured to include Windows 10 patches.
Once Windows 10 is added to your Software Update Point, we will create a Software Update Group that will be deployed to our Windows 10 deployment collection. This way, all patches released after the Windows 10 media creation (or your Capture date) will be deployed during the deployment process.
To create a Windows 10 Software Update Group :
- Open the SCCM Console
- Go to Software Library / Software Updates / All Software Updates
- On the right side, click Add Criteria, select Product, Expired and Superseded
- Product : Windows 10
- Expired : No
- Superseded: No
- Title contains 2004
- Select only the latest Cumulative Updates that apply (x64 or x86) and select Create Software Update Group
- Once created, go to Software Library / Software Updates / Software Update Groups
- Right-click your Windows 10 SUG and deploy it to your OSD deployment collection
IMPORT ADMX FILE
If you’re responsible for managing group policy in your organization. Ensure that you import the latest Windows 10 2004 ADMX file on your domain controller.
BONUS RESOURCES
After your SCCM Windows 10 2004 Upgrade, need a report to track your Windows 10 devices? We developed a report to help you achieve that :
Asset – Windows 10 SCCM Report

Part 18 | SCCM DESKTOP ANALYTICS
This post will describe how to connect your SCCM infrastructure to the Desktop Analytics cloud-based service. We will show how to create your workspace and connect it to an SCCM 1906 server. In the latest SCCM 1906 version, some new features were added to Desktop Analytics :
From Microsoft :
- You can now get more detailed insights for your desktop applications including line-of-business apps.
- Use the DesktopAnalyticsLogsCollector.ps1 tool from the Configuration Manager install directory to help troubleshoot Desktop Analytics. It runs some basic troubleshooting steps and collects the relevant logs into a single working directory.
WHY USE SCCM DESKTOP ANALYTICS
Desktop Analytics is a standalone cloud-based service that connects with SCCM. By using Desktop Analytics service, you can easily find interesting information about your Windows clients.
When connected together, Desktop Analytics and SCCM can :
- Inventory running apps on your clients
- Assess app compatibility
- Identify compatibility issues
- Receive mitigation suggestions based on cloud-enabled data insights
- Create pilot groups that represent your organization based on application and drivers
- Use those pilot group to Deploy Windows 10
The main advantage is that it can help an organization stay current with Windows 10 by helping you assess problems from drivers and application compatibility. There’s really no reason not to use Desktop Analytics if you have all the requirements.
WINDOWS ANALYTICS VS DESKTOP ANALYTICS
Desktop Analytics is a “new version” of Windows Analytics. It has all the same features plus it can be connected with SCCM.
The Desktop Analytics service includes:
- Upgrade Readiness
- Update Compliance
- Device Health
- Richer app and Office macro insights
- Easier integration with SCCM
PREREQUISITES BEFORE USING DESKTOP ANALYTICS AND SCCM INTEGRATION
Before integrating SCCM and Desktop analytics :
- Ensure you are using SCCM 1902 with update rollup (4500571) or later. For this post, we will use SCCM 1906
- An account with Full Administrator role in SCCM
- Devices must run Windows 7, Windows 8.1, or Windows 10
- Ensure the SCCM clients are installed with the latest version. The client agent version should be 5.00.8790.1025 and above. (which is 1902)
- Clients must be able to connect to the Microsoft public cloud
- An Azure subscription, using an account with Global Admin permission
- Windows 10 Enterprise E3 or E5; or Microsoft 365 F1, E3, or E5
- Windows 10 Education A3 or A5; or Microsoft 365 A3 or A5
- Windows VDA E3 or E5
Beyond the cost of license subscriptions, there’s no additional cost for using Desktop Analytics.
CREATE A DESKTOP ANALYTICS WORKSPACE IN AZURE
Let’s start by creating a Desktop Analytics workspace in Azure portal :
- Log to Desktop Analytics portal (see needed permission above)
- If you are not redirected to the Desktop Analytics page, click on it on the left menu

- On Welcome to Desktop Analytics screen, click Start

- On the Accept service agreement screen, click Next

- Click the slider to Yes, Click Next

- Move the Allow the Desktop Analytics to manage directory roles on your behalf slider to the right (Yes)
- Under Workspace Owners, add desired users who will have access to your Desktop Analytics portal
- Click Next

- On Set up your workspace page, select your Azure Subscription. You can add a new workspace or use an existing workspace. We will create a new workspace
- Click Add Workspace and click Set as Desktop Analytics workspace

- On the Confirm and grant access box, click Continue, then Accept the permission requested


- When you successfully add the workspace, you will find the following details. Validate the Workspace Name, Workspace ID and Commercial ID Key. Click Next
- Desktop Analytics is now configured. Click Go to Desktop Analytics

- On the Desktop Analytics home screen, you are warned that It could take up to 72 hours to process data. Be patient, you’ll also see a warning: Welcome to Desktop Analytics! You will need to enroll devices in Configuration Manager to populate your workspace. This is what we’ll be doing in the next steps.

- Under the hood, if you log into your Azure Portal and go in the Log Analytics workspace, you’ll see that your workspace has been created

CONNECT SCCM WITH DESKTOP ANALYTICS
It’s now time to connect SCCM with the newly created Desktop Analytics workspace.
- Open the SCCM console
- Navigate to Administration / Cloud Services / Azure Services.
- Right-click Azure Services and click Configure Azure Services

- Set a name and select Desktop Analytics, Click Next

- Select the Azure environment and click Browse to select the associated Web App. On the Server app window, click Create

- Specify an Application name
- The HomePage URL and App ID URI should be set to https://ConfigMgrService. If you get an error that Another object with the same value for property identifierUris already exists, this is probably because you’ve already configured another Azure service with that name. Set a unique name and click Sign-In

- Enter your Azure Credentials and ensure that the login is successful, click OK to close the window

- Click Next
- On the Diagnostic Data page, make a note of Commercial ID
- Select the desired Windows 10 diagnostic Data level. We will select Enhanced (Limited)
- Select Enable to Allow Device Name in Diagnostic Data, click Next

- In the Available Functionality screen, click Next

- Select the SCCM collection that will target Desktop Analytic onboarding by clicking the Add button. You’ll be able to add more collection later. Since this is a lab environment we selected All Systems collection. Choose a Pilot collection to start on your site.
- The Target collection includes all devices that SCCM configures with your commercial ID and diagnostic data settings.
- Once selected, click Next

- On the Summary screen, verify all settings, Click Next and Close

Desktop AnaVERIFICATION
Once completed you can verify that the connection has been made
- Go to Administration / Cloud Services / Azure Services
- You’ll see that the Desktop Analytics service is listed

To monitor the enrollment status of devices :
- Go to Software Library / Analytics Servicing / Connection Health

- This Dashboard shows valuable data to help you. Microsoft has also release good documentation about how to troubleshoot issues
- SCCM 1906 and later also have a PowerShell script DesktopAnalyticsLogsCollector.ps1 from the SCCM install directory\cd.latest\SMSSETUP\TOOLS\DesktopAnalyticsLogsCollector) to help troubleshoot Desktop Analytics.

ENROLL DEVICES
Once that your service is connected, the work is just beginning, you need to enroll the most device as possible to gather valuable information.
Depending on the Operating System, you need to make sure that they have all the required updates.
For Enrollment, you don’t need to install any client. Desktop Analytics relies on diagnostic data sent depending on the configured settings.
SCCM will use the collection you specified in the previous steps to configure your devices.
CREATE DEPLOYMENT PLANS
Once your devices are enrolled you need to create Deployment Plans. Deployment plans are used to simulate a Windows deployment and to :
- Automatically recommend which devices to include in pilots
- Identify compatibility issues and suggest mitigations
- Assess the health of the deployment before, during, and after updates
- Track the progress of your deployment
Unfortunately, these plans are not created in SCCM. You need to create them in your Desktop Analytic portal and they will be synced in SCCM. You’ll then use SCCM to deploy the plans to collections.
By clicking on the Deployment Plan, you’ll be able to see the results in the SCCM Console

To see all status meaning, see Microsoft Documentation.
Log file reference – Configuration Manager | Microsoft Docs
DESKTOP ANALYTICS LOGS FILES
Use the following log files to help troubleshoot issues.
The log files on the service connection point are in the following directory: %ProgramFiles%\Configuration Manager\Logs\M365A.
The log files on the Configuration Manager client are in the usual C:\Windows\CCM\Logs directory.
| Log | Description | Computer with log file |
|---|---|---|
| M365ADeploymentPlanWorker.log | Information about deployment plan sync from Desktop Analytics cloud service to on-premises Configuration Manager | Service connection point |
| M365ADeviceHealthWorker.log | Information about device health upload from Configuration Manager to Microsoft cloud | Service connection point |
| M365AHandler.log | Information about the Desktop Analytics settings policy | Client |
| M365AUploadWorker.log | Information about collection and device upload from Configuration Manager to Microsoft cloud | Service connection point |
| SmsAdminUI.log | Information about Configuration Manager console activity, like configuring the Azure cloud services | Service connection point |
Desktop Analytics is still in the preview phase and it’s possible that process change during the development phase. We’ll try to keep this post as current as possible as the product hits General Availability.
REPORTING
We build 2 SSRS reports that will help you using Desktop Analytics. For more details, click here.

Share
Get the latest insights and exclusive content delivered to your inbox


Dave Smith
03.22.2020 AT 09:03 PMRodrigo
08.19.2018 AT 06:18 AMJared
05.01.2018 AT 12:38 PMEric D
04.19.2018 AT 12:50 PM