
SCCM Windows 10 Deployment | Prepare your Environment
Founder of System Center Dudes. Based in Montreal, Canada, Senior Microsoft SCCM Consultant, 8 times Enterprise Mobility MVP. Working in the industry since 1999. His specialization is designing, deploying and configuring SCCM, mass deployment of Windows operating systems, Office 365 and Intune deployments.

Benoit Lecours
PresidentTable of Content


Share


Get the latest insights and exclusive content delivered to your inbox
In the first part of this blog series on how to deploy Windows 10 with SCCM, we will prepare our environment for Windows 10. If you’re already deploying other operating systems with SCCM 1511, adding Windows 10 is just a matter of adding a new WIM (which our post covers in part 4). If you’re new to deploying operating system with SCCM, follow this post which will covers all steps needed before you can deploy your first systems.
Overview SCCM Windows 10 Deployment
- Upgrade to SCCM 1511
- Enable PXE Support
- Prepare your boot image
- Prepare your Operating Systems
- Create your SUG
- USMT Packages
Upgrade to SCCM 1511
It’s possible to manage Windows 10 with SCCM 2012 but when it comes to deploying Windows 10, if you want to use the full features, you need SCCM 1511 and further. Follow our guide to upgrade your SCCM server and make sure that you are upgrading your Windows ADK version which is included in the upgrade process.
Enable PXE Support
Follow these steps if you want to deploy your images using PXE boot (recommended)
- Open the SCCM Console
- Go to Administration / Site Configuration / Servers and Site System Roles
- Select your distribution point and right-click on the Distribution point role on the bottom, select Properties

- Select the PXE tab
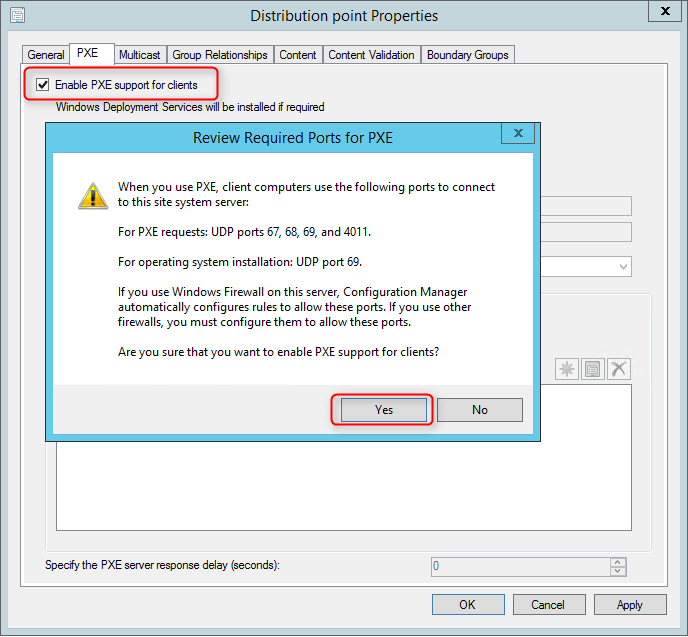
- Enable the Enable PXE support for Clients check-box and answer Yes when prompted about firewall ports (UDP ports 67, 68, 69 and 4011 )
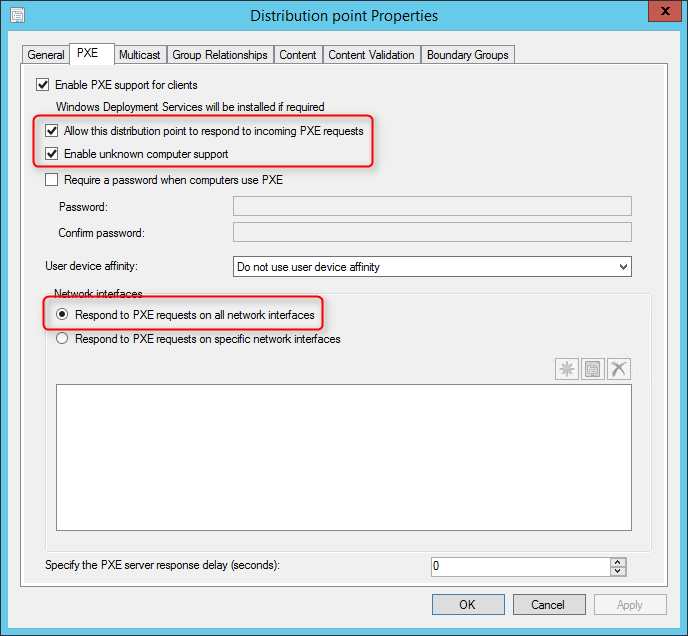
- Check the Allow this distribution point to respond to incoming PXE requests check box
- Check the Enable unknown computer support check box
- Ensure that the Respond to PXE request on all network interfaces is selected
- Click Ok
Your distribution point will now install Windows Deployment Services (if not already installed) and will copy the necessary files on the distribution point.
You can monitor this process in the SCCM Console :
- Go to Monitoring / Distribution Status / Distribution Point Configuration Status
- Click your distribution point on the top and select the Details tab on the bottom
- You will see that the distribution point PXE settings has changed

Prepare your boot image
[su_box title=”Important note” style=”glass” title_color=”#F0F0F0″]If you have created any custom boot images in previous version, you won’t be able to manage it (customize, add drivers, ect…) through the SCCM console. The only manageable version would be PE10 images. Other version could still be used but you’ll have to manage them outside the console using DISM.[/su_box]
Drivers
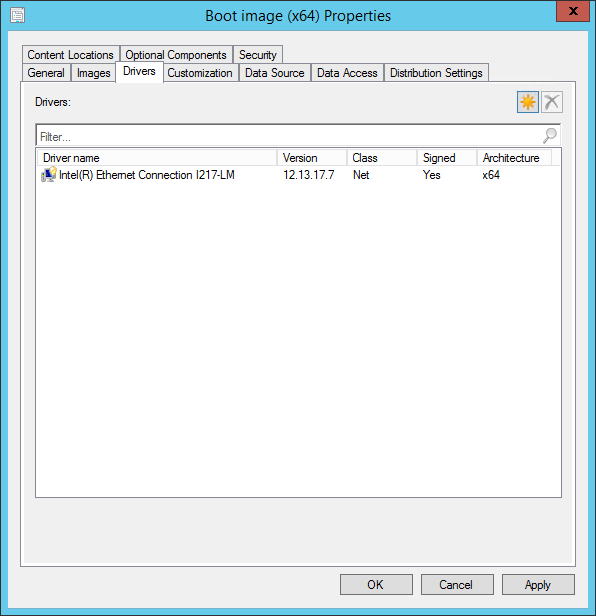
Before launching your first boot image you must include your Windows 10 drivers into the boot image. Our rule of thumb about drivers is to try to boot a certain model and if it fails, add the drivers. Do not add all your NIC drivers to your boot image, it’s overkill and unnecessary increase the size of the boot image.
To add drivers to the boot image :
- Open the SCCM Console
- Go to Software Library / Operating Systems / Boot Images
- Right-click your Boot Image, select Properties
- Select the Drivers tab
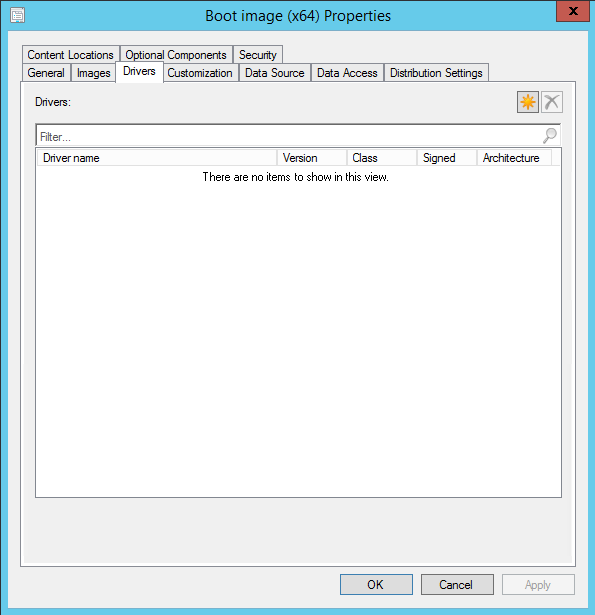
- Click the Star icon
- Select the desired drivers and click OK
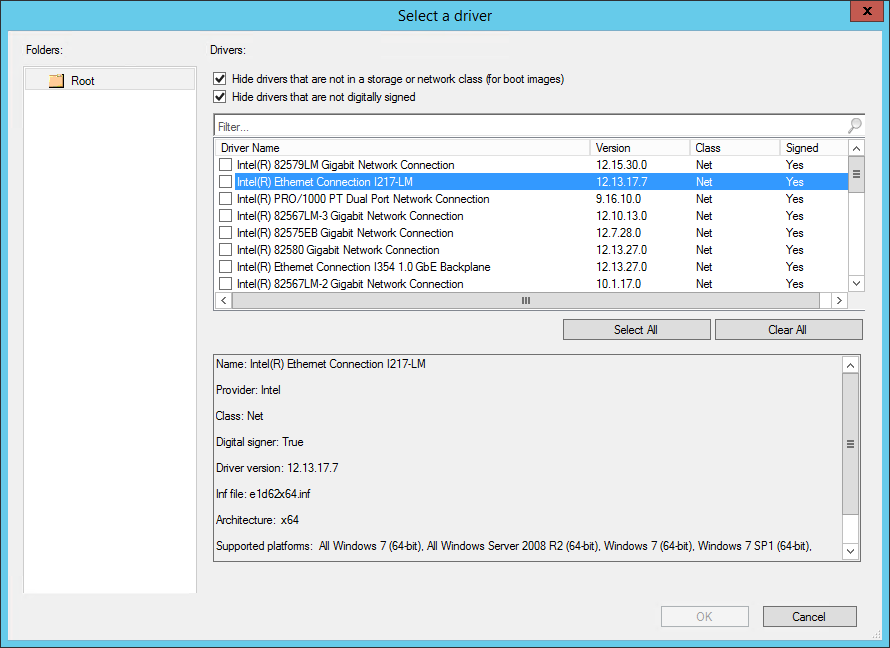
- The selected drivers are added to the boot image, once you click OK, SCCM will inject the driver in your boot image
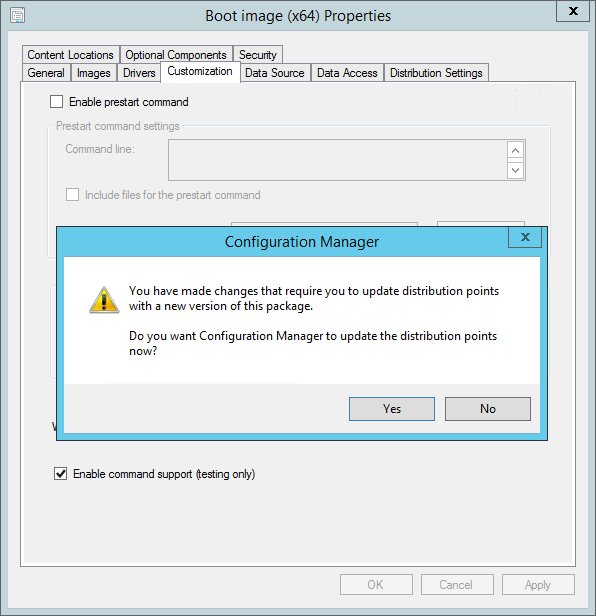
Customization
We will now make a couple customization to the boot image to enable command support (F8) and add a custom background image to the deployment
- Open the SCCM Console
- Go to Software Library / Operating Systems / Boot Images
- Right-click your Boot Image
- Select the Customization tab
- Check the Enable command support checkbox. This allows to have the F8 command line support during deployment
- Specify a custom background if needed by checking Specify the custom background image file checkbox

- If you’re using a PXE-enable distribution point, select the Data Source tab and check the Deploy this boot image from the PXE-Enabled distributon point checkbox
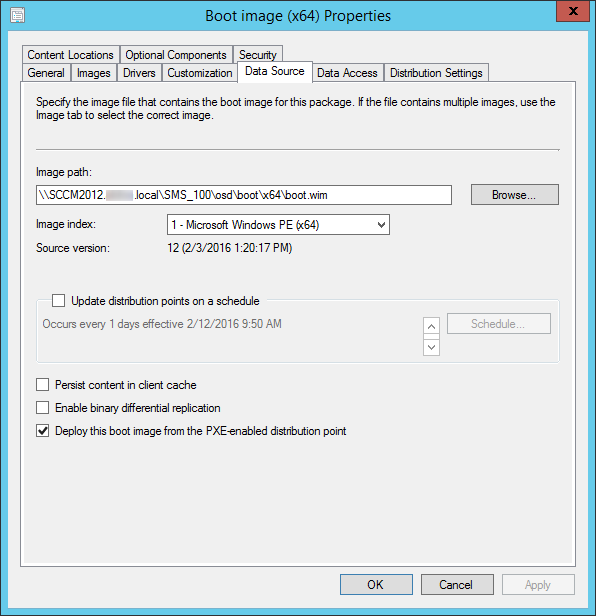
- Click Apply and Yes to the warning, close the window
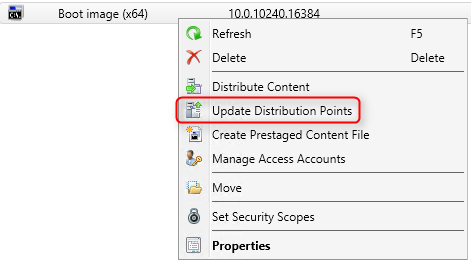
Distribute your boot image
Since you’ve upgraded your ADK to version 10 and made modifications to your boot image, you need to redistribute it to your distribution points.
- Right click your boot image and select Update Distribution Points
Prepare your Operating Systems
We will now import the Windows 10 WIM file for Windows 10 deployment.
[su_box title=”Important” style=”glass” title_color=”#F0F0F0″]You’ll see both Operating System Images and Operating System Upgrade Packages. One is to import .WIM files and the other one is for Full Media. We will need both for different scenarios. In the case of a vanilla deployment or after a build and capture, you use Operating System Images to import the WIM files. In an Upgrade task Sequence, you will need to have the Full media imported in Operating System Upgrade Packages.[/su_box]
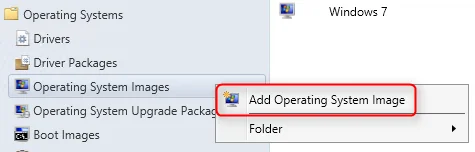
We will start by importing the default Install.Wim from the Windows 10 media for a “vanilla” Windows 10 deployment. You could also import a WIM file that you’ve created through a build and capture process.
- Open the SCCM Console
- Go to Software Library / Operating Systems / Operating System Images
- Right click Operating System Images and select Add Operating System Image
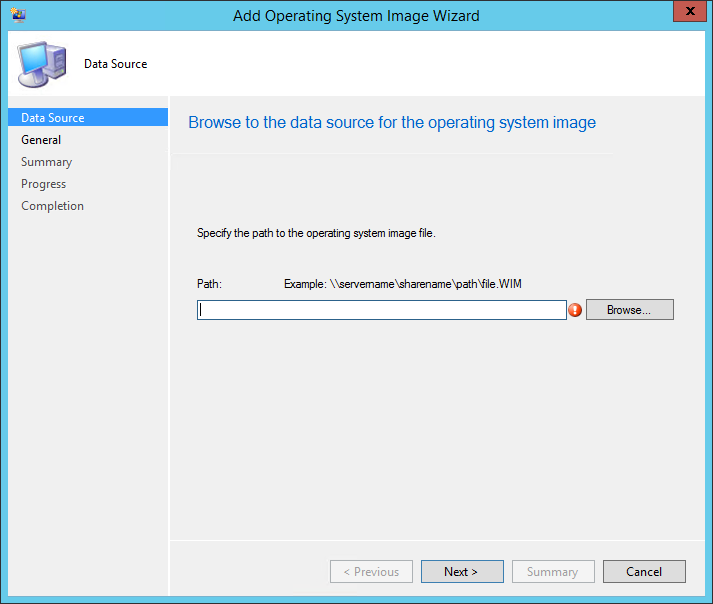
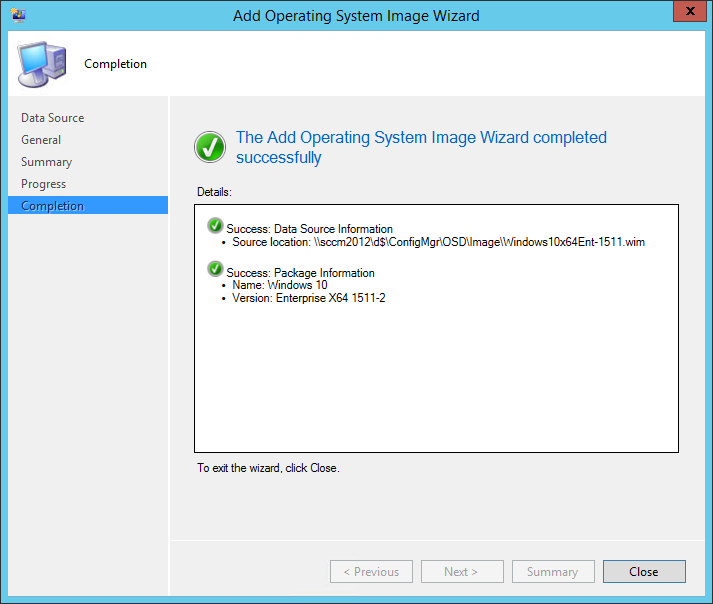
- On the Data Source tab, browse to your WIM file. The path must be in UNC format
- In the General tab, enter the Name, Version and Comment, click Next
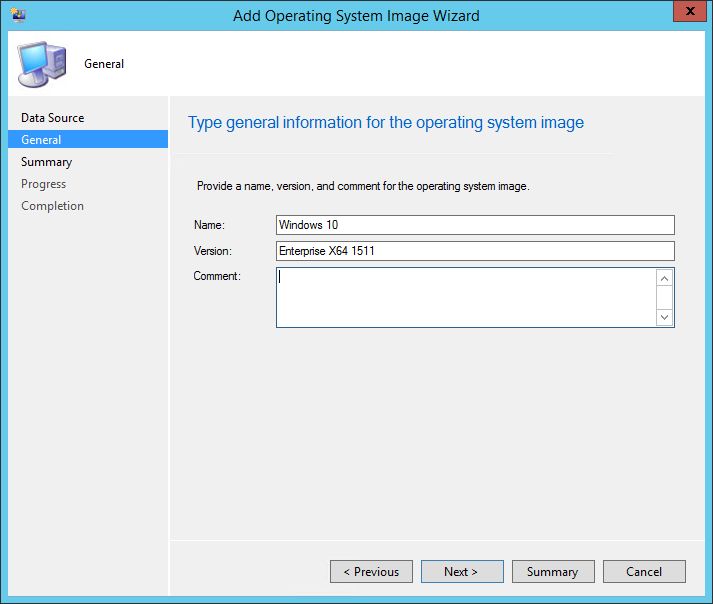
- On the Summary tab, review your information and click Next
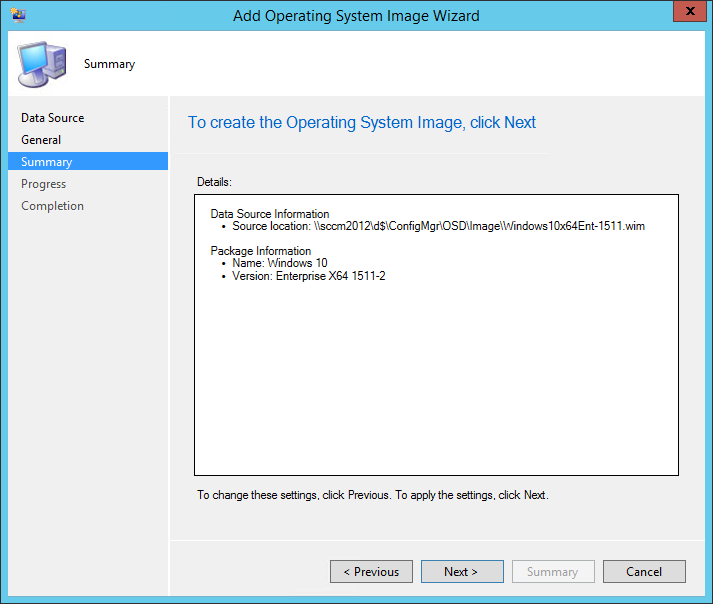
- Complete the wizard and close this window
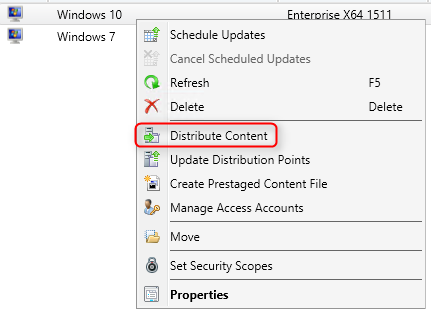
Distribute your Operating System Image
We now need to send the Operating System Image (WIM file) to our distribution points.
- Right click your Operating System Image, select Distribute Content and complete the Distribute Content wizard
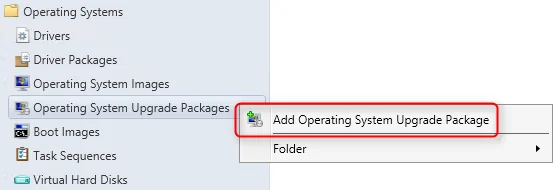
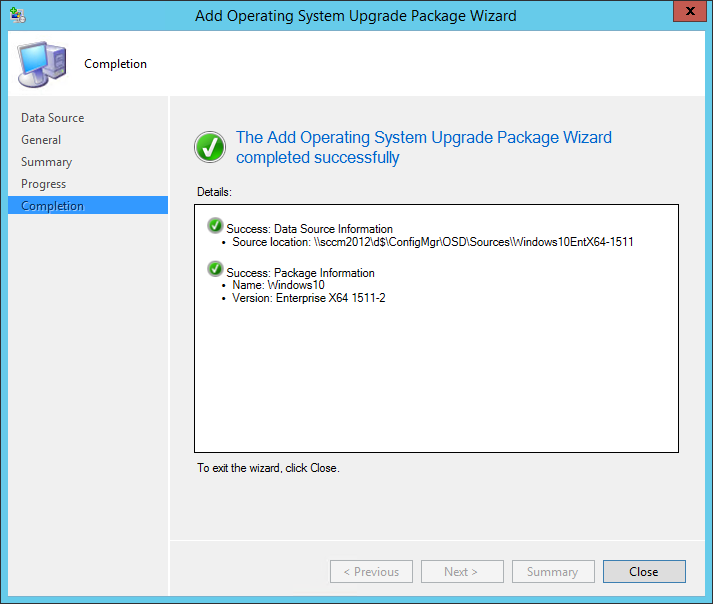
We will now import the complete Windows 10 media in Operating System Upgrade Packages. This package will be used to upgrade a Windows 7 (or 8.1) device to Windows 10 using an Upgrade Task Sequence.
- Open the SCCM Console
- Go to Software Library / Operating Systems / Operating System Upgrade Packages
- Right click Operating System Upgrade Packages and select Add Operating System Upgrade Packages
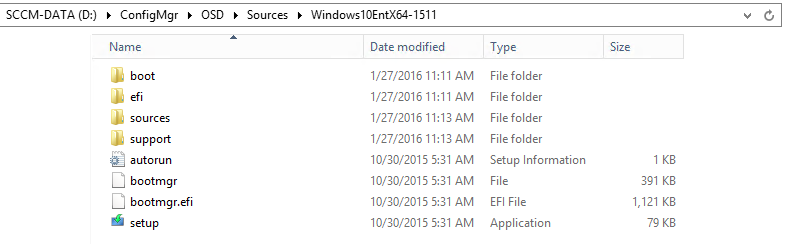
- In the Data Source tab, browse to the path of your full Windows 10 media. The path must point on an extracted source of a ISO file. You need to point at the top folder where Setup.exe reside
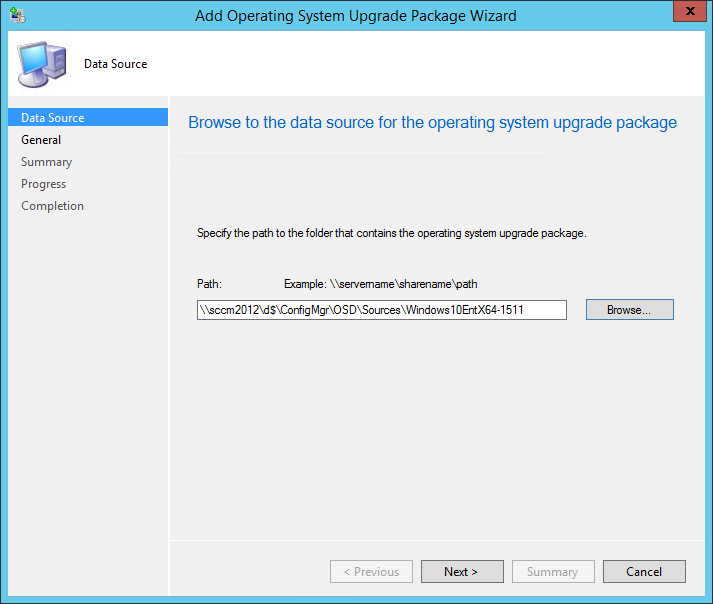
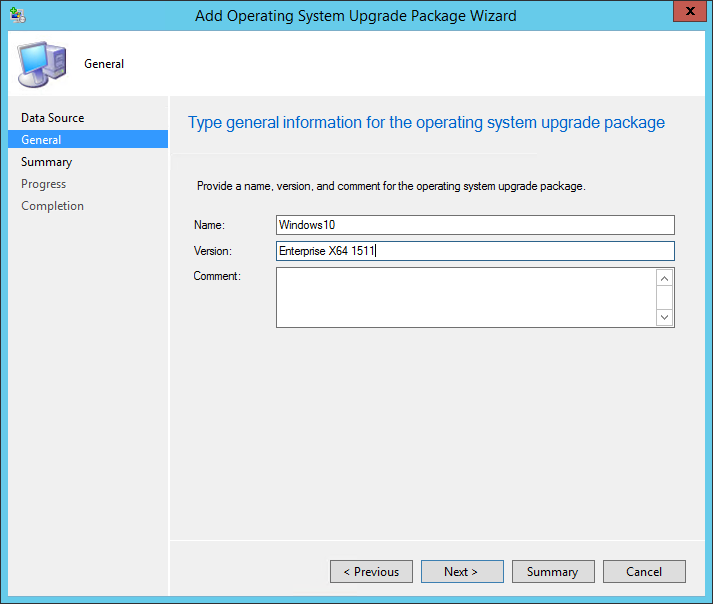
- In the General tab, enter the Name, Version and Comment, click Next
- On the Summary tab, review your information and click Next
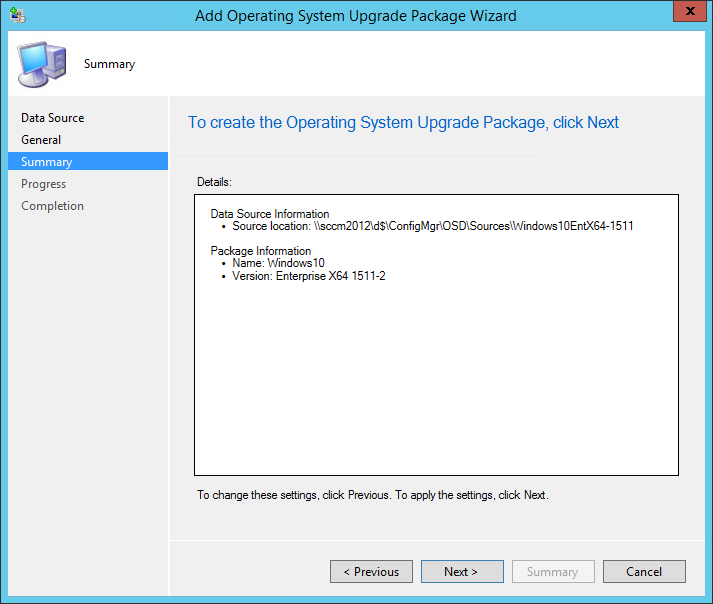
- Complete the wizard and close this window
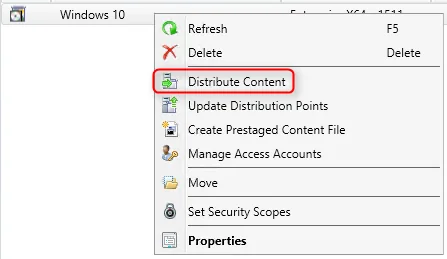
Distribute your Operating System Upgrade Packages
We now need to send the Operating System Upgrade Package to your distribution points.
- Right click your Operating System Upgrade Package, select Distribute Content and complete the Distribute Content wizard
Create Software Update Group
One important thing in any OSD project, is to make sure that every machines deployments are up to date. Before deploying Windows 10, make sure that your Software Update Point is configured to include Windows 10 patches.
Once Windows 10 is added to your Software Update Point, we will create a Software Update Group that will be deployed to our Windows 10 deployment collection. This way, all patches released after the Windows 10 media creation (or your Capture date) will be deployed during the deployment process.
To create a Windows 10 Software Update Group :
- Open the SCCM Console
- Go to Software Library / Software Updates / All Software Updates
- On the right side, click Add Criteria, select Product, Expired and Superseded
- Product : Windows 10
- Expired : No
- Superseded : No
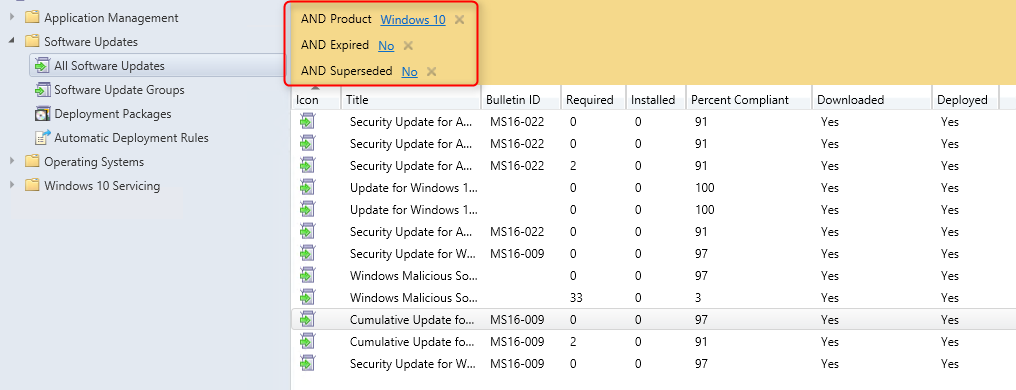
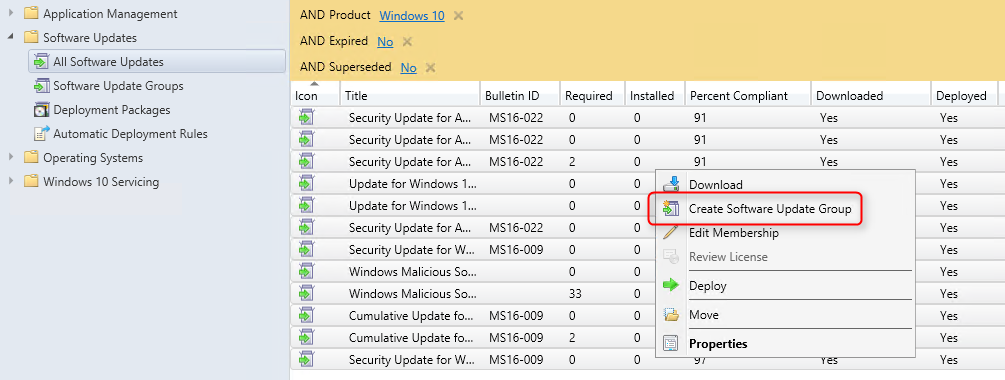
- Select all patches and select Create Software Update Group
- Once created, go to Software Library / Software Updates / Software Update Groups
- Right-click your Windows 10 SUG and deploy it to your OSD deployment collection
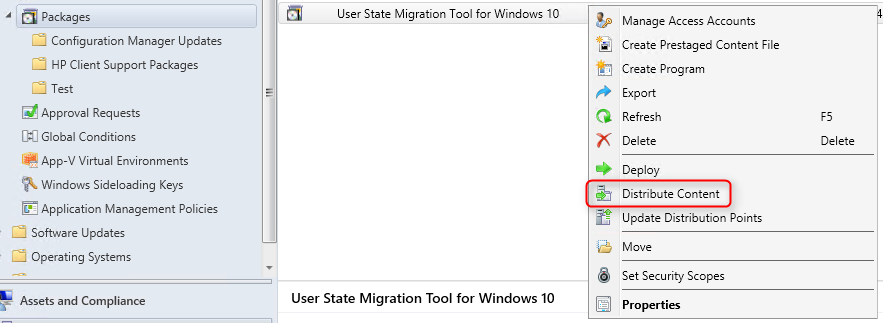
USMT Package
If you are planning to use USMT to capture and restore user settings and files, you need to make sure that the USMT package is created and distributed.
- Open the SCCM Console
- Go to Software Library / Application Management / Packages
- Right-click the User State Migration Tool for Windows 10 package and select Properties
- On the Data Source tab, ensure that the package is using the ADK 10 – Which is per default C:\Program Files\Windows Kits\10\Assessment and Deployment Kit\User State Migration Tool
- Right-click the User State Migration Tool for Windows 10 package and select Distribute Content
That’s it ! You have everything that’s needed to create your first Windows 10 deployment. Read the next parts of this blog series to successfully deploy Windows 10.
Share
Get the latest insights and exclusive content delivered to your inbox


Aaron Ross
03.17.2019 AT 11:23 AMDan
02.13.2018 AT 03:12 AMron
08.25.2017 AT 01:14 PMErik
03.13.2017 AT 11:27 AMRushaoz
09.23.2016 AT 12:51 PMChris
07.27.2016 AT 02:17 AMJonathan Lefebvre
07.27.2016 AT 08:26 AMv-juanm
06.02.2016 AT 12:55 AMv-juanm
06.02.2016 AT 10:52 AMJohn Ferragamo
04.04.2016 AT 12:56 PMJoshT
01.16.2017 AT 10:44 AMBenoit Lecours
04.06.2016 AT 11:31 AMjackr
03.10.2016 AT 07:32 PM