
Use SCCM External Notification to trigger Microsoft Teams message
Founder of System Center Dudes. Based in Montreal, Canada, Senior Microsoft SCCM Consultant, 8 times Enterprise Mobility MVP. Working in the industry since 1999. His specialization is designing, deploying and configuring SCCM, mass deployment of Windows operating systems, Office 365 and Intune deployments.

Benoit Lecours
PresidentTable of Content


Share


Get the latest insights and exclusive content delivered to your inbox
Following a blog post on receiving an email after an operating system deployment completes, I received a friendly tip to try replicating the behavior using the new External notifications feature available since SCCM 2107. Challenge accepted! Beginning with SCCM 2107, you can enable the site to send notifications to an external system. You can use Azure Logic Apps to configure subscriptions to send these notifications. These notifications can be based on SCCM events like status message filter rules. In the previous post, we were using status message filter rules to trigger a Powershell script. In this blog post, we’ll be using the new SCCM External Notification feature to trigger an event in Microsoft Team to notify a channel that a Task Sequence deployment is complete.
Besides Teams, you can also use the Office O365 connector to send an email. For this blog post, we’ll stick to the Teams option as I find it much more dynamic.
There are multiple other uses that you could use that for. Here’s some example :
- Send a notification when a specific component is failing (ex: AD Discovery, MP Control, Rule Engine)
- Send a notification when a collection membership changes
- Send a notification when a Distribution Point complete processing of a package
- Send a notification when your backup task completes
- Send a notification when your ADR creation fails
You get the point… if the event is triggered by SCCM Status Message, you can use it and get creative.
If you’re not familiar with Status Message, you can see them all in the console :
- In the SCCM Console
- Go to Monitoring / System Status / Status Message Queries / All Status Message

- Status Message shows all actions, there’s lots of valuable information in there. Your SCCM External configuration can be based on multiple things : MessageID, a component, a severity….

SCCM External Notification – Prerequisites
- SCCM 2107+
- Microsoft Teams
- Site service connection point in Online mode
- An active Azure subscription with rights to create an Azure logic app
- Full administrator rights in SCCM
- The SetupExternalServiceNotifications.ps1 script to create the subscription and status filter rules
To obtain this script, run this command in a PowerShell Window on your SCCM server :
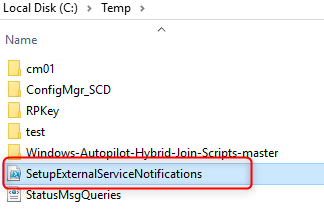
The script will be saved in C:\Temp after code execution
$FileName = "C:\temp\SetupExternalServiceNotifications.ps1"
Invoke-WebRequest https://aka.ms/cmextnotificationscript -OutFile $FileName
(Get-Content $FileName -Raw).Replace("`n","`r`n") | Set-Content $FileName -Force
(Get-Content $FileName -Raw).TrimEnd("`r`n") | Set-Content $FileName -Force
Once you have the script, we can go to Azure to create our Logic App to receive SCCM External Notifications
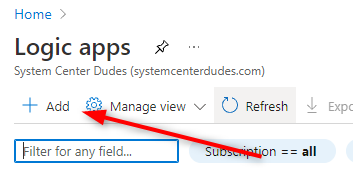
Create an Azure logic app
We will create an app in Azure Logic Apps to receive the notification from Configuration Manager :
- Sign in to the Azure portal
- Select Logic Apps

- Select Add
- Select your subscription and ressource group. On the Type, choose Consumption
- Name your Logic app and select your region
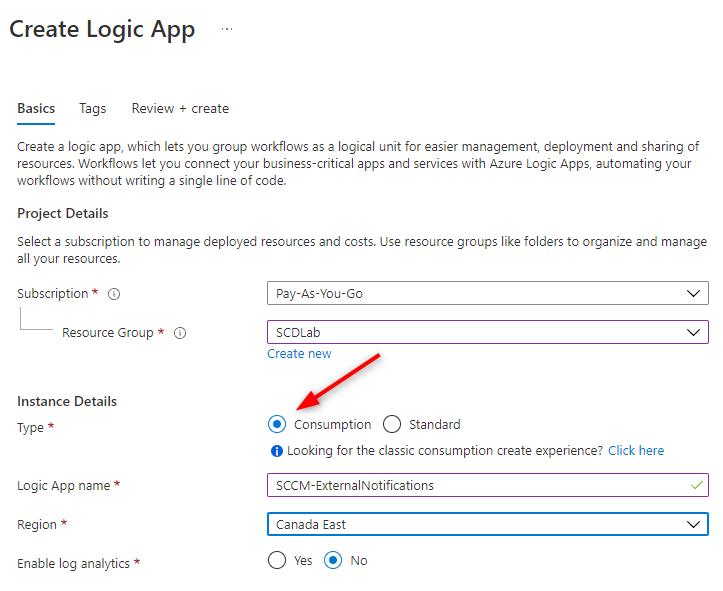
- Select Review + create and select Create
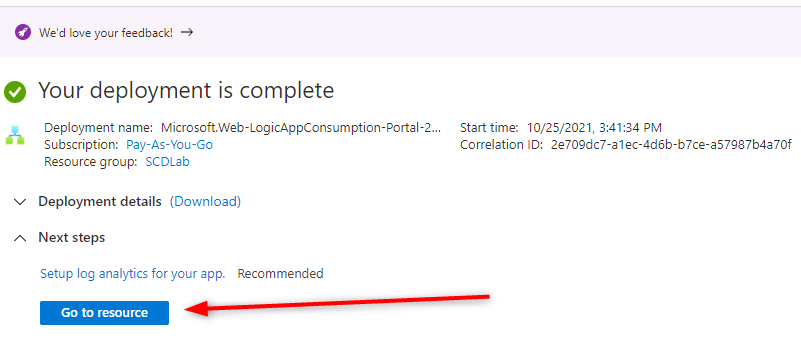
- Wait for the deployment to complete and under Next steps, select Go to resource
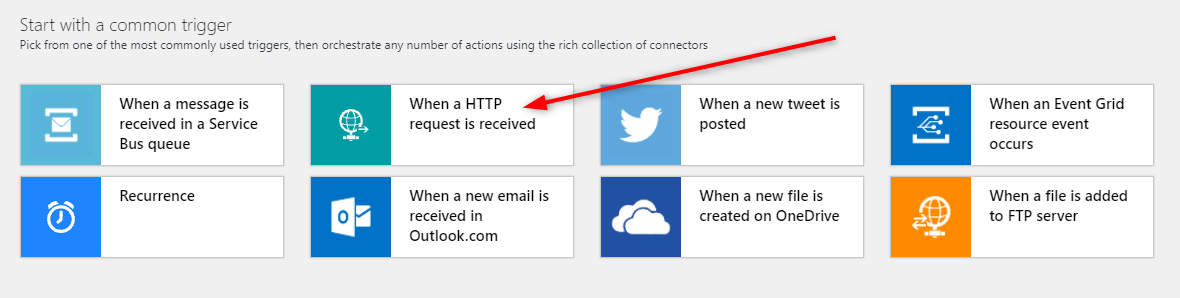
- Under the section to Start with a common trigger, select When a HTTP request is received
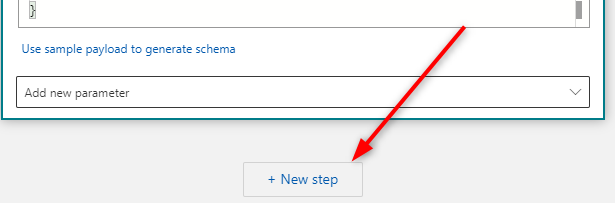
- At the bottom of the trigger editor, select Use sample payload to generate schema
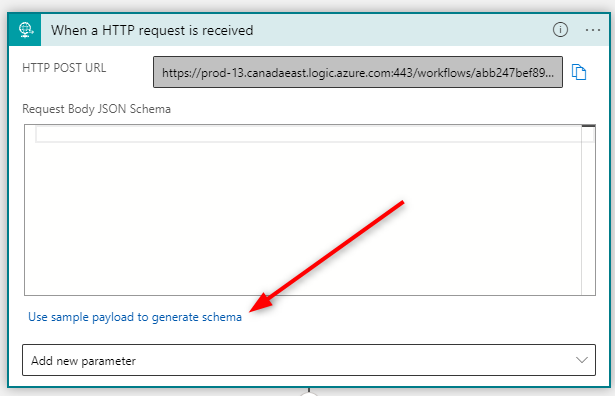
- Paste the following sample schema into the new window
{
    "EventID":0,
    "EventName":"",
    "SiteCode":"",
    "ServerName":"",
    "MessageID":0,
    "Source":"",
    "EventPayload":""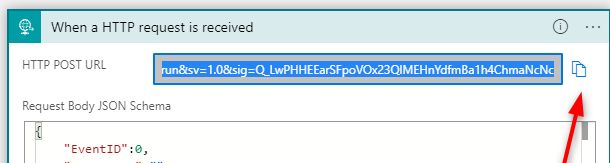
}- Select Done and Save
- Copy the generated URL for the logic app. You’ll use this URL later when you create the subscription in Configuration Manager
- We will now create the event notification in Teams
Post a mesage to Microsoft Teams
We have now created a Logic App, we now need to add a step to send our notification. You have 2 possible options :
- Send an email, using the Office 365 Outlook connector
- Post a message to Microsoft Team
We will use Team as an example for this post
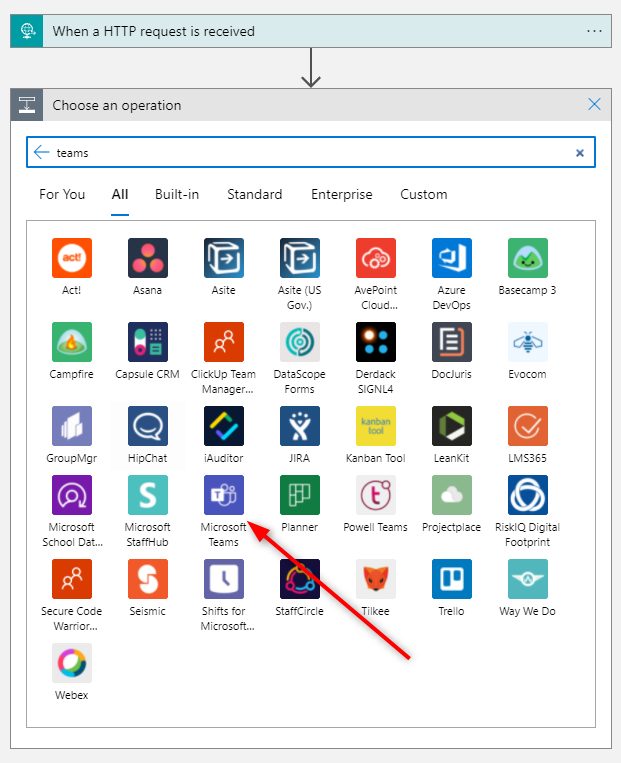
- Select + New Step bellow our HTTP Request
- Select Microsoft Teams from the list of available operation
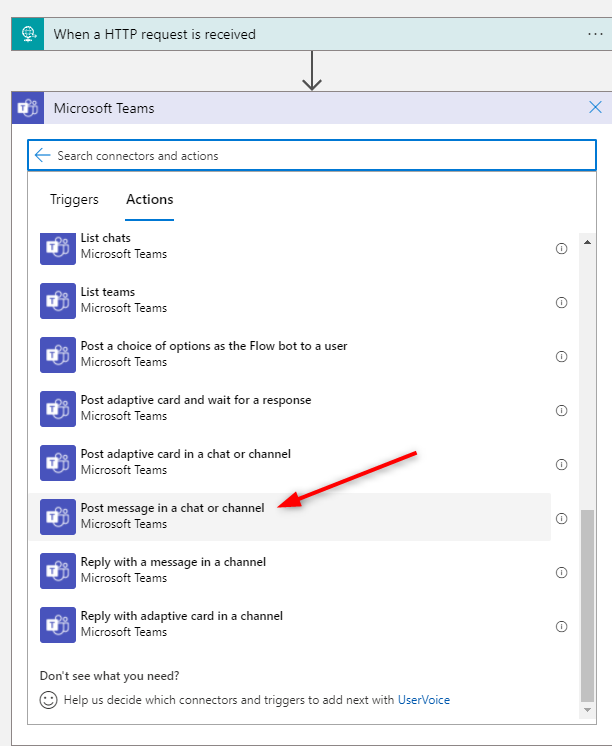
- Select Post message in a chat or channel
- Complete the Teams configuration to post in the desired channel / Chat and enter your message
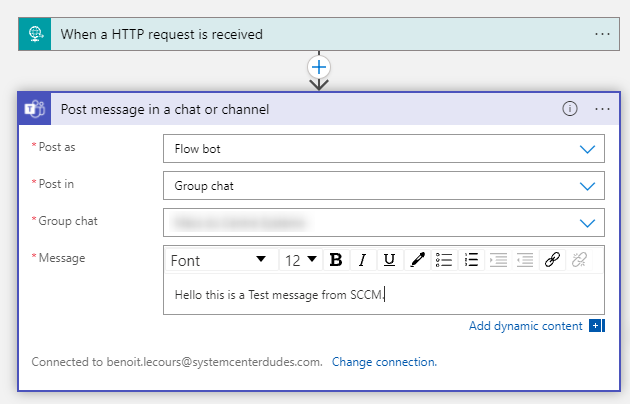
- When completed, click Save on the far left corner
- The Logic App setup is now completed
SCCM Status Filter Rules creation
Now that our logic app is ready to receive our notification, we need to tell SCCM to send its event to this Logic App. We’ll achieve that by using a Status Filter Rule in SCCM . For our example, we’ll use MessageID 11171 which means that a Task Sequence has been run successfully. In a production environment that could mean that an IT technician or a whole team receives a notification to their Teams when a computer has successfully deployed Windows 11.
This is the event we want to trap :

So each time the MessageID 11171 will be generated, a message will be sent to Microsoft Teams.
The important part to understand here is that you cannot create the Status Filter Rule manually, you need to use Microsoft provided a script that you’ve downloaded in the first step of this guide.
- On the site server, run SetupExternalServiceNotifications.ps1
- Enter Y to continue
- Select 2 to create a new status filter rule
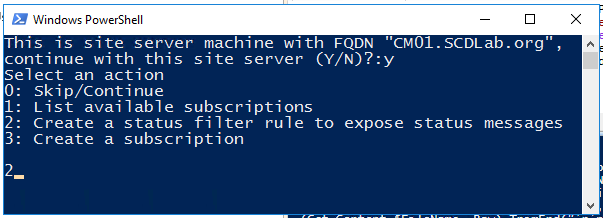
- Specify a name for the new status filter rule
- Select criteria for the rule. Specify 0 when you want to skip a criterion. For our example we’ll use these :
- Source: Client
- Site code : SCD
- System : 0
- Component: 0
- Message type: 0
- Severity: 0
- Message ID : 11171
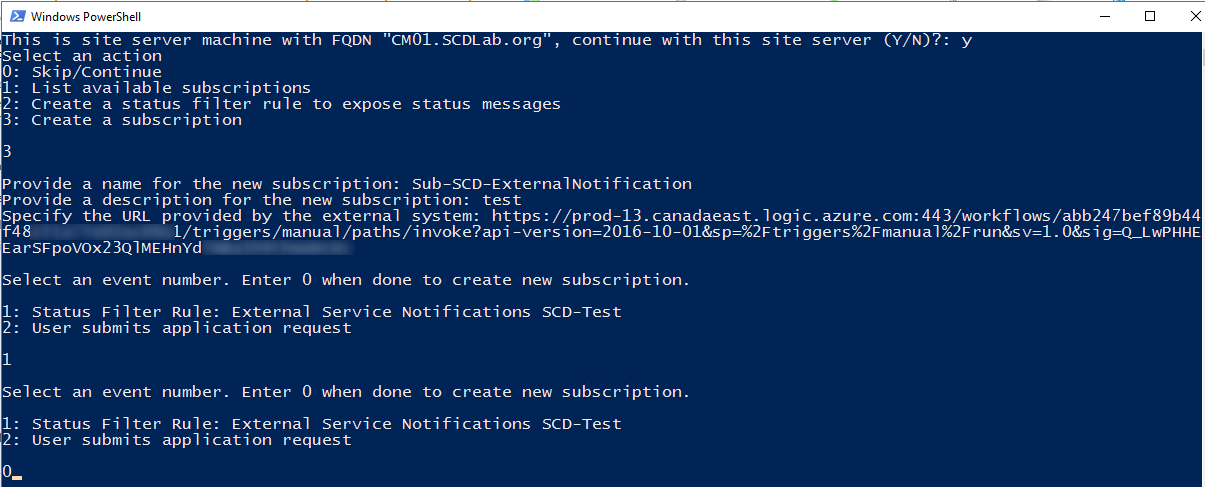
- The script will exit.
- Rerun the PowerShell script
- Select option 3 create a new subscription
- Specify a name and description for the subscription
- Specify the logic app URL that you previously copied from the Azure portal in the previous step
- Select your newly created status filter rule
- Select 0 to exit the script
SCCM External Notification – Testing and Monitoring
It’s now time to test our rule creation. If everything was done correctly, you should have a Teams notification on the provided channel each time a task sequence completes (MessageID 11171)
Let’s start by validating that our rule has been configured
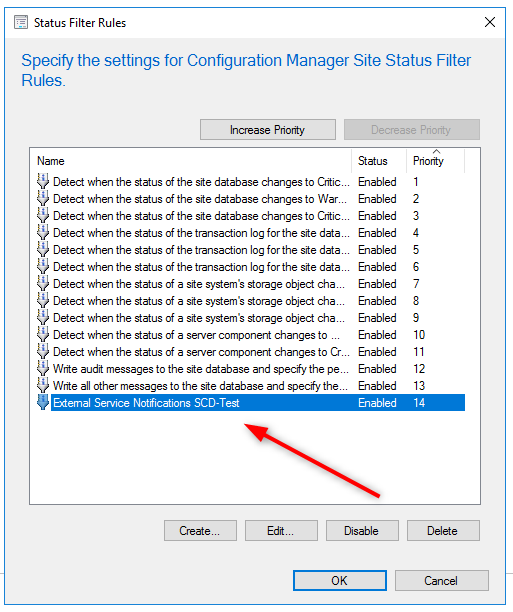
- Go to Administration / Sites / Status Filter Rules
- Ensure that your rule is listed. Do not modify your rule in the console. This will break the app. If something needs to be changed, create a new one.
- You can also validate that your subscription has been created by reruning the script and select the #1 option.
- Once everything looks good, generate an event. In our example, I deployed a task sequence to a computer and wait until it finished.
- Once you see the MessageID 11171 in your Status Message Query, you should receive the Team notification no more than 5 minutes after. This is beause the trigger is each 5 minutes.
You can monitor this process by opening the ExternalNotificationsWorker.log file. The SubscriptionID can be found by using the script and using the 1 option.

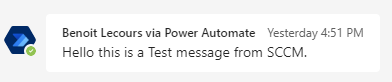
- No more than 5 minutes after, my Team notification pops !

There are so many uses I can see using the SCCM External Notification feature! I will certainly write more blog posts on other possible use in the near future.
Share
Get the latest insights and exclusive content delivered to your inbox


Only authorized users can leave comments
Log In