
Rollback Windows 10 Feature Update using SCCM or Microsoft Intune
Founder of System Center Dudes. Based in Montreal, Canada, Senior Microsoft SCCM Consultant, 8 times Enterprise Mobility MVP. Working in the industry since 1999. His specialization is designing, deploying and configuring SCCM, mass deployment of Windows operating systems, Office 365 and Intune deployments.

Benoit Lecours
PresidentTable of Content


Share


Get the latest insights and exclusive content delivered to your inbox
During a Windows 10 Feature Update deployment, you may want to uninstall or rollback to the previous Windows 10 version. A Windows 10 Rollback is wanted for example because the user runs into a problem after the Windows 10 Feature Update deployment.
The Windows 10 Rollback action can be initiated by SCCM or Microsoft Intune. However, there’s a couple of catch that I found when I was asked to do it. In this blog post, I’ll describe everything you need to know if you need to do a Windows 10 Rollback using SCCM or Intune.
By default, Windows 10 gives you ten days to roll back major upgrades. After ten days, Windows deletes those old files to free up disk space. This is a change from the initial versions of Windows 10, which gave you 30 days to decide.
Rollback Windows 10 to a Previous Version
If you have compatibility issues with some OS component or applications after a Windows 10 Feature update, you can uninstall the updates using either Configuration Service Provider (Intune) or DISM (SCCM/MEMCM)
The term Uninstall is important here because Microsoft tools are not using the Rollback term, it’s using the Uninstall term. A slight, but important difference.
Using SCCM and DISM
So let’s begin with explaining how to do the Windows 10 rollback action using SCCM.
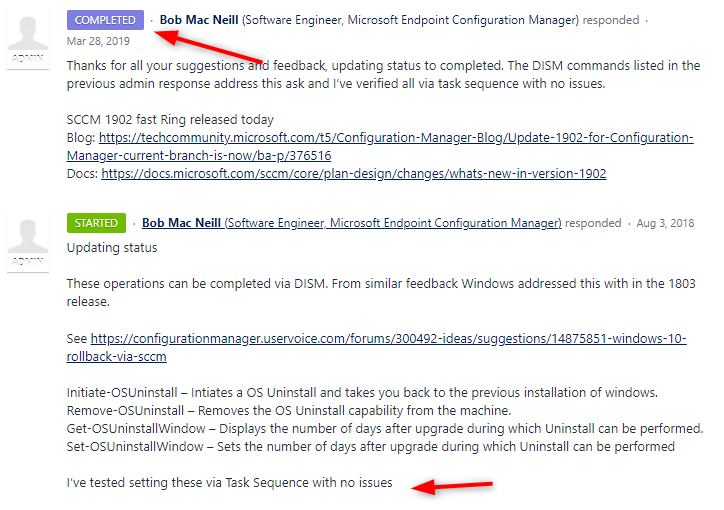
There no built-in action in SCCM to do a Windows 10 rollback. The product group has confirmed this in this User Voice Item. They are basically saying that you need to use the provided DISM commands for that.
The only “catch” is that you need to be using Windows 10 1803+ and SCCM 1902+ to use those DISM commands.
The reason is pretty simple, some of the DISM commands were introduced in the latest Windows 10 builds.
There’s also a known issue well documented by the SCCM product group : A Configuration Manager in-place upgrade task sequence doesn’t continue after a Windows 10 in-place upgrade rollback.
In short, the client gets stuck in Provisioning mode and fails in previous Windows and SCCM version.
Once again, the resolution is to use Windows 10 1803+ and SCCM 1902+ to avoid this problem. You can read the various resolutions you can take if you’re not running these versions.
So, if you’re running a supported Windows 10 and SCCM version. You can initiate a Windows 10 Rollback by using DISM.
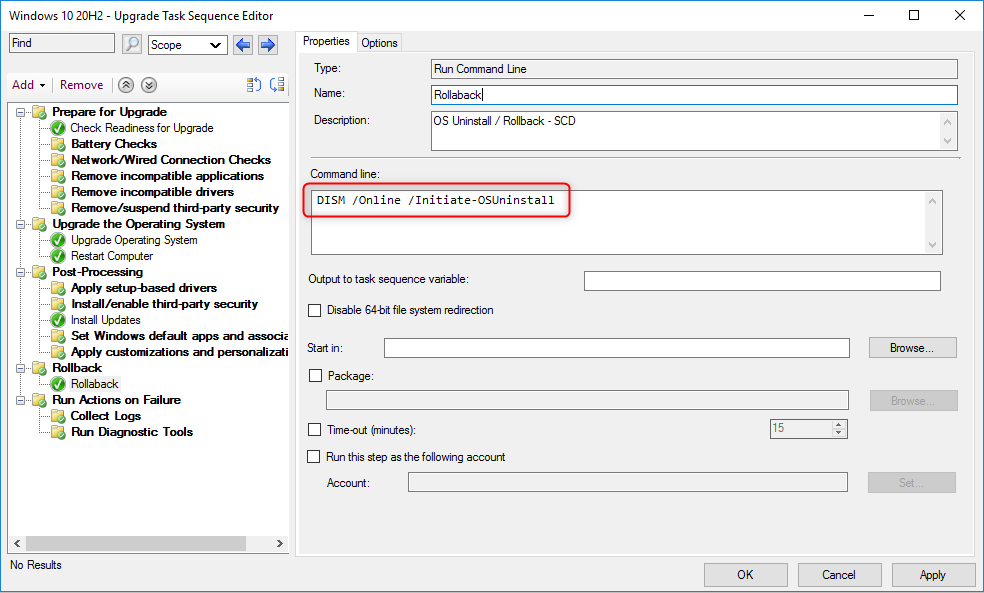
You can use a package, a script or a Task Sequence to run the following command :
- DISM /Online /Initiate-OSUninstall

All other DISM options related to operating system uninstall are listed in the Microsoft Documentation
- Initiate-OSUninstall – Intiates a OS Uninstall and takes you back to the previous installation of windows.
- Remove-OSUninstall – Removes the OS Uninstall capability from the machine.
- Get-OSUninstallWindow – Displays the number of days after upgrade during which Uninstall can be performed.
- Set-OSUninstallWindow – Sets the number of days after upgrade during which Uninstall can be performed
Windows 10 Rollback via Microsoft Intune using CSP
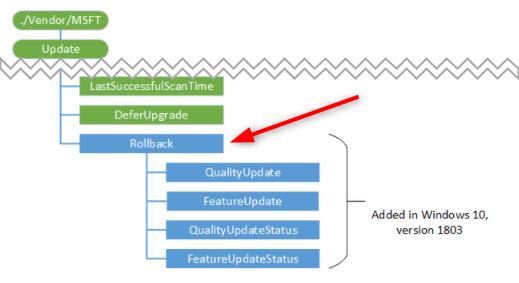
To do a Windows 10 Rollback using Microsoft Intune, you must use a Configuration Service Provider (CSP). More specifically the Update CSP which manage and control the rollout of new updates.
This was introduced in Windows 1803. This CSP can’t be used if you’re running a previous Windows 10 build.
- ./Vendor/MSFT/Update/Rollback/FeatureUpdate
Intune is basically using WUfB policy to manage the Windows 10 Update Rings. So you have the choice to use a Custom CSP or use the built-in feature
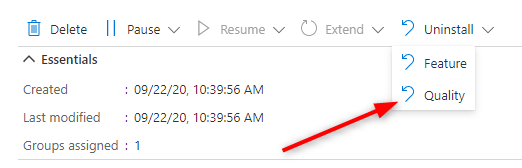
- In your Microsoft Endpoint Manager Admin portal
- Click Devices / Windows 10 Update Rings
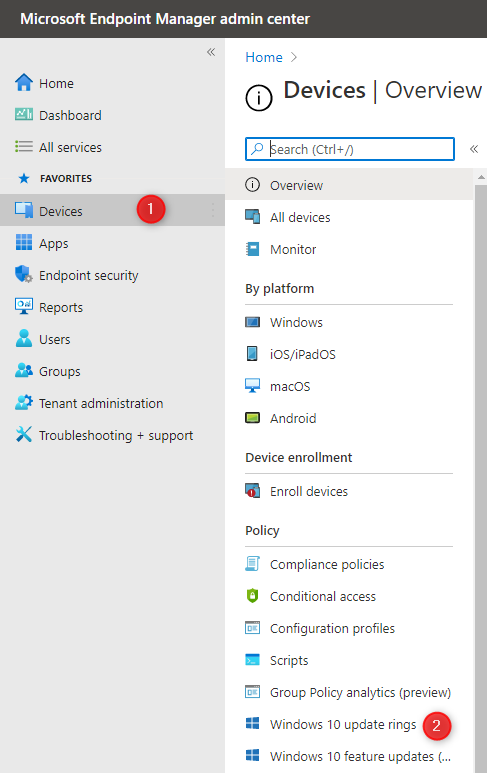
- Click on your Profile and on the top Ribbon click Uninstall / Feature
- This will initiate the Windows 10 Update Rollback / Uninstall to the device that are in the group
Share
Get the latest insights and exclusive content delivered to your inbox


Only authorized users can leave comments
Log In