

SCCM Windows 10 Customization using Task Sequences
Founder of System Center Dudes. Based in Montreal, Canada, Senior Microsoft SCCM Consultant, 8 times Enterprise Mobility MVP. Working in the industry since 1999. His specialization is designing, deploying and configuring SCCM, mass deployment of Windows operating systems, Office 365 and Intune deployments.

Benoit Lecours
PresidentTable of Content


Share


Get the latest insights and exclusive content delivered to your inbox
In this post we will describe how to customize your windows 10 image to personalize it to your company. There’s an infinite amount of customization that can be made but i’ll try to cover the more frequent one, those that are asked 95% of every Windows 10 projects I was involved in. You could also do all those modifications through group policies if you want to enforce those settings.
SCCM Windows 10 Customization Package
Before we begin any customization, we will create a Windows 10 Customization package that we will use in our task sequence. It will be empty to start but we will create the folders and scripts during this blog post.
- Open the SCCM Console
- Go to Software Library / Application Management / Packages
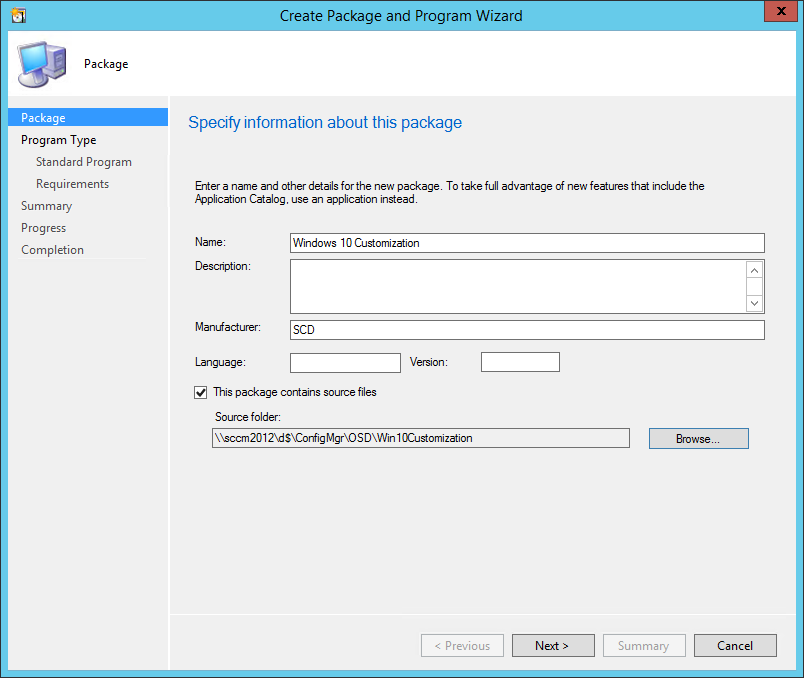
- Create a new package
- On the Package tab, enter a Name, Description, Manufacturer and Source folder (this is where all scripts will be stored)
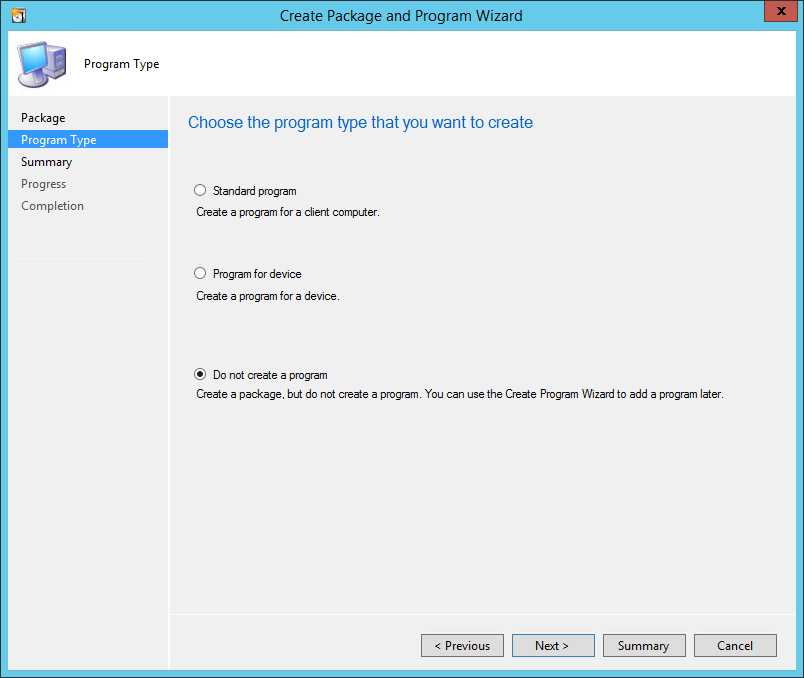
- On the Program Type tab, select Do not create a program
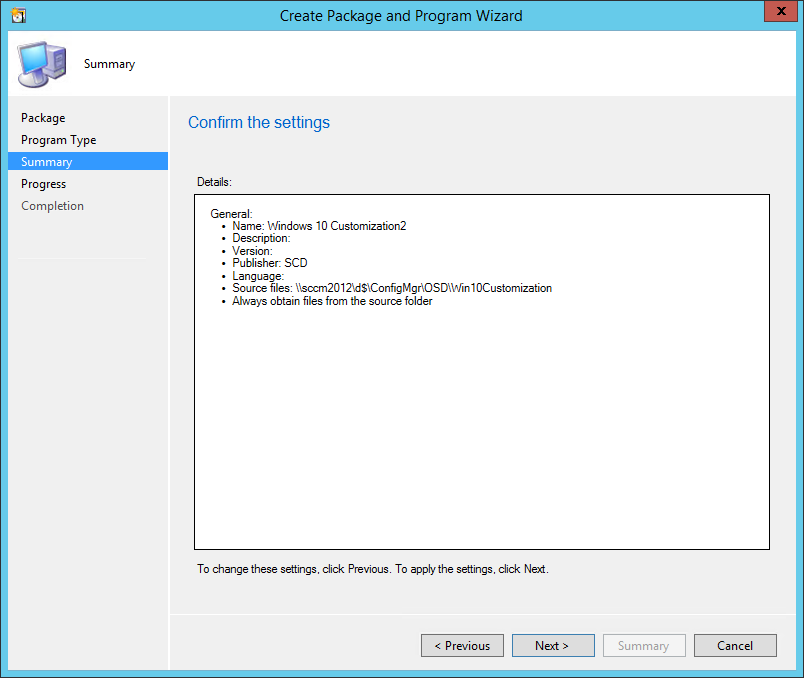
- On the Summary tab, review your choices and complete the wizard
File Association
The first item we will be covering is file association. By default, Windows 10 uses Microsoft Edge to open every PDF files and HTTP links. For this post, we will redirect PDF files to Adobe Reader and HTTP/HTTPS to Internet Explorer. You can redirect any extension to any software. You just need to make sure that the application that you associate is installed during your Windows 10 deployment (or in your image).
The first step is to make the association manually, we will then export the configuration to a XML file and we will use DISM in our task sequence to import the configuration.
- Log on a Windows 10 machine
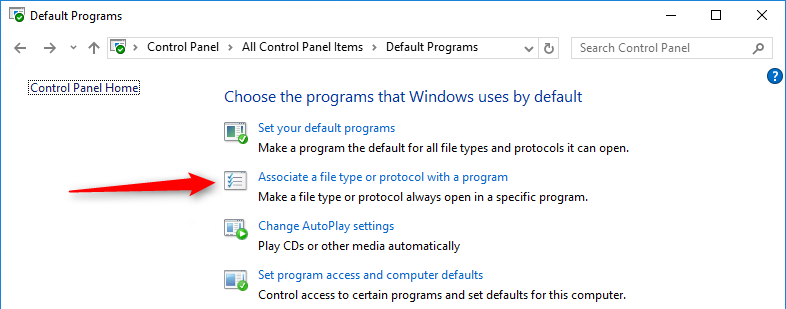
- Open Control Panel / Programs / Default Programs / Set Associations
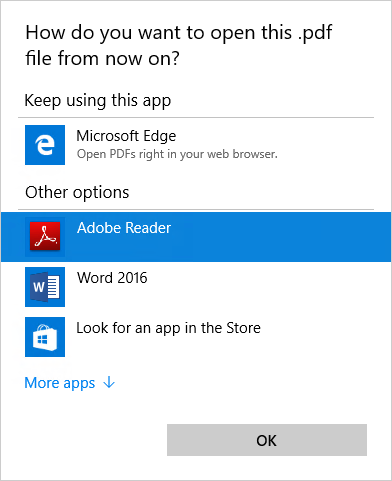
- Navigate to .PDF and click on Change Program
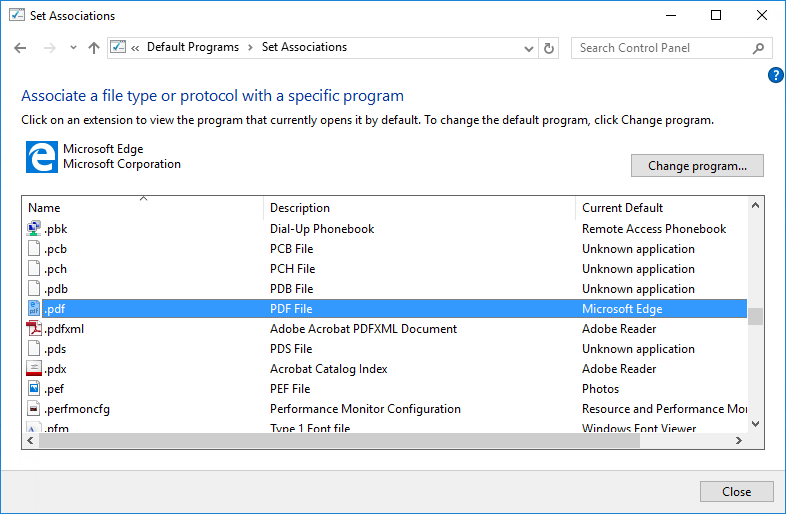
- Select Adobe Reader and click OK
- Your .PDF files are now associated to Adobe Reader
- For Internet Explorer association, select HTTP Protocol, .HTM and .HTML files, change program to Internet Explorer
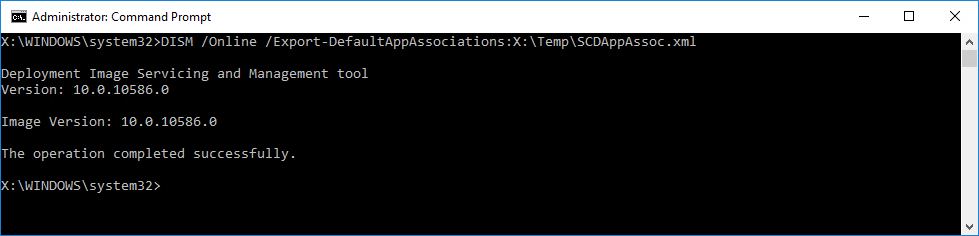
Now that our associations has been done, we need to export the associations to a XML file using DISM :
- Open an elevated command prompt
- Run the following command : Dism /Online /Export-DefaultAppAssociations:C:\Temp\SCDAppAssoc.xml
- (Change the XML file name and path if desired but make sure that the directory exists or you’ll get an error code 3)
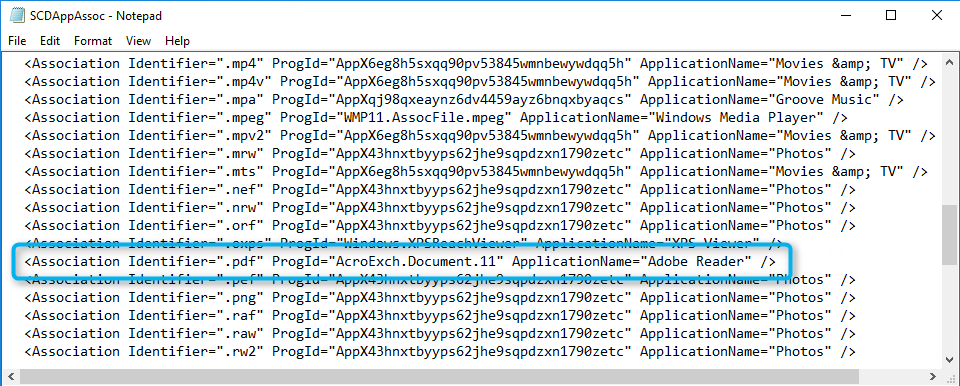
The XML file can be opened using any text editor. You can see our modifications has been made. It’s possible to change manually in this file but it’s a bit tricky to find ProdId and ApplicationName.
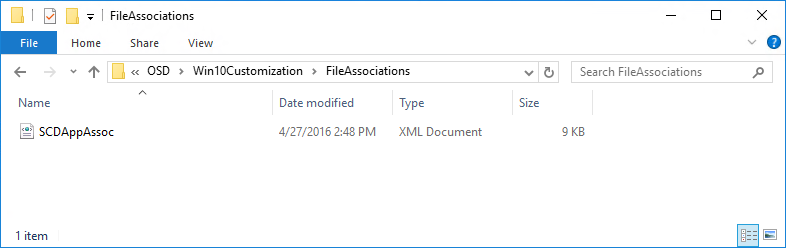
- Copy the XML file to your Windows 10 customization package in the FileAssociations Folder
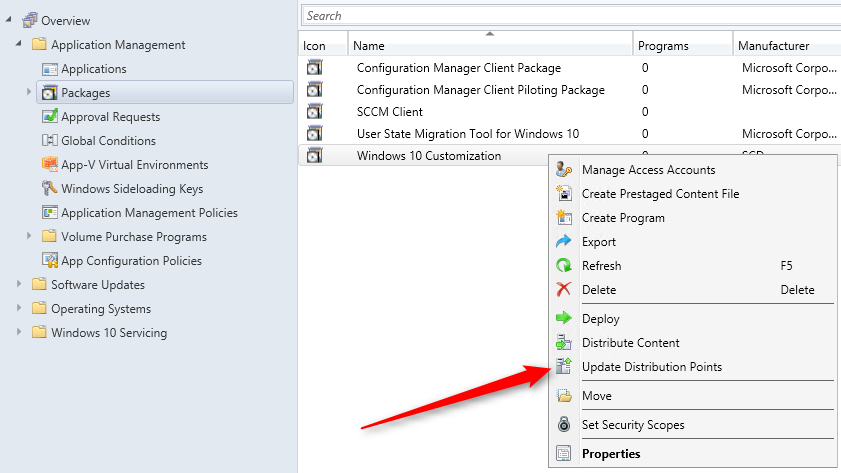
- Open the SCCM Console and browse to Packages
- Right-click your Windows 10 Customization package and select Update Distribution Point
- Go to Software Library \ Operating Systems \ Task Sequences
- Right-click and Edit your Windows 10 task sequence
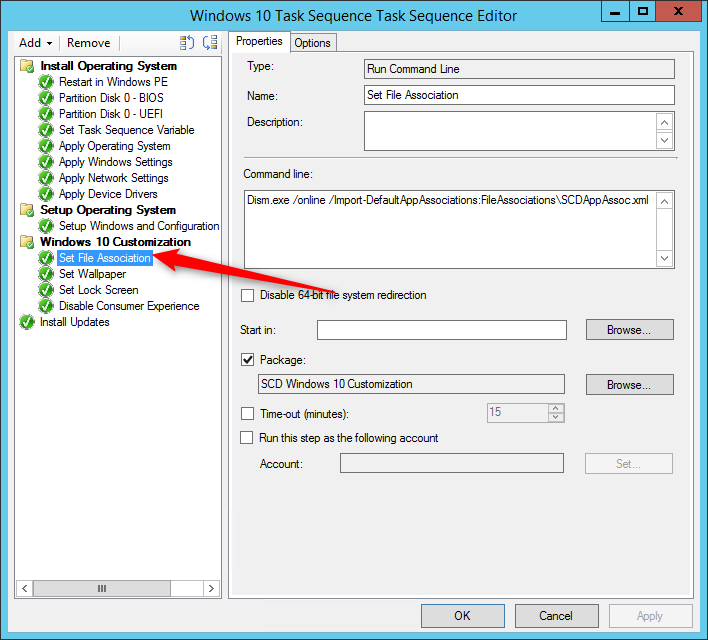
- Select Add / General / Run Command Line
- Name : Set File Association
- Command line : Dism.exe /online /Import-DefaultAppAssociations:FileAssociations\SCDAppAssoc.xml
- Check the Package box and specify your Windows 10 customization package
- Position this step after the Windows image has been deployed
Setting the Default Windows 10 Wallpaper
We will now change the default Windows 10 wallpaper to a corporate one.
- The default Windows 10 wallpapers are stored in the C:\Windows\Web\Wallpaper\Windows\ folder
- Windows 10 also support 4K wallpapers which are stored in C:\Windows\Web\4K\Wallpaper\Windows
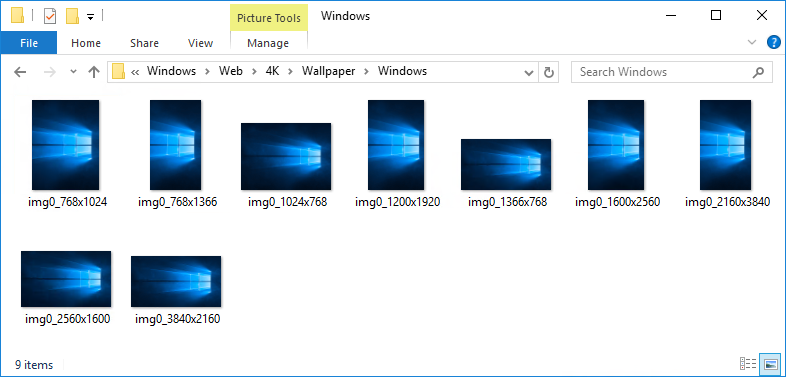
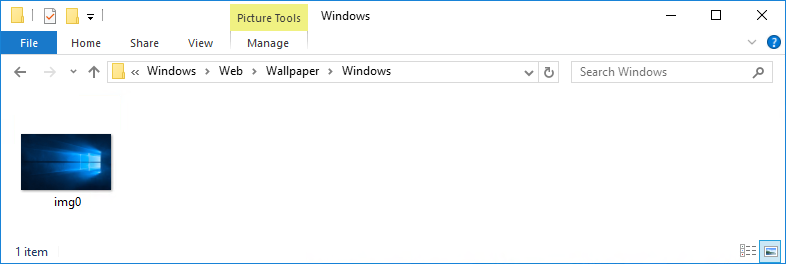
For our post, we will delete the 4K wallpapers and overwrite the default img0.jpg file. If you need to support 4K wallpaper, just place them in the 4K folder before updating your distribution points and the script will copy it to the right location.
By default, you can’t modify those files, we will use a PowerShell script to change the security of the folder and overwrite the wallpaper file. We will grant access to the SYSTEM account since it’s the account used during the SCCM task sequence.
- Create a new WallPaper\DefaultRes and WallPaper\4K folder in your Windows 10 customization directory
- Rename your wallpaper to img0.jpg copy it in the WallPaper\DefaultRes directory
- If 4K support is needed, copy your files in the WallPaper\4K Directory
Create a new Powershell script in the root of the Wallpaper directory and copy this code into it :
takeown /f c:\windows\WEB\wallpaper\Windows\img0.jpg
takeown /f C:\Windows\Web\4K\Wallpaper\Windows\*.*
icacls c:\windows\WEB\wallpaper\Windows\img0.jpg /Grant ‘System:(F)’
icacls C:\Windows\Web\4K\Wallpaper\Windows\*.* /Grant ‘System:(F)’
Remove-Item c:\windows\WEB\wallpaper\Windows\img0.jpg
Remove-Item C:\Windows\Web\4K\Wallpaper\Windows\*.*
Copy-Item $PSScriptRoot\img0.jpg c:\windows\WEB\wallpaper\Windows\img0.jpg
Copy-Item $PSScriptRoot\4k\*.* C:\Windows\Web\4K\Wallpaper\Windows
You’ll end up with the following structure :

- Open the SCCM Console and browse to Packages
- Right-click your Windows 10 Customization package and select Update Distribution Point
- Go to Software Library \ Operating Systems \ Task Sequences
- Right-click and Edit your Windows 10 task sequence
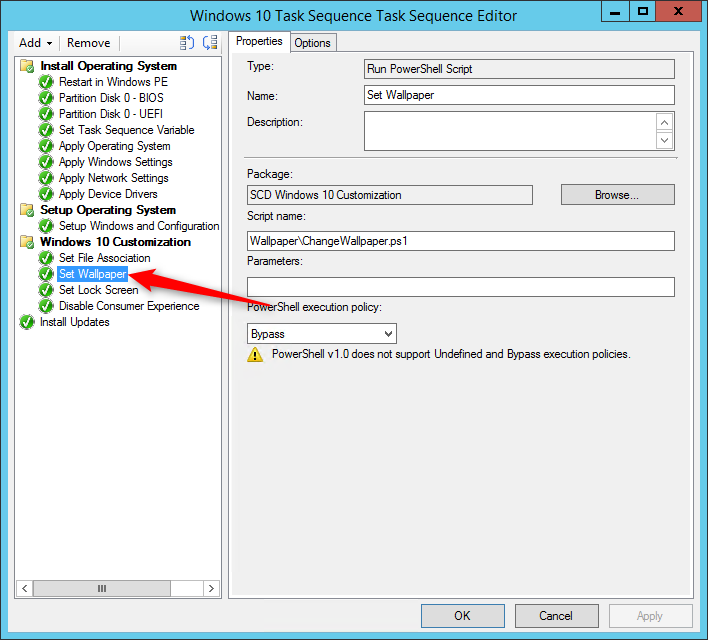
- Select Add / General / Run PowerShell Script
- Name : Set Wallpaper
- Script Name : Wallpaper\ChangeWallpaper.ps1
- PowerShell execution policy : Bypass
- Position this step after the Windows image has been deployed
Change Lock Screen Image
The lock screen image is the image you see when the computer is locked. To change it, we must copy our image locally on the computer and then modify a registry key to read it.
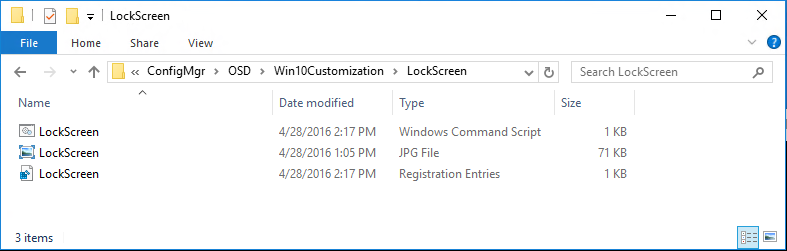
- Create a new LockScreen folder in your Windows 10 customization directory
- Create a new LockScreen.cmd file and copy the following code
xcopy LockScreen\LockScreen.jpg C:\SCD\LockScreen\ /Y /S
reg import LockScreen\LockScreen.reg
reg import LockScreen\LockScreen.reg /reg:64
- Create a new LockScreen.reg file and copy the following code (watch out of the “” when copy/pasting)
Windows Registry Editor Version 5.00
[HKEY_LOCAL_MACHINE\SOFTWARE\Policies\Microsoft\Windows\Personalization]
“LockScreenImage”=”C:\\SCD\\LockScreen\\LockScreen.jpg”
- Copy the image you want to set as the lock screen. For this blog post we will call it LockScreen.jpg. If you rename this file, make sure to change the script to fit this name.
You’ll end up with the following structure :
- Open the SCCM Console and browse to Packages
- Right-click your Windows 10 Customization package and select Update Distribution Point
- Go to Software Library \ Operating Systems \ Task Sequences
- Right-click and Edit your Windows 10 task sequence
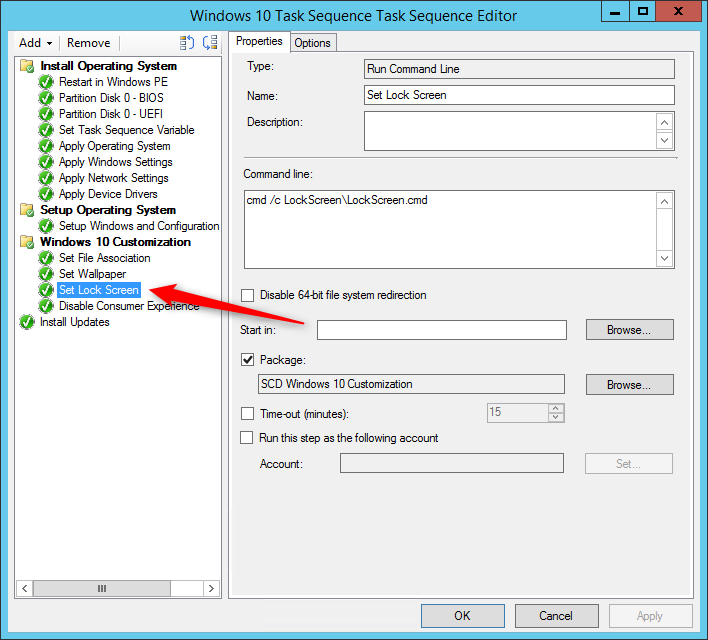
- Select Add / General / Run Command Line
- Name : Set File Association
- Command line : cmd.exe /c LockScreen\LockScreen.cmd
- Check the Package box and specify your Windows 10 customization package
- Position this step after the Windows image has been deployed
Disable Microsoft Consumer Experiences
The latest Windows 10 feature upgrade includes a new feature that automatically installs a few apps from the Windows Store. Some apps like Candy Crush and Minecraft gets installed, we don’t think that belong to a work environment so we’ll delete it.
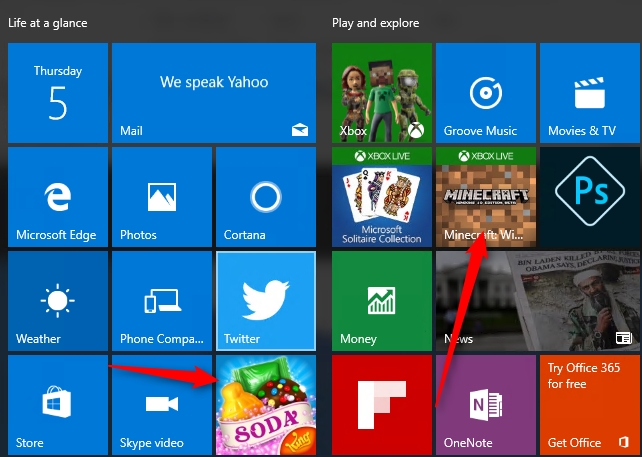
The good news is that it’s quite simple to disable. You need to disable a function called Microsoft Consumer Experiences. We will do this using a registry modification :
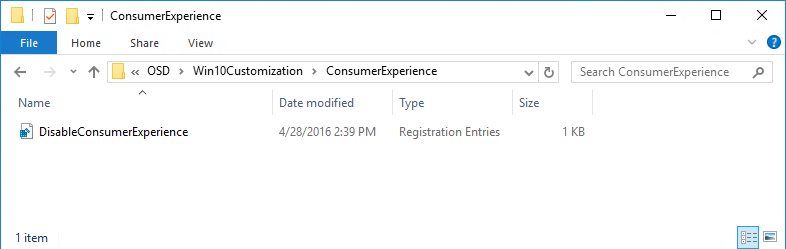
- Create a new ConsumerExperience folder in your Windows 10 customization directory
- Create a new DisableConsumerExperience.reg file and copy the following code :
Windows Registry Editor Version 5.00
[HKEY_LOCAL_MACHINE\SOFTWARE\Policies\Microsoft\Windows\CloudContent]
“DisableWindowsConsumerFeatures”=dword:00000001
You’ll end up with the following structure :
- Open the SCCM Console and browse to Packages
- Right-click your Windows 10 Customization package and select Update Distribution Point
- Go to Software Library \ Operating Systems \ Task Sequences
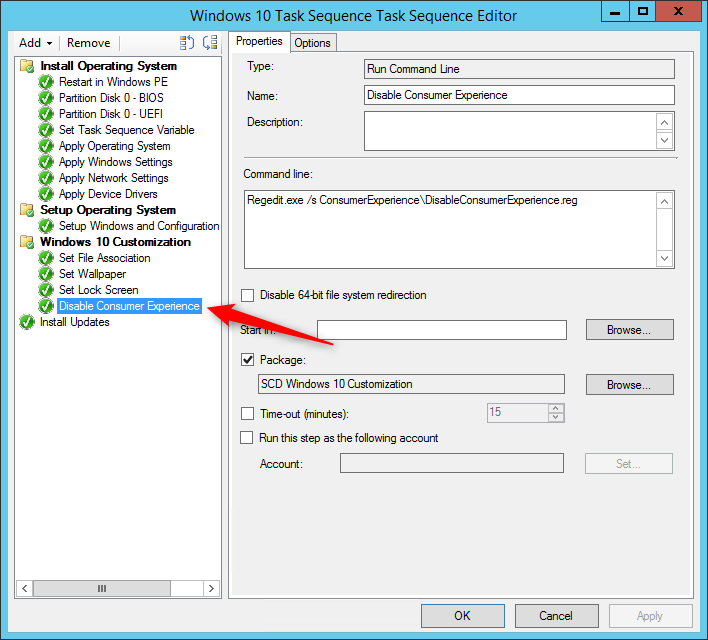
- Right-click and Edit your Windows 10 task sequence
- Select Add / General / Run Command Line
- Name : Disable Consumer Experience
- Command line : Regedit.exe /s ConsumerExperience\DisableConsumerExperience.reg
- Check the Package box and specify your Windows 10 customization package
- Position this step after the Windows image has been deployed
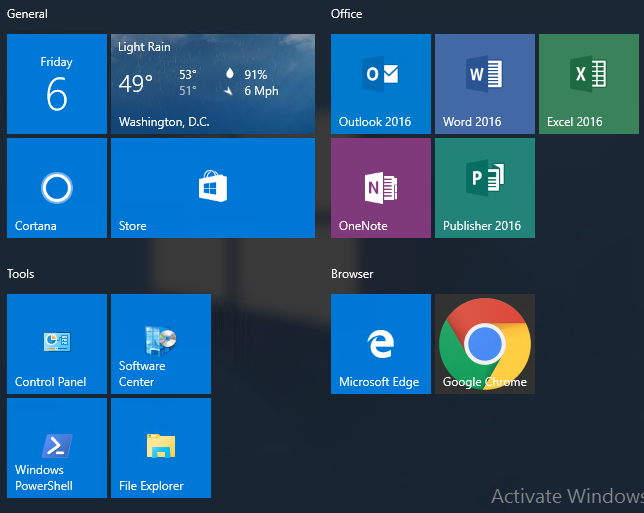
Create Custom Start Menu
We will now create a default Windows 10 start menu that will be used on every Windows 10 machine by default. If you add shortcuts to applications, make sure that you’ve include them in your task sequence or you’ll end up with a start menu looking like swiss cheese. (empty spots)
- Log on a Windows 10 machine
- Manually configure the Start Menu
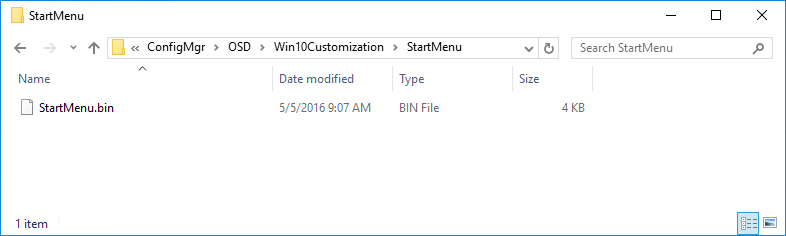
- Create a new StartMenu folder in your Windows 10 customization package
- Start an elevated PowerShell and run the following command : Export-StartLayout -Path “C:\Temp\StartMenu.bin”
- Copy the StartMenu.bin file to your Windows 10 customization package in the StartMenu folder
- Open the SCCM Console and browse to Packages
- Right-click your Windows 10 Customization package and select Update Distribution Point
- Go to Software Library \ Operating Systems \ Task Sequences
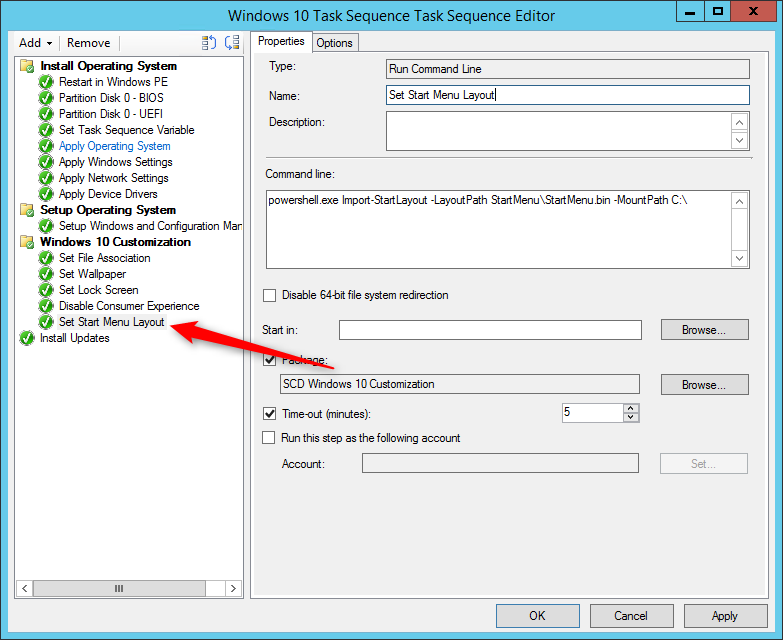
- Right-click and Edit your Windows 10 task sequence
- Select Add / General / Run Command Line
- Name : Set Start Menu Layout
- Command line : Powershell.exe Import-StartLayout -LayoutPath StartMenu\StartMenu.bin -MountPath C:\
- Check the Package box and specify your Windows 10 customization package
- Position this step after the Windows image has been deployed
Set Windows 10 Pinned Taskbar items
Windows 10 permits to “pin” program on the task bar for easy access. Here’s how to create a standard task-bar for your Windows 10 users.
![]()
- Create a new PinTaskBar folder in your Windows 10 customization directory
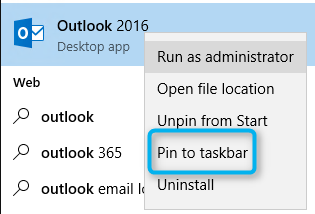
- Log on a Windows 10 computer
- Manually pin all the desired program using the Pin to taskbar option
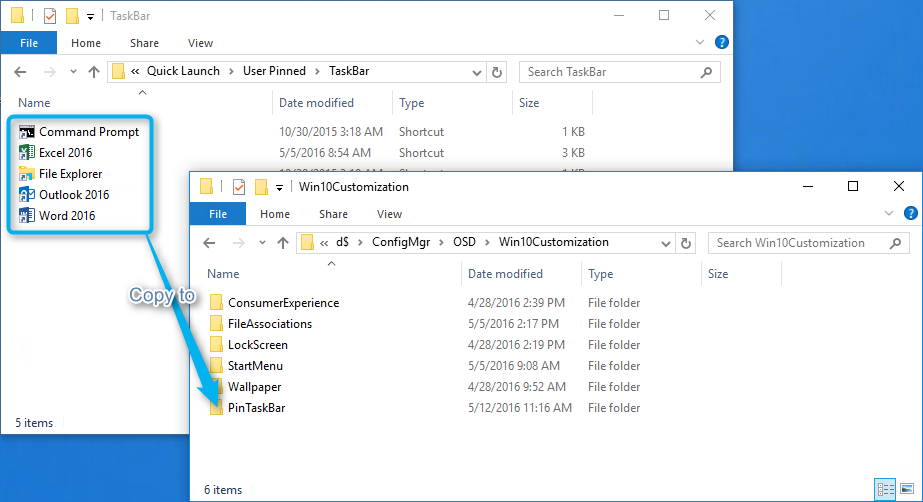
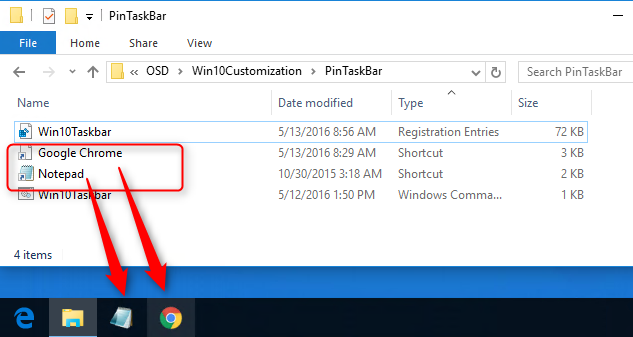
- Copy the links from %AppData%\Microsoft\Internet Explorer\Quick Launch\User Pinned\TaskBar to your Windows 10 customization package in the PinTaskBar directory. This directory is hidden, so be sure to show Hidden Items

- Open Registry Editor
- Export the HKEY_CURRENT_USER\Software\Microsoft\Windows\CurrentVersion\Explorer\Taskband key to Win10Taskbar.reg

- Copy the Win10Taskbar.reg file to your Windows 10 customization package in the PinTaskBar directory
- Edit the Win10Taskbar.reg file using a text editor and replace the beginning of the first line
- Replace HKEY_Current_User to HKEY_LOCAL_MACHINE\defuser
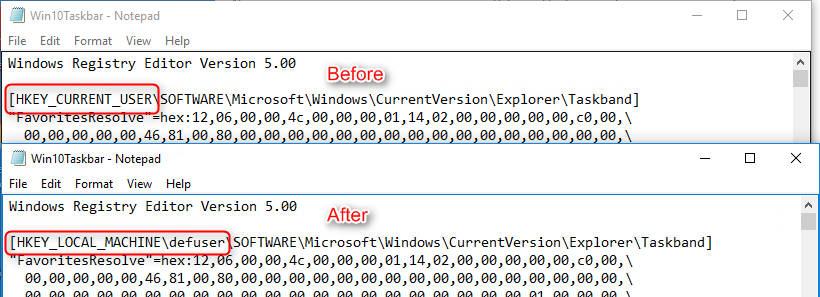
- The final string will be : HKEY_LOCAL_MACHINE\defuser\SOFTWARE\Microsoft\Windows\CurrentVersion\Explorer\Taskband
- Create a new Win10Taskbar.cmd file in your Windows 10 customization package in the PinTaskBar directory and copy the following code :
Reg.exe load HKEY_LOCAL_MACHINE\defuser C:\users\default\ntuser.dat
Reg.exe import “PinTaskBar\Win10Taskbar.reg”
Reg.exe unload HKEY_LOCAL_MACHINE\defuser
Xcopy PinTaskBar\*.lnk “C:\Users\Default\AppData\Roaming\Microsoft\Internet Explorer\Quick Launch\User Pinned\TaskBar” /Q /Y /I

You’ll end up with the following structure :
- Open the SCCM Console and browse to Packages
- Right-click your Windows 10 Customization package and select Update Distribution Point
- Go to Software Library \ Operating Systems \ Task Sequences
- Right-click and Edit your Windows 10 task sequence
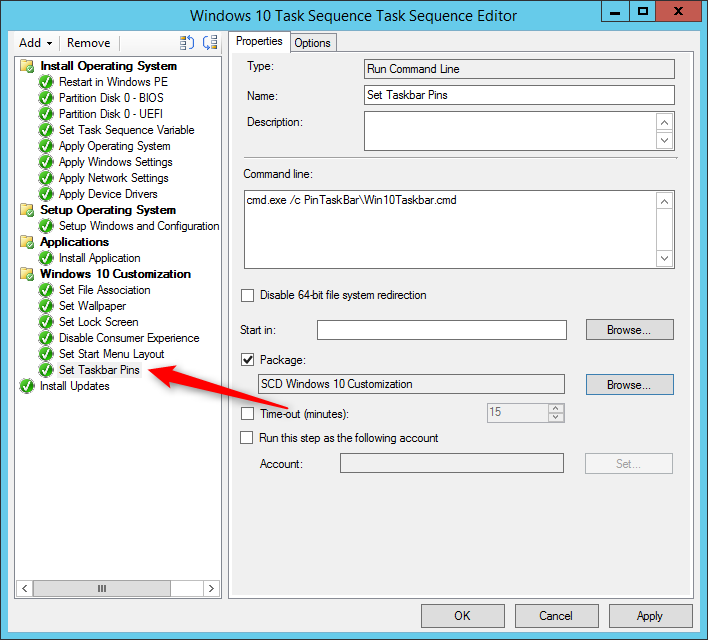
- Select Add / General / Run Command Line
- Name : Set Taskbar Pins
- Command line : cmd.exe /c PinTaskBar\Win10Taskbar.cmd
- Check the Package box and specify your Windows 10 customization package
- Position this step after the Windows image has been deployed
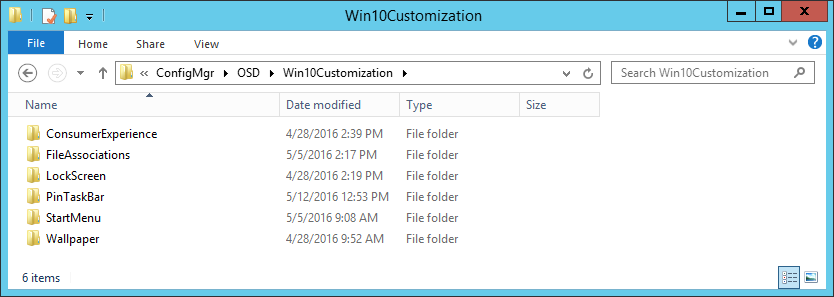
Conclusion
If you correctly follow this post, you’ll end up with this structure in your Windows 10 Customization package :
And you’ll have 6 new steps in your Windows 10 task sequence :
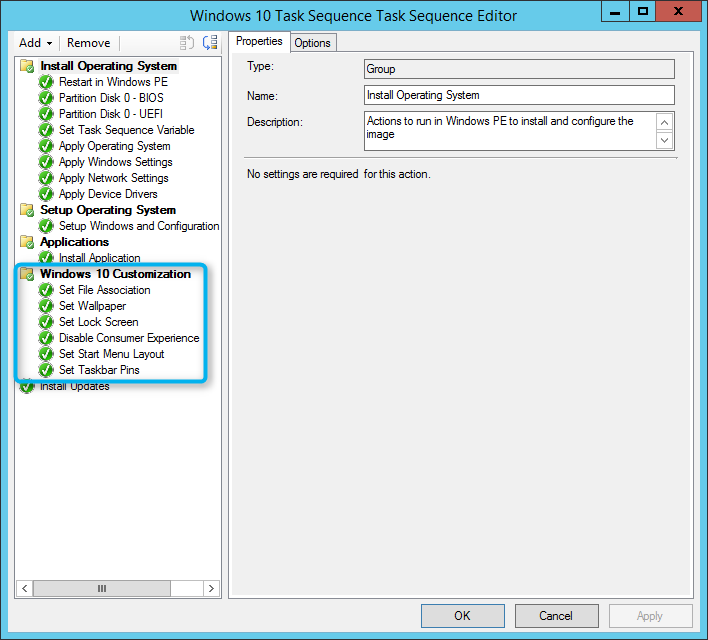
You can now deploy your Windows 10 task sequence to a test machine and all customization should be there. See our post on how to monitor your task sequence if something goes wrong or simply if you want to track the progress.
We hope this post will help you out for your Windows 10 customization. Feel free to post your customization using the comment section. We will update this post on a regular basis when we have more to share.
[ratings]
Share
Get the latest insights and exclusive content delivered to your inbox


Hans Peter
01.26.2017 AT 10:09 AMCalvin Woods
12.08.2016 AT 10:48 AMCor
11.04.2016 AT 12:30 AMBenoit Lecours
11.08.2016 AT 05:07 PMDylan
10.13.2016 AT 09:59 AMAmbar
09.26.2016 AT 09:56 PMBill H.
11.04.2016 AT 01:22 PMJonathan Lefebvre
09.28.2016 AT 08:53 AMSachin
09.26.2016 AT 09:41 PMJonathan Lefebvre
09.28.2016 AT 08:42 AMTim
09.16.2016 AT 08:51 AMKevin
11.02.2016 AT 05:51 AMKevin
11.02.2016 AT 05:50 AMCarl
09.01.2016 AT 08:48 AMBenoit Lecours
09.06.2016 AT 12:37 PMSach
08.31.2016 AT 11:26 PMBaardH
02.06.2017 AT 09:04 AMHelper
12.02.2016 AT 11:18 AMJerry
08.31.2016 AT 08:40 PMJared
08.06.2016 AT 03:37 PMMatt
08.05.2016 AT 11:48 AMVit
08.05.2016 AT 03:23 AMQWade
07.29.2016 AT 12:00 PMEric
06.29.2016 AT 10:21 AMJonathan Lefebvre
07.05.2016 AT 01:56 PMEric
06.29.2016 AT 10:20 AMJohn
06.22.2016 AT 07:58 AMDavid
07.05.2016 AT 07:06 PMCalvin
06.20.2016 AT 08:40 AMBenoit Lecours
06.22.2016 AT 07:20 AMDan
06.02.2016 AT 04:20 AMMo
06.01.2016 AT 03:52 PMKenny
07.20.2016 AT 03:12 AM