This blog post will describe how to Deploy Office 2019 using SCCM (using Click-to-run version). Beginning in Office 2019, Office client applications will no longer be available in MSI format. You can download an ISO on your volume licensing download center or use the Office Deployment Tool. We suggest using the Office deployment tool to have the latest available version.

If you’re’ still confused about the differences about Office 2019 vs Office 365:

Office 365 is a subscription that comes with premium apps like Word, Excel, PowerPoint, OneNote, Outlook, Publisher, and Access (Publisher and Access available on PC only). The apps can be installed on multiple devices, including PCs, Macs, iPads, iPhones, Android tablets, and Android phones. With a subscription, you get the latest versions of the apps and automatically receive updates when they happen.

Office 2019 is a one-time purchase that comes with classic apps like Word, Excel, and PowerPoint for PC or Mac, and does not include any of the services that come with an Office 365 subscription. One-time purchases don’t have an upgrade option, which means if you plan to upgrade to the next major release, you’ll have to buy it at full price.

So if your organization has chosen to deploy Office 2019, you can deploy it using SCCM. The mains steps are :

  • Preparing the installation
  • Create the SCCM application
  • Create the deployment type
  • Deploy the application

PREPARE SCCM OFFICE 2019 INSTALLATION

The first step is to download the Office Deployment Tool and create a Download.xml file that we’ll use to download the latest version of Office 365 Pro Plus (2019). Read the Reference for Click-to-Run xml file to know more about the available options.

This is not a mistake. The Office Deployment Tools is version 2016. If you read the fine print you’ll see that the ODT can download 2019 products: Updated to support the download and installation of Office 2019 products.

  • After downloading the tool, run OfficeDeploymentTool.exe
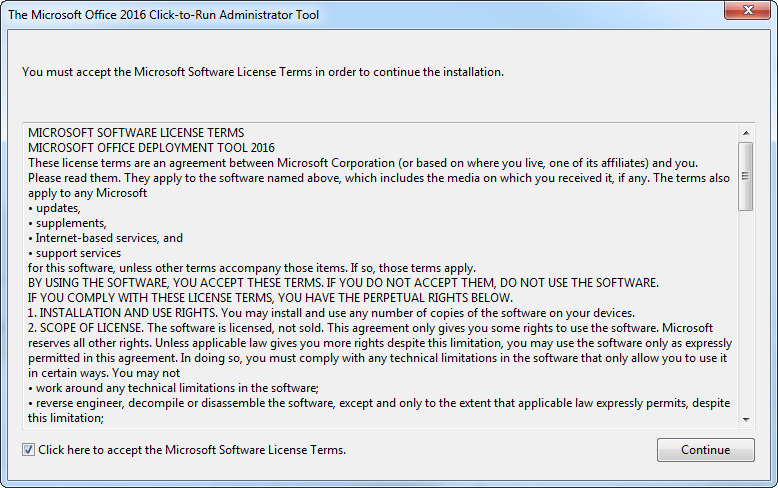
SCCM Office 2019

  • Extract the files to a drive on your computer
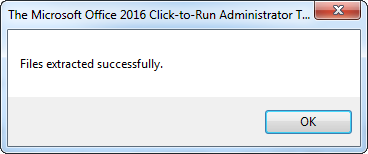
SCCM Office 2019

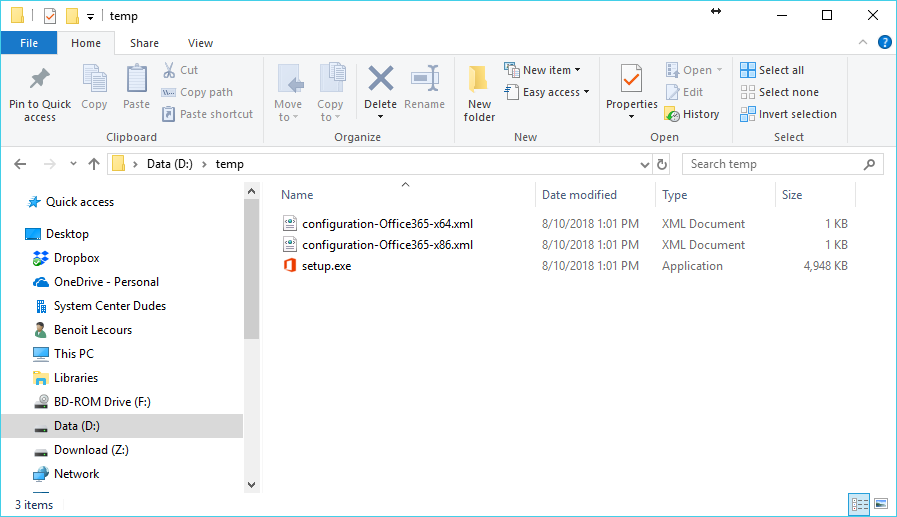
  • You’ll end up with 3 files (Setup.exe and 2 configuration files)
SCCM Office 2019

Create a Download.xml file and copy this content :

<Configuration>
<Add SourcePath=”C:\Office 2019″ OfficeClientEdition=”32″ >
<Product ID=”ProPlus2019Volume”>
<Language ID=”en-us” />
<Language ID=”fr-fr” />
</Product>
</Add> 
</Configuration>

  • In our example, we are downloading the 32 bit version in the C:\Office 2019 directory and add the English and French language
  • Change the SourcePath and OfficeClientEdition if desired
  • The ProductID is important and can be changed if you need a different product
  • You can also add an additional language if needed by modifying/adding more language in <Language ID=”xx-xx” />
  • Save the Download.xml file in the same directory as Setup.exe

We will now modify the Configuration-O365-x86.xml file that will be used when deploying Office 2019

  • Open the Configuration-O365-x86.xml file and modify it to reflect this :

<Configuration>
<Add OfficeClientEdition=”32″ >
<Product ID=”ProPlus2019Volume”>
<Language ID=”en-us” />
<Language ID=”fr-fr” />
</Product>
</Add>
<Display Level=”None” AcceptEULA=”TRUE” />
</Configuration>

It’s important that you don’t include the SourcePath attribute in the Add section of your Configuration.xml file. That’s because SCCM copies the installation files for an application into a folder under the SCCM client cache folder, and the name of that subfolder is different for each computer. The DisplayLevel and AcceptEULA parameters ensure that our installation is silent. You can also use the PIDKEY setting if you don’t have a KMS server for activation.

Once the 2 files are created and modified, we can launch the download using our Download.xml file :

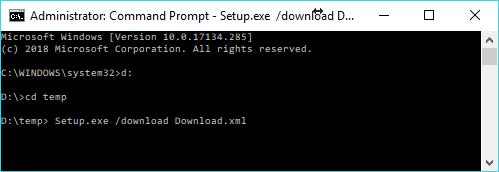
  • Open an administrator command prompt and navigate to your folder
  • Execute : Setup.exe /download Download.xml
SCCM Office 2019

The download starts silently, you’ll see an Office folder appear in your specified Office 2019 directory (in download.xml). The folder is around 2GB so it will take some time to complete depending on your download speed. You won’t have a notification when it completes.

SCCM Office 2019

If the directory was created outside your SCCM source directory, move it to its definitive location before creating the application.

CREATE THE SCCM OFFICE 2019 APPLICATION

  • Open the SCCM console
  • Go to Software Library / Application Management / Applications
  • Right-click Applications and choose Create Application
  • On the General tab of the Create Application Wizard, select Manually specify the application information, choose Next
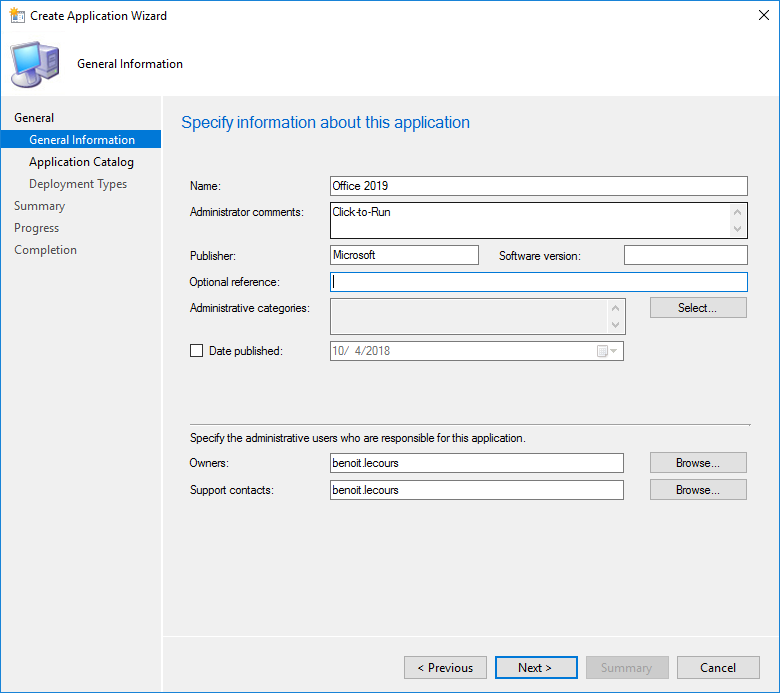
  • On the General Information tab, enter a name for the application, enter any optional information, choose Next
SCCM Office 2019

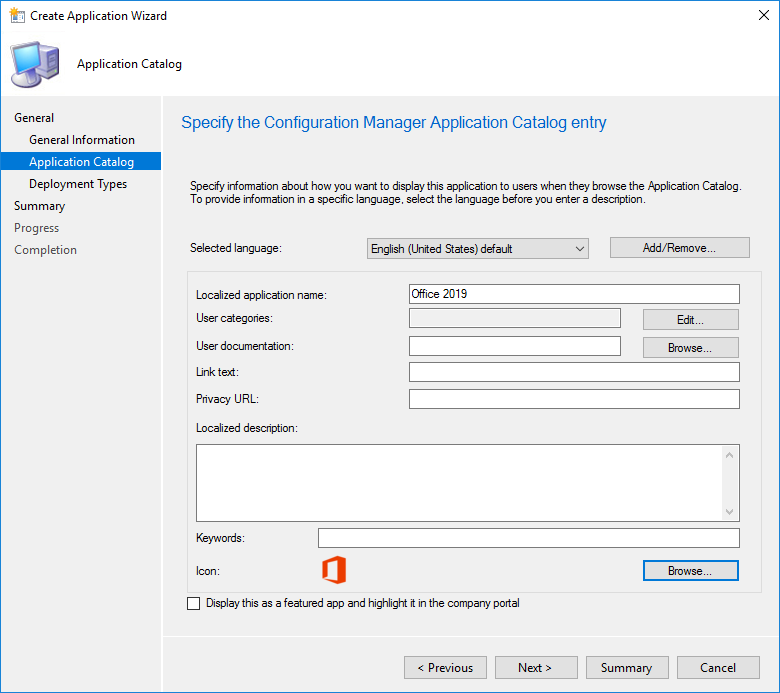
  • On the Application Catalog tab, provide the information that’s appropriate for your environment, choose Next
SCCM Office 2019

  • On the Deployment Types tab, choose Next. We’ll add a deployment type later
  • On the Summary tab, review the settings you’ve chosen, choose Next
  • Complete the wizard by selecting Close

CREATE SCCM OFFICE 2019 DEPLOYMENT TYPE

  • Open the SCCM console
  • Go to Software Library / Application Management / Applications
  • Right-click the Office 2019 application and choose Create Deployment Type
  • On the General tab of the Create Deployment Type Wizard, in the Type list, select Script Installer, choose Next
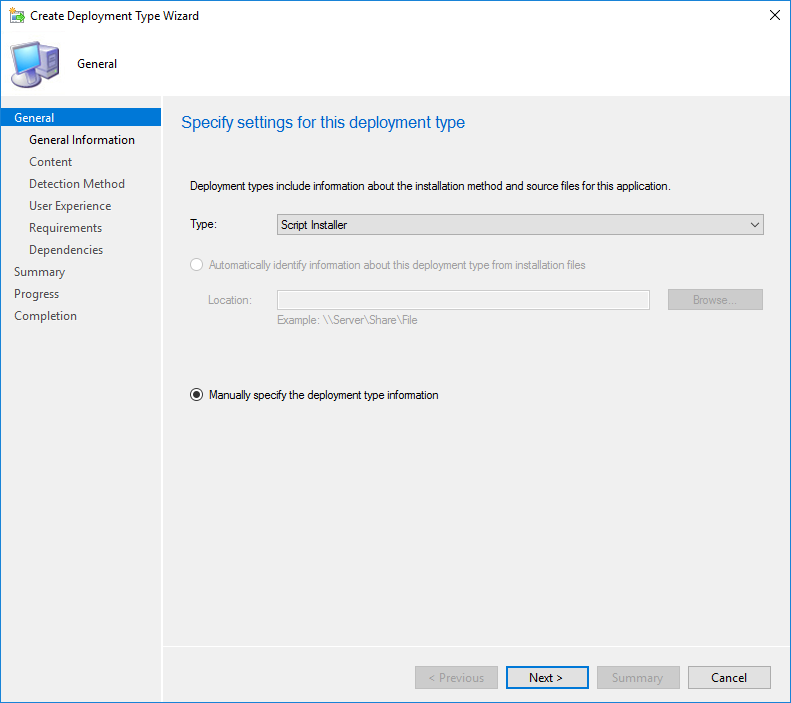
SCCM Office 2019

  • On the General Information tab, enter a name for the deployment type, enter any optional information, and then choose Next
  • On the Content tab, do the following :
    • In the Content location box, enter the network share where you put the Office Deployment Tool, your Configuration.xml file, and the Office 365 ProPlus installation files that you downloaded from the Internet
    • In the Installation program box, enter the following text: Setup.exe /configure Configuration-O365-x86.xml
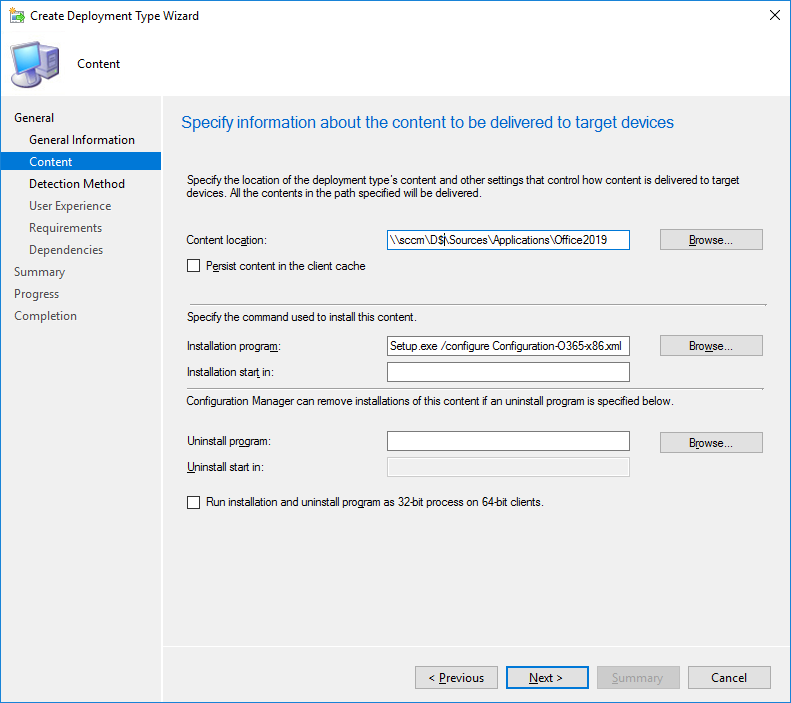
SCCM Office 2019

  • After you enter this information, choose Next
  • On the Detection Method tab , choose Add Clause
    • In the Detection Rule dialog box, do the following :
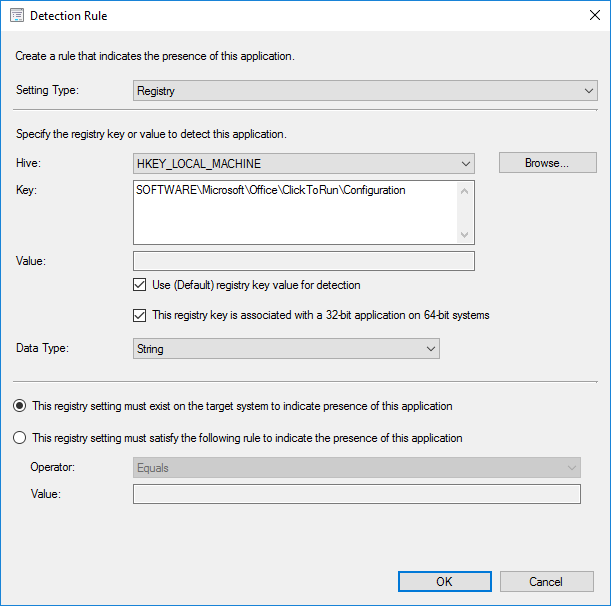
      • Setting Type – Registry
      • Hive – HKEY_LOCAL_MACHINE
        • Key – SOFTWARE\Microsoft\Office\ClickToRun\Configuration
      • Check Use (Default) registry key value for detection
      • Check This registry key is associated with a 32-bit application on 64-bit systems
      • Data Type – String
      • Select This registry setting must exist on the target system to indicate the presence of this application

SCCM Office 2019

  • After you enter this information, choose OK, and then choose Next
  • On the User Experience page, in the Installation behaviour list, select Install for system, and then choose Next
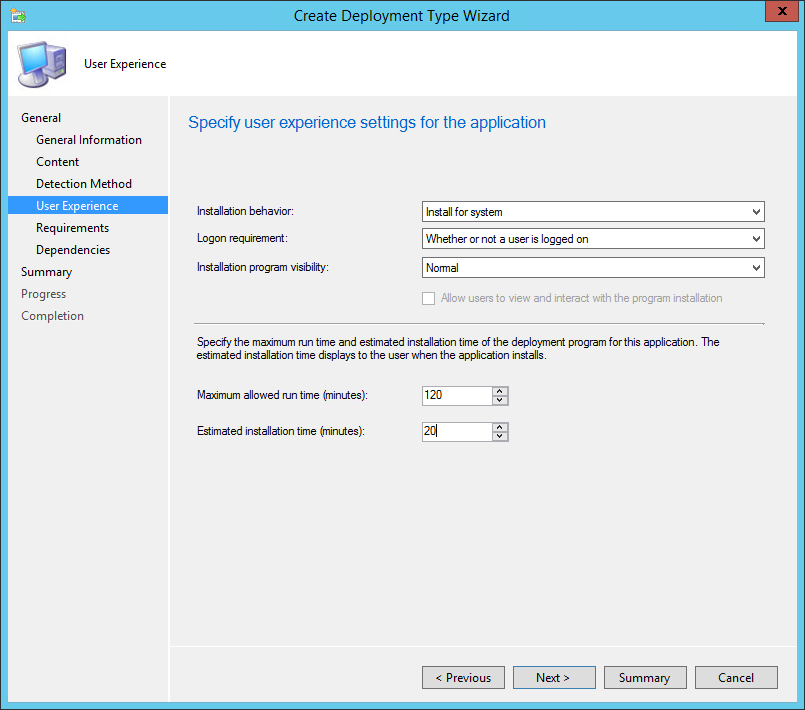
SCCM Office 2019

  • If you want to specify any requirements or dependencies for the deployment type, choose Next to go through those pages in the wizard. Otherwise, choose Summary
  • Complete the wizard by selecting Close

The only step left is to distribute the content to your distribution points and create an SCCM Office 2019 deployment.

BONUS INFORMATION

There is a new set of Administrative Template files (ADMX/ADML) for Group Policy settings. You can download the Administrative Template files using this Microsoft Download Center link.

[ratings]

Comments (22)

VC

09.03.2019 AT 08:58 AM
Anyone have any idea of how to deploy Office 2019 security updates via SCCM? Also, if it's possible does SCCM need to go out to the CDN to fetch the updates? Thanks

ITBrian

09.24.2020 AT 05:57 PM
@VC Did you ever get the security updates installed via SCCM? Looking into this issue now for work.

D B

07.25.2019 AT 08:10 AM
Hi. For some reason this works perfectly fine as part of a task sequence that installs Windows 10 from scratch, however, if I just deploy the app to a single machine for testing I get the following error: "The software change returned error code 0x643(1603).£ Any thoughts?

Aaron

07.02.2019 AT 12:53 PM
I have set this up as described, although I have installed a 64bit version of Office 2019. My issue is I have Office 2016 installed as a part of our base image on our machines. When I run the install for Office 2019 through SCCM application installation from the Software Center, the application "runs" and eventually times out without doing anything. If I run all of the exact same commands via command line, the installation will remove the 2016 version of office, and install 2019. I can't seem to figure out why SCCM doesn't seem to like the install commands.

David Ramirez

06.26.2019 AT 07:34 AM
Something to be noted, if you install or deploy, Visio or Project 2019, before the office Suite, it will create the key for the deployment evaluation, yet the suite won't be Installed. It happened to me and it was quite a head scratcher... Since the uninstall keys are useless, because they don't identify which product was installed, we added an additional rule to verify: "ProductReleaseIds", it is in the same key used in the article, and it contains the product id that was installed.

username

04.19.2019 AT 11:26 AM
seconding the question about uninstalling office 2019. tried setting up a config file to removeall = true: this didn't work. the office 2019 splash screen comes up for a couple seconds and then disappears, office 2019 is still installed.

finding replacement parts

03.27.2019 AT 04:08 AM
Very nice design and style and excellent content material, absolutely nothing else we require 😀.

Dana

02.19.2019 AT 02:45 PM
Ok I just tried to deploy the x64 bit version and it failed with the error code: 0x87D00324(-2016410844). The programs was not detected following installation. The software didn't install at all. I was trying to do both Office and Vision. All and any comments would be greatly appreciated.

Michael Brown

11.26.2018 AT 11:55 AM
sometimes handwriting a xml config will cause errors you can use this https://config.office.com/ to configure the xml for you.

Jean-Sebastien

11.22.2018 AT 10:39 AM
As of novembre 22 2018, Office 2019 is not present in SCCM ODT (through office 365) and client update are into Office 365 client items, not with regular Windows Update. Also, they aren'T categorize as Office 2019, they are categorize as Office 365. But, for me, when I installed Office 2019, I have put the item " " and not, even if SCCM tell me I have a computer which require the update, it doesn't appear in SCCM Client and the Office 2019 isn't updated.

Mirza

11.20.2018 AT 05:54 PM
What is the suggested process to remove Office 2016 (installed via MSI) before installing Office 2019? We created the Office 2016 Application in SCCM (IIRC we used a guide from here); then deployed this during our PXE process. Now we need to uninstall this MSI version first before pushing the new click-to-run 2019 version.

Sean Rodgers

01.28.2020 AT 02:05 PM
Mizra, How did you address this? Thank you in advance! Thanks, Sean

garnerl

11.07.2018 AT 04:00 PM
I have followed all these steps. Client downloads and when indicator flips to "Begin installation" it immediately fails. Suggestions on which log file to look at to determine why i fails? Please and thank you!

Jeff

11.21.2018 AT 02:49 PM
Have you uninstalled the previous version of Office? Mine was doing the same thing and manually removing or not have any Office apps open fixed it.

Glenn Turner

10.29.2018 AT 10:46 PM
David James from the ConfigMgr team confirmed that Office 2019 support will be included in ConfigMgr 1810.

Chad Pyle

10.19.2018 AT 09:59 AM
Anyone know how to configure the uninstall?

Tim

10.16.2018 AT 07:21 PM
I was able to successfully download the Office 2019 files but whenever I run the installation using the configuration file, It runs for about 10 seconds then exits without doing anything. Any clues?

soch234

10.09.2018 AT 07:41 AM
Short hint: After pasting the mentioned content of the download.xml into Notepad++ I got an XML Parsing Error and "30088-1007"-Error in ODT. After searching a while I noticed that the mentioned quotes in your download.xml are "italic-quotes" and not the "standard-XML-quotes". After replacing them the download worked like a charm.

Alan Yousif

10.08.2018 AT 09:11 AM
It installed correctly but received error 0x87D00324(-2016410844). I Think its the Detection method. Any suggestions

Glenn Turner

10.05.2018 AT 02:58 PM
This provides the steps of deploying this without using that Office 365 wizard. Thank you! We've been deploying 32-bit Office, but with this release we'll be moving to 64-bit. Once it's deployed, I'd love to see a follow-up article around keeping these installations up to date.

Erik

10.04.2018 AT 07:24 PM
This detection method is not is not recommended if you plan to deploy Visio and/or project 2019. Better of using the registry key in "HKEY_LOCAL_MACHINE\SOFTWARE\Microsoft\Windows\CurrentVersion\Uninstall" and use the subkey for each product.

Eric Lindenfelser

10.04.2018 AT 02:06 PM
Update from Microsoft regarding SCCM CB and Office 2019: "The Office 365 Client Installation wizard in Configuration Manager (Current Branch) currently doesn’t support Office 2019, including Project 2019 and Visio 2019. The product team is working on the changes needed to enable this and expect support for Office 2019 to be available by the end of the year." https://docs.microsoft.com/en-us/deployoffice/office2019/deploy