
Use Powershell to generate certificates for your lab

Thomas Larsen
Table of Content


Get the latest insights and exclusive content delivered to your inbox
Share


Certificates are becoming more and more important and are used almost everywhere and many solutions need a certificate to even start up.
In production, you should have a healthy PKI solution up and running, but in your lab environment or if you just want to quickly test things without involving your company’s PKI-guy you can use PowerShell to quickly spin up certificates.
Here’s how to use Powershell to generate certificates in your lab :

Create a Root CA
First we’ll create our root certificate.
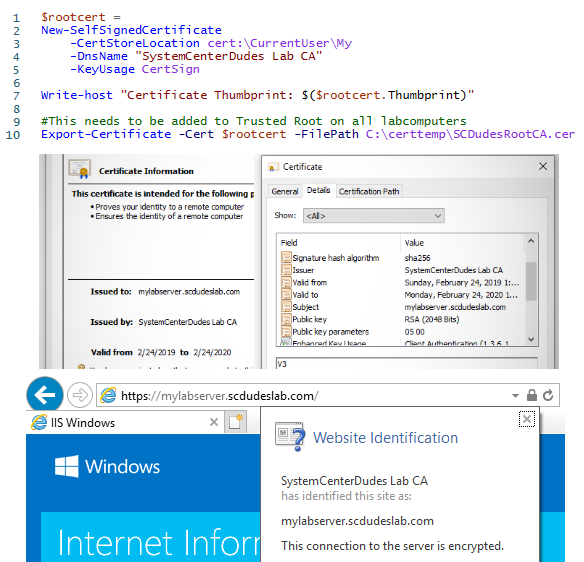
$rootcert = New-SelfSignedCertificate -CertStoreLocation cert:\CurrentUser\My -DnsName "SystemCenterDudes Lab CA" -KeyUsage CertSign
Write-host "Certificate Thumbprint: $($rootcert.Thumbprint)"

#This needs to be added to Trusted Root on all labcomputers
Export-Certificate -Cert $rootcert -FilePath C:\certtemp\SCDudesRootCA.cer
Copy the Thumbprint of your newly generated root cert into notepad ,you’ll need it later.
This does a few things. It creates a new certificate with the CertSign usage with means we can use it to sign other certificate and puts it in the current users cert store. This is our new mini root certificate that we’ll use to sign all the other certificates.
The second command exports the root certificates public key to a file. This file need to be added to Trusted Root Certificates on all machines in your lab.
#Imports certificate to Trusted Publishers (Requires "Run as Administrator")
Import-Certificate -FilePath C:\certtemp\SCDudesRootCA.cer -CertStoreLocation Cert:\LocalMachine\Root
Create your Certificates
Now we’re ready to create our certificates. In most cases what we need is some sort of machine certificate, also known as a web server certificate. By default, the New-SelfSignedCertificate command will spits out a 1 year SHA256 certificate with both server and client authentication properties. If you need something else you may need to add a few parameters to the command.
Open Powershell as administrator if your working with the Local Computer Cert store
#the thumbprint of need to be changed to your root certificate.
$rootca = Get-ChildItem cert:\CurrentUser\my | Where-Object {$_.Thumbprint -eq "C46F2E3F00E61DFBCB006FFD8F245165AC4B371D"}
#Path can be changed to 'cert:\CurrentUser\My\' if needed
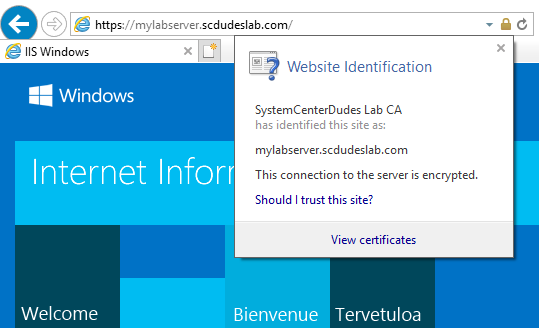
New-SelfSignedCertificate -certstorelocation cert:\LocalMachine\My -dnsname mylabserver.scdudeslab.com -Signer $rootcaIf you need more dns names you can just separate them with a comma. The first name will be the subject field ,the rest will be added as SAN names.
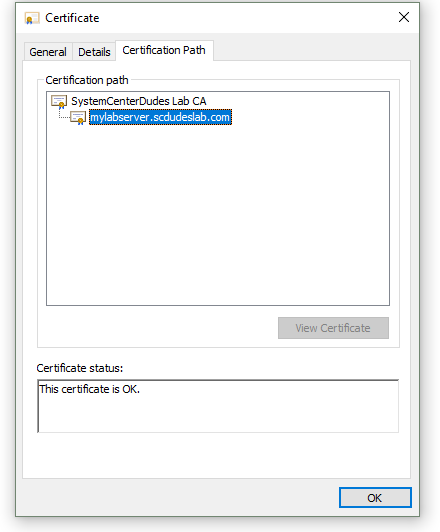
Now if you open your cert store you should see a trusted certificate.
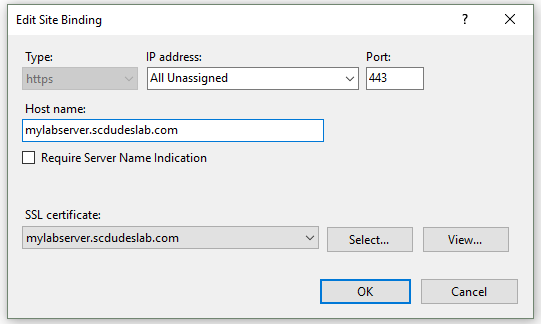
Certificates in the Local Computer cert store should be available for selection in IIS Bindings.
Certificates are exportable with the private key ,so you can create the certificate on one computer and export it to another.
Pro tip! run CertLM.msc to open Certificate Manager for Local Computer directly or CertMgr.msc for the Current User
If you would like to see more blog posts about PKI in general or how to setup SCCM to use certificates let me know.
Next post from me will be on how to get started using certificates to sign scripts and drivers.
Share
Get the latest insights and exclusive content delivered to your inbox


mattMali
04.26.2019 AT 06:00 PM