

How to configure PatchMyPC cloud portal
Contributor of System Center Dudes. Based in Montreal, Canada, Senior Microsoft SCCM consultant, working in the industry for more than 10 years. He developed a strong knowledge of SCCM and MDT to build automated OS deployment solution for clients, managed large and complexe environment, including Point of Sale (POS) related projects.

Jonathan Lefebvre
Table of Content
- Prerequisites
- Why use the PatchMyPC Cloud portal instead of the on-prem Publishing service?
- Onboard PatchMyPC Cloud portal
- Connect PatchMyPC Cloud to Intune
- Customize Branding of PatchMyPC notifications
- Configure Notifications
- Similar preferences to Publishing service
- Publishing applications and updates using PatchMyPC Cloud portal


Share


Get the latest insights and exclusive content delivered to your inbox
The guys at PatchMyPC are always busy working at making device management admins’ lives easier. The PatchMyPC cloud portal is a fairly new addition and recently announced a feature parity with the on-prem Publishing service. While the publishing service was able to be connected to SCCM and Intune, the Cloud portal is exclusively made for Intune integration.
In this blog post, we’ll detail how to onboard the PatchMyPC Cloud portal to Intune and get going with Intune to automatically create applications and update them.
Prerequisites
- Internet connection to access Azure and PatchMyPC portals
- PatchMyPC Enterprise Plus, Enterprise Premium or MSP Plus subscription.
- Active Intune tenant.
- Recommended Global Administrators’ rights for original onboarding.
Why use the PatchMyPC Cloud portal instead of the on-prem Publishing service?
- If the Intune connection isn’t already created in the publishing service, this will facilitate moving App publishing and updates to Intune.
- If you wish to move another service to cloud-based only, this portal replaces the need to host the Publishing service, especially for an Intune-only environment.
- If you use Autopatch in a co-managed environment, SCCM won’t be able to push PatchMyPC updates through SCCM, unlike manually using Windows Update for business.
Note that the portal does not replace Intune portal for monitoring of application installation, updates, and inventory. It is there to recreate the capabilities of the On-prem publishing service.
Onboard PatchMyPC Cloud portal
- Access the PatchMyPC cloud portal at https://portal.patchmypc.com/
- A Global Administrator or Application Administrator should perform the original sign-in to Consent on behalf of your organization to prevent the prompt for future admin sign-in. It is NOT mandatory to check the box at all.
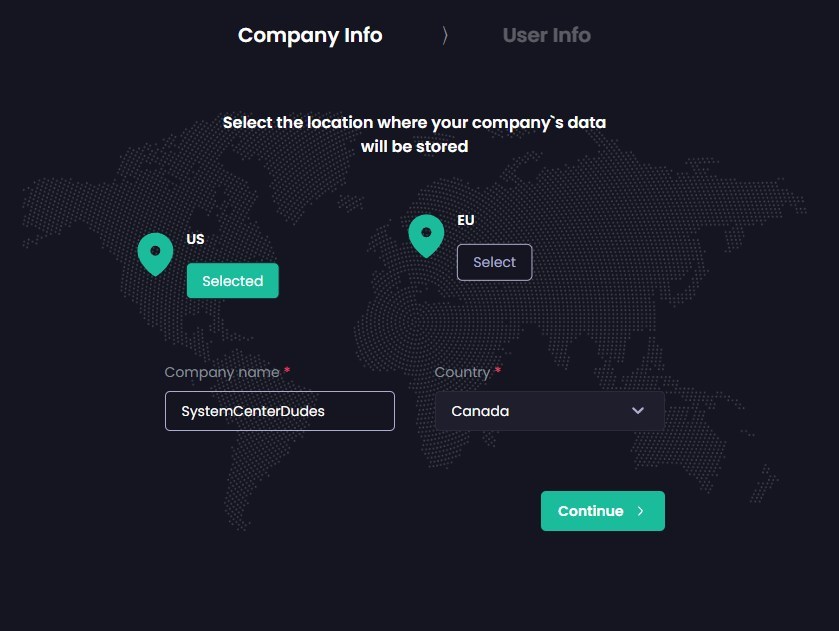
- First-time configurations are displayed and are mandatory. Enter the company name and location.
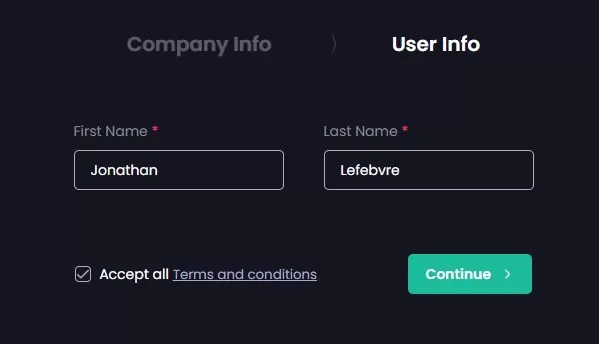
- Provide your name and accept the terms and conditions.
- Once those simple steps are completed, a few additional settings are recommended. A warning at the top is displayed to add additional accounts. click on Fix Access.

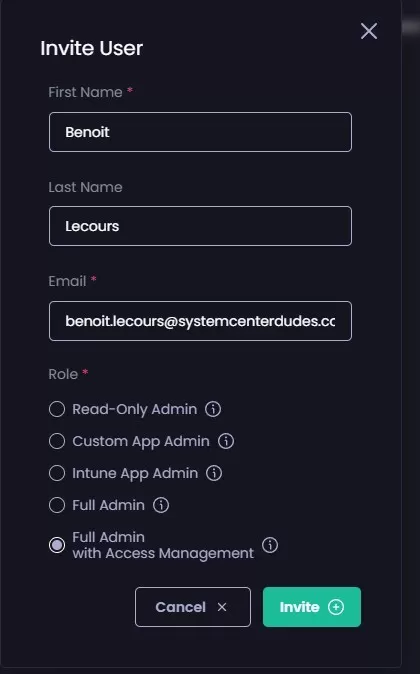
- Send the invite to additional users and select the level of access. It is possible to use groups, but will get back to that later.
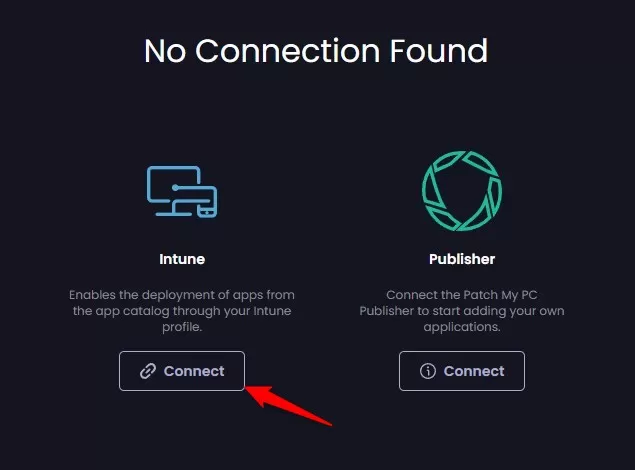
Connect PatchMyPC Cloud to Intune
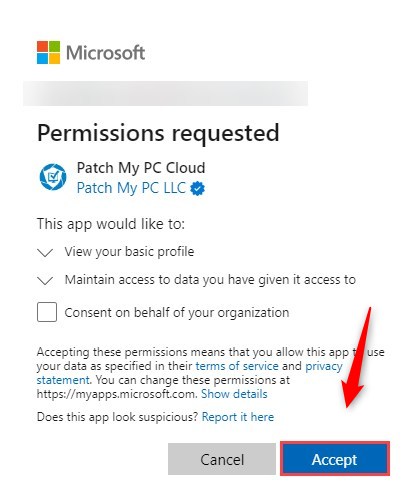
- The PatchMyPC Cloud must be connected to your Intune to do the work. Click on Connect
This again requires Global Administrator rights to perform this connection.
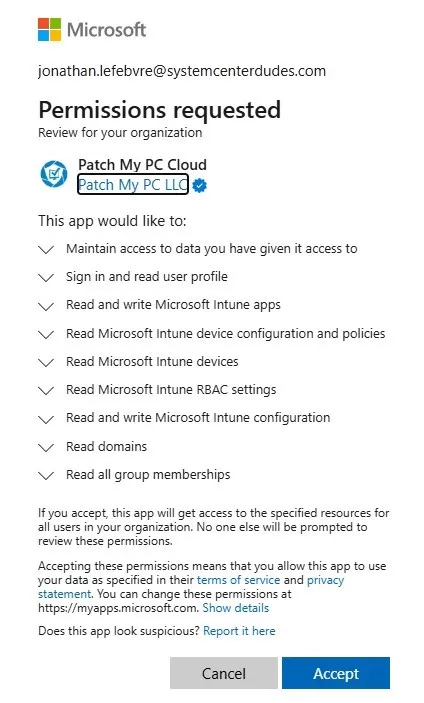
- Accept the required permission.
- Following a successful connection to Intune, it will ask to provide your PatchMyPC license key. If you have the on-prem Publishing service, it will be the same key.

- Once provided, hit Activate now, and a confirmation prompt will appear within seconds.

Customize Branding of PatchMyPC notifications
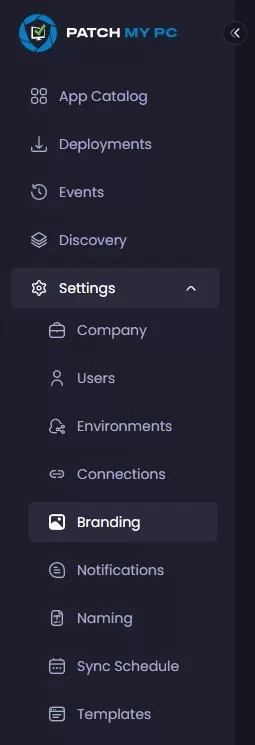
- Under Settings / Branding, it’s possible to set the company logo that will be used for notifications.
- Browse to select your logo. The image needs to be at a maximum 370×100 pixels.
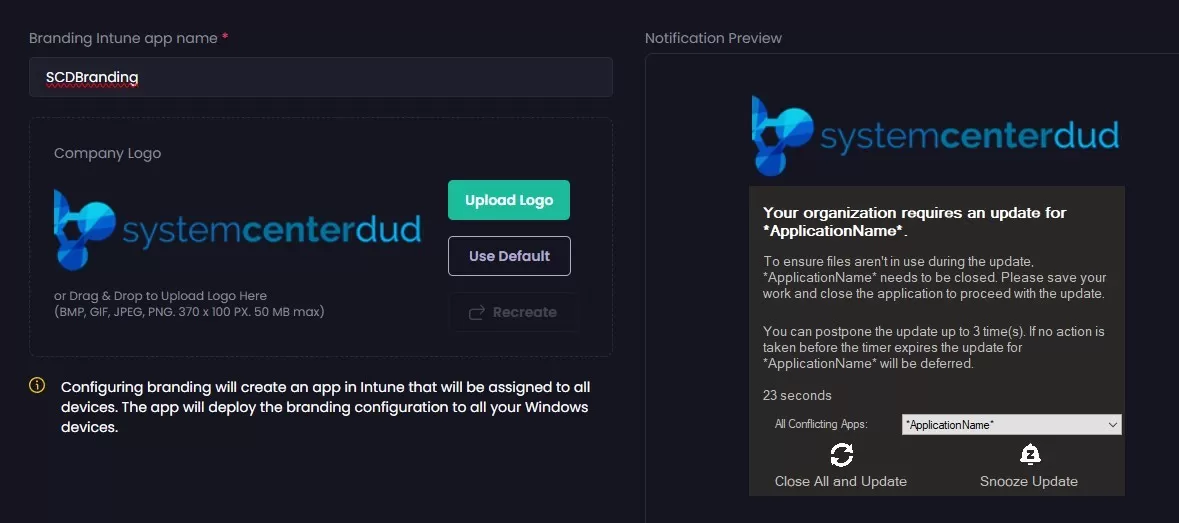
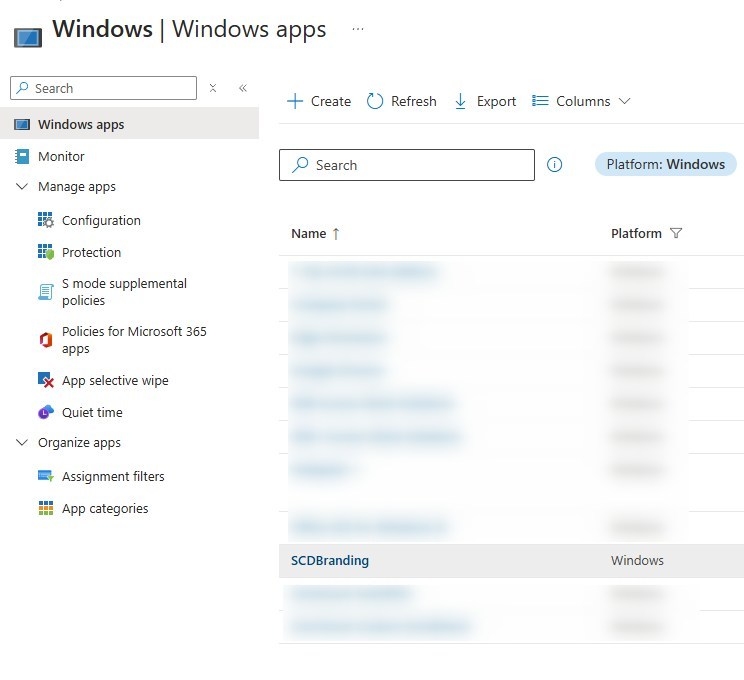
As stated here, this will create an Intune Application to be pushed to all devices. For more details, see PatchMyPC documentation.
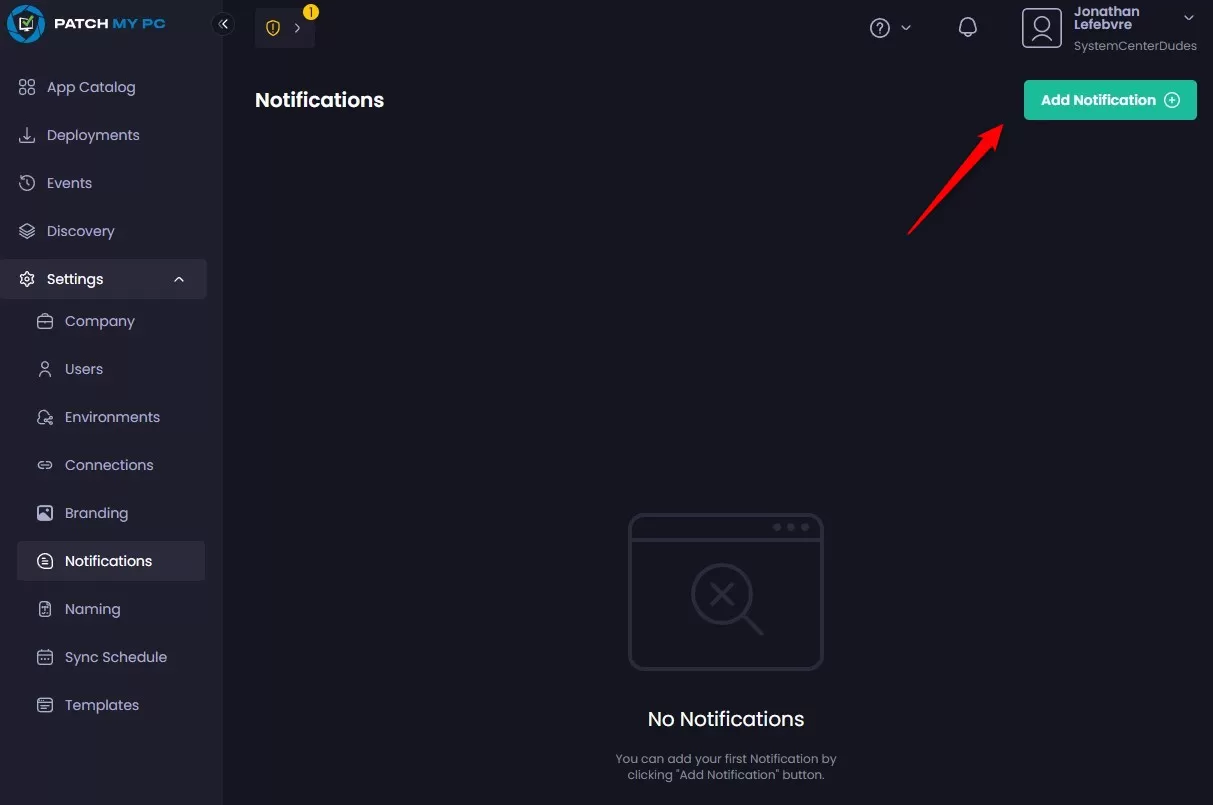
Configure Notifications
These notifications are for administrators to receive details of automation happening like new deployment, updated version, etc. Notification can be sent to Microsoft Teams, Slack and by email.
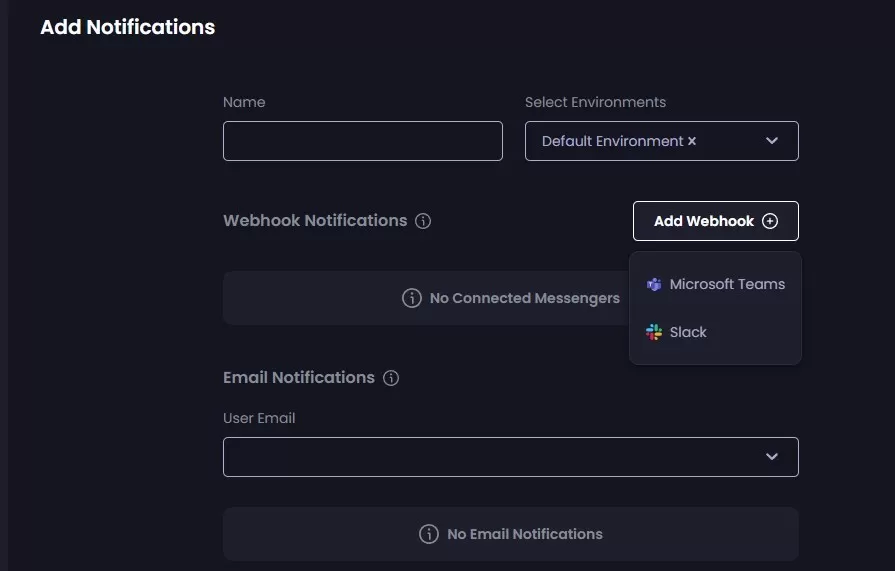
- Under Settings / Notifications, select Add Notification
- Fill out all the required fields.
See PatchMyPC documentation for more details about notifications.
Similar preferences to Publishing service
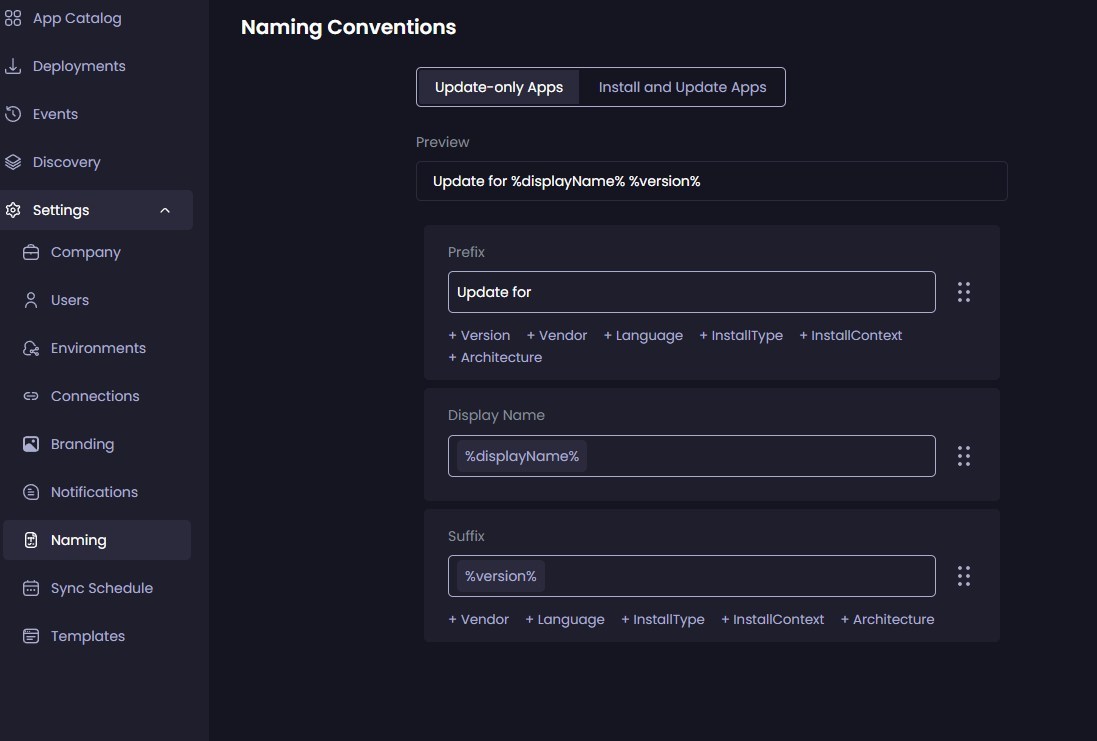
Review the Naming convention
- Under Settings / Naming Convention, it is possible to adjust to your preferences how PMPC apps and updates will be named in the Intune portal
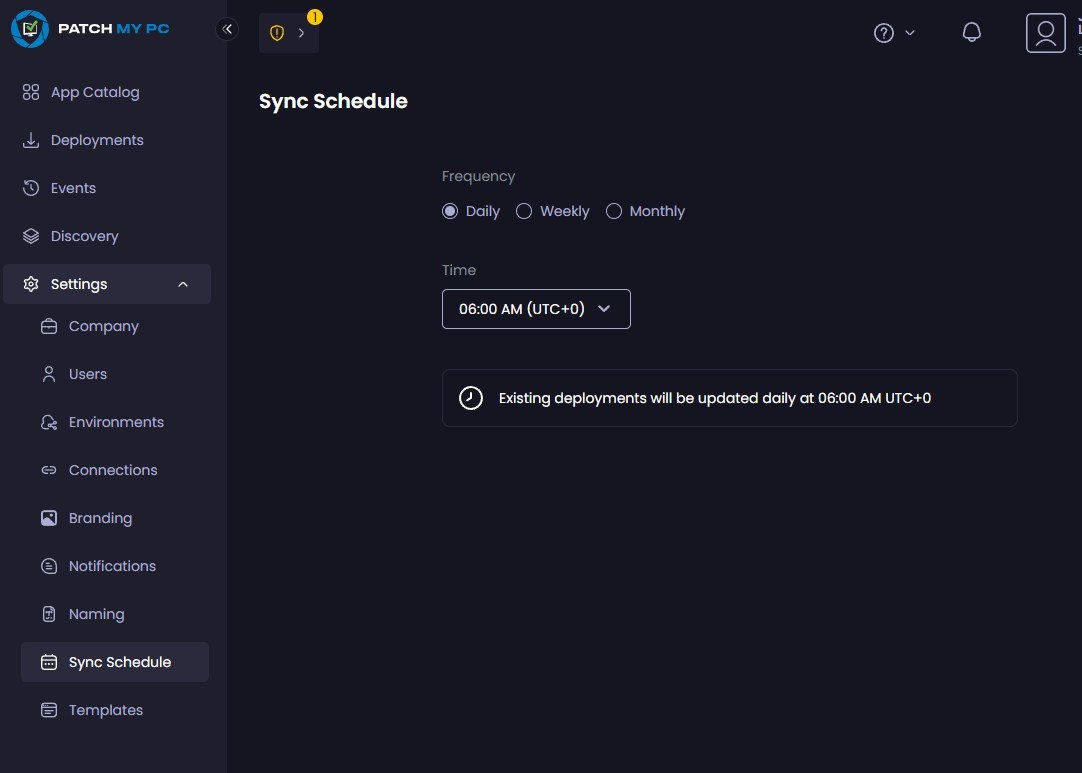
Review the Sync Schedule
- Under Settings / Sync Schedule, select your preferred time to sync.
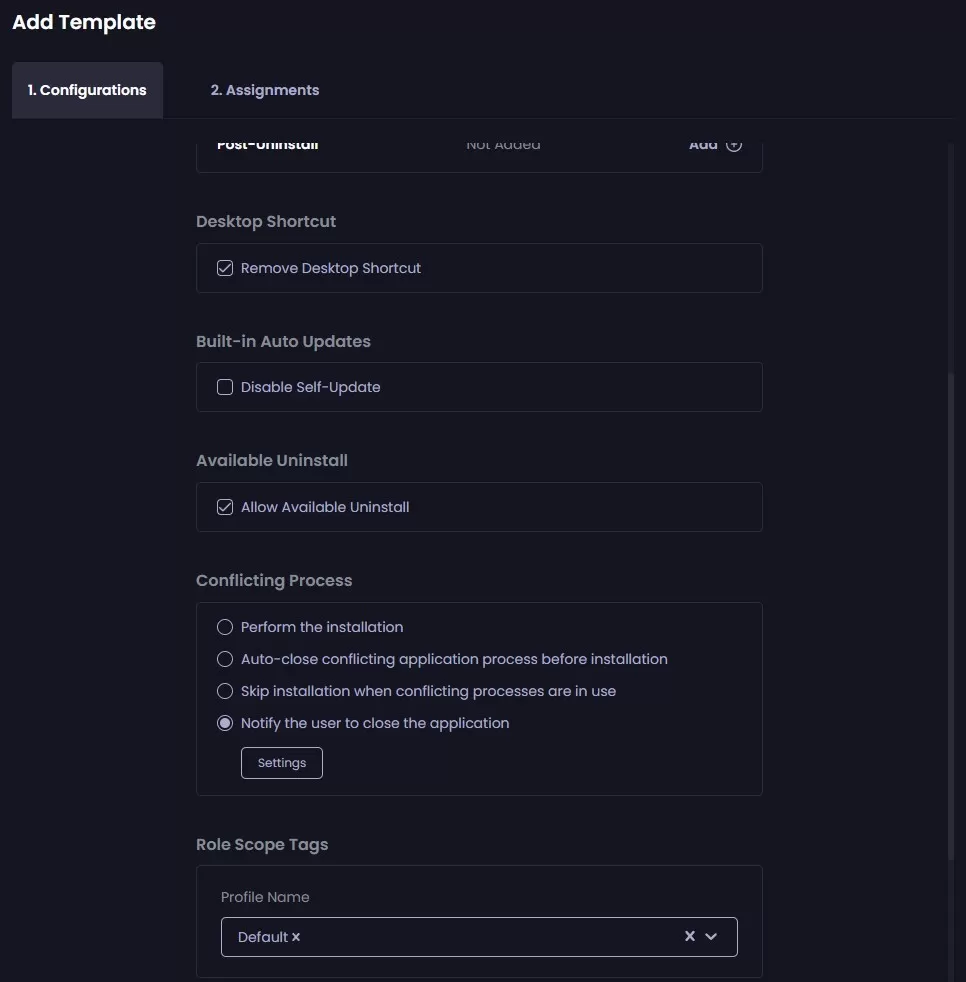
Create Templates
Templates are used to set many options that will occur when applications are installing or updating. The goal is the make it easier when publishing new applications. This is a more advanced option.
Many options can be modified:
- Pre and post scripts for install/uninstall
- desktop Shortcut
- Auto-Update behavior
- Available to uninstall
- Conflicting process
- Scope tag and categories
- Integration to ESP profiles for Autopilot.
- Under Settings / Templates, click Add Template
Publishing applications and updates using PatchMyPC Cloud portal
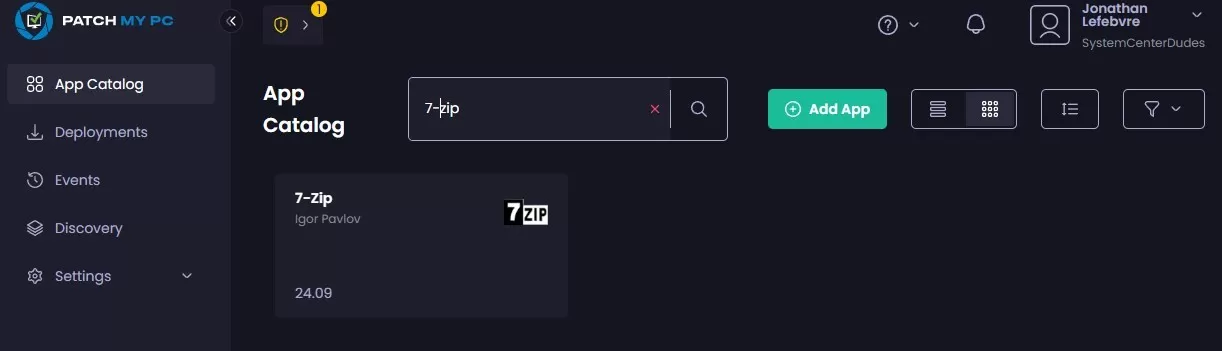
The App Catalog essentially works as the publishing service. We select the applications to synchronize, add them to our selection,
- Select an application and click on it.
- A detailed window shows up, select Deploy. This will NOT deploy the application right away.
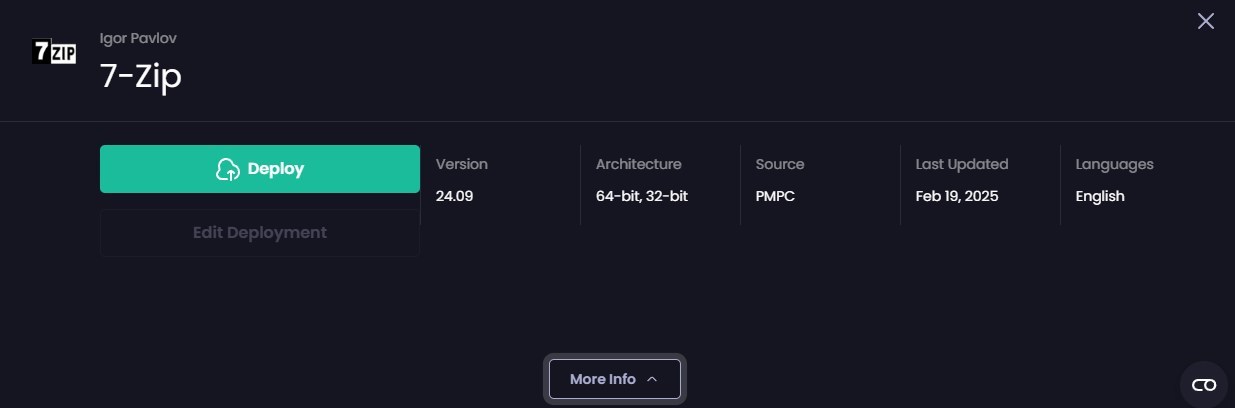
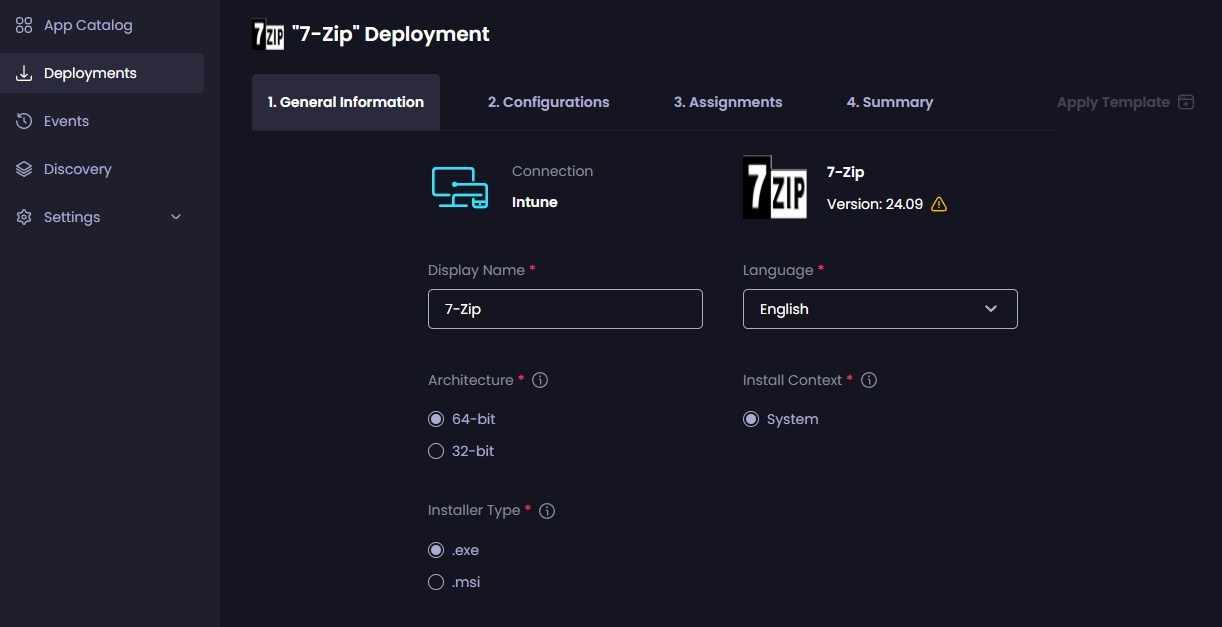
- Set the general information about the application.
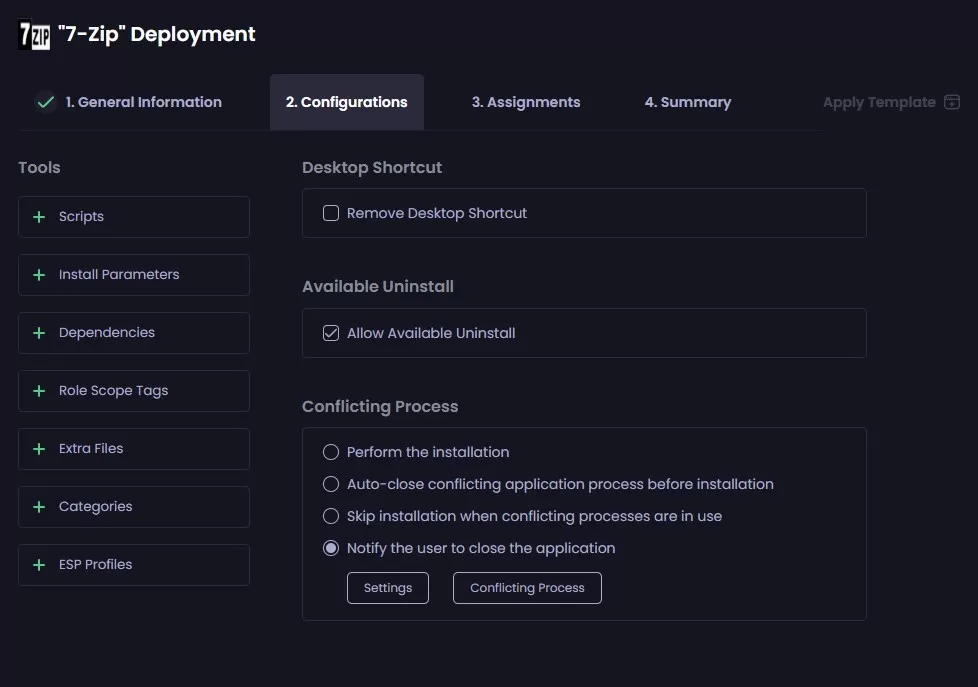
- Set the needed configuration, if any. These are the equivalent of Intune Win32 App options such as dependencies, scope, command lines, etc. Note that templates can preset some of those automatically.
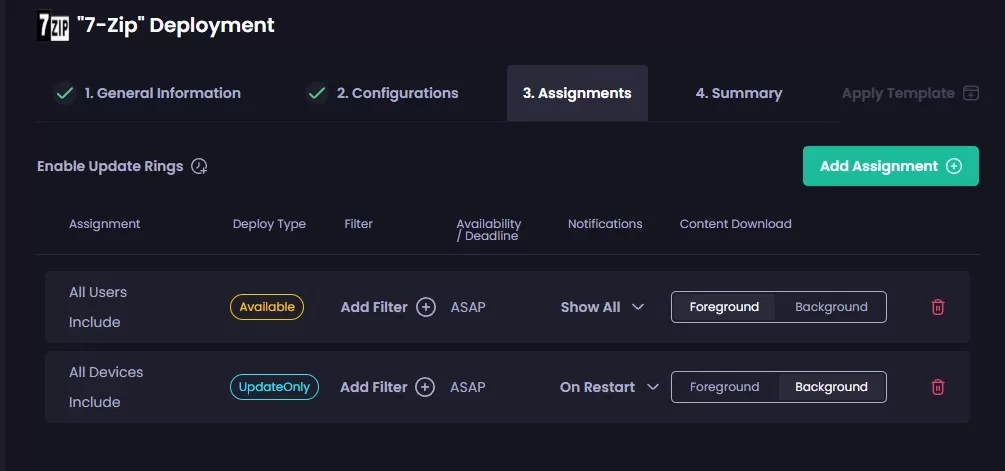
- Set the assignment type needed for this application. These will create apps and deployment according to your needs.
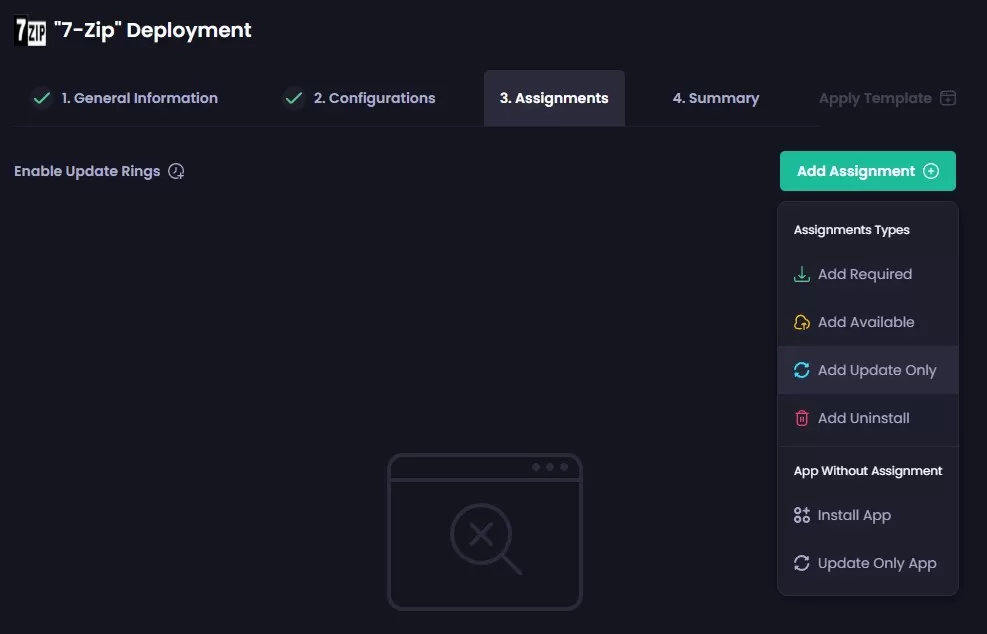
- Multiple assignments can be set on a single app. For example, making it available within the Company portal and also publishing the Update.
This is likely the most critical part and provides tons of options. Reviewing the official documentation is strongly recommended! Assignments | Getting Started
- Deployment will display as In Progress, while everything gets created in Intune.
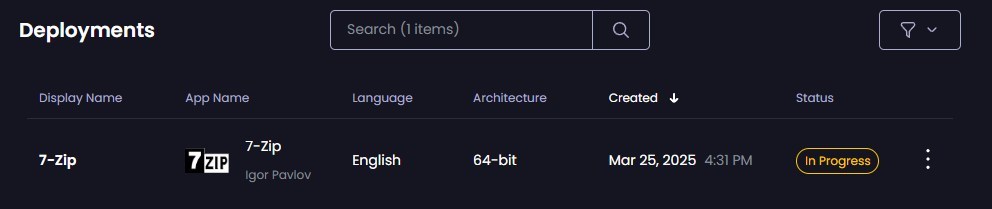
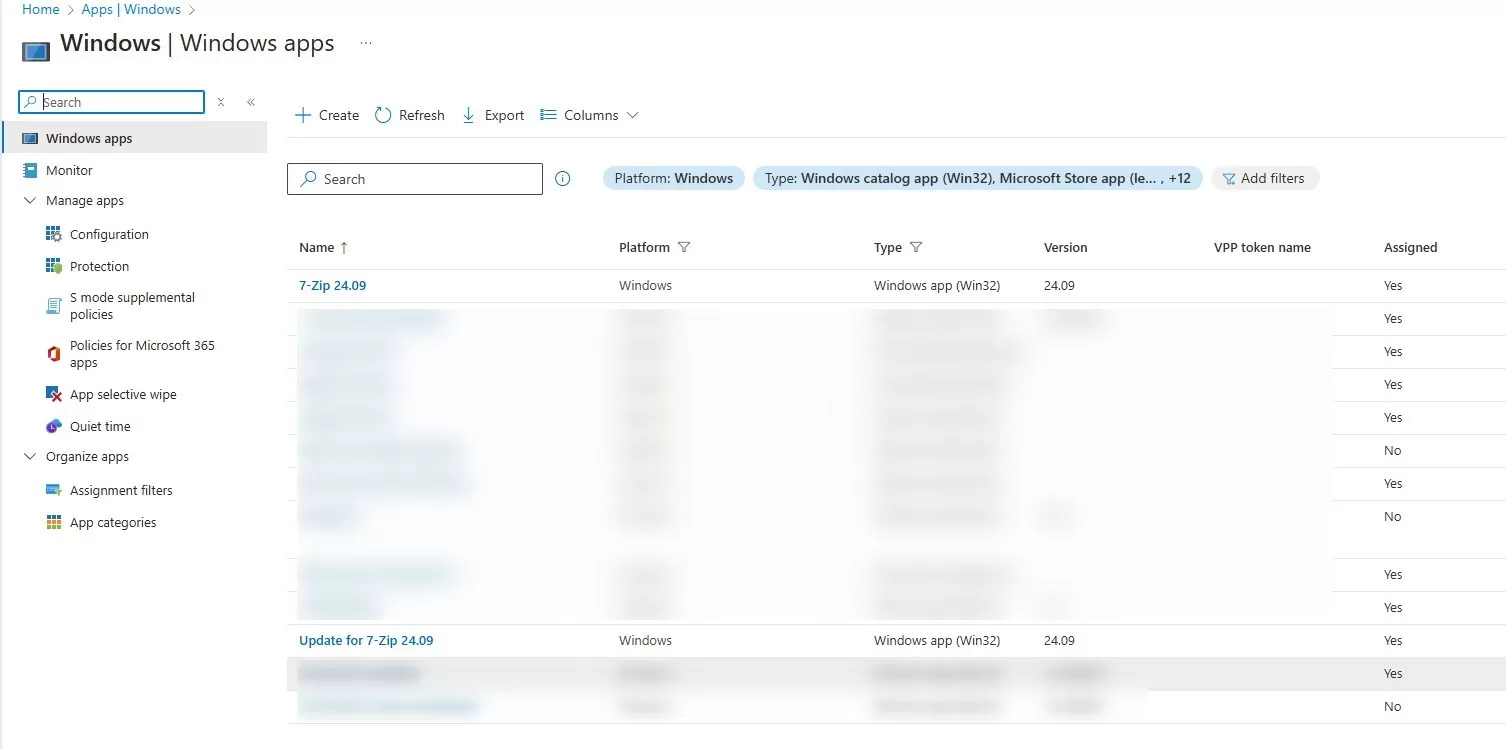
- Once completed, in Intune, both new installation and Update applications are available.
If you’re already a PMPC customer or looking to buy as a new customer and want to save as much as 25% on your licensing cost, ask us a quote. We are an authorized Patch My PC reseller.
That will be all for this post. There is more available with the PatchMyPC Cloud Portal, but this should get you started!
Share
Get the latest insights and exclusive content delivered to your inbox


Only authorized users can leave comments
Log In