
Create SCCM Windows 10 Collections for Feature Updates deployments
Founder of System Center Dudes. Based in Montreal, Canada, Senior Microsoft SCCM Consultant, 8 times Enterprise Mobility MVP. Working in the industry since 1999. His specialization is designing, deploying and configuring SCCM, mass deployment of Windows operating systems, Office 365 and Intune deployments.

Benoit Lecours
PresidentTable of Content


Share


Get the latest insights and exclusive content delivered to your inbox
One of the most common tasks in every Windows 10 Feature Update project is to create SCCM Windows 10 Collections in order to easily target your deployments. The goal is to target only a specific Windows version. For example let’s say that you have devices running Windows 10 1709, 1803 and 21H1, you may want to update only devices that are no longer supported which are 1709 and 1803 and leave your 21H1 alone.
There are various ways to create your SCCM Windows 10 collections and this post will show you all the different methods. If you’re looking to create Windows 10 collections automatically, jump to the last section of this post. I provide an automatic script to create 15 Windows 10 collections in a couple of seconds.
SCCM Windows 10 Collections – Post Content
Identify your Windows 10 Versions
Let’s see how to identify your different Windows 10 versions.
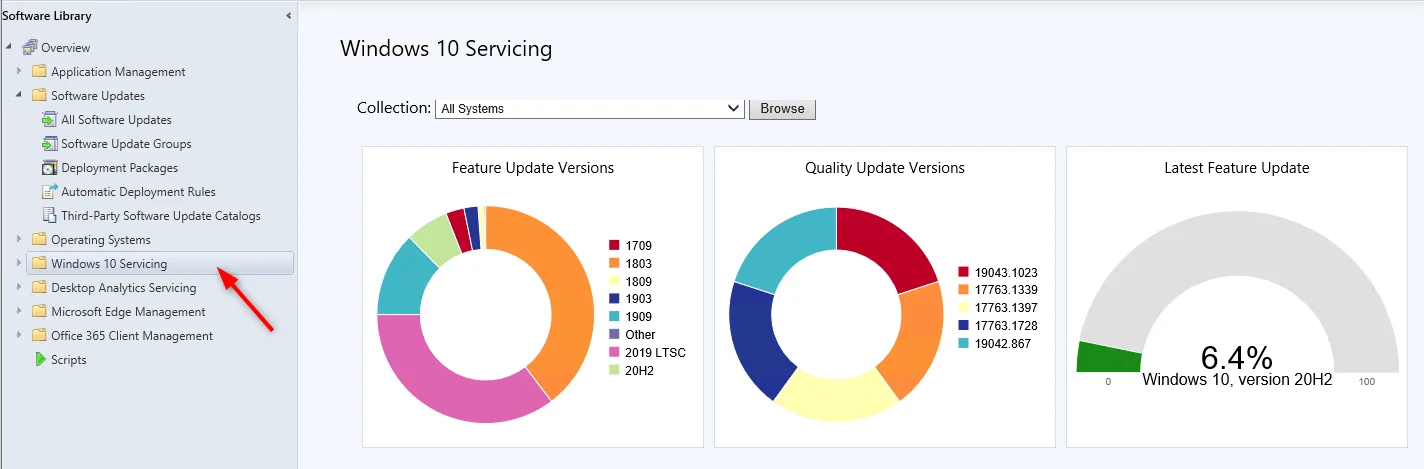
Windows 10 Servicing Dashboard
- Go to Software Library \ Windows 10 Servicing
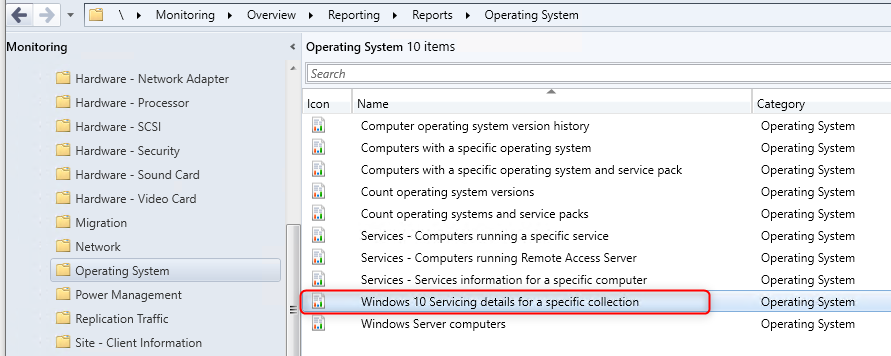
Built-In Reports
- Go to Monitoring \ Reporting \ Reports \ Operating System
- Run the Windows 10 Servicing details for a specific collection
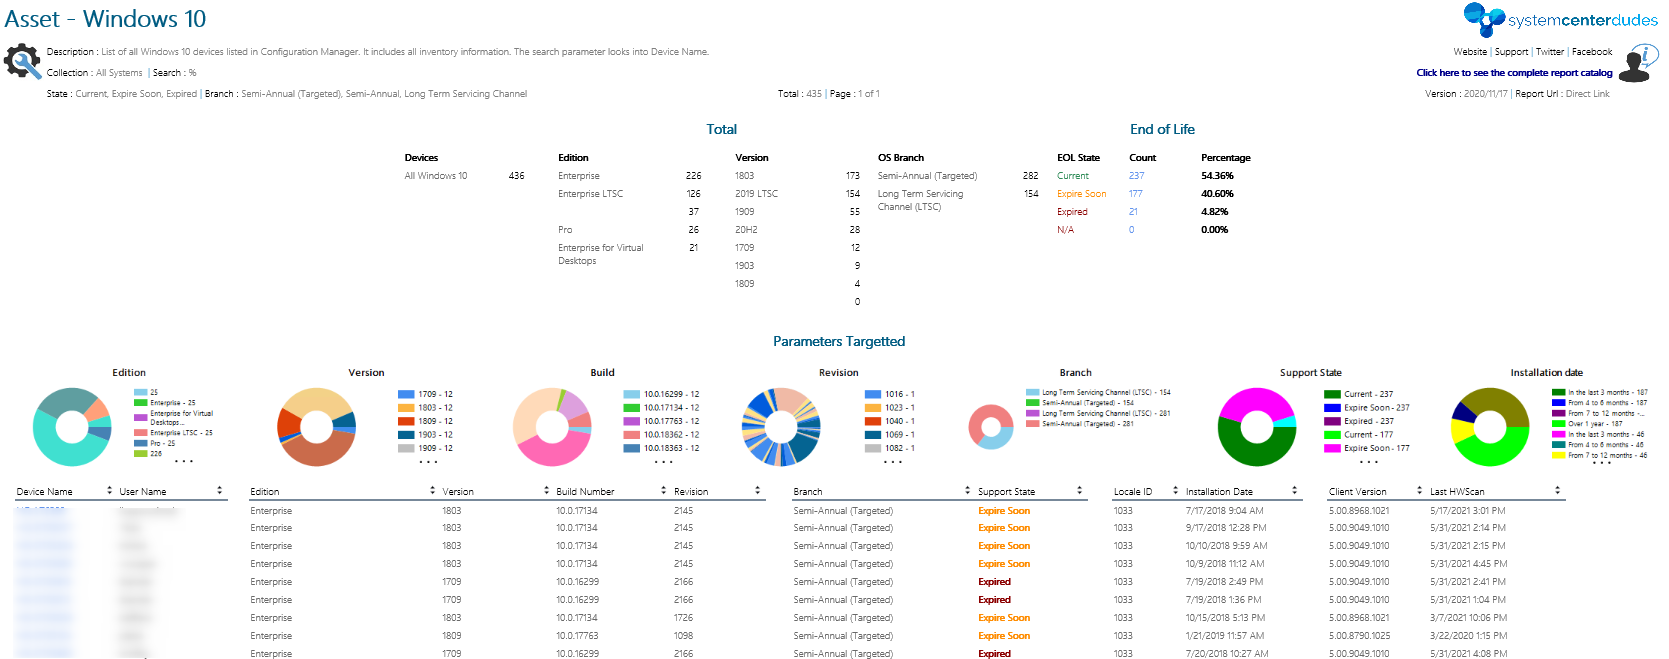
SCD Reports
- Buy our Windows 10 Report, download it and run it on your server
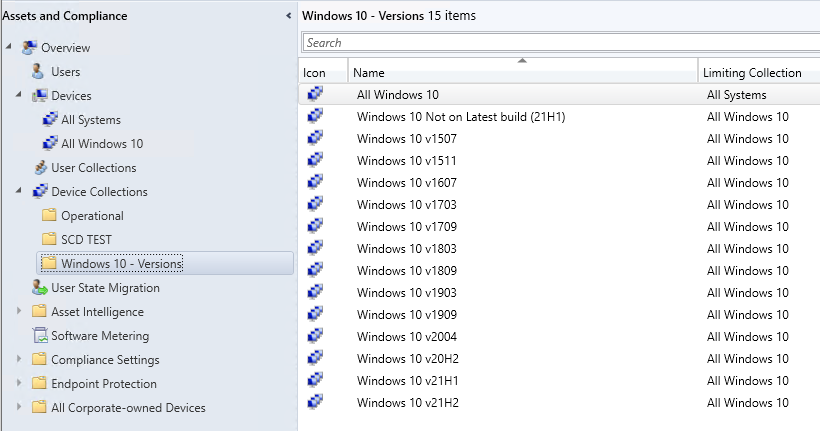
So as you can see, there can be various Windows 10 version deployed on your devices. If you haven’t done any update since the first Windows 10 release, it can be difficult to follow. There’s actually 12 different Windows 10 versions.
Create SCCM Windows 10 Collections
With all these differents Windows 10 versions, we’ll show you various ways to create collections based on the Windows 10 version. For each method, we will need the Windows 10 Build number (ex: 10.0.18363) as we will use this to create the collection. The reason is simple, the SCCM inventory contains the “real” Windows 10 number (ex: 21H2) is buried so deep that you can’t create an SCCM collection based on this. I’ll just leave the following table to ease the process for you.
| Windows 10 Version | Build Number |
|---|---|
| 1507 | 10240 |
| 1511 | 10586 |
| 1607 | 14393 |
| 1703 | 15063 |
| 1709 | 16299 |
| 1803 | 17134 |
| 1809 | 17763 |
| 1903 | 18362 |
| 1909 | 18363 |
| 2004 | 19041 |
| 20H2 | 19042 |
| 21H1 | 19043 |
| 21H2 | 21390 |
Create Manually
If you just want to create a single collection, the fastest way is to create a collection manually based on the Windows 10 version.
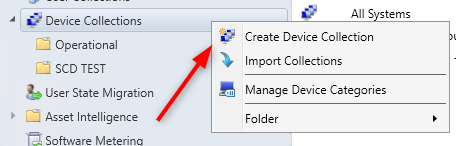
- Go to Assets and Compliance \ Device Collections. Create a new Collection
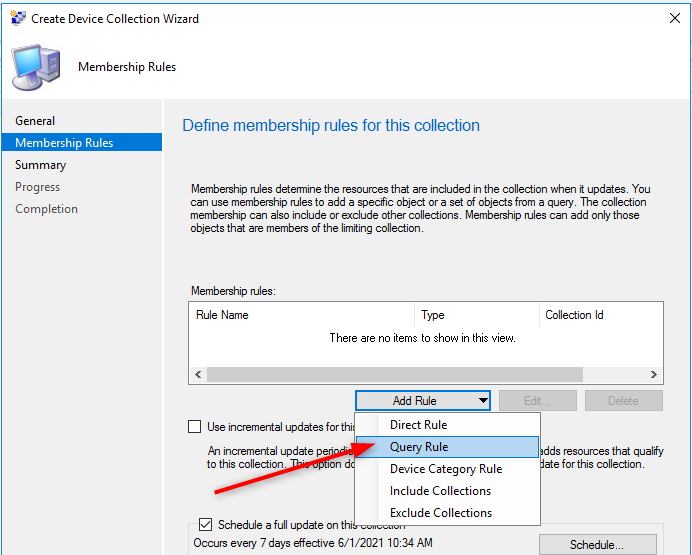
- Name your Collection and select a Query Rule Collection
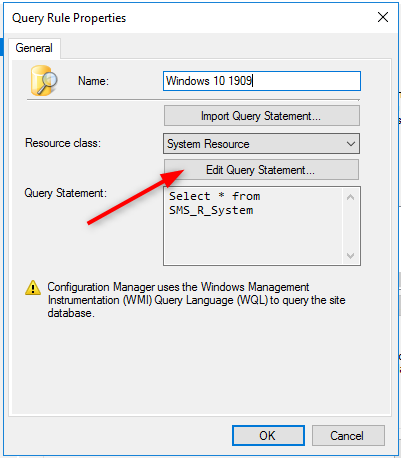
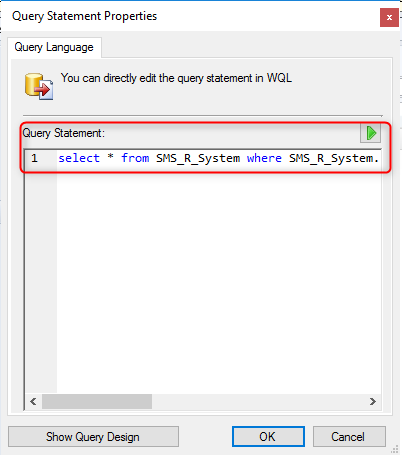
- Click Edit Quey Statement
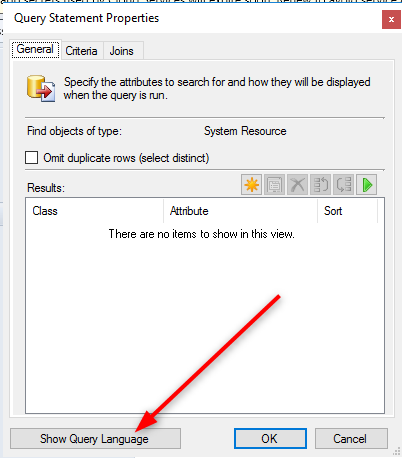
- At the bottom, click Show Query Language
- Paste the following code. You can change the build version to reflect the desired version (see table at the top). This query is for Windows 10 1909. It’s important to add the “Workstation” part at the end or you’ll end up with servers in your collections.
select * from SMS_R_System where SMS_R_System.Build = “10.0.18363” and SMS_R_System.OperatingSystemNameandVersion like “%Workstation%”
- Click Ok, to close all Windows and ensure that you have some results in your collection
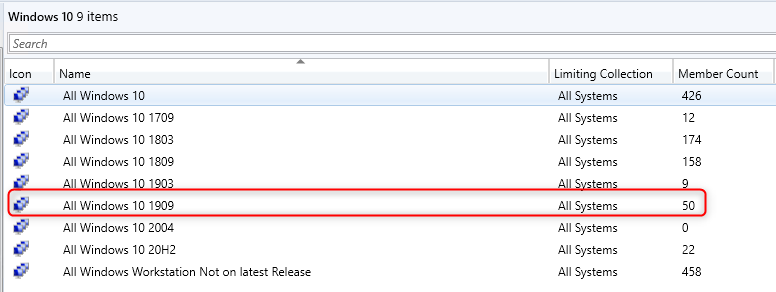
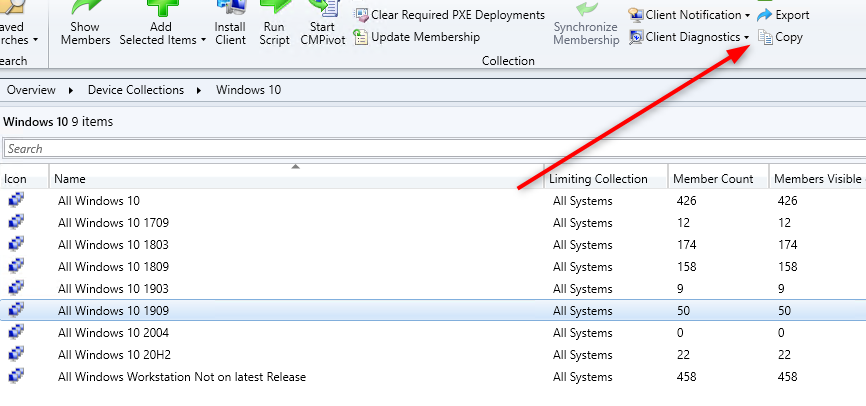
If you create your collection correctly, you should have members in it. From there you can use the Copy button at the top and change the Name and Build number in the Query to duplicate the collection for a new version… or you can continue to read to see how to create all collections automatically.
SCCM Windows 10 Collections – Automatic PowerShell Script
I like to use PowerShell to quickly create collections. For Windows 10, we have 12 different collections to create. This is perfect for PowerShell. I’ve modified my popular Set of Operational Collection script to create only Windows 10 collections.
The script use the New-CMDeviceCollection and Add-CMDeviceCollectionQueryMembershipRule command.
You can download the script on my Github Repository. This script will create 15 Windows 10 collections. 1 per Windows 10 version and one that contains all your machines that are not up to date. At the time of this writing, the latest version is Windows 10 21H1.
To use the script, simply download it from my repository and run it on your server.

Using CMPivot
You can also use CMPivot to create Windows 10 Collections easily. CMPivot is a live query done on a specific collection to return live results. You need to know that only online machines will be able to be queried and that the resulting collection will be a direct membership collection. That means that the collection won’t be dynamic and auto-update with time. If you need to add more devices to this collection, you would need to run the CMPivot query again. If you’re not used with CMPivot, we have a complete blog post to get you started.
To create an SCCM Windows 10 collection using CMPivot :
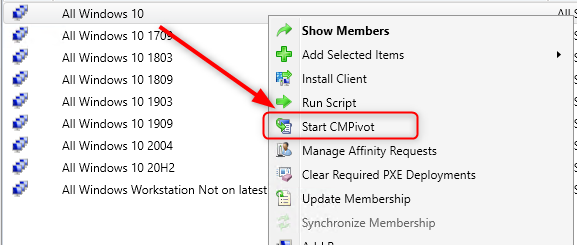
- Select the desired collection to run the query on
- Click Start CMPivot
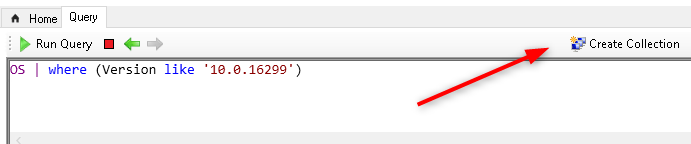
- In the CMPivot window, click the Query tab at the top and enter the following query and click Run Query. Change the build version for your need. (See table on top)
OS | where (Version like ‘10.0.16299’)
- Once you got results, click on the Create Collection button on the top right.
- Complete the Create Collection wizard. You’ll end up with a direct membership collection containing discovered devices by our query. In our example Windows 10 1709.
We have a complete article with multiple CMPivot queries if you’re interested to know more about this.
Conclusion
Once you’ve got your collections created, you can now start your Windows 10 Feature Update deployments to keep your device up to date. We hope this post was helpful.
Share
Get the latest insights and exclusive content delivered to your inbox


Only authorized users can leave comments
Log In