
Complete SCCM Installation Guide and Configuration
Founder of System Center Dudes. Based in Montreal, Canada, Senior Microsoft SCCM Consultant, 8 times Enterprise Mobility MVP. Working in the industry since 1999. His specialization is designing, deploying and configuring SCCM, mass deployment of Windows operating systems, Office 365 and Intune deployments.

Benoit Lecours
PresidentTable of Content
- SCCM Installation Guide Part 1 – Design Recommendation and Installation Prerequisites
- Primary Site server prerequisites
- SCCM Installation Guide Part 2 – SCCM SQL 2017 Installation
- SCCM Installation Guide Part 3 – SCCM Current Branch Installation
- SCCM Installation Guide Part 4 – Application Catalog web service point
- SCCM Installation Guide Part 6 – Asset Intelligence Synchronization Point
- SCCM Installation Guide Part 7 – Certificate Registration Point
-
SCCM Installation Guide Part 8 – Distribution Point Installation
- Introduction
- Pre-Requisites
- Distribution point server configuration
- Windows Server configuration – Roles and Features
- Remote Differential Compression
- IIS
- Windows Deployment Service
- BITS
- Microsoft Visual C++ 2008 Redistributable
- Powershell 3.0
- Firewall
- Distribution Point site server installation
- Add new distribution point server to the SCCM console – Site System
- Verification
- Replicate content
- Distribution Point Monitoring
- SCCM Installation Guide Part 9 – Endpoint protection point
- SCCM Installation Guide Part 10 – Enrollment Point Installation
- SCCM Installation Guide Part 12 – Fallback Status Point
- SCCM Installation Guide Part 13 – Management Point Installation
- SCCM Installation Guide Part 14 – Reporting Point Installation
- SCCM Installation Guide Part 15 – Software Update Point Installation
- SCCM Installation Guide Part 16 – State Migration Point Installation
- SCCM Installation Guide Part 17 – System Health Validator Point
- SCCM Installation Guide Part 18 – Service Connection Point Installation
- SCCM Installation Guide Part 19 – Plan and Configure Boundaries
- SCCM Installation Guide Part 20 – Configure Client Settings
- SCCM Installation Guide Part 21 – Configure Discovery Methods
- SCCM Installation Guide Part 22 – Configure Maintenance Tasks
- SCCM Installation Guide Part 23 – Backup your Server after SCCM Installation
- More SCCM Ressources


Share


Get the latest insights and exclusive content delivered to your inbox
This blog post is a completely revised Step-by-step SCCM Installation Guide. It covers every aspect of the SCCM Installation. From the server prerequisites to the SQL installation, the SCCM installation and all configuration and site server installation. Following this guide, you should have a functional SCCM server in a few hours.
 |
|---|
We already did a guide in the past when SCCM 1511 was released, but it was time for a 2020 refresh.
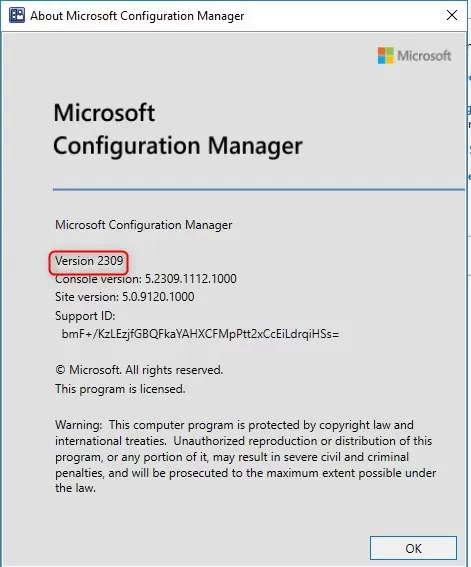
Since our first guide, more than 12 SCCM versions have been released… and the product even changed its name to Microsoft Endpoint Manager. (MEM or MEMCM).
SCCM installation has never been easy, and the product can be complex for inexperienced administrators. With this blog post, we aim to bring it a bit further, explaining concepts and best practices rather than just guiding the user through the installation process.
If you’re unfamiliar with SCCM’s Current Branch Features, you can visit this Microsoft Docs article, which covers everything.
Stop reading this guide if you’re still running SCCM 2012 (!) and plan to migrate. You do not need to do a completely new installation. See our blog post on upgrading to the SCCM Current Branch instead.
We hope this guide brings all the necessary information and that you’ll appreciate administering it.
The PDF file is a 162 pages document that contains all informations to install and configure SCCM Current Branch. Use our products page or use the button below to download it . size> |
SCCM Installation Guide Part 1 – Design Recommendation and Installation Prerequisites
SCCM Hardware Requirements
In the first part of this SCCM Installation Guide, we will cover SCCM installation prerequisites, precisely hardware requirements, design recommendations, and server prerequisites.
The hardware requirements for a Primary Site server largely depend on the enabled features and how each component is utilized. When the number of clients grows and changes, the server hardware requirements change accordingly. For the initial deployment, hardware requirements can be estimated for each server by determining:
- The overall need for each component (Will you do Operating System Deployment ? How many daily software deployments ? Is Inventory and reporting necessary for your organization? Will you manage Internet Clients?)
- The number of clients planned to be installed
- The load on each of the installed SCCM components
In general, medium environments (a couple thousand clients) should consider the following recommendations when planning hardware:
- SCCM and SQL Server communicate constantly. We recommend installing the SCCM database and SQL Server on the Primary site server. This is debatable, and we understand that some organizations try to standardize their SQL distribution. Performance is simply better using a local installation when appropriately configured.
- Neither the SCCM site nor the SQL database should share their disks with other applications.
- Configure the SQL Server databases and logs to run on a disk different from where the SCCM database is located.
Another issue to consider when determining hardware requirements for a site server is the total amount of data that will be stored in the database. An approximate figure of 5Mb to 10Mb per client is typically used to estimate the required database size for a single site.
In our setup, we will install a single primary site with the roles of management point, reporting point, distribution point, PXE service point, state migration point, fallback status point, and software update point. SQL Reporting Services will be used to provide consolidated reporting for the hierarchy. This role will also be installed on the SCCM Server. Running reports can impact server CPU and memory utilization, particularly if large, poorly structured queries are executed as part of the report generation.
Consider placing a client-facing role (Distribution Point, Reporting Point) on a separate server to reduce load on your Primary server.
Here’s our recommended reading about hardware requirements:
SCCM Installation Guide
- Design a hierarchy of sites
- Recommended hardware
- Supported configurations
- Plan for the site database
- Plan for site system servers and site system roles
We strongly recommend that you understand SQL Server before installing SCCM. Talk to and have a good relationship with your DBA if you have one in your organization.
Here’s our recommended reading about SQL :
- Storage Top 10 Best Practice
- SQL Server Best Practices Article
- Disk Partition Alignment Best Practices for SQL Server
Operating System
Our servers run Windows 2019 with the latest security patches for this post.
Make sure that your OS is supported; see the SCCM Current Branch Technet Documentation
Disks
Disk IOs are the most critical aspect of SCCM performance. We recommend configuring the disks following SQL Best practices. Split the load on different drives. When formatting SQL drives, NTFS’s cluster size (block size) must be 64KB instead of the default 4K. See the previously recommended reading to achieve this.
| Letter | Content | Size | ||
|---|---|---|---|---|
| C:\ | Windows | 100GB | ||
| D:\ | SCCM | 200GB | ||
| E:\ | SQL Database (64K) | 40GB | ||
| F:\ | SQL TempDB (64K) | 40GB | ||
| G:\ | SQL Transaction Logs (64K) SQL TempDB Logs | 40GB |
Primary Site server prerequisites
Once your hardware is carefully planned, we can now prepare our environment and server before SCCM Installation.
Active Directory schema extension
You need to extend the Active Directory Schema only if you didn’t have a previous installation of SCCM in your domain. If you have SCCM 2007 already installed and are planning a migration, skip this step.
- Login to a server with an account that is a member of the Schema Admins security group
- From SCCM ISO run .\SMSSETUP\BIN\X64\extadsch.exe
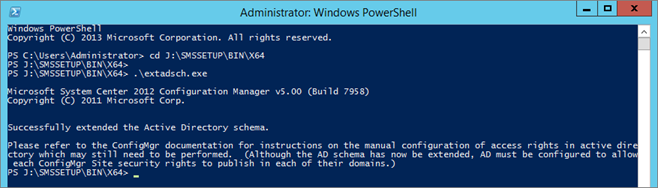
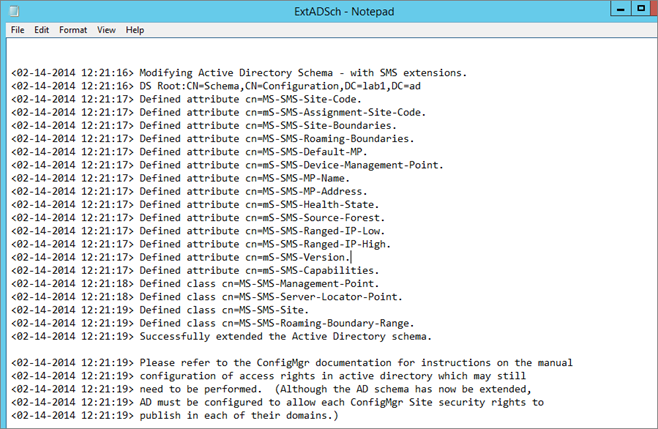
- Check the schema extension result, and open Extadsch.log located in the root of the system drive.
Create the System Management Container
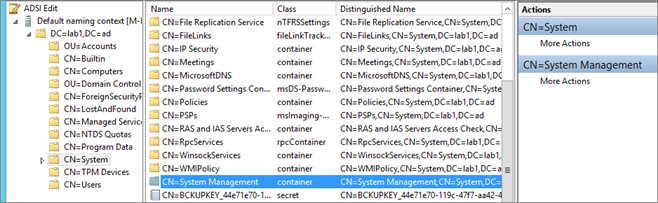
Configuration Manager does not automatically create the System Management container in Active Directory Domain Services when the schema is extended. The container must be created once for each domain, including a Configuration Manager primary or secondary site server that publishes site information to Active Directory Domain Services.
- Start ADSIEdit, go to the System container and create a new Object
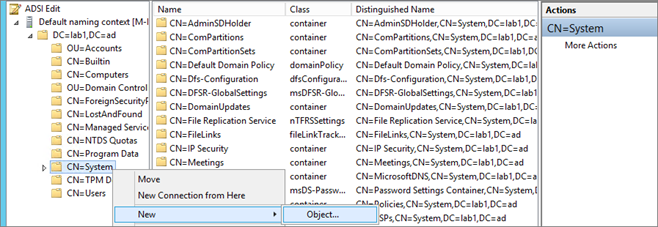
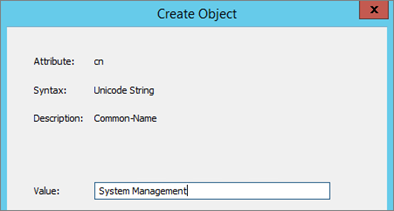
- Select Container
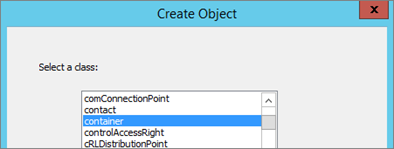
- Enter System Management
Set security permission
- Open properties of the container System Management created previously
- In the Security tab, add the site server computer account and Grant Full Control permissions
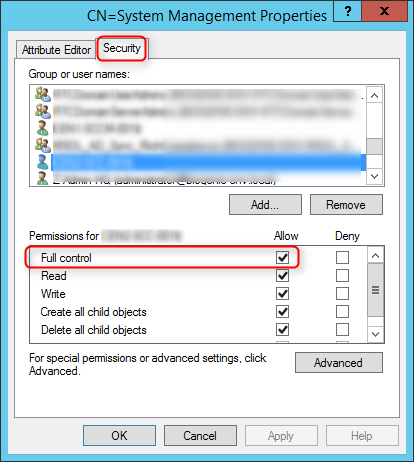
- Click Advanced, select the site server’s computer account, and then click Edit
- In the Applies to list, select This object and all descendant objects
- Click OK and close the ADSIEdit console
SCCM Accounts
Create the necessary accounts and groups created before installation. You can use a different name, but I’ll refer to these names throughout the guide.
- SQL server services account – SCCM-SQLService
- SCCM Network Access Account – SCCM-NAA
- Domain user account for use SCCM client push install – SCCM-ClientPush
- Domain user account for use with reporting services User – SCCM-SQLReporting
- Domain account used to join machine to the domain during OSD – SCCM-DomainJoin
- Domain group containing all SCCM Admins Group – SCCM-Admins
- Domain group containing all SCCM servers in the hierarchy Group – SCCM-SiteServers
Network Configuration
- Make sure that the server has a fixed IP and that the internet connection is up
Firewall Configuration
- Make sure the firewall service is ON
Run this script in an elevated command prompt to open the ports needed for SCCM.
** If you are using custom ports, change the values before running the script. **
@echo ========= SQL Server Ports ===================
@echo Enabling SQLServer default instance port 1433
netsh advfirewall firewall add rule name=”SQL Server” dir=in action=allow protocol=TCP localport=1433
@echo Enabling Dedicated Admin Connection port 1434
netsh advfirewall firewall add rule name=”SQL Admin Connection” dir=in action=allow protocol=TCP localport=1434
@echo Enabling conventional SQL Server Service Broker port 4022
netsh advfirewall firewall add rule name=”SQL Service Broker” dir=in action=allow protocol=TCP localport=4022
@echo Enabling Transact-SQL Debugger/RPC port 135
netsh advfirewall firewall add rule name=”SQL Debugger/RPC” dir=in action=allow protocol=TCP localport=135
@echo ========= Analysis Services Ports ==============
@echo Enabling SSAS Default Instance port 2383
netsh advfirewall firewall add rule name=”Analysis Services” dir=in action=allow protocol=TCP localport=2383
@echo Enabling SQL Server Browser Service port 2382
netsh advfirewall firewall add rule name=”SQL Browser” dir=in action=allow protocol=TCP localport=2382
@echo ========= Misc Applications ==============
@echo Enabling HTTP port 80
netsh advfirewall firewall add rule name=”HTTP” dir=in action=allow protocol=TCP localport=80
@echo Enabling SSL port 443
netsh advfirewall firewall add rule name=”SSL” dir=in action=allow protocol=TCP localport=443
@echo Enabling port for SQL Server Browser Service’s ‘Browse’ Button
netsh advfirewall firewall add rule name=”SQL Browser” dir=in action=allow protocol=TCP localport=1434
@echo Allowing Ping command
netsh advfirewall firewall add rule name=”ICMP Allow incoming V4 echo request” protocol=icmpv4:8,any dir=in action=allow
No_sms_on_drive.sms
Place a file name no_sms_on_drive.sms on the root drive of each drive you don’t want SCCM to put content on.
Windows Server Features
The following components must be installed on the Primary site server before SCCM installation. We’ll install all these components using a PowerShell script.
- .Net Framework 3.51 SP1
- .Net Framework 4
- IIS
- Remote Differential Compression
- BITS Server Extension
- WSUS 3.0 SP2
- Report Viewer
- ADK for Windows 8.1
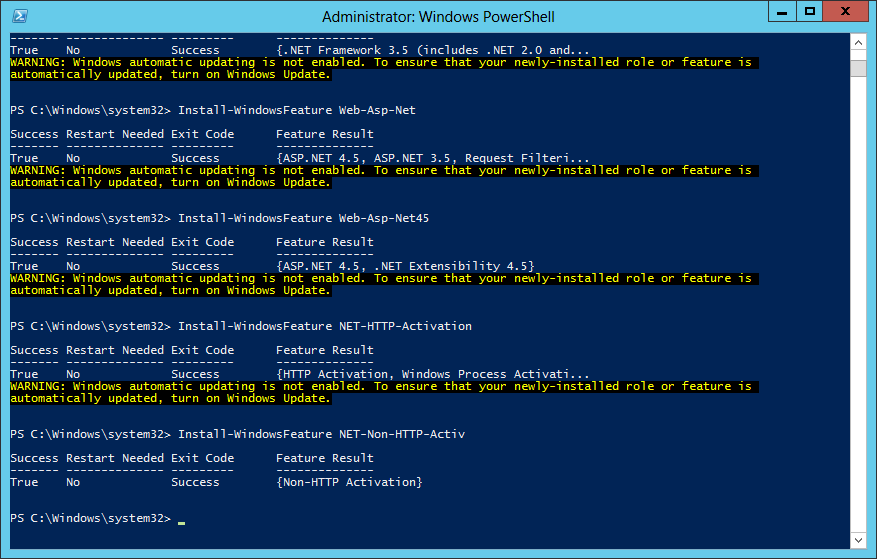
Roles and features
On the Site Server computer, open a PowerShell command prompt as an administrator and type the following commands. This will install the required features without using the Windows 2012 GUI.
Get-Module servermanager
Install-WindowsFeature Web-Windows-Auth
Install-WindowsFeature Web-ISAPI-Ext
Install-WindowsFeature Web-Metabase
Install-WindowsFeature Web-WMI
Install-WindowsFeature BITS
Install-WindowsFeature RDC
Install-WindowsFeature NET-Framework-Features -source \yournetwork\yourshare\sxs
Install-WindowsFeature Web-Asp-Net
Install-WindowsFeature Web-Asp-Net45
Install-WindowsFeature NET-HTTP-Activation
Install-WindowsFeature NET-Non-HTTP-Activ
Ensure that all components are showing as SUCCESS as an EXIT Code. It’s normal to have Windows Update warnings at this point.
Report Viewer
Download and install – here
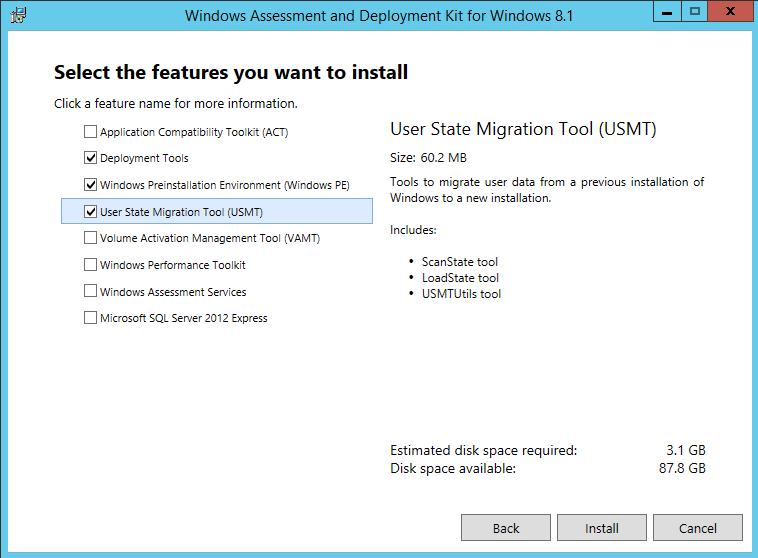
ADK for Windows 10
Download and install – here
- Select the default path
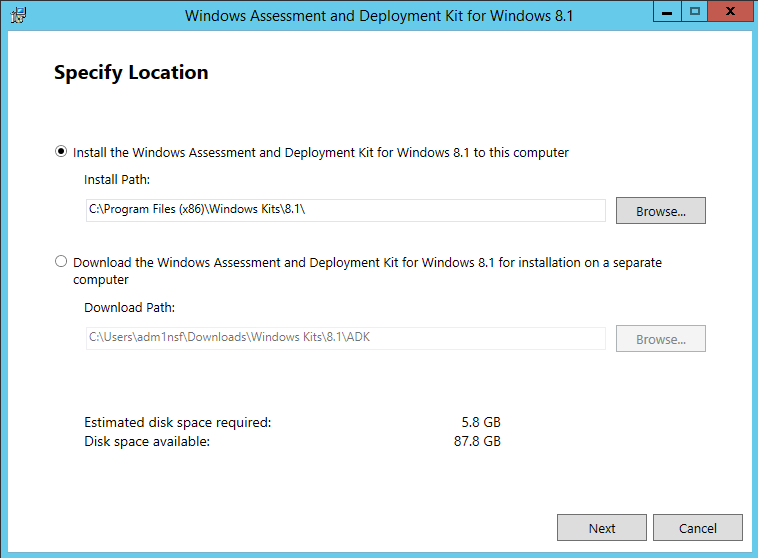
- Do not join CEIP
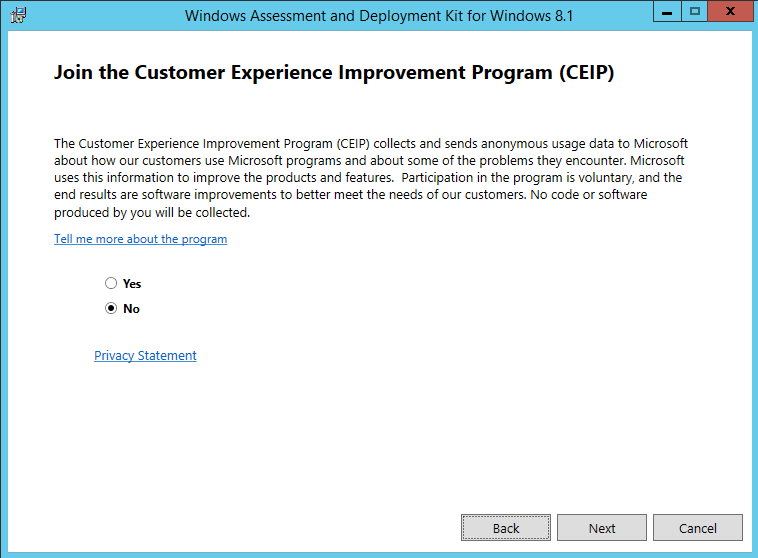
- Accept the License Agreement
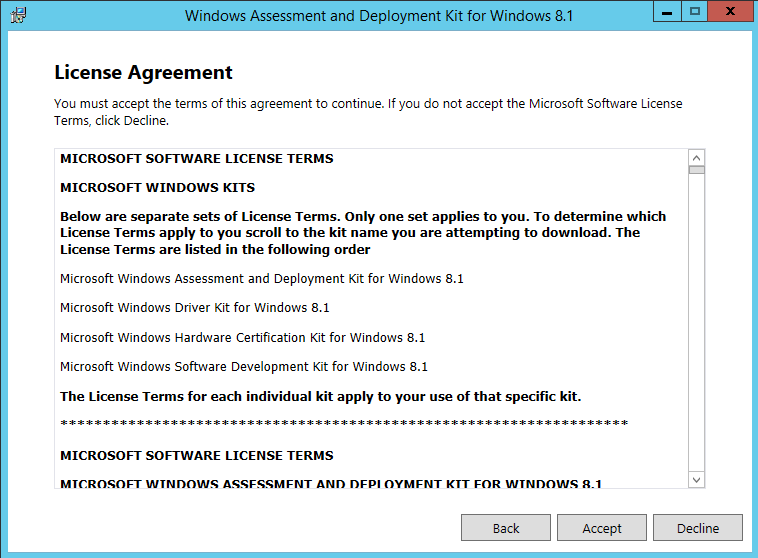
- Install the following components
- Deployment Tools
- Windows Pre-installation Environment
- User state Migration tool
Active Directory
- Add the computer account of all your site servers in the SCCM-SiteServers AD group.
- Ensure that the group has Full Control of the SYSTEM Container in the Active Directory.
Local Admin accounts
Add both the SCCM computer account and the SCCM Admin account to the local administrator group on the site server.
- SCCM-Admins
- SCCM-SiteServers
SCCM Client
If applicable, uninstall the SCCM 2007 client and FEP if present on the server before the installation. The 2012 SCCM Management Point installation will fail if the client is present.
Windows Updates
Run Windows update and patch your server to the highest level
Your server is now ready for the SQL installation.
SCCM Installation Guide Part 2 – SCCM SQL 2017 Installation
We will go through the complete SCCM SQL 2017 Install Guide to install and configure SQL before installing SCCM Current Branch 1806 or higher.
This post is our updated version of our SQL install guide for version 2017 and higher. If you are planning on installing an older version of SQL, please follow our previous post here.
Click the following link to see all supported SQL versions. For our post, we will install SQL 2017 locally on the same server where the Primary Site will be installed.
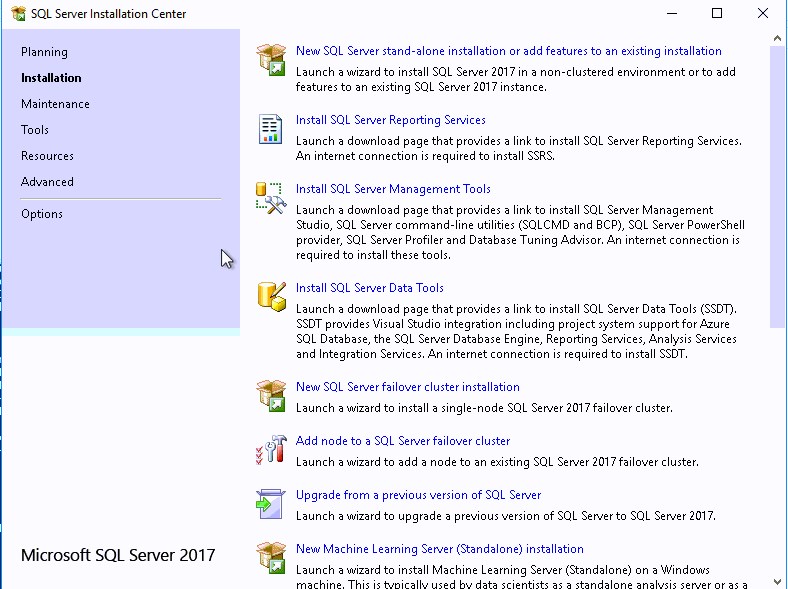
- Execute Setup.exe from the SQL installation media, select New SQL server stand-alone installation.
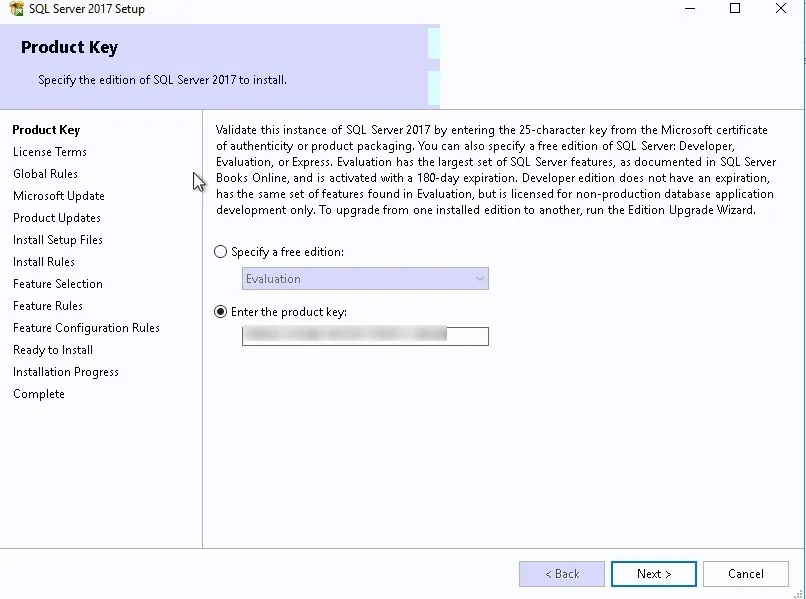
- Provide the product key and click Next
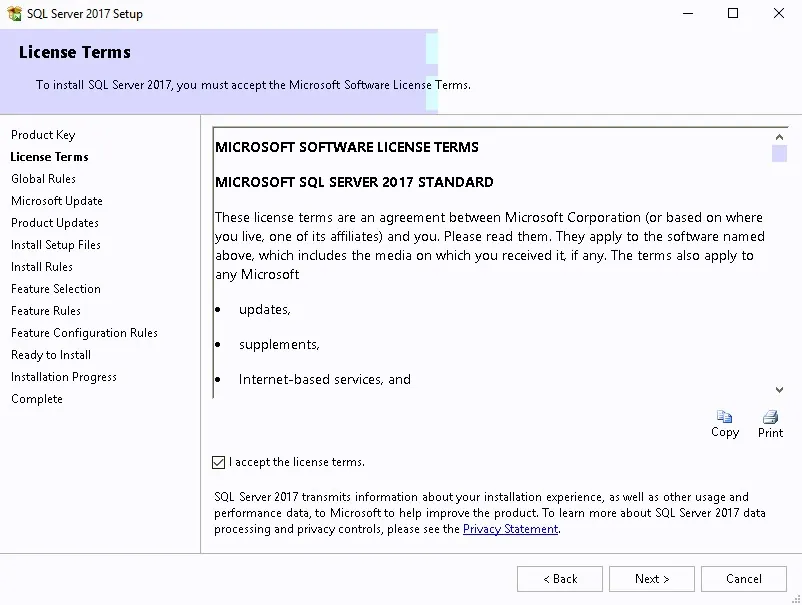
- Review and Click Next
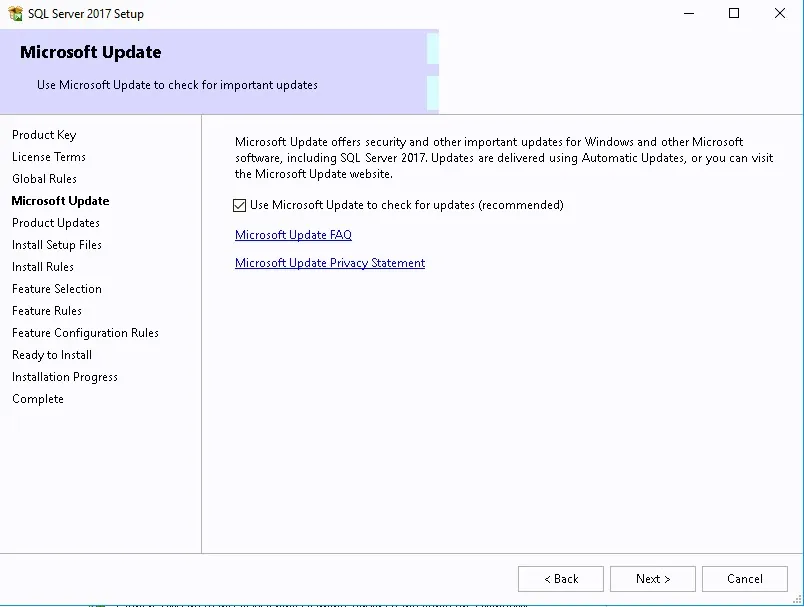
- Check Use Microsoft Update to check for updates and click Next
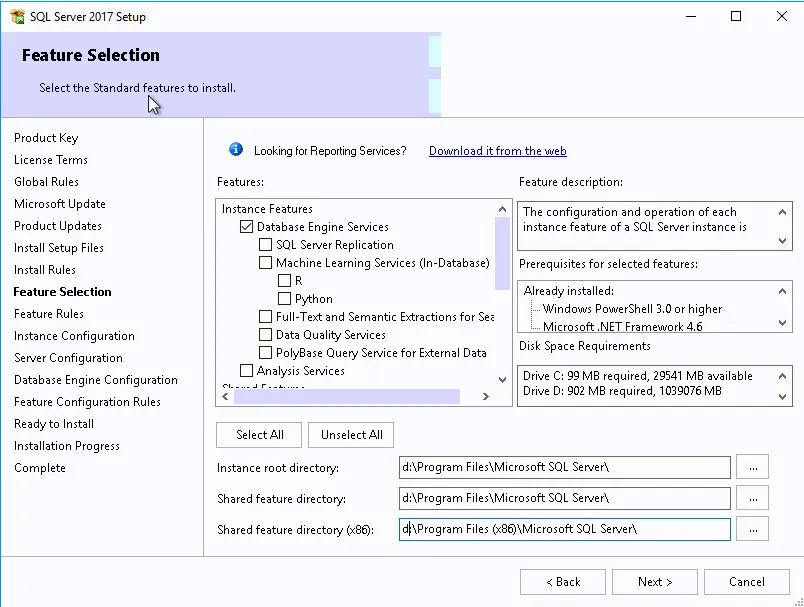
- Select SQL Server Feature Installation
Note that some steps in the wizard are automatically skipped when no action is required. For example, product updates, Install setup Files and Install Rules might be skipped.
- Select the Database Engine feature and specify the SQL installation directory. This is the directory for the program files and shared features.
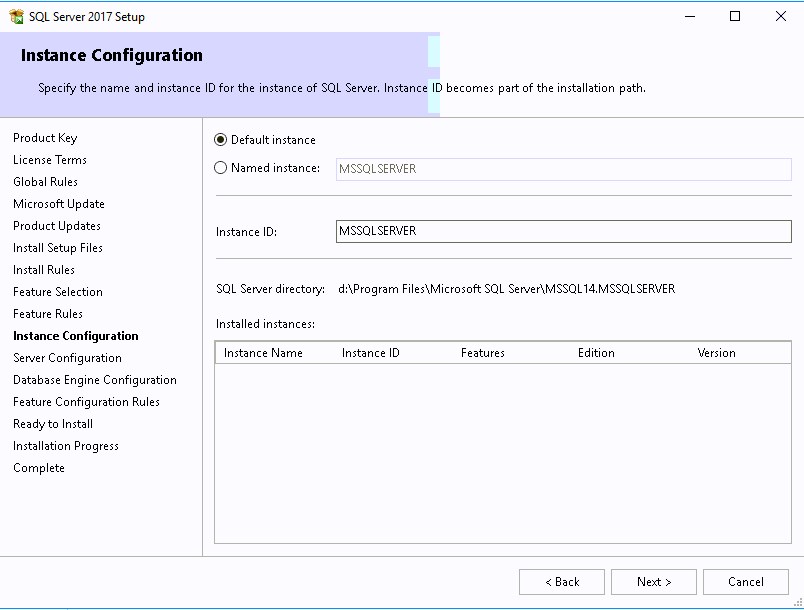
- Select Default instance and ensure that your instance is created on the SQL Volume.
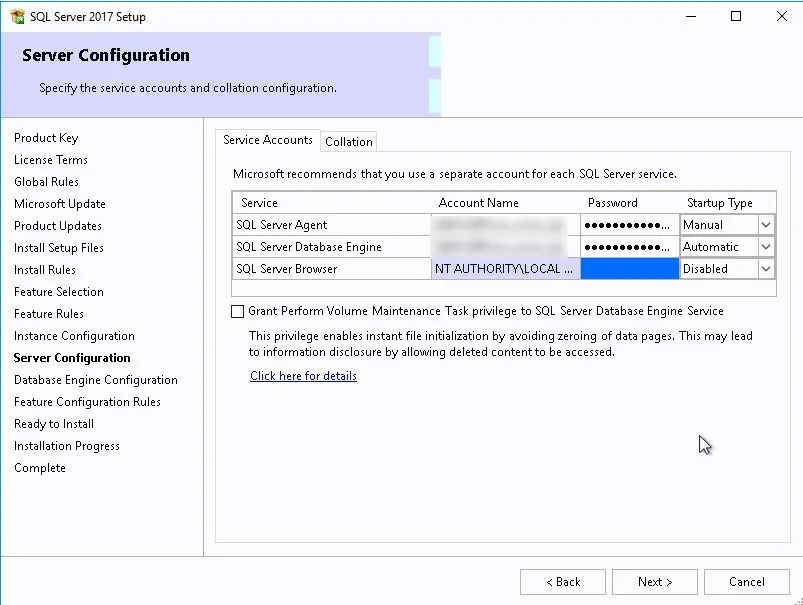
- Set all services to run as the SQL domain account that you created previously and set the services startup type to Automatic.
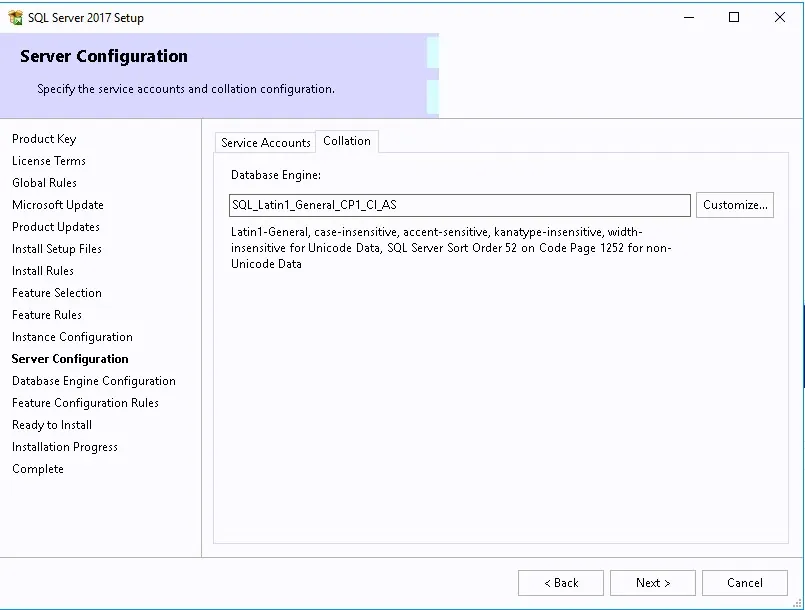
- On the Collation tab, set the Database Engine to use SQL_Latin1_General_CP1_CI_AS.
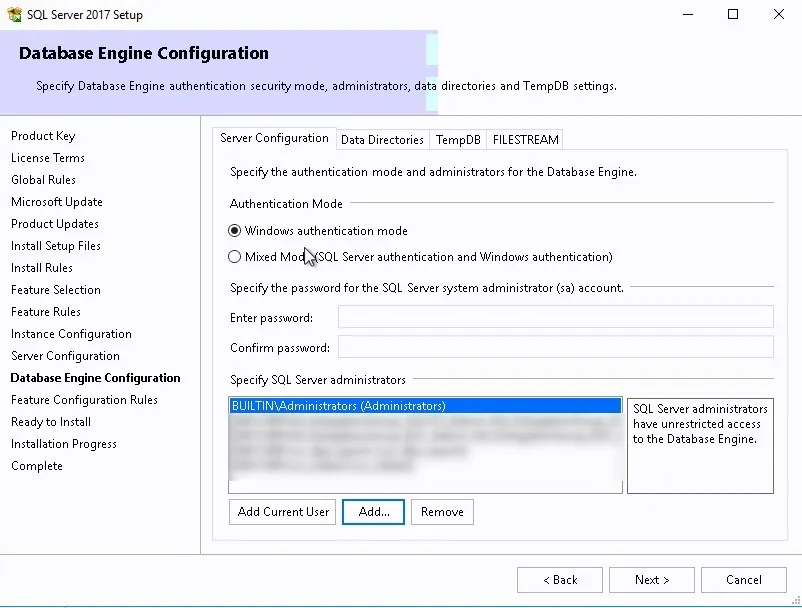
- In the Server Configuration tab, set the authentication mode to Windows Authentication and in the SQL Server Administrators, add your SCCM Admins group.
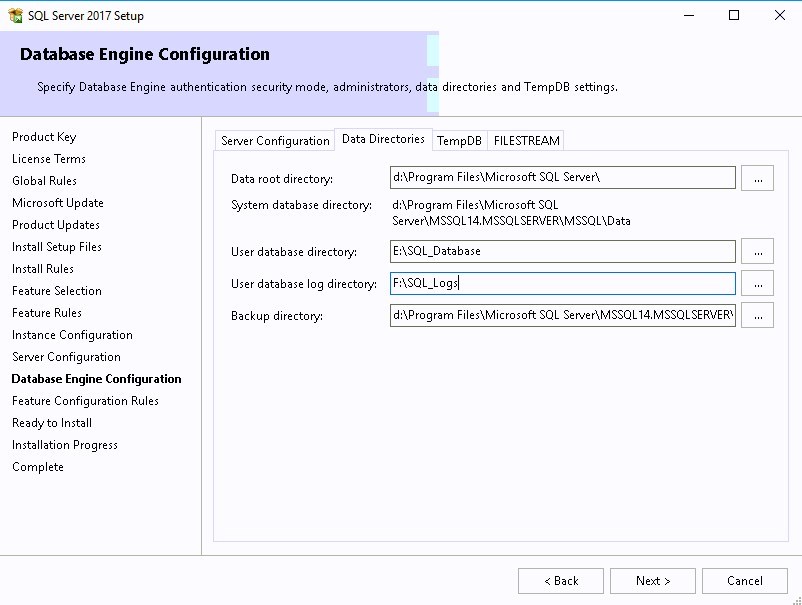
- In the Data Directories tab, set your drive letters correctly for your SQL databases, Logs, TempDB, and backup.
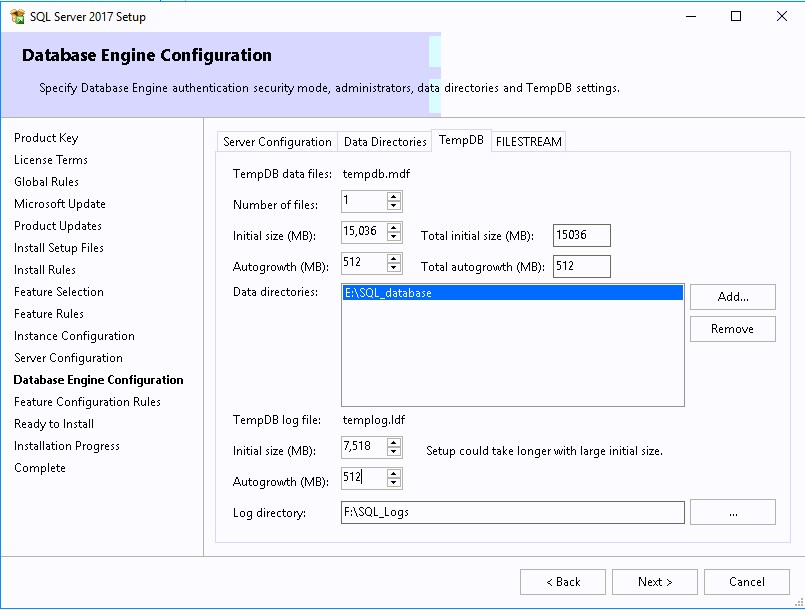
- On the TempDB, complete the various information based on the Database sizing section below.
- Click Install
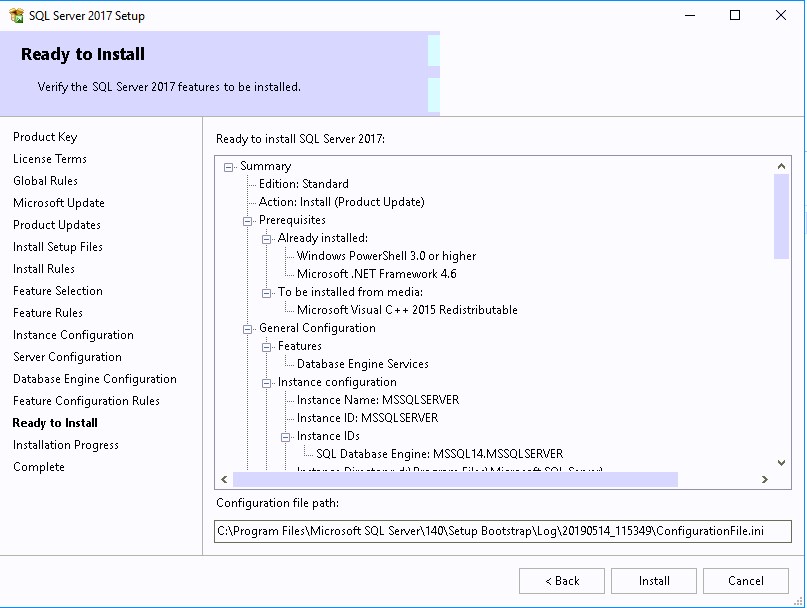
- Complete the installation by clicking Close
Install SQL Server Management Studio (SSMS)
- Back in the SQL Server Installation Center, click on Install SQL Server Management tools.
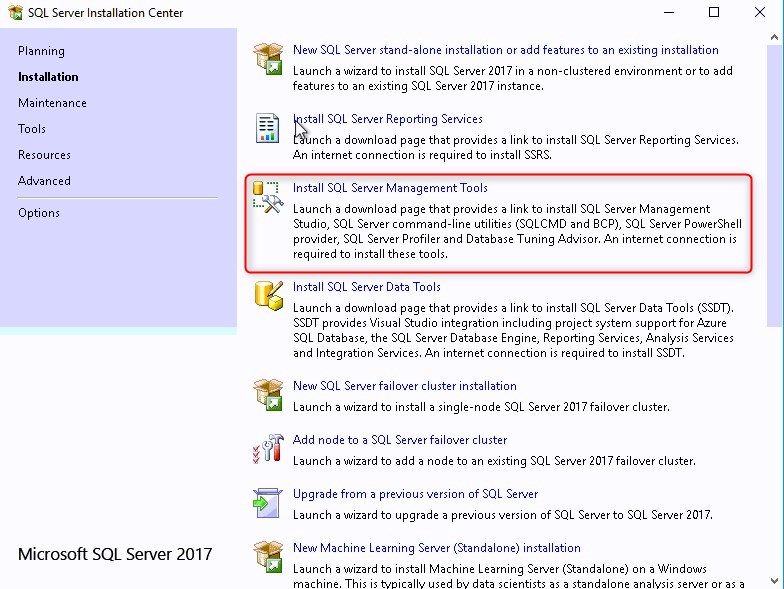
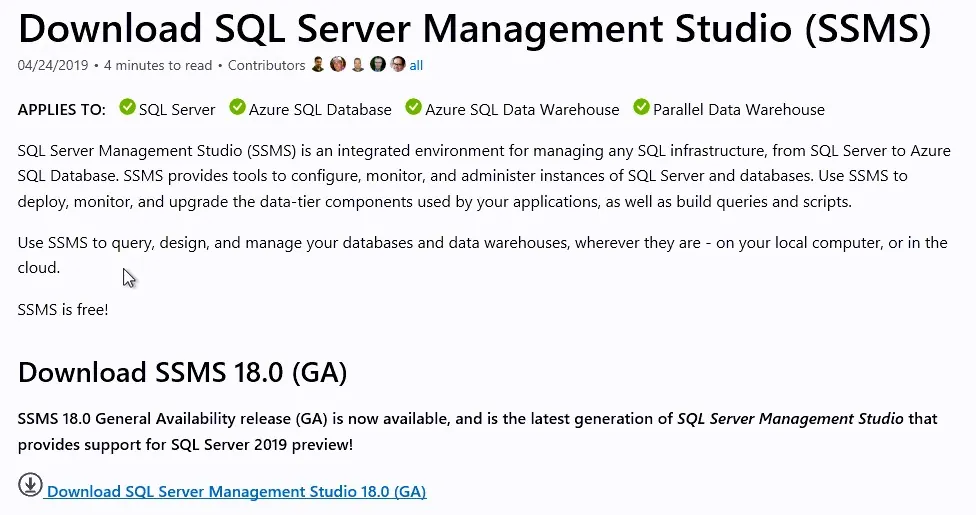
- This will redirect you to the Download page of SQL Server Management Studio. SSMS is no longer tied to the SQL server installation in terms of version.
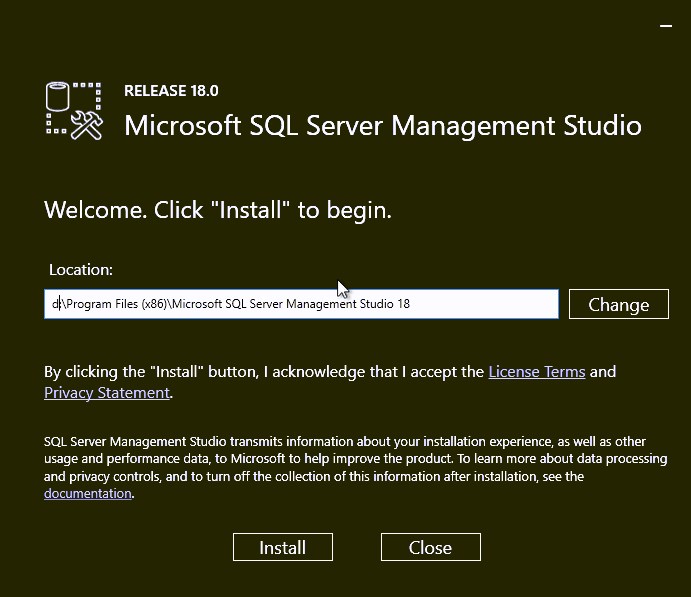
- Adjust the installation path if needed, then click Install
Install SQL Reporting Services
- Click on Install SQL Reporting Services in the SQL Server Installation Center.
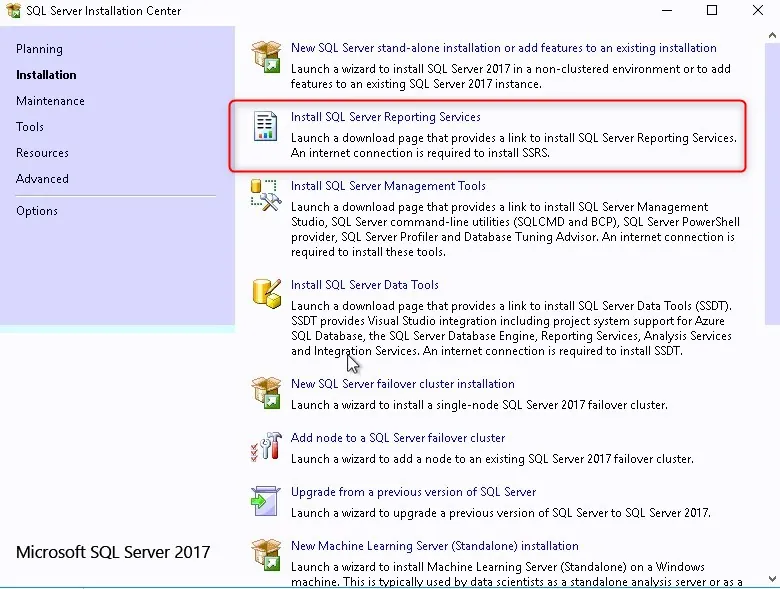
- The SQL reporting services are just like the Management console; they require a separate download.
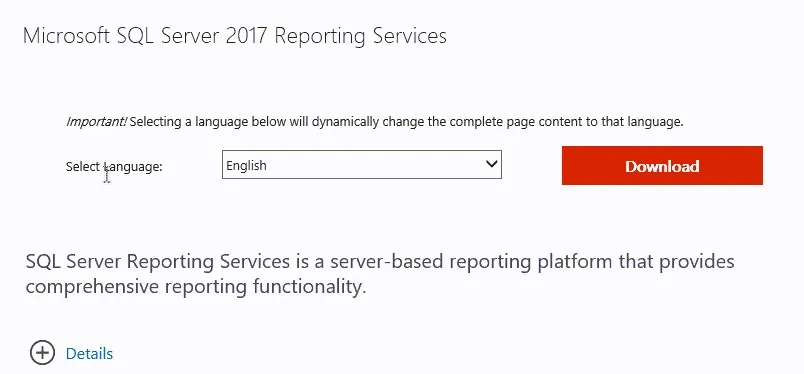
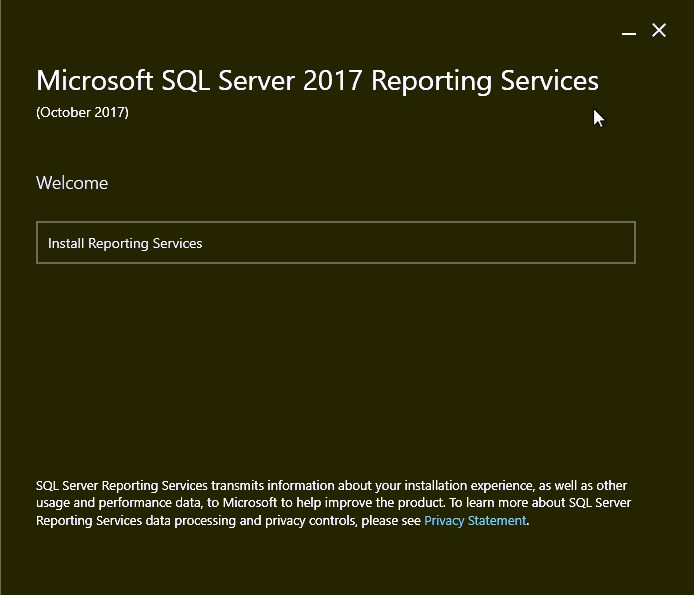
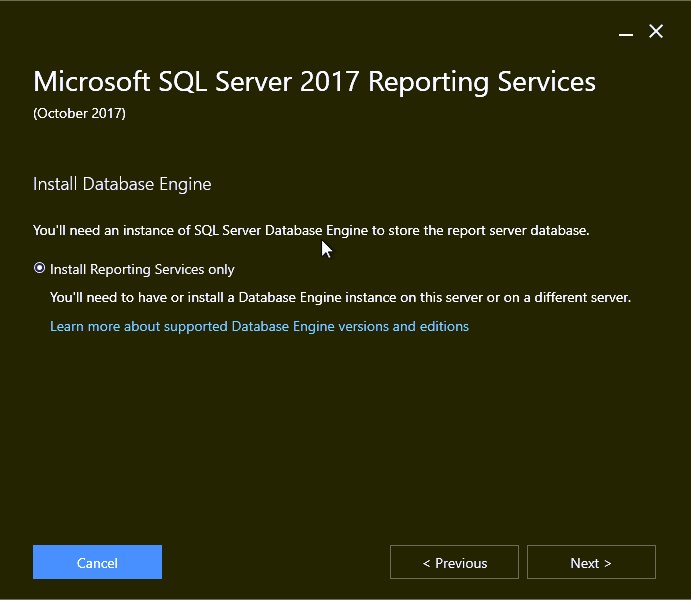
- Click on Install Reporting Services
- Provide the Product key
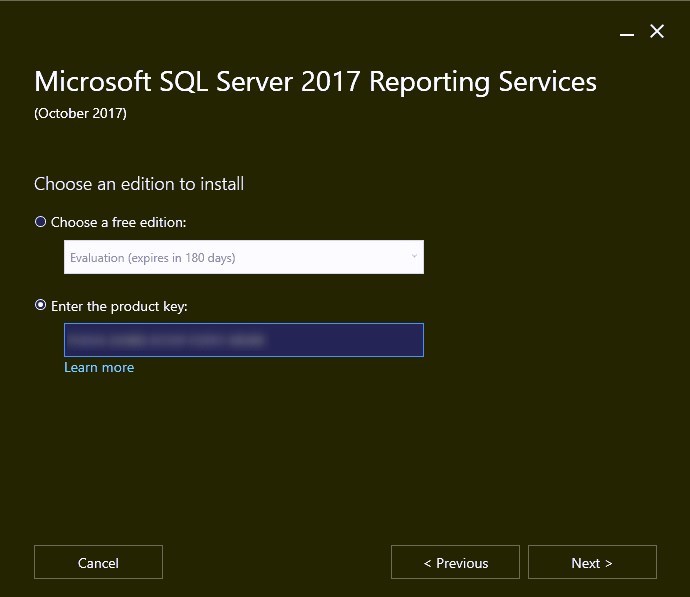
- Accept License terms
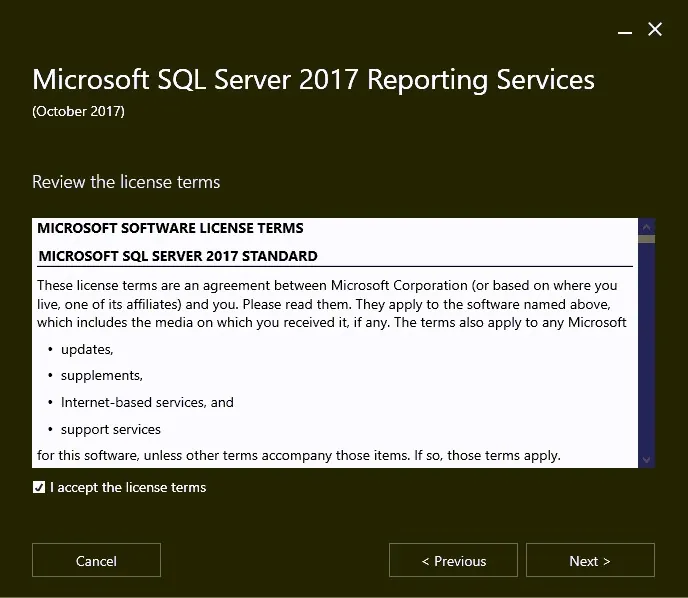
- Click Next
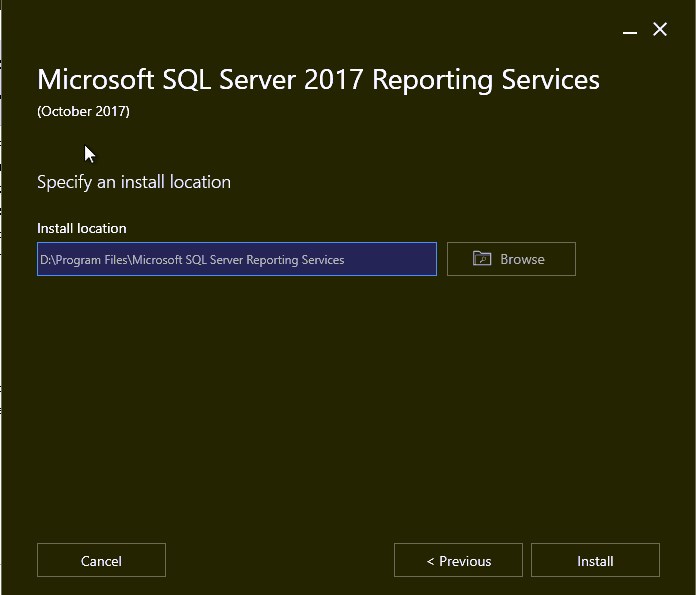
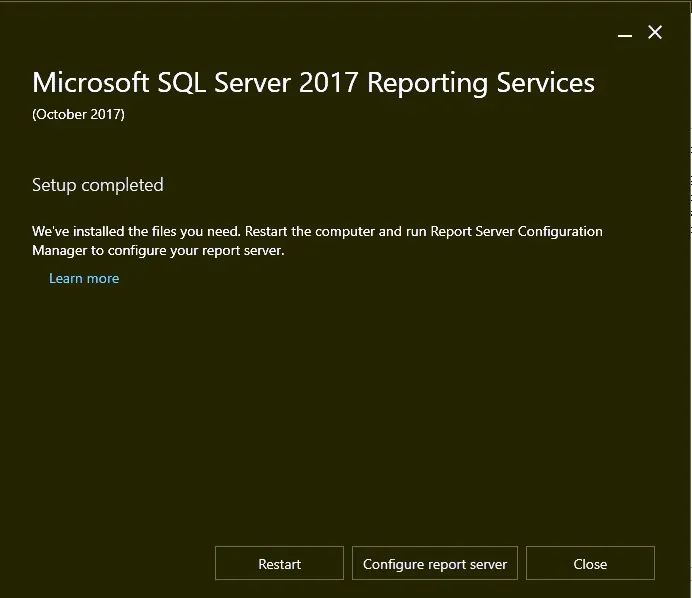
- Select the installation path, click Install
- A reboot is required after the installation
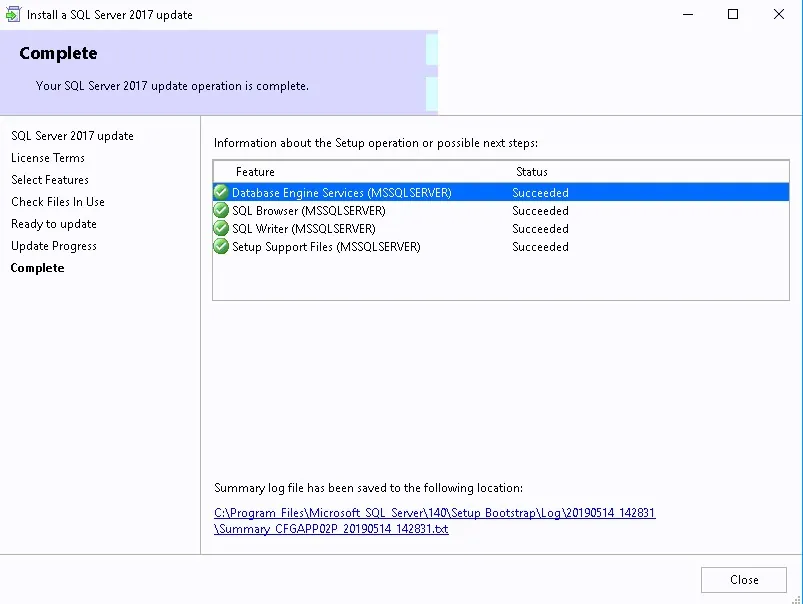
Apply SQL 2017 CU2 or higher
At the time of this writing, the latest SQL Cumulative Update is CU17. We will install it to have an updated SQL Installation. Note that CU2 is the minimum requirement.
- Download and execute SQL 2017 CU17
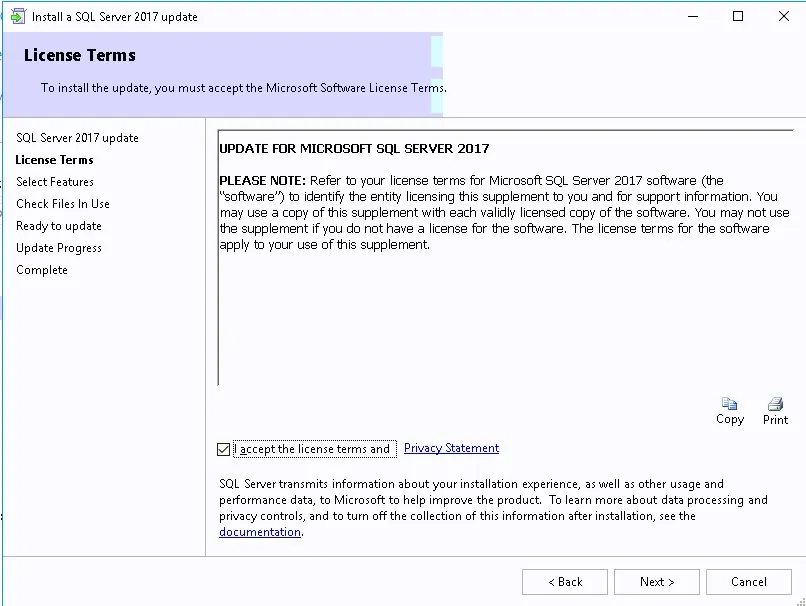
- Accept the license terms and click Next
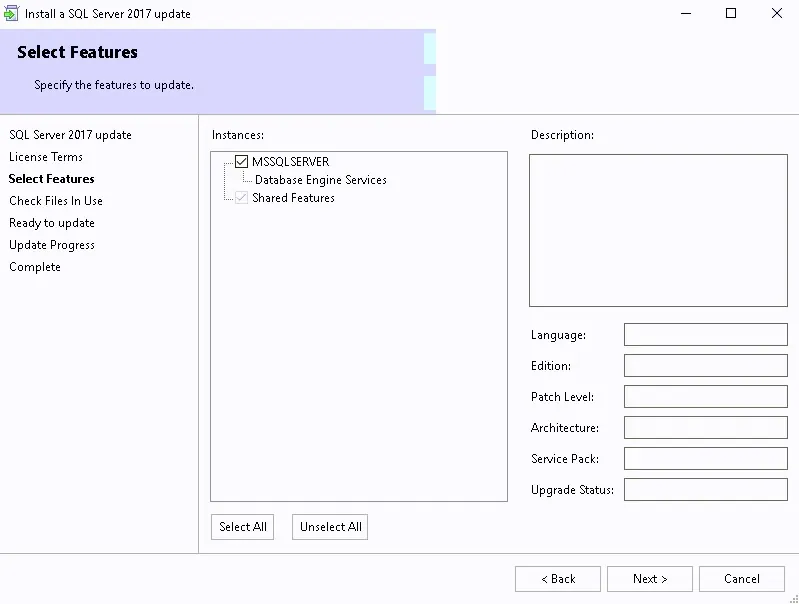
- Leave default values, click Next
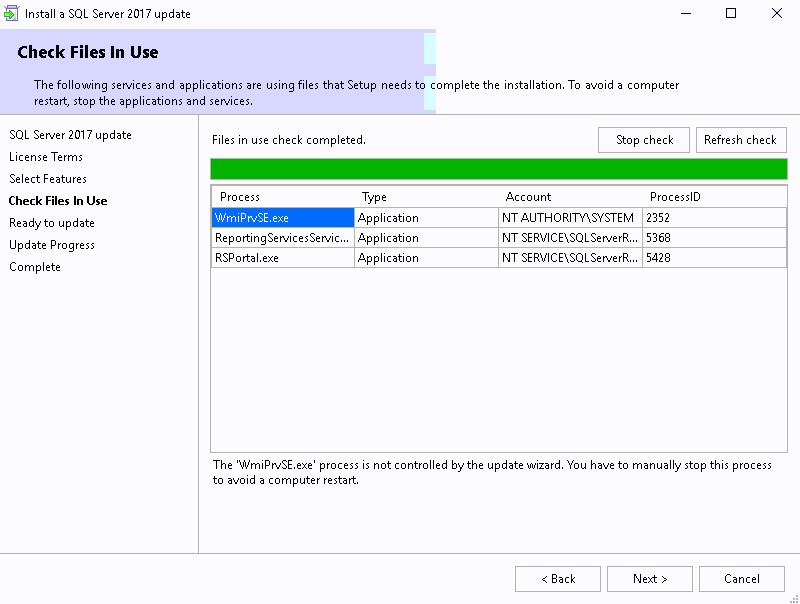
- Wait for Check File in Use and click Next
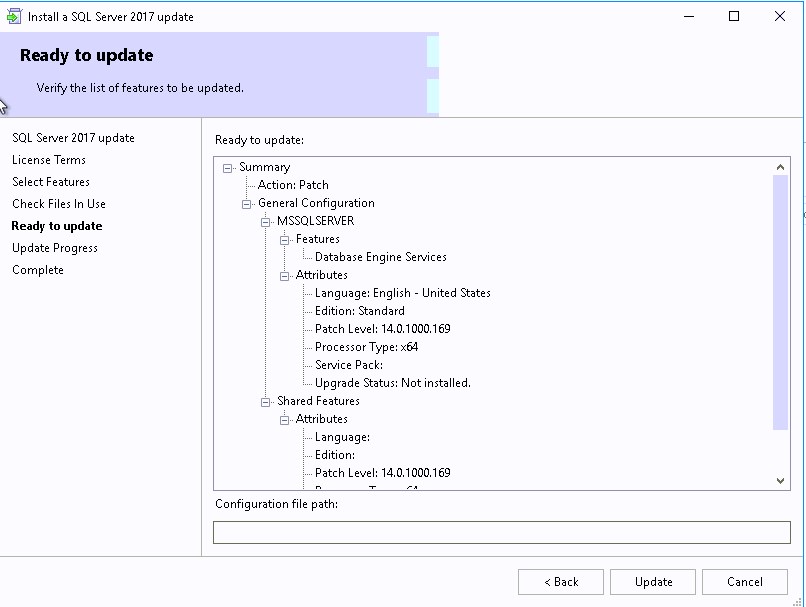
- Click Update
- Update completed; might require a reboot.
SPN Creation
When you configure SQL Server to use the local system account, a Service Principal Name (SPN) for the account is automatically created in Active Directory Domain Services. When the local system account is unused, you must manually register the SPN for the SQL Server service account.
Since we are using a domain account, we must run the Setspn tool on a computer that resides in the domain of the SQL Server. It must use Domain Administrator credentials to run.
Run both commands to create the SPN, Change the server name and account name in each commands.
- setspn -A MSSQLSvc/yourservername:1433 yourdomain\SQLSA
- setspn -A MSSQLSvc/yourserver.fullfqdn.com:1433 yourdomain\SQLSA
To verify the domain user SPN is correctly registered, use the Setspn -L command
- setspn –L yourdomain\SQLSA
SQL Configuration
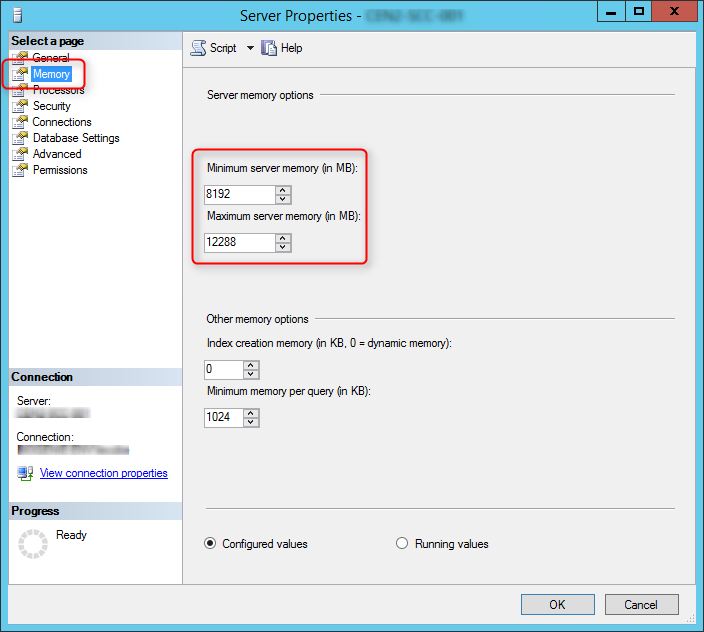
SCCM setup verifies that SQL Server reserves a minimum of 8 GB of memory for the primary site. To avoid the warning, we’ll set the SQL Server memory limits to 8GB-12GB (80% of available RAM).
- Open SQL Server Management Studio
- Right-click the top SQL Server instance node.
- Select Properties
- In the Memory tab, define a minimum and maximum server memory limit. Configure and limit the memory to 80% of your server’s available RAM. In my case I have 16GB available.
- Minimum 8192
- Maximum 12288
Database Sizing
We always recommend creating the SCCM database before the setup. This is not mandatory, SCCM will create the database for you during setup but will not create it the optimal way. We strongly recommend watching The Top Ten Lessons Learned in Managing SQL session from MMS2013 which covers it all.
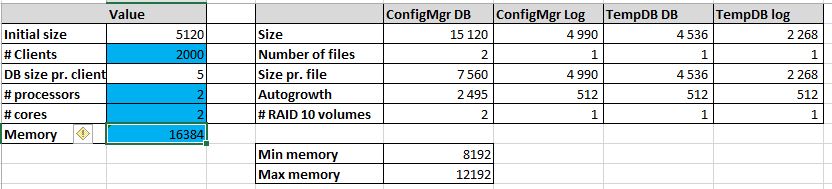
We follow the guide made by MVP, Kent Agerlund to estimate my DB sizing need. Visit his blog post and download the provided Excel file. Input your values in the blue cells and keep it for the next part. We’ll create the DB using those values using a script in the next section.
For this blog post, We’ve created a Database for 2000 clients, 2 processors, 2 cores and 16GB RAM.
Create Database
To create the database, you can use Kent’s script and input your values (as returned previously in the Excel file) OR use the following one which is really simple:
The Name value will become your Site Code during the SCCM installation. Be sure to select a unique Site Code.
- **Replace all XXX value with your 3 character Site Code**
- **Change the values of the Filename, Size, MaxSize and FileGrowth. Change the location of the file to your SQL and Logs drives**
USE master
CREATE DATABASE CM_XXX
ON
( NAME = CM_XXX_1,FILENAME = ‘E:\SCCMDB\CM_XXX_1.mdf’,SIZE = 7560, MAXSIZE = Unlimited, FILEGROWTH = 2495)
LOG ON
( NAME = XXX_log, FILENAME = ‘G:\SCCMLogs\CM_XXX.ldf’, SIZE = 4990, MAXSIZE = 4990, FILEGROWTH = 512)
ALTER DATABASE CM_XXX
ADD FILE ( NAME = CM_XXX_2, FILENAME = ‘E:\SCCMDB\CM_XXX_2.mdf’, SIZE = 7560, MAXSIZE = Unlimited, FILEGROWTH = 2495)
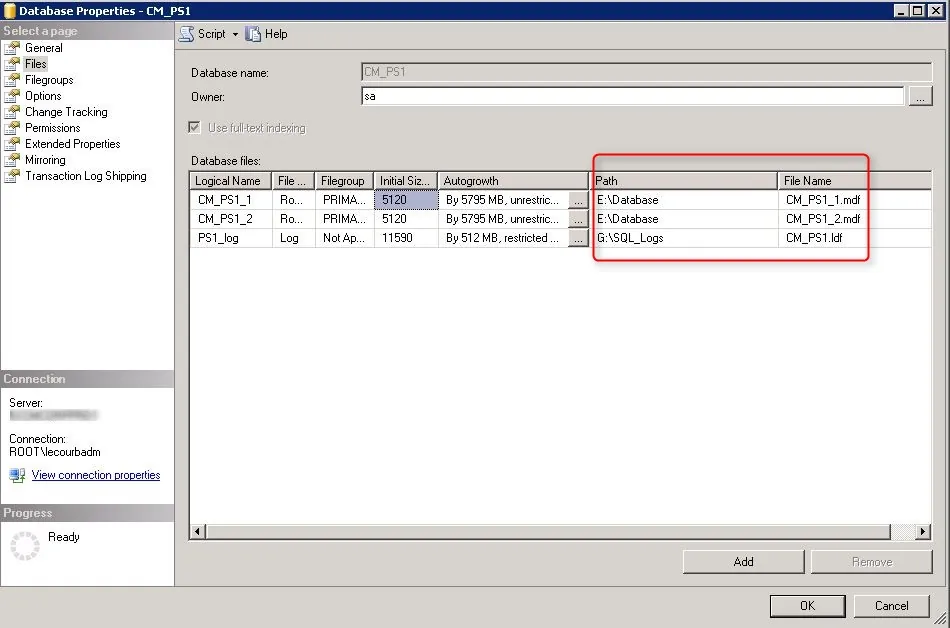
Review the Site Database properties
- Open SQL Management Studio
- Right-click your DB, Select Properties
- In the General tab, verify that the SQL collation name is SQL_Latin1_General_CP1_CI_AS
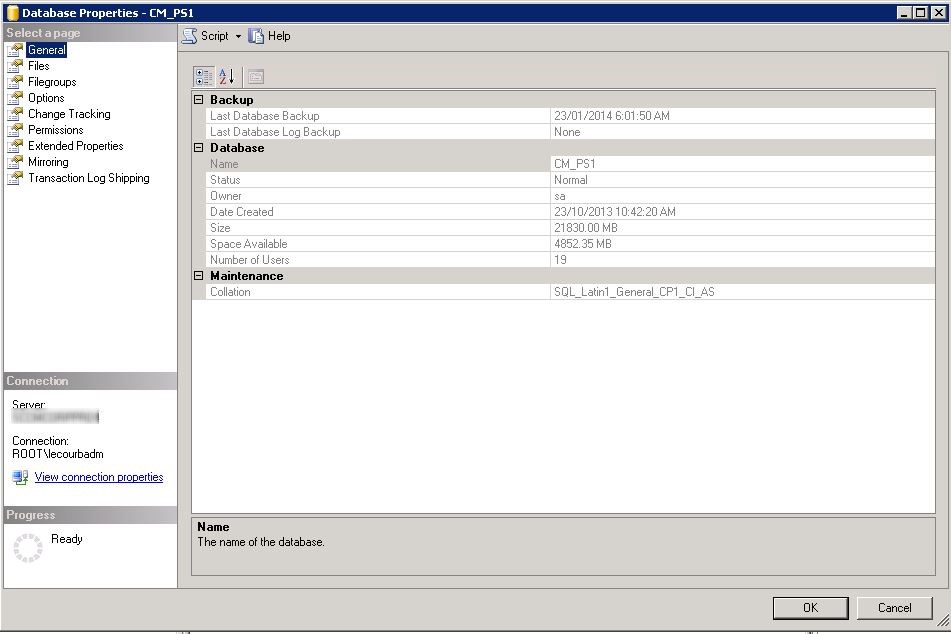
- In the File tab, verify that your database files has been created with the script value
- Verify that the file is located on your SQL Volume
- Change the database owner to SA. By default the owner will be the account that created the database.
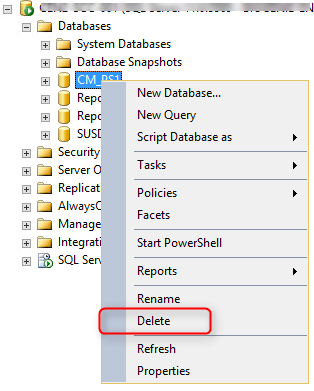
If you find out that you made an error, you can safely delete the Database using SQL Management Studio and rerun the script.
- Open SQL Management Studio
- Right-click your DB, Select Delete
TempDB sizing
This section is left here for reference to help configure the TempDB in the installation wizard.
Run the following scripts to size the TempDB. (using the value returned by the Excel file)
**Change the values of Filename, Size, MaxSize and FileGrowth. Change the location of the file to your TempDB drives**
use master
go
alter database tempdb modify file (name=’tempdev’, filename=’F:\SCCMTempDB\tempDB.MDF’, SIZE= 4536, MAXSIZE = Unlimited, FILEGROWTH = 512)
go
alter database tempdb modify file (name=’templog’, filename=’G:\SCCMLogs\templog.LDF’, SIZE= 2268, MAXSIZE = Unlimited, FILEGROWTH = 512)
go
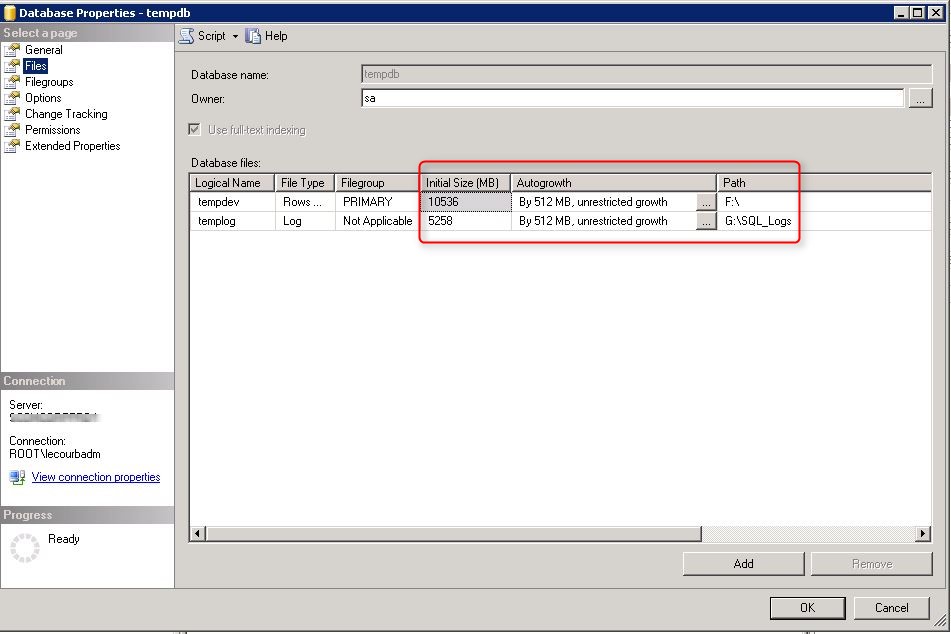
Review the TempDB properties
- Open SQL Management Studio
- In System Database, Right click the TempDB, select Properties
- In the File Tab, verify that your database files has been created with the script value
- Ensure that the TempDB and log are on the TempDB volume
SQL Communications
To ensure proper SQL communication, verify that settings are set accordingly in SQL Network configuration
- Open SQL Server Configuration Manager
- Go to SQL Server Network Configuration / Protocols for MSSQLServer
- On the Right Pane, right-click TCP/IP and select Properties
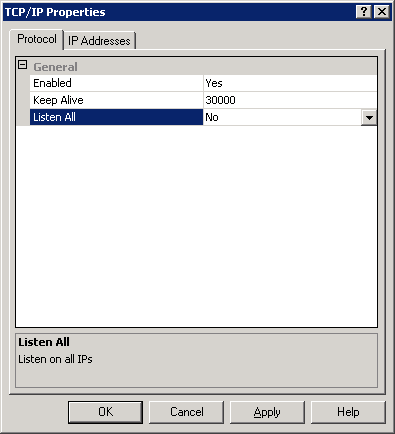
- In the Protocol tab
- Enable: YES
- Listen All : NO
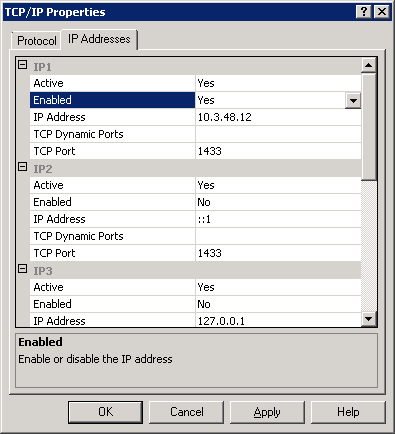
- In the IP Addresses tab
- IP1 (which should have your Server IP)
- Active : YES
- Enabled : YES
- All other IP and IP ALL
- Active : YES
- Enabled : NO
- TCP Dynamic Ports : Blank value
- TCP Port : 1433
Once the modification has been made, restart the SQL Server Service.
The server is now ready for the SCCM installation. We will now run the prerequisite checker and proceed to the complete SCCM Installation. We will install a stand-alone Primary site.
SCCM Installation Guide Part 3 – SCCM Current Branch Installation
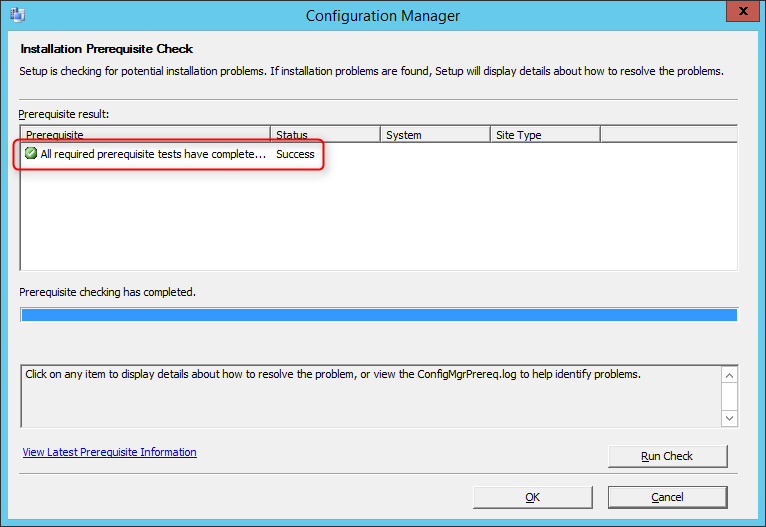
Prerequisite Check
Before launching the SCCM installation, we recommend launching the Prereqchk tool in order to verify if all components are configured correctly. The SCCM installation wizard will also run this check but if you’re missing a requirement, you’ll have to go through the whole installation wizard again after fixing it. We prefer to use the standalone tool before running the setup.
To start the prerequisite check tool :
- Open an Administrator command prompt
- Browse to .\SMSSETUP\BIN\X64
- Run the following command: Prereqchk.exe /AdminUI
If you follow the prerequisite guide correctly you’ll have this result :
Refer to this Technet article to see the list of all checks done by the tool.
If you have any warning or error refer to this Technet article in order to resolve it, or go through part 1 and part 2 of this guide.
New SCCM Installation
We are finally ready to launch the setup. First, reboot the server. This will make sure that the machine is not in a Reboot pending state.
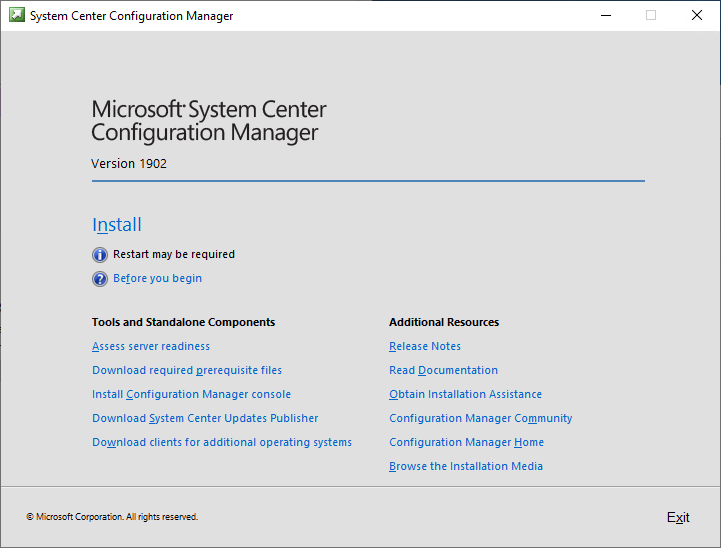
- Mount and open the SCCM ISO that was previously downloaded from the Microsoft Volume Licensing Site
- Run Splash.hta
- Select Install
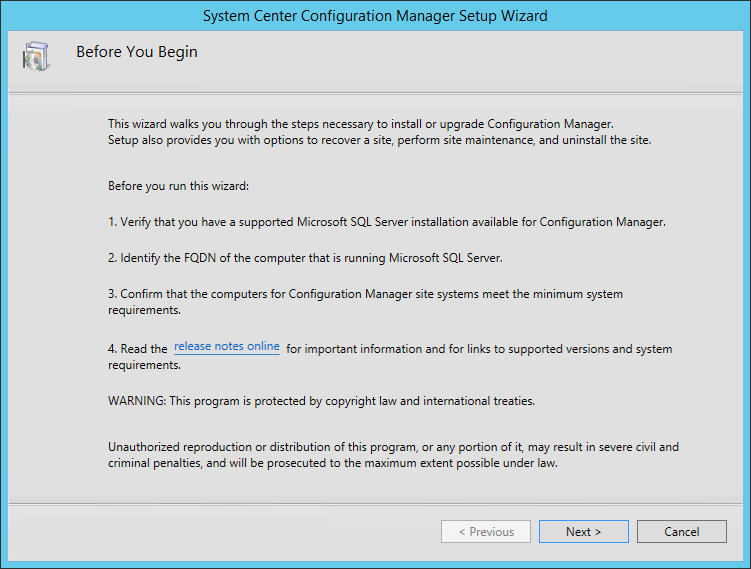
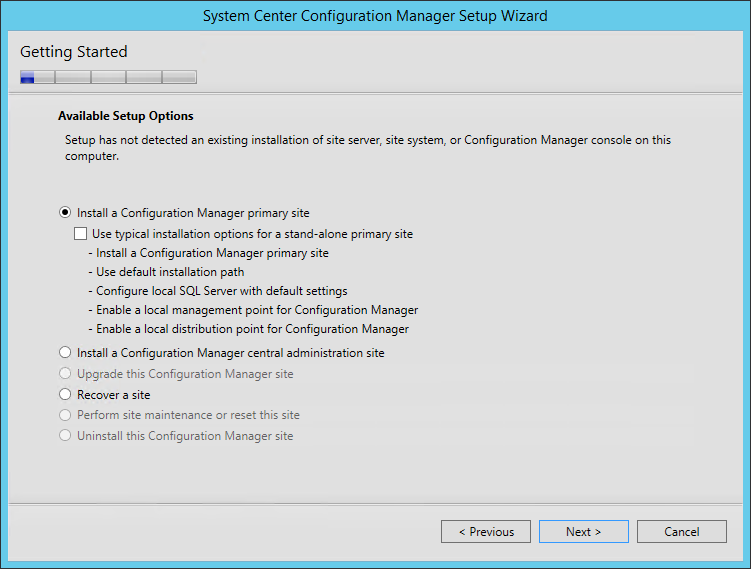
- On the first screen, Click Next
- On the Getting Started screen, Select Install a Configuration Manager Primary Site and click Next
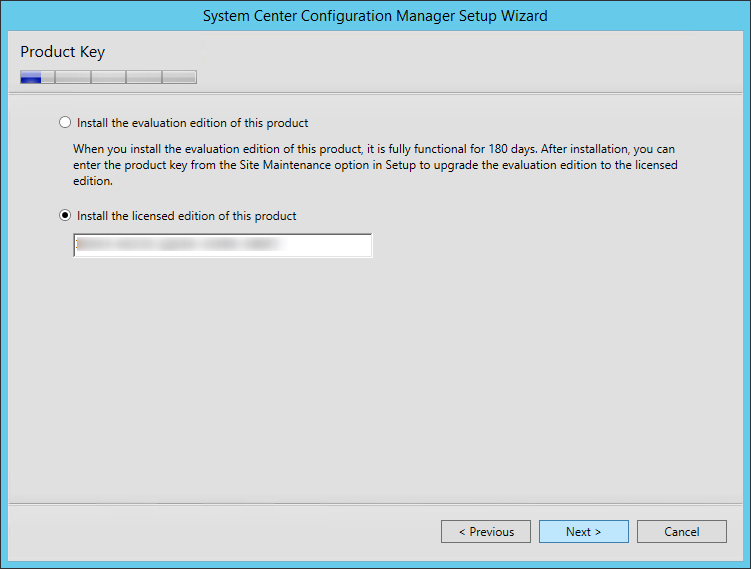
- On the Product Key screen, enter it and click Next
- On the Microsoft Software License Terms screen, accept the terms and click Next
- On the Product License Terms screen, accept the License Terms and click Next

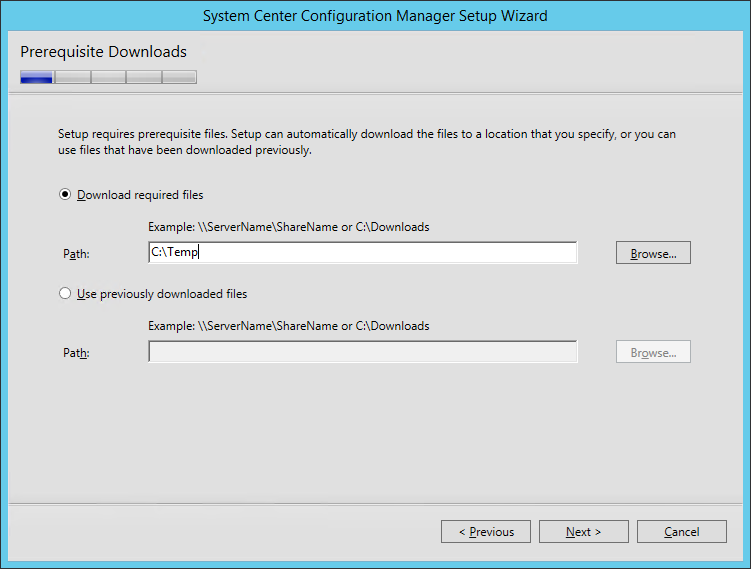
- On the Prerequisite Downloads screen, specify a location to download the prerequisite file. This folder can be deleted after setup
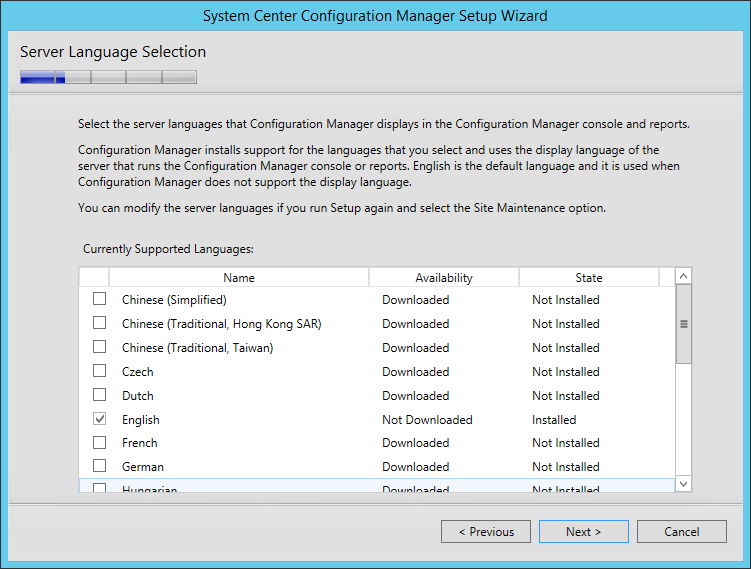
- On the Server Language Selection screen, select the language you want to display in the SCCM Console and Reports. You can modify language later by running setup again and select the Site Maintenance option
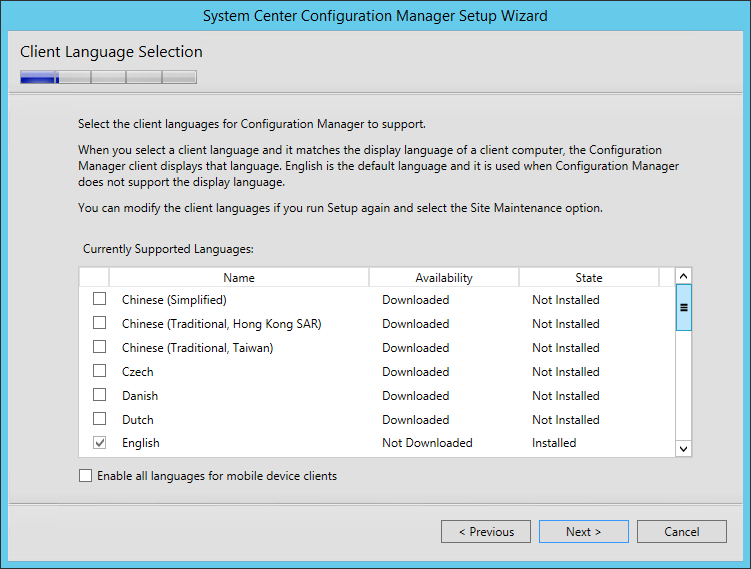
- On the Client Language Selection screen, select the Client language to support. You can modify languages later by running setup again and select the Site Maintenance option
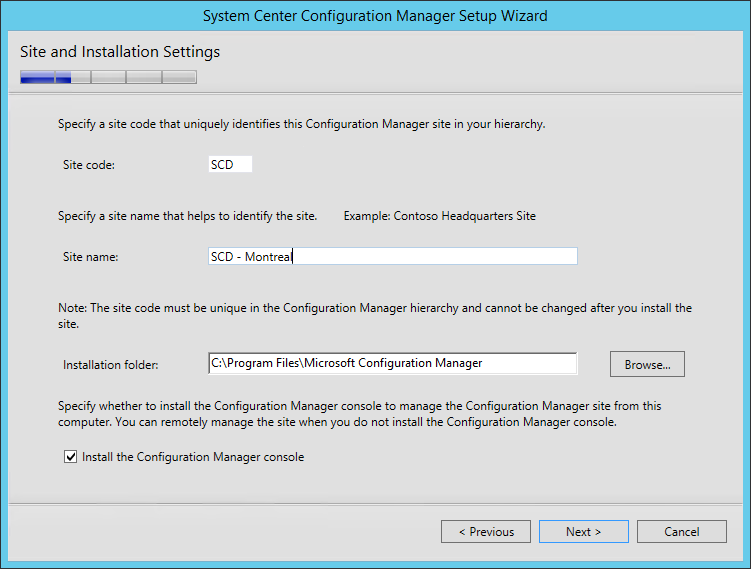
- On the Site and Installation Settings screen, enter your Site Code. Use the same Site Code as you specified when creating your Database
- Note : Site codes cannot be used more than one time in a Configuration Manager hierarchy for a central administration site or primary sites. If you reuse a site code, you run the risk of having object ID conflicts in your Configuration Manager hierarchy. This applies also if you’re doing a migration from an earlier version.
- Enter your Site Name. This name will appear in the console so choose accordingly
- On the Primary Site Installation screen, select Install the primary site as a stand-alone site. If you have a Central Administration site, this is where you would join the Primary Site to the existing hierarchy
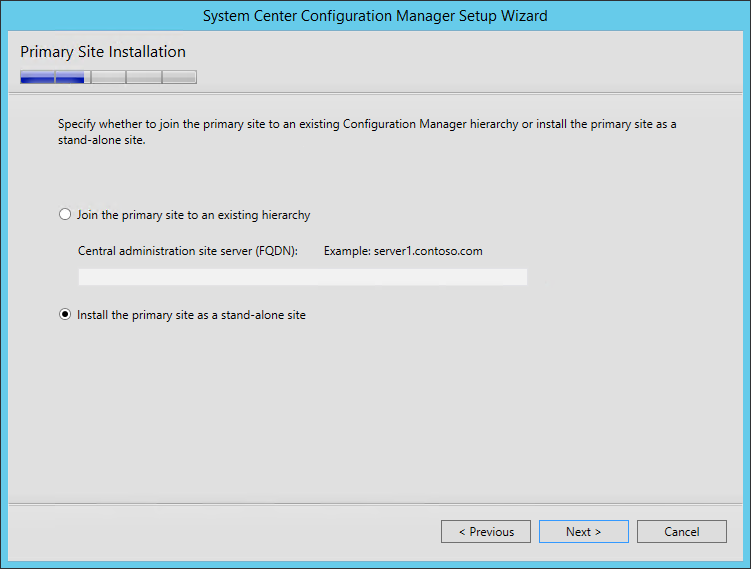
- On the warning, click Yes

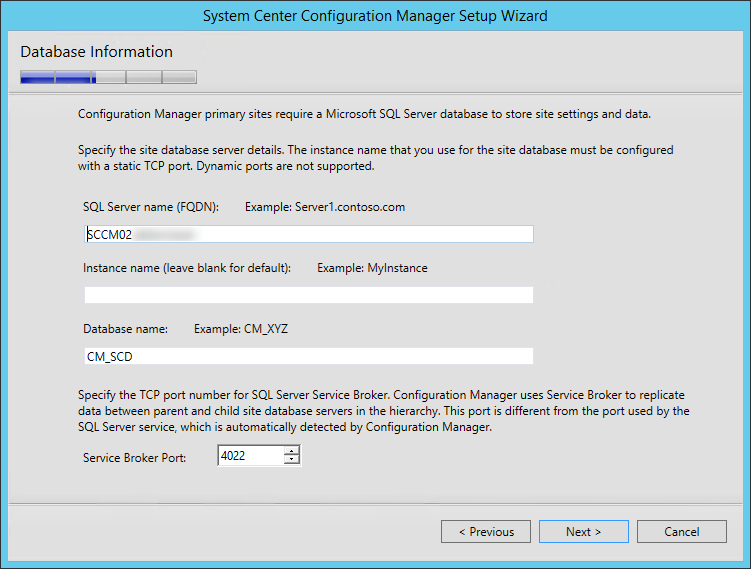
- On the Database Information screen
- Enter your SQL Server Name. In our case the SQL server is the same box as SCCM
- Leave the Instance Blank
- Enter your Database name. Once again, this must match the previously created Database in part 2
- Leave the Service Broker Port to 4022
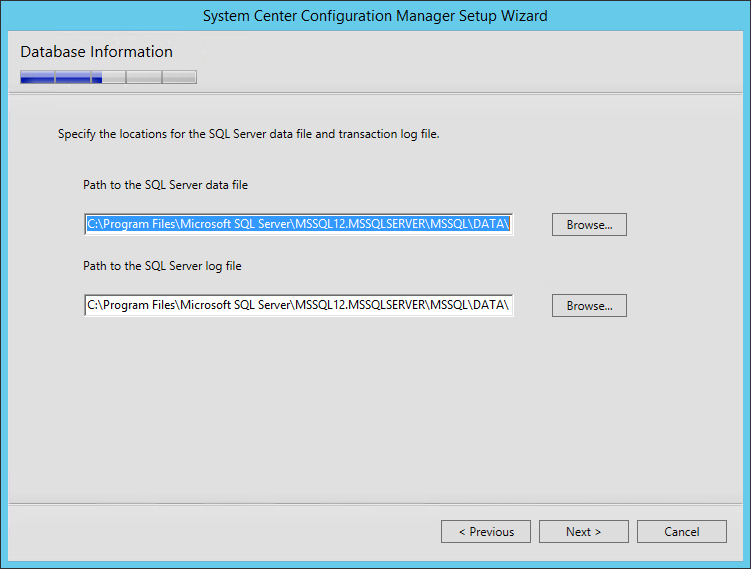
- On the Database Information screen :
- Enter the path to the SQL Server data file. Locate this on the SQL Volume
- Enter the path to the SQL Server log file. Locate this on the SQL Logs Volume.
- I like to use the same directory where I created my database and logs (E:\SCCMDB, G:\SCCMLogs)
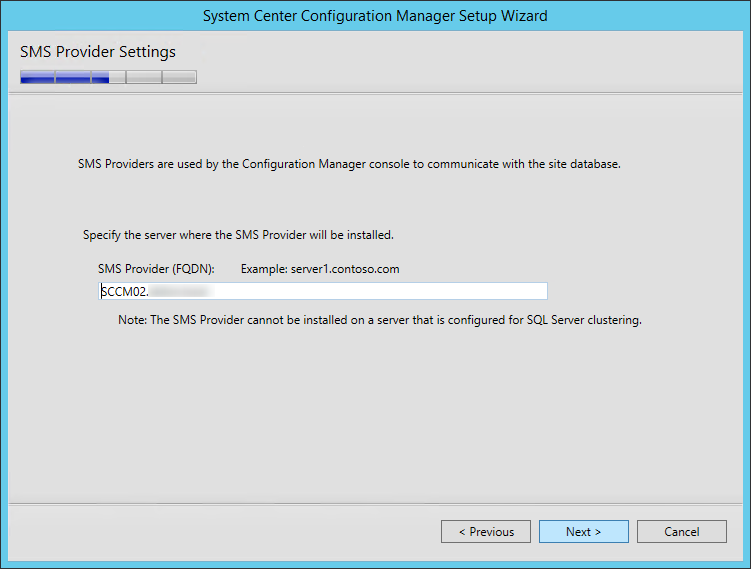
- On the SMS Provider Settings screen, leave the SMS Provider to the default value which is the local server. Refer to the following Technet article to read about the SMS Provider.
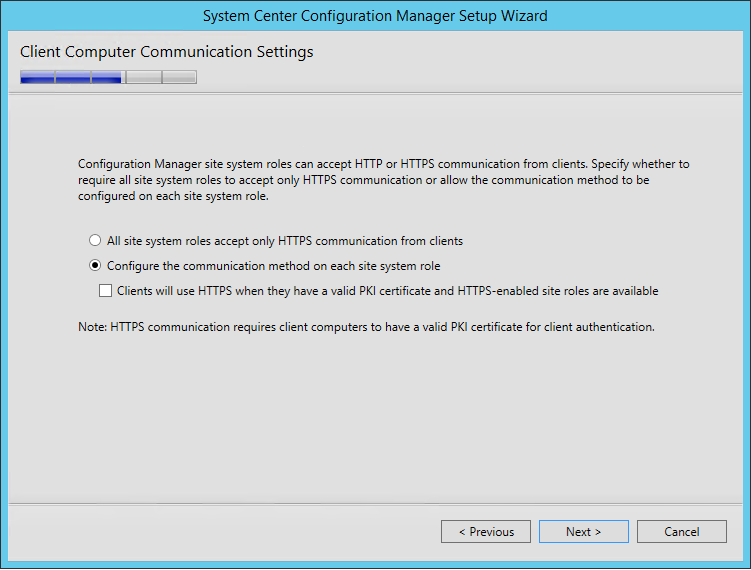
- On the Client Computer Communication Settings screen, select Configure the communication method on each site system role. This is where you select to have HTTPS or not on your initial Management Point and Distribution Point. This setting can be changed later
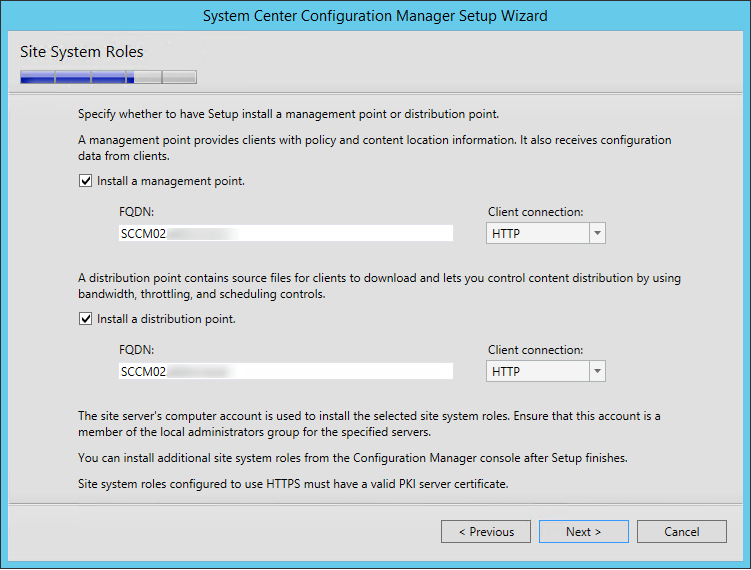
- On the Site System Roles screen :
- Check Install a Management Point
- Check Install a Distribution Point
- We will install both MP and DP on the same box so leave the FQDN as is
- The Client connection drop-down is unavailable due to our previous selection
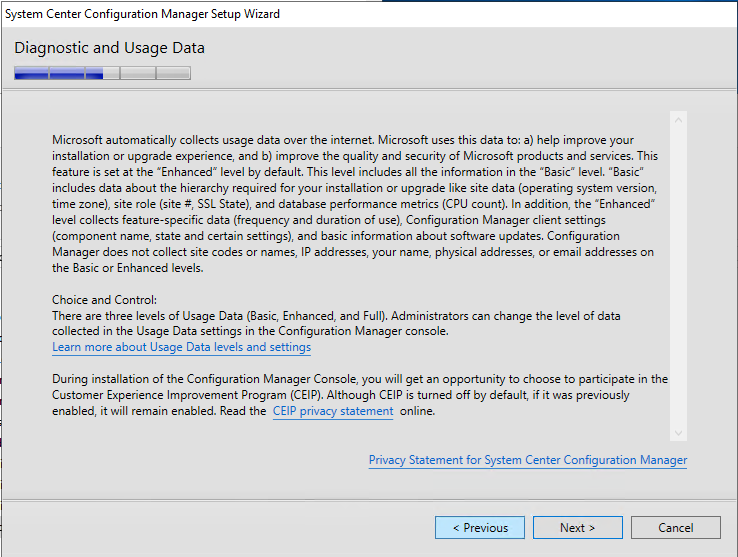
- On the Usage Data screen, click Next. This new screen basically tells that you accept that you will send some telemetry data to Microsoft
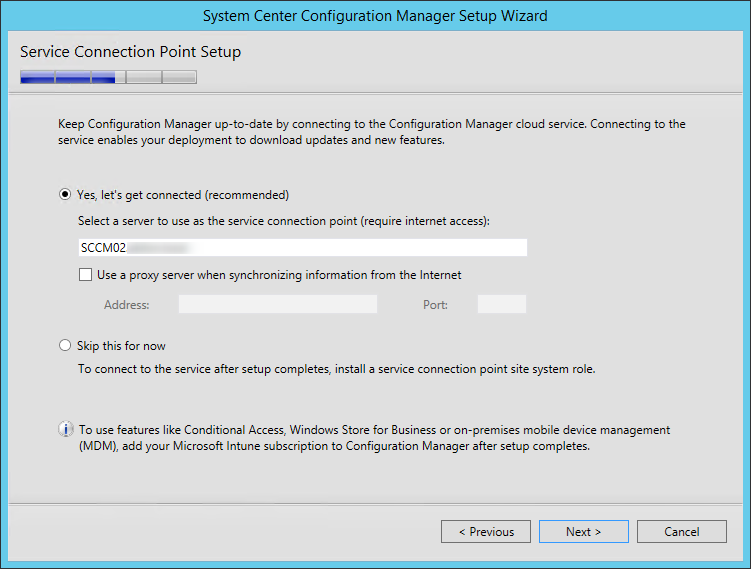
- On the Service Connection Point screen, click Next. This new role enables your deployment to download updates and new features
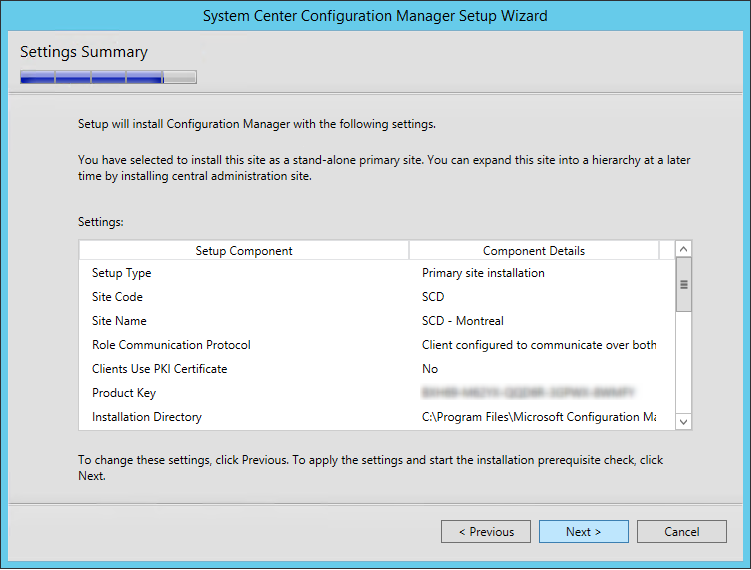
- On the Settings Summary Screen, review your options and click Next
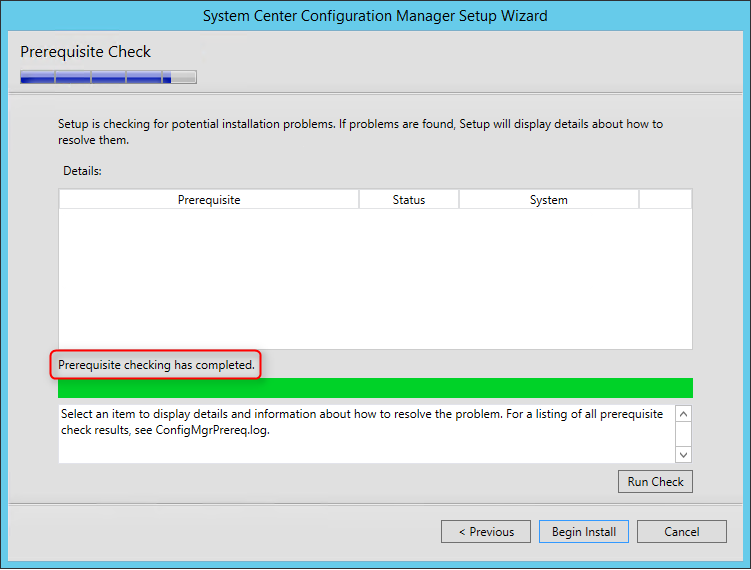
- On the Prerequisite Check screen, you should have no error since you’ve run it before setup, click Next
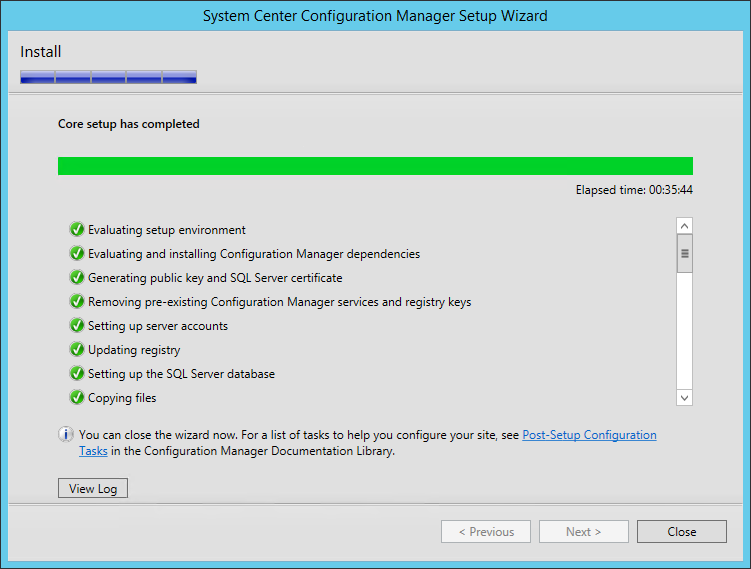
- The installation is in progress. You can count between 15 and 30 minutes depending of your server specifications
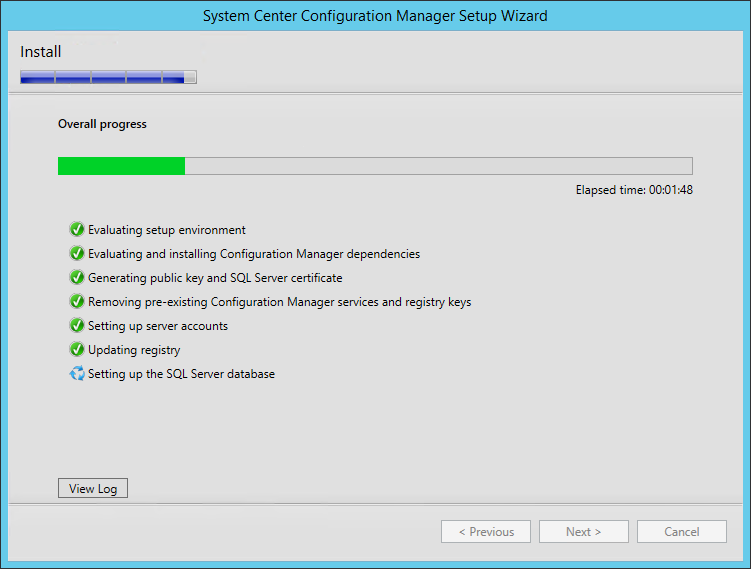
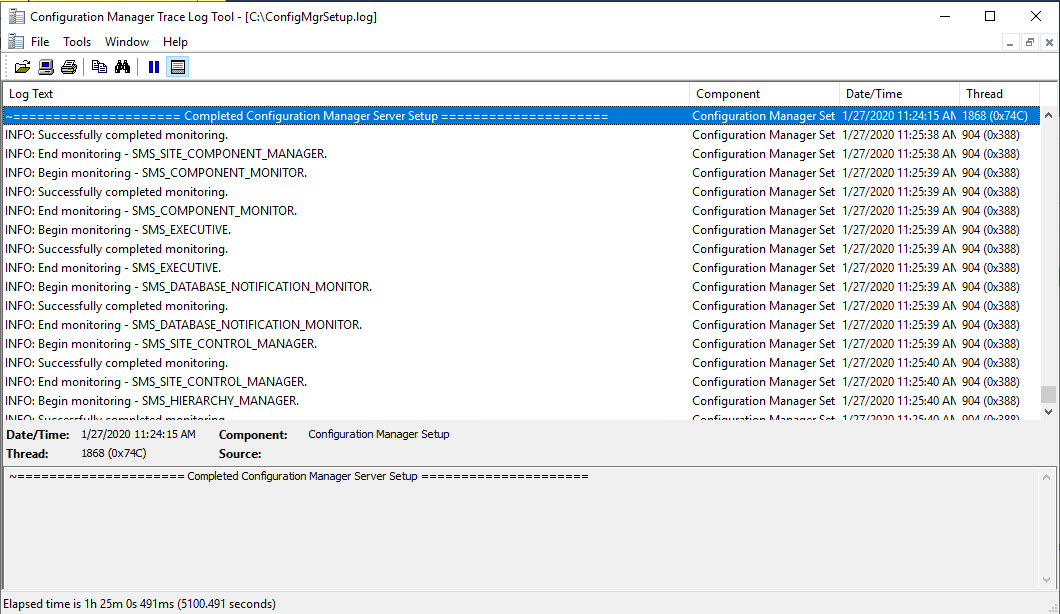
- You can follow the progress by clicking the View Log button or open the ConfigMgrSetup.log file on the C: drive
- Wait for Core setup has completed and close the wizard
We’re still not done yet ! Before opening the SCCM console, we suggest to install the following tools :
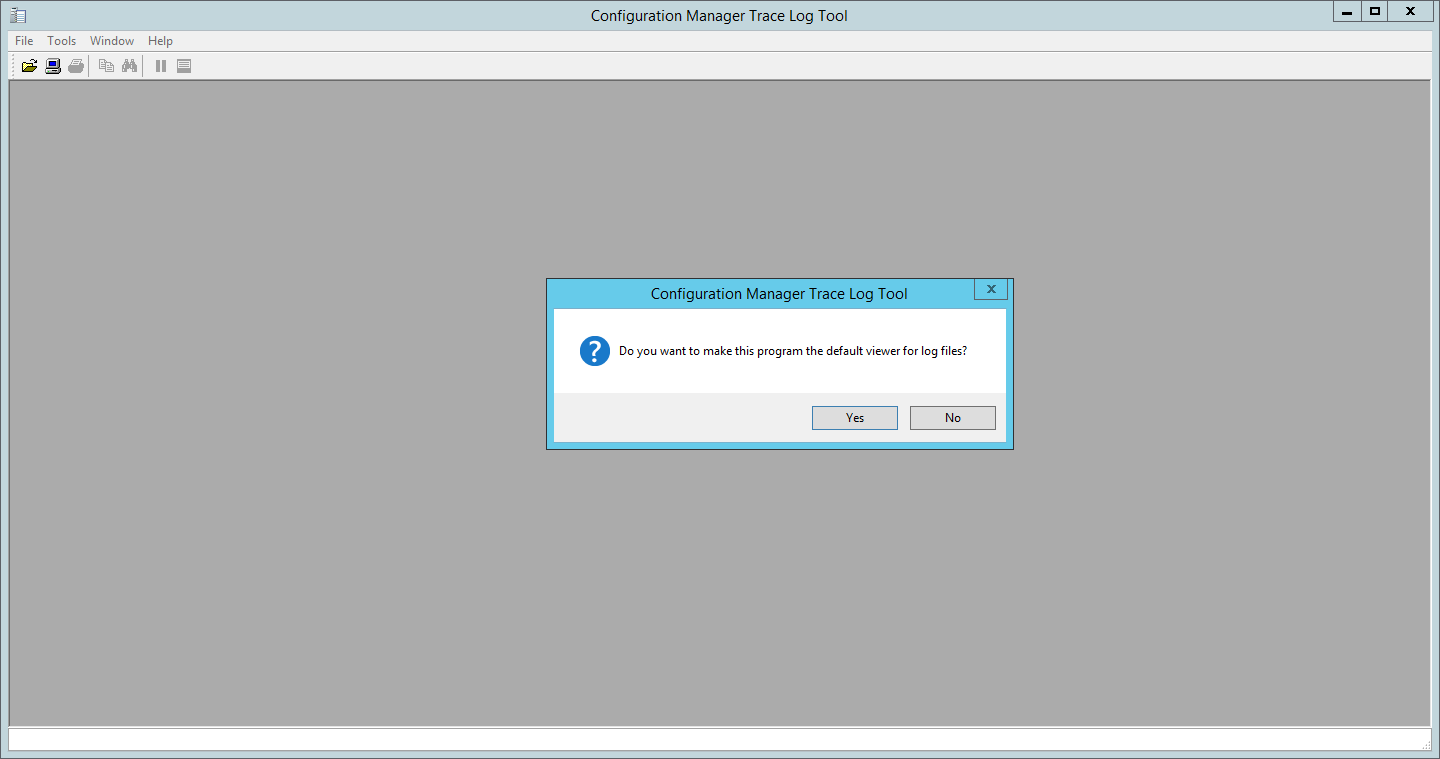
CMTrace
CMTrace will become your best friend when reading log files.
- Open the SCCM ISO
- Browse to .SMSSETUPTOOLS
- Click on CMTrace.exe
- Click on YES to set is as your default log viewer
Additionally, you can read our blog post :
System Center 2012 R2 Configuration Manager Toolkit
The SCCM 2012 R2 toolkit is compatible with SCCM Current Branch and contains fifteen downloadable tools to help you manage and troubleshoot SCCM.
Download and install it here
SCCM Current Branch Installation Extra Information
You can also refer to our blog post about Useful Resources to help you begin with SCCM. If you need further help to understand and configure various SCCM site components, consult our Step-by-Step SCCM 1511 Installation Guide blog series. It covers all you need to know.
SCCM Current Branch Upgrade
The first task we like to do after a new SCCM installation is to upgrade it to the latest version. If you’re not familiar with this, Microsoft releases a Baseline version that you can install from scratch and then, you must upgrade to the latest version. We have a bunch of guides for each version. For reference, at the time of this blog post, the baseline is 1902 and the latest version is SCCM 1910. Just follow our latest upgrade guide and you’ll be at the latest available version.
SCCM Current Branch Configuration
The next sections will be for configuring the various site server roles in your newly installed SCCM server. Role installation order is not important, you can install roles independently of others.
SCCM Installation Guide Part 4 – Application Catalog web service point
This part will describe how to install the SCCM Application Catalog web service point and the Application Catalog website point. Both of these roles are now unsupported. We do not recommend adding this role to your hierarchy.
The application catalogue’s Silverlight user experience isn’t supported as of current branch version 1806. Starting in version 1906, updated clients automatically use the management point for user-available application deployments. You also can’t install new application catalogue roles. Support ends for the application catalogue roles with version 1910.
Role Description
The Application Catalog web service point provides software information to the Application Catalog website from the Software Library.
The Application Catalog website point provides users with a list of available software.
This is not a mandatory site system but you need both the Application Catalog website point and the Application Catalog web service point if you want to provide your user with a Self-Service application catalog (web portal).
Site System Role Placement in Hierarchy
The Application Catalog web service point and the Application Catalog website point are hierarchy-wide options. It’s supported to install those roles on a stand-alone Primary site or child Primary site. It’s not supported to install it on a Central Administration site or Seconday site. The Application Catalog web service point must reside in the same forest as the site database.
If you’re having less than 10,000 users in your company, co-locating the Application Catalog web service and Application Catalog website roles on the same server should be ok. The web service role connects directly to the SCCM SQL database so ensure that the network connectivity between the SQL server and the Application Catalog web service servers is robust.
If you have more geographically distributed users, consider deploying additional application catalogs to keep responsiveness high and user satisfaction up. Use client settings to configure collections of computers to use different Application Catalog servers.
Read more on how to provide a great application catalog experience to your user in this Technet blog article.
If your client needs HTTPS connections, you must first deploy a web server certificate to the site system. If you need to allow Internet clients to access the application catalog, you also need to deploy a web server certificate to the Management Point configured to support Internet clients. When supporting Internet clients, Microsoft recommends that you install the Application Catalog website point in a perimeter network, and the Application Catalog web service point on the intranet. For more information about certificates see the following Technet article.
Prerequisites
Using Windows Server 2012, the following features must be installed before the role installation:
Application Catalog web service point
Features:
- .NET Framework 3.5 SP1 and 4.0
WCF activation:
- HTTP Activation
- Non-HTTP Activation
IIS Configuration:
- ASP.NET (and automatically selected options)
- IIS 6 Management Compatibility
- IIS 6 Metabase Compatibility
Application Catalog website point
Features:
- .NET Framework 4.0
IIS Configuration:
- Common HTTP Features
- Static Content
- Default Document
- Application Development
- ASP.NET (and automatically selected options)
- Security
- Windows Authentication
- IIS 6 Management Compatibility
- IIS 6 Metabase Compatibility
SCCM Application Catalog Installation
For this post, we will be installing both roles on our stand-alone Primary site using HTTP connections. If you split the roles between different machines, do the installation section twice, once for the first site system (selecting Application Catalog web service point during role selection)and a second time on the other site system (selecting Application Catalog website point during role selection).
- Open the SCCM console
- Navigate to Administration / Site Configuration / Servers and Site System Roles
- Right-click your Site System and click Add Site System Roles
- On the General tab, click Next

- On the Proxy tab, click Next

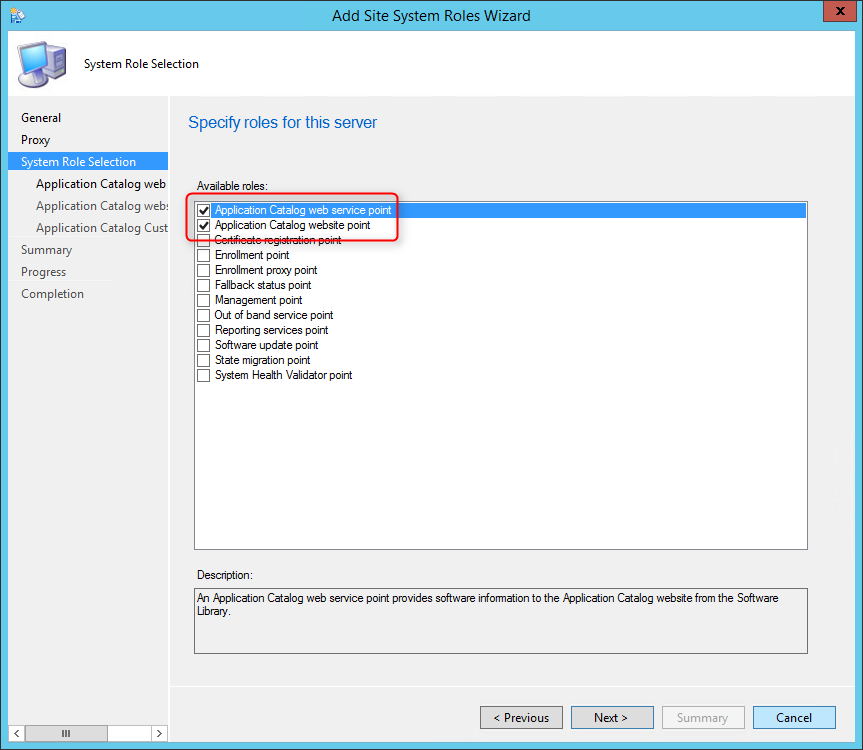
- On the Site System Role tab, select Application Catalog web service point and Application Catalog website point, click Next
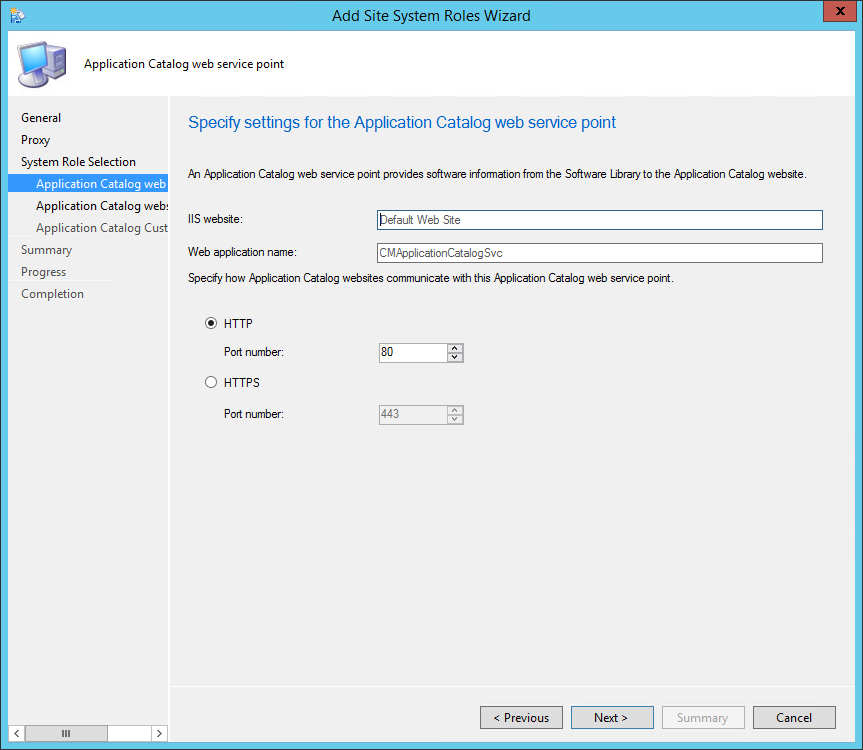
- On the Application Catalog Web Service Point
- In the IIS Website and Web application name fields,leave both to the default values
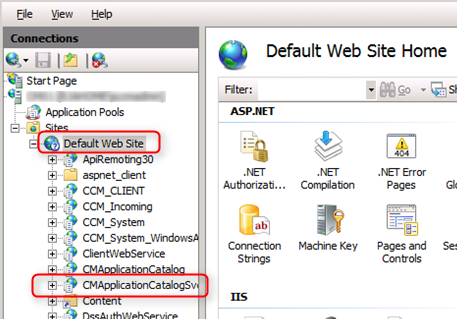
- This is just the name that you’ll see in IIS after the installation (see next screenshot). It has nothing to do with your user facing portal
- Enter the port and protocol that you want to use
- On the Application Catalog WebSite Point
- In the IIS Website keep the default value
- In Web application name, enter the name that you want for your Application Catalog. This is the URL that will be published to your users
- Enter the port and protocol that you want to use

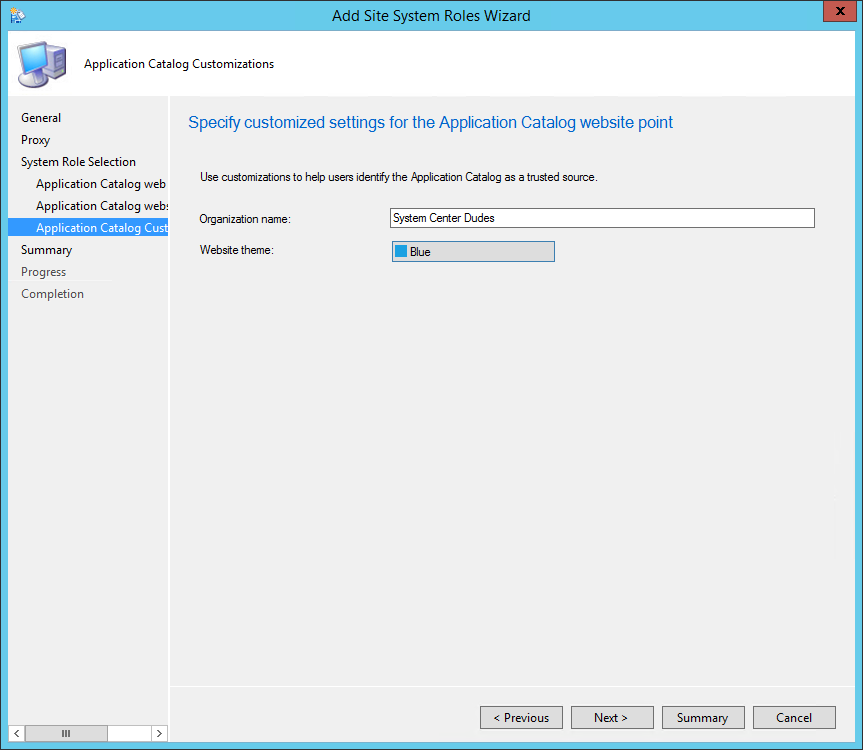
- On the Application Catalog Customizations tab, enter your organization name and the desired colour for your website
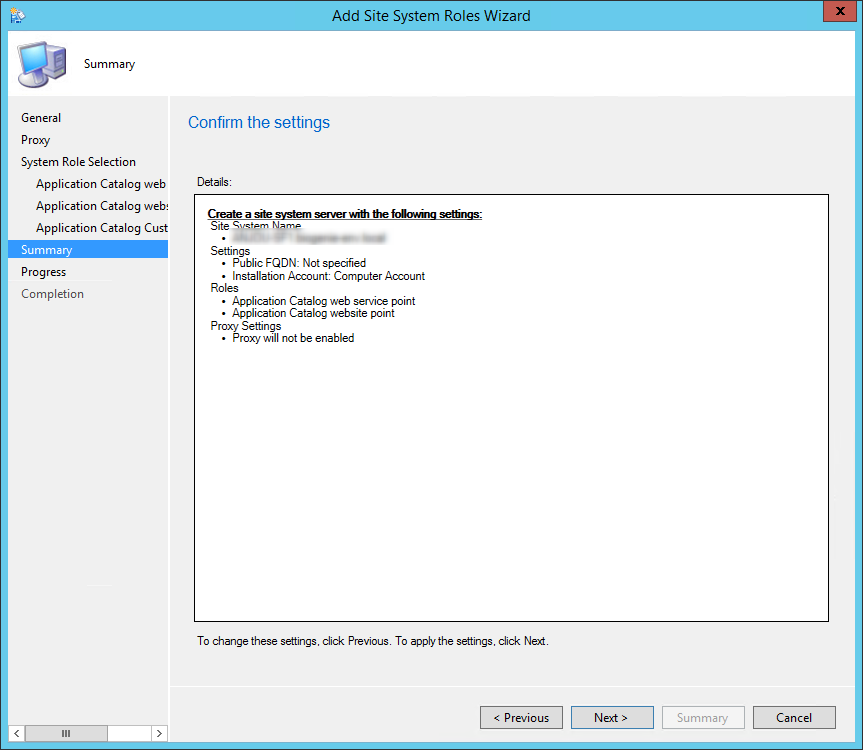
- On the Summary tab, review your settings, click Next and complete the wizard
Verification and Logs files
You can verify the role installation in the following logs:
- ConfigMgrInstallationPath\Logs\SMSAWEBSVCSetup.log and awebsvcMSI.log – Records details of about the Application Catalog Web Service Point installation
- ConfigMgrInstallationPath\Logs\SMSPORTALWEBSetup.log and portlwebMSI.log – Records details of about the Application Catalog Website Point installation
In the console :
- Open the SCCM Console
- Go to Monitoring / System Status / Component Status
- See status of the components SMS_PORTALWEB_CONTROL_MANAGER and SMS_AWEBSVC_CONTROL_MANAGER

Web browser
Verify that the Application Catalog is accessible :
- Open a web browser
- Browse to http://YourServerName/CMApplicationCatalog
- Replace YourServerName with the server name on which you installed the Application Catalog Website Point
- Replace CMApplicationCatalog with the name that you give your Application Catalog. (Default is CMApplicationCatalog)
If everything is set up correctly, you’ll see a web page like this :

URL Redirection
The default URL to access the Application Catalog is not really intuitive for your users.
It’s possible to create a DNS entry to redirect it to something easier (ex: http://ApplicationCatalog) The following Coretech article describe how to achieve that.
Client Settings
Ensure that the client settings for your clients are set correctly to access the Application Catalog
- Open the SCCM Console
- Go to Administration / Client Settings
- Right-click your client settings and select Properties
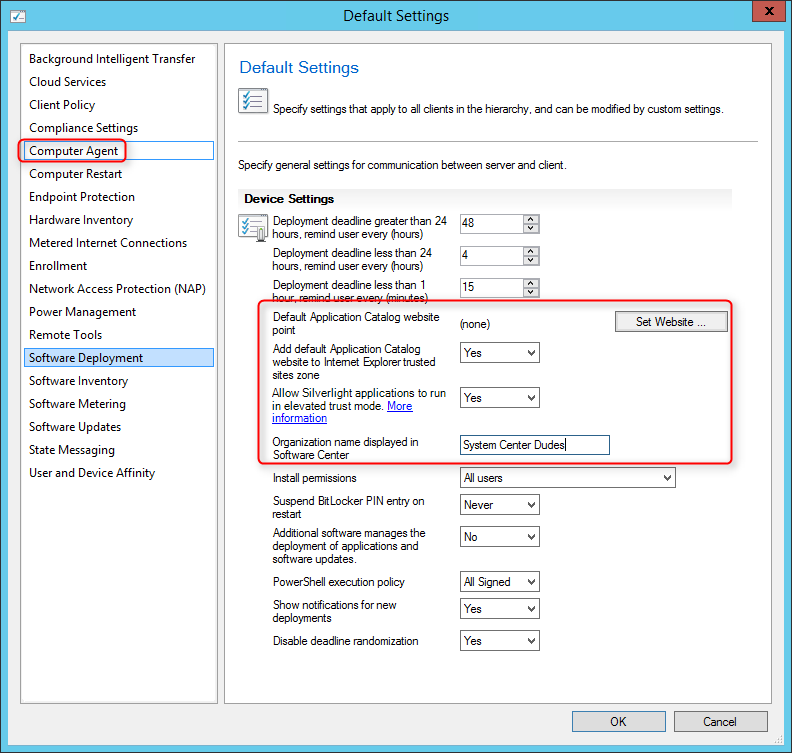
- On the left pane, select Computer Agent
- Click the Set Website button and select your Application Catalog (the name will be automatically populated if your Application Catalog is installed)
- Select Yes on both Add Default Application Catalog website to Internet Explorer trusted site zone and Allow Silverlight application to run in elevated trust mode
- Enter your organisation name in Organisation name displayed in Software Center
That’s it, you’ve installed your SCCM Application Catalog, publish the link to your user and start publishing your applications.
SCCM Installation Guide Part 6 – Asset Intelligence Synchronization Point
This part of this SCCM Installation Guide will describe the Asset Intelligence Synchronization Point (AISP).
Role description
The AISP is used to connect to Microsoft in order to download Asset Intelligence catalog information and upload uncategorized titles. For more information about planning for Asset Intelligence, see Prerequisites for Asset Intelligence in Configuration Manager.
This is not a mandatory Site System but we recommend installing the AISP if you are planning to use Asset Intelligence. Read our blog post on Why should you use Asset Intelligence in SCCM.
Site System Role Placement in Hierarchy
The AISP is a hierarchy-wide option. SCCM supports a single instance of this site system role in a hierarchy and only at the top-level site. Install it on your Central Administration Site or stand-alone Primary Site depending of your design.
AISP Installation
- Open the SCCM console
- Navigate to Administration / Site Configuration / Servers and site System Roles
- Right-click your Site System and click Add Site System Roles

- On the General tab, click Next
- On the Proxy tab, enter your Proxy server information if needed and click Next

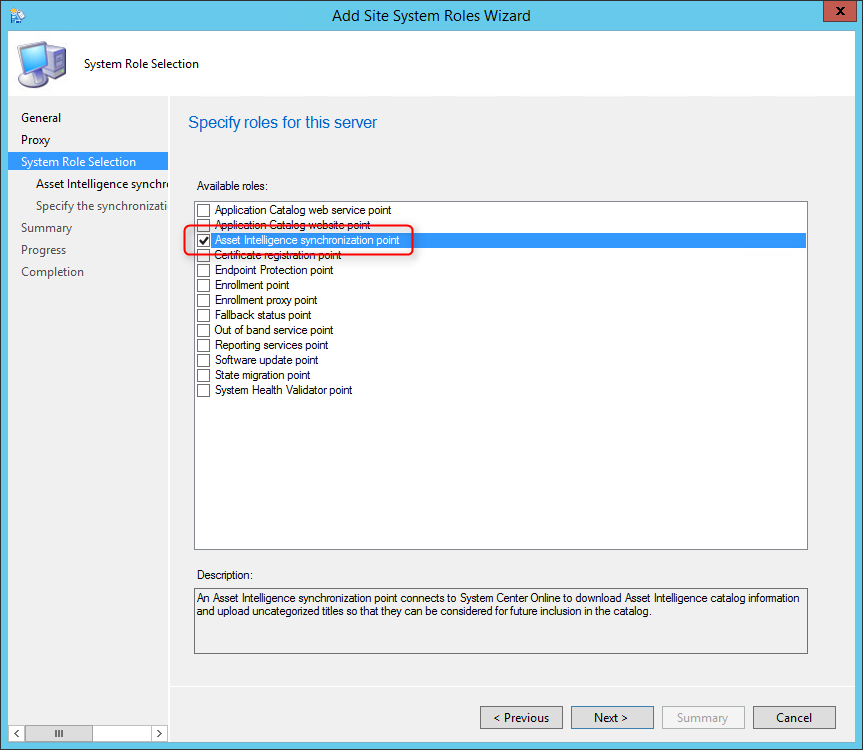
- On the Site System Role Selection tab, select Asset Intelligence Synchronization Point, click Next
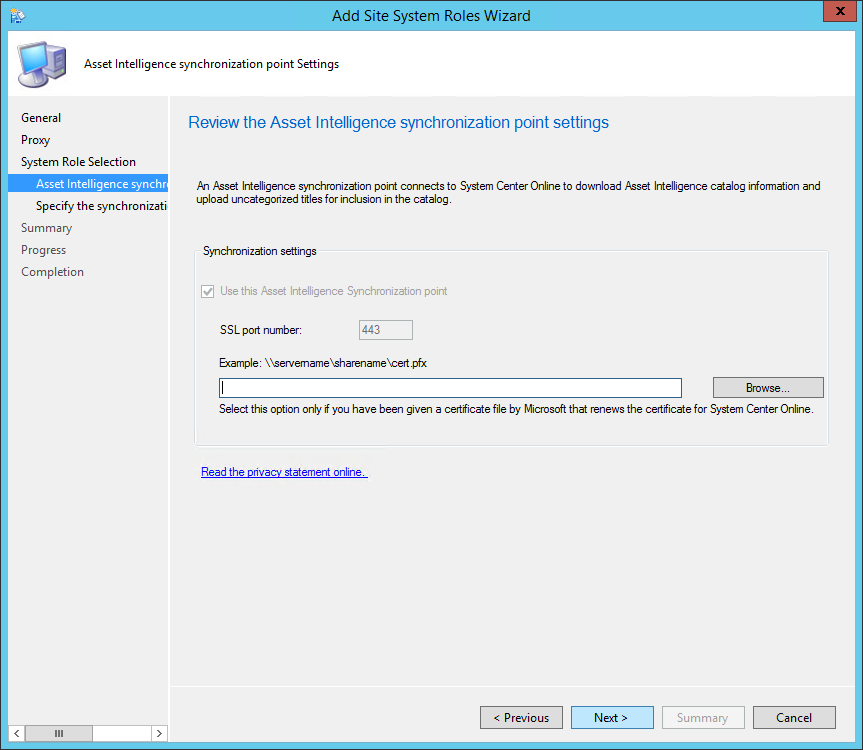
- On the Certificate page, click Next
- By default, the Use this Asset Intelligence Synchronization Point setting is selected and cannot be configured on this page. System Center Online accepts network traffic only over TCP port 443, therefore the SSL port number setting cannot be configured on this page of the wizard
- You can specify a path to the System Center Online authentication certificate (.pfx) file. Typically, you do not specify a path for the certificate because the connection certificate is automatically provisioned during site role installation
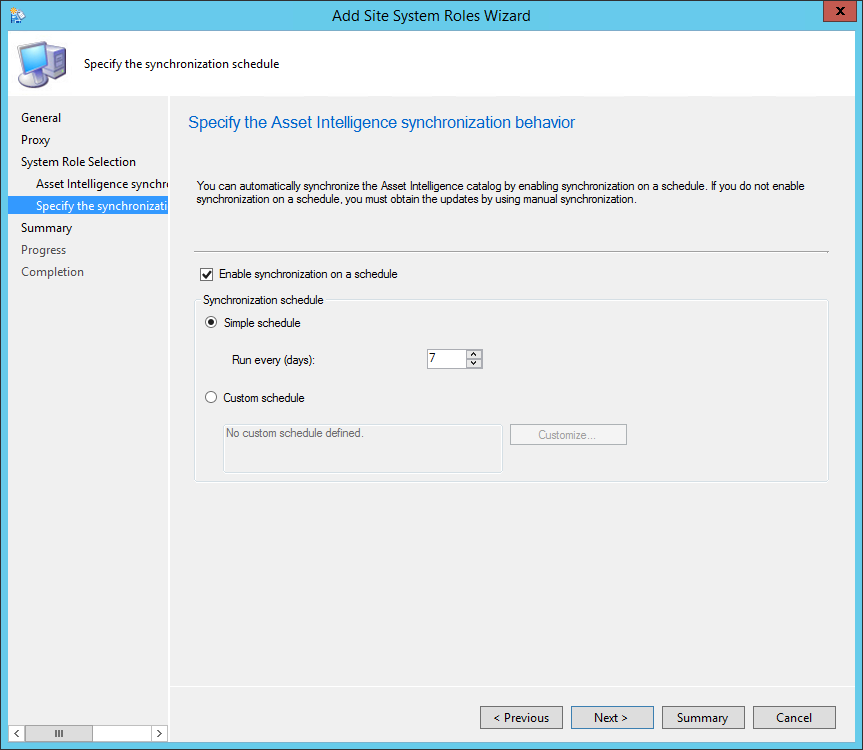
- Specify the desired catalog Synchronization Schedule, click Next
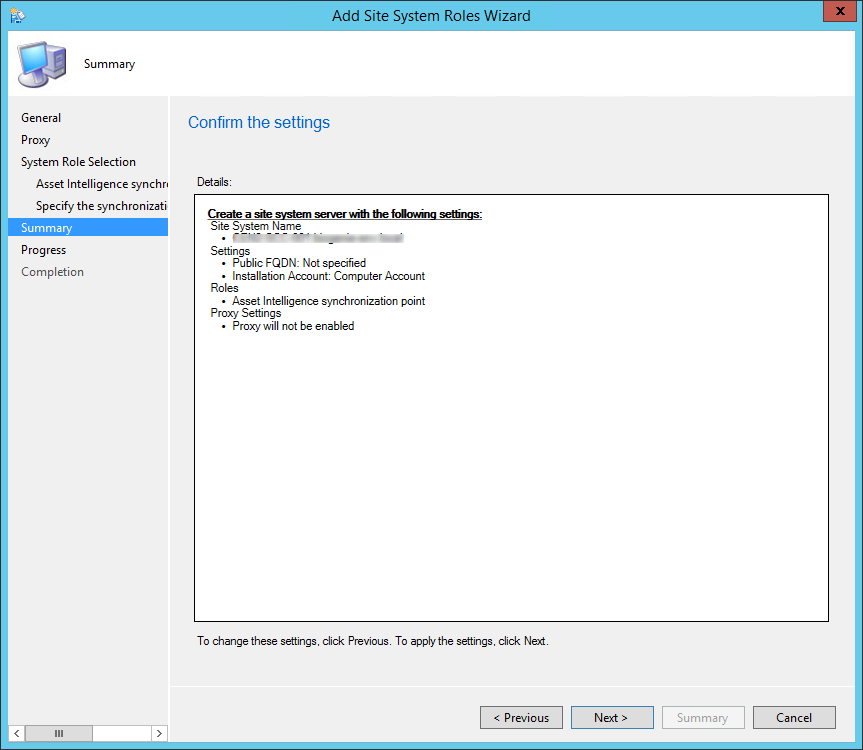
- On the Summary tab, review your setting and click Next
- Wait for the setup to complete and close the wizard
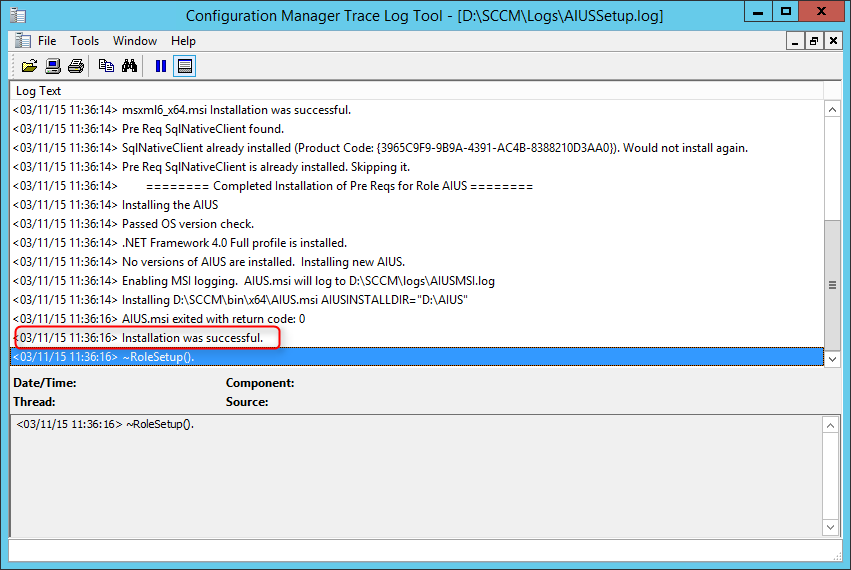
AISP Logs
- AIUSSetup.log – Information about the installation of the Asset Intelligence catalog synchronization point site system role
- AIUpdateSvc.log – Information about the Asset Intelligence catalog synchronization service
- Aikbmgr.log – Information about the Asset Intelligence catalog manager service
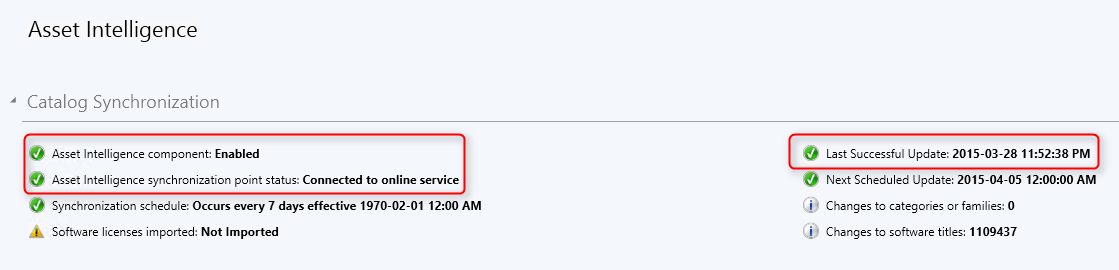
Verification
- Verify that the role installation is completed in AIUSSetup.log
- Open the SCCM console
- Navigate to Assets and Compliance / Overview / Asset Intelligence
- Verify that the Sync is Enabled and Successful
Enable Inventory Reporting Classes
In order to have inventory data, first ensure that Hardware Inventory is enabled in your Client Settings.
- Navigate to Administration / Client Settings
- Right-click your Client Settings and choose Properties
- On the Hardware Inventory Tab
- Ensure that your hardware inventory is Enabled

Once confirmed, enable inventory reporting classes :
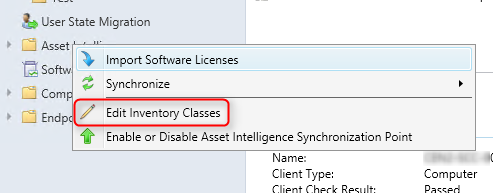
- Open the SCCM console
- Navigate to Assets and Compliance / Asset Intelligence
- Right-click Asset Intelligence and select Edit Inventory Classes
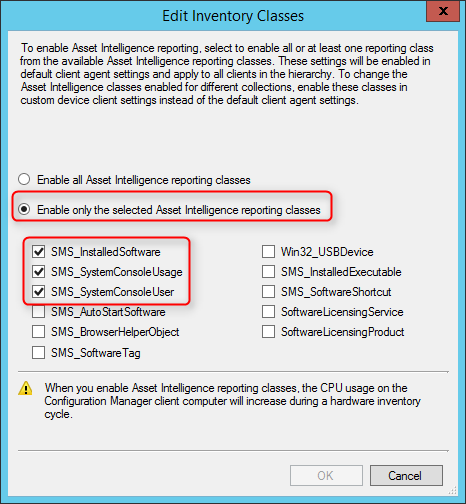
- Select Enable only the selected Asset Intelligence reporting classes
- Select SMS_InstalledSoftware, SMS_ConsoleUsage and SMS_SystemConsoleUser
- See the following Technet article to see dependencies between hardware and reporting class
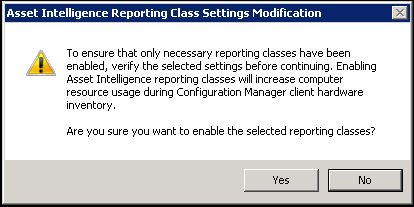
- On the warning, click Yes
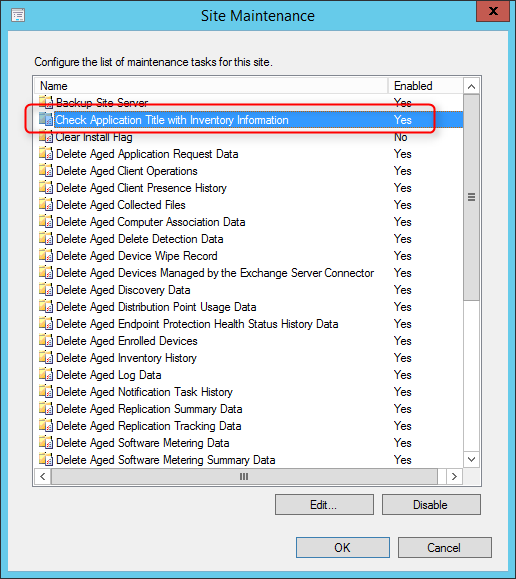
Maintenance Tasks
2 maintenance tasks are available for Asset Intelligence :
- Check Application Title with Inventory Information
- This maintenance task checks that the software title that is reported in software inventory is reconciled with the software title in the Asset Intelligence catalog.
- Summarize Installed Software Data
- This maintenance task provides the information that is displayed in the Assets and Compliance workspace. When the task runs, Configuration Manager gathers a count for all inventoried software titles at the primary site.
To set the maintenance tasks :
- Navigate to Administration / Site Configuration / Sites
- Select Site Maintenance on the top ribbon
- Select the desired schedule for both tasks
You’re now done installing the AISP.
SCCM Installation Guide Part 7 – Certificate Registration Point
We will describe how to install SCCM Certificate Registration Point (CRP).
Role Description
Using SCCM and Intune, the CRP communicates with a server that runs the Network Device Enrollment Service (NDES) to provision device certificate requests.
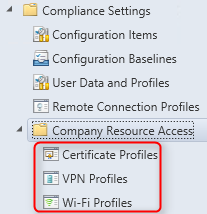
This is not a mandatory Site System but we recommend to install a CRP if you need to provision client certificates to your devices (like VPN or WIFI).
Prerequisites
Before the CRP can be installed, dependencies outside SCCM is required. I won’t cover the prerequisite configuration in details as they are well documented on this Technet article and it goes beyond SCCM. Here’s an overview of what needs to be done :
- Install the NDES role on a Windows 2012 R2 Server
- Modify the security permissions for the certificate templates that the NDES is using
- Deploy a PKI certificate that supports client authentication
- Locate and export the Root CA certificate that the client authentication certificate chains to
- Increase the IIS default URL size limit
- Modify the request-filtering settings in IIS
On the machine that will receive the CRP role, install the following using Windows server role and features:
- IIS
- ASP .NET 3.5
- ASP .NET 4.5
- WCF HTTP Activation
If you are installing CRP on a remote machine from the site server, you will need to add the machine account of the site server to the local administrator’s group on the CRP machine.
Site System Role Placement in Hierarchy
The Certificate Registration Point must not be installed on the same server that runs the Network Device Enrollment Service. It’s supported to install this role on a Central Administration Site, child Primary Site or stand-alone Primary Site but it’s not supported on a Secondary Site.
CRP Installation
- Open the SCCM console
- Navigate to Administration / Site Configuration / Servers and Site System Roles
- Right click your Site System and click Add Site System Roles
- On the General tab, click Next

- On the Proxy tab, click Next
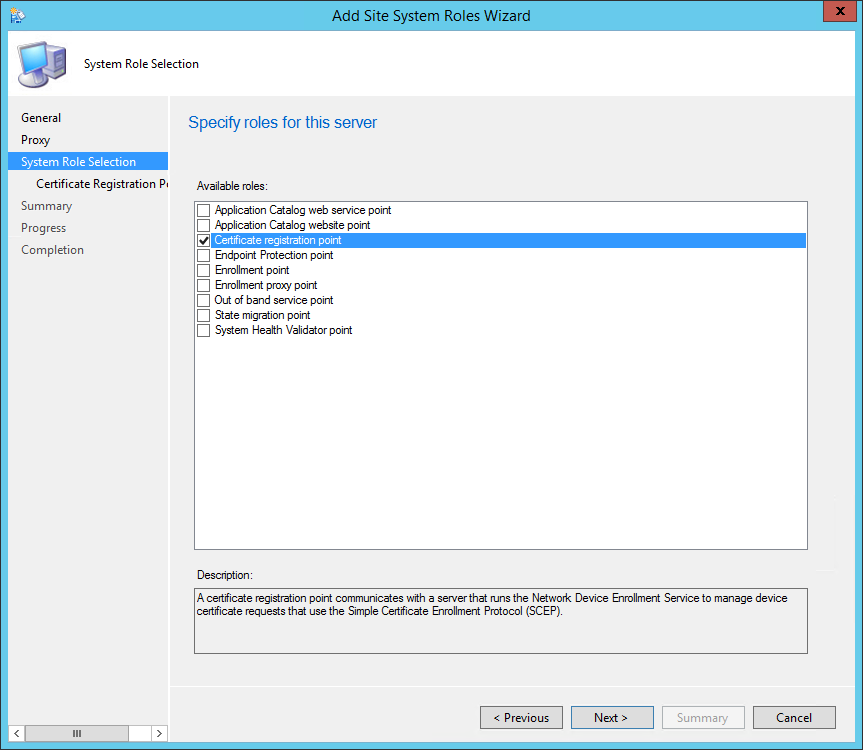
- On the Site System Role tab, select Certificate Registration Point, click Next
- On the Certificate Registration Point Properties, leave the default website name and virtual application name. Take note of your Virtual Application Name, you will need it later.
- Click on Add
- Enter the URL of your NDES server
- This URL will be part of the profile send to the devices. The device will needs to access this URL from the internet
- Example : https://ndes.systemcenterdudes.com/certsrv/mscep/mscep.dll
- Enter the path to your exported Root CA Certificate (.cer file)
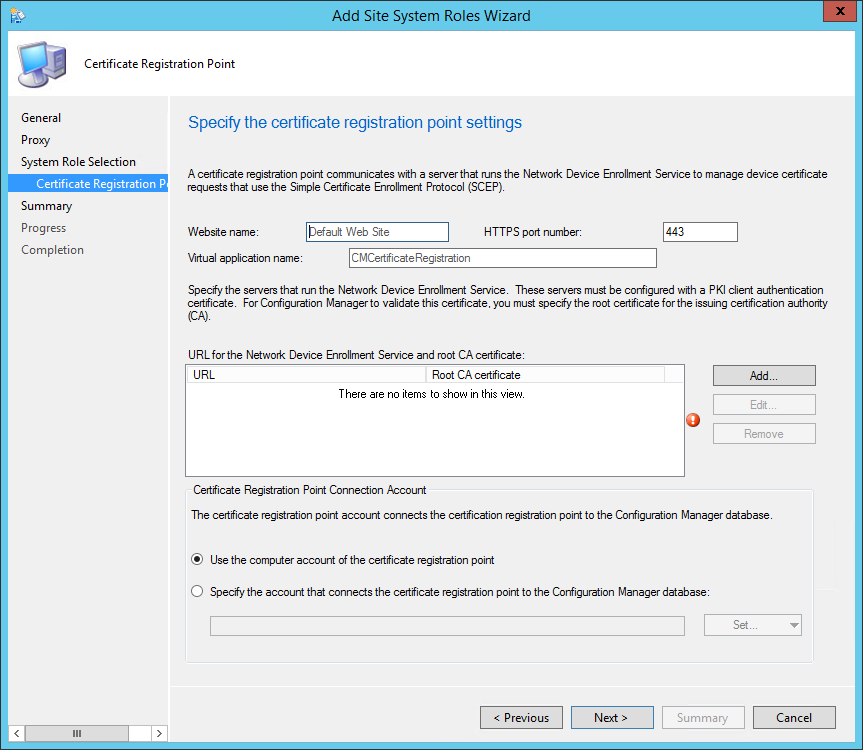
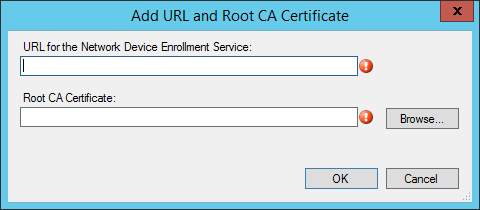
- Once completed, click on Next, review the Summary and close the wizard
Verification and Logs files
- ConfigMgrInstallationPath\Logs\crpmsi.log – Detailed CRP Installation status
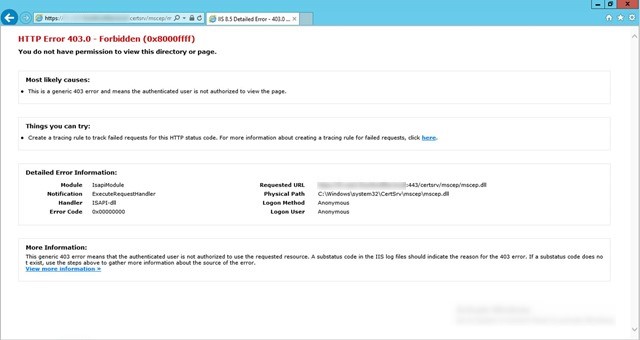
- Using a browser, verify that you can connect to the URL of the certificate registration point—for example, https://crp.systemcenterdudes.com/CMCertificateRegistration
- HTTP Error 403 is ok. If you have a 404 error or 500 error, look at the logs file before continuing
- After the CRP is installed, the system will export the certificate that will be used for NDES plugin to the certmgr.box folder. It may take up to 1 hour to appear.

- Save this .cer file on the NDES server as we will need it in the next section.
Configuration Manager Policy Module
Now that the Certificate Registration Point has been installed, we must install a plug-in on the NDES server to establish the connection with SCCM.
On the server that runs the Network Device Enrollment Service :
- Copy the \SMSSETUP\POLICYMODULE\X64 folder from the the Configuration Manager installation media to a temporary folder
- From the temporary folder, run PolicyModuleSetup.exe
- Click Next, accept the license terms and click Next
- On the Installation Folder page, accept the default installation folder click Next
- On the Certificate Registration Point page, specify the URL of the Certificate Registration Point. This is the Virtual Application Name created during the SCCM role installation (Example : https://crp.systemcenterdudes.com/CMCertificateRegistration)
- Accept the default port of 443, click Next
- On the Client Certificate for the Policy Module page, browse to and specify the client authentication certificate. This is the same certificate you used in the CRP Installation wizard in SCCM
- On the Certificate Registration Point Certificate page, click Browse to select the exported certificate file (the one exported from \inboxes\certmgr.box)
- Click Next and complete the wizard
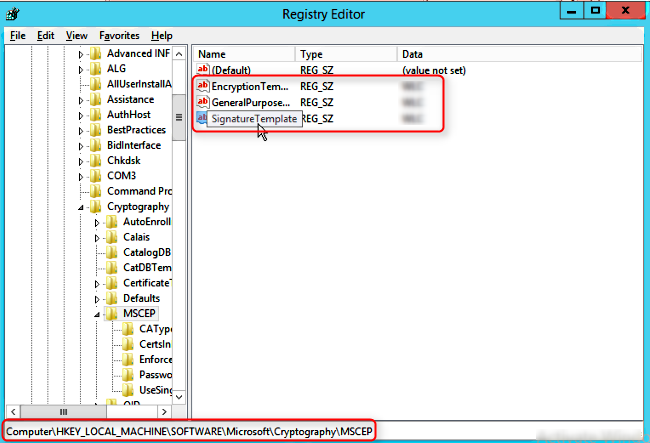
- Open the registry editor and browse to HKLM\SOFTWARE\Microsoft\Cryptography\MSCEP
- Make sure that the values of EncryptionTemplate, GeneralPurposeTemplate and SignatureTemplate match the names of the template on your CA
- Open Internet Explorer on the NDES server and browse to https://ndes.systemcenterdudes.com/certsrv/mscep/mscep.dll, you will no longer see the web page but instead you should see an error 403, this is expected
Once all the above has been configured and verified, you are ready to create your certificate profile in SCCM.
References
Here are my favourites articles covering the subject :
- Technet Article
- Configuration Team Blog article
- Pieter Wigleven’s installation (Technical Solution Professional at Microsoft)
- Peter van der Woude’s key configuration steps
SCCM Installation Guide Part 8 – Distribution Point Installation
In this part, we will describe how to perform an SCCM distribution point installation.
I saw a lot of posts recently on the Technet forum which leads me to think that there’s a lack of documentation explaining this.
Introduction
Several distribution points can provide better access to available software, updates, and operation systems. A local Distribution Point also prevents the installation thought the WAN.
Pre-Requisites
- Functional SCCM hierarchy
- SCCM Admin console access
- RDP access on the Distribution Point server
- The required level of security in the SCCM console
Distribution point server configuration
Prevent package from replication on the wrong drive
- Logon locally on the target machine with remote desktop
- Create an empty file called NO_SMS_ON_DRIVE.SMS on the root of each drive where SCCM should NOT write. (If any)
Local Administrator group
On the DP, add a group that contains your site system computer account in the Administrators group.
I like to create a SCCM system groups that contain all my distribution points.
- Open Server Manager
- Expand Local Users and Groups
- Click on Groups
- Double-click on “Administrators”
- Add the security groups that contain the SCCM computer account
Windows Server configuration – Roles and Features
Configuration Manager requires some roles and features to be installed on the server prior to the DP installation
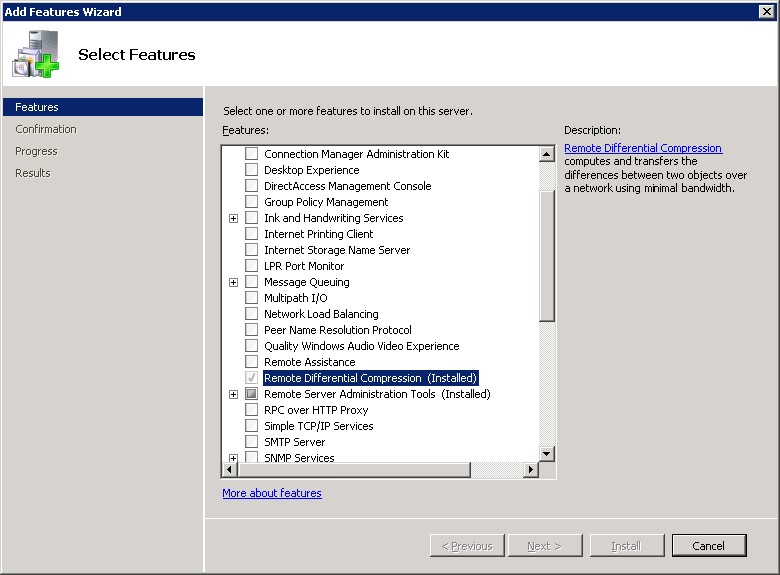
Remote Differential Compression
- Open Server Manager, on the Features node, starts the Add Features Wizard.
- On the Select Features page, select Remote Differential Compression
IIS
IIS needs to be installed on the server but it will automatically be installed using the site installation wizard.
Make sure that these roles are installed on your server prior to the installation :
- IIS WMI Compatibility tool
- IIS Scripting Tool
Windows Deployment Service
For Windows Server 2012+, WDS is installed and configured automatically when you configure a distribution point to support PXE or Multicast.
For Windows Server 2003, you must install and configure WDS manually.
BITS
The distribution point site system role does not require Background Intelligent Transfer Service (BITS). When BITS is configured on the distribution point computer, BITS on the distribution point computer is not used to facilitate the download of content by clients that use BITS
Microsoft Visual C++ 2008 Redistributable
You can run the Microsoft Visual C++ 2008 Redistributable Setup from the Configuration Manager installation at: <ConfigMgrInstallationFolder>\Client\x64\vcredist_x64.exe
For Configuration Manager SP1, vcredist_x64.exe is installed automatically when you configure a distribution point to support PXE.
Powershell 3.0
For Windows 2012 only, you need to enable Powershell 3.0 (or further) before installing the distribution point.
Firewall
Ensure that your firewall is set correctly. 2 ports need to be opened.

Distribution Point site server installation
Reboot your server to avoid the case where your server is in “Reboot pending State” which will result in unexpected reboot during distribution point installation.
Now that the Distribution point server is ready to receive a new role, we need to add the server to the site server list
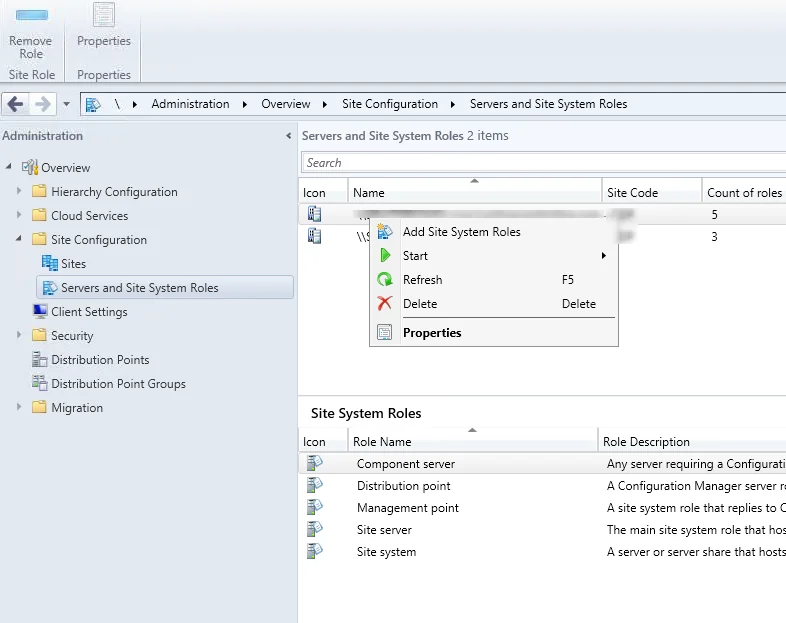
Add new distribution point server to the SCCM console – Site System
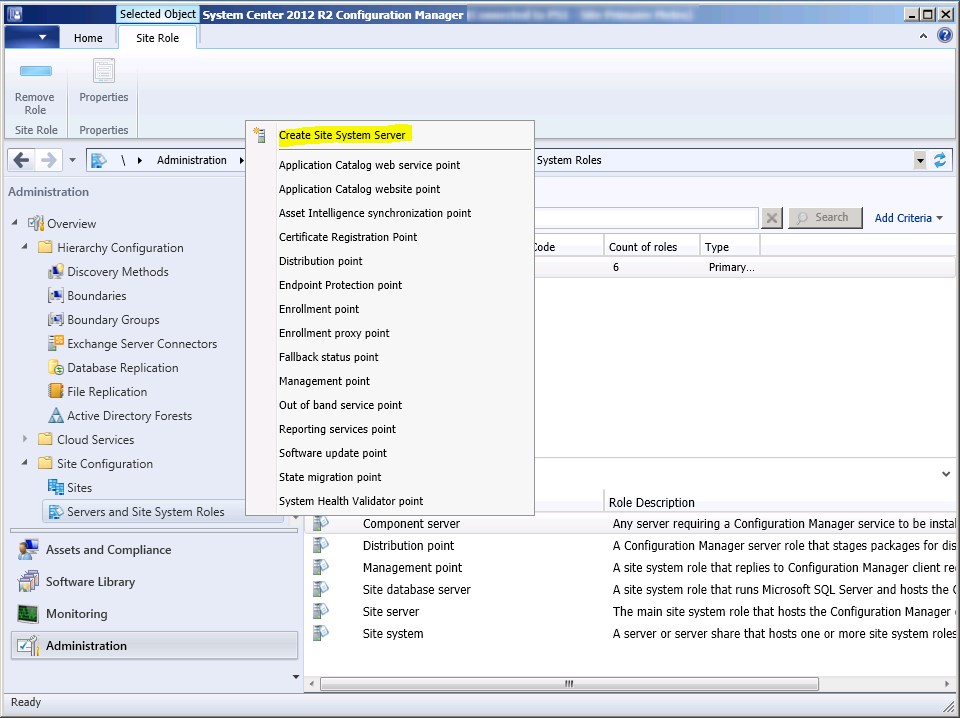
- In the Configuration Manager console, click Administration
- In the Administration workspace, expand Site Configuration, and then right click Servers and Site System Roles.
- Select Create Site System Server. The Create Site System Server Wizard opens.
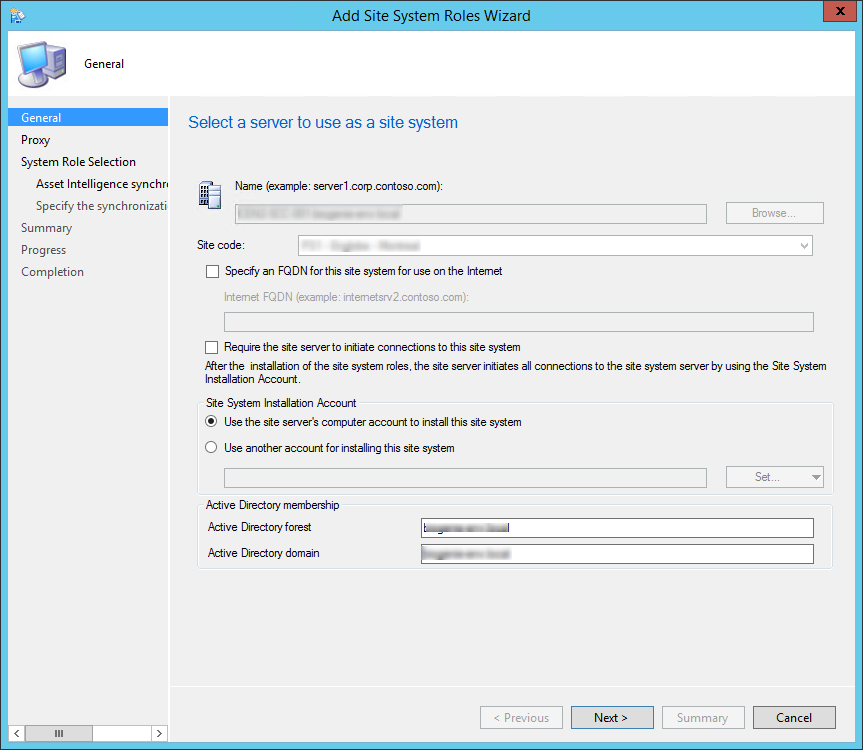
- On the General page, specify the Name for the site system server
- Select the Site Code and Click Next
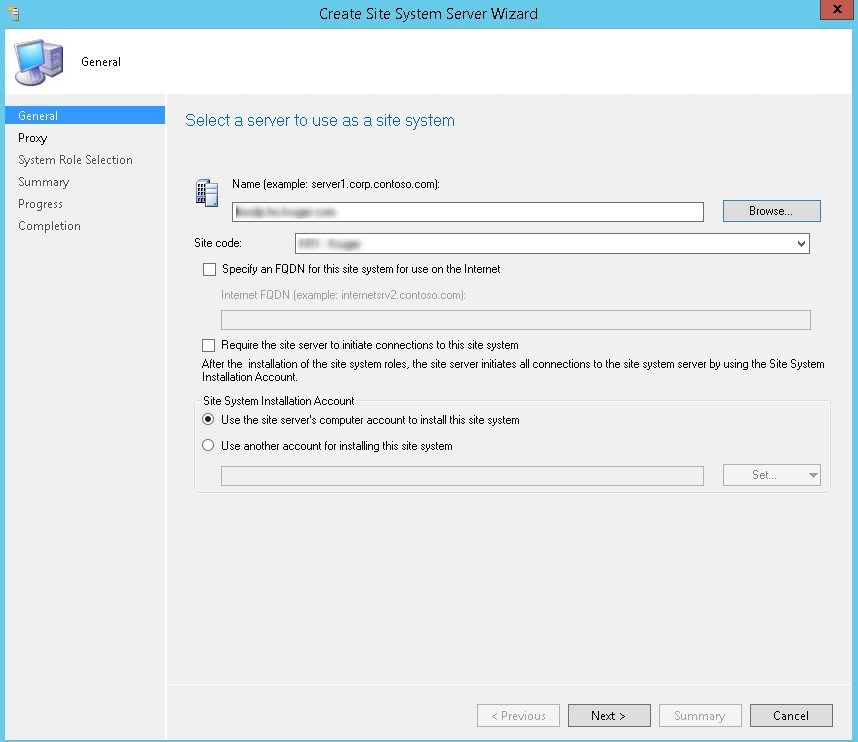
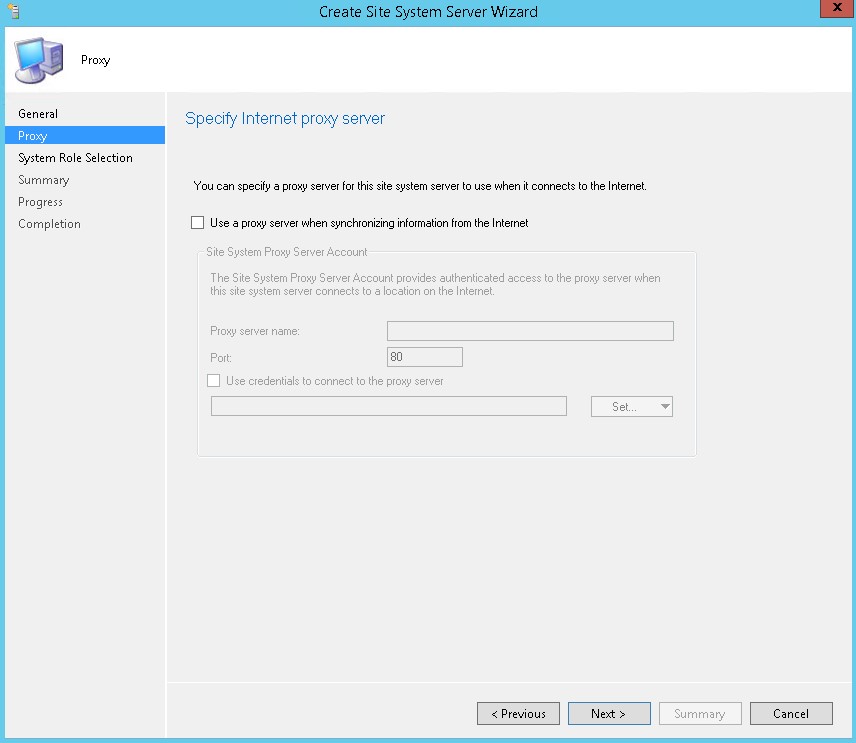
- Do not specify a proxy server, click Next
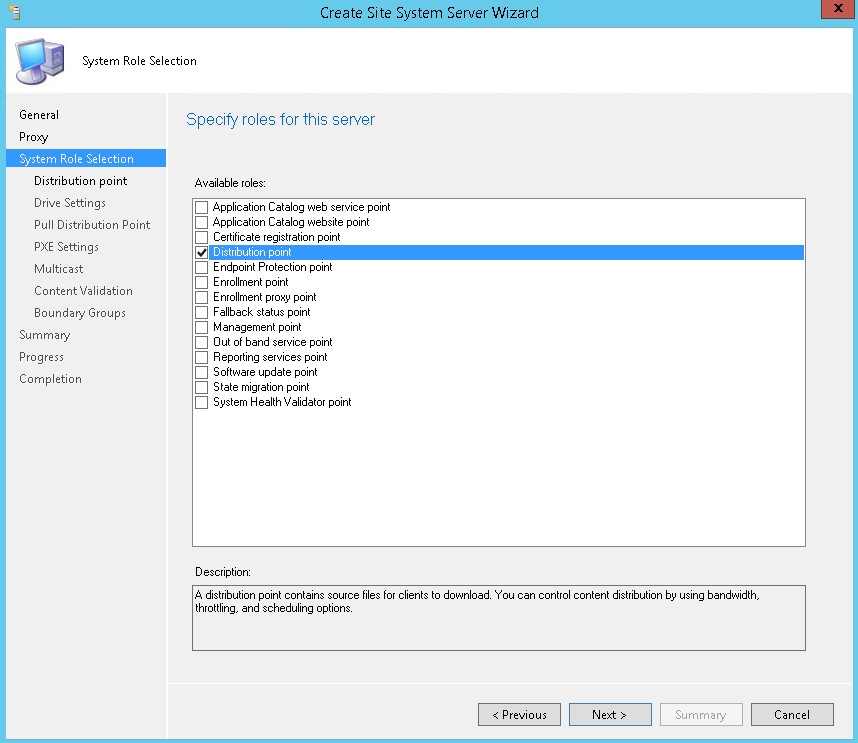
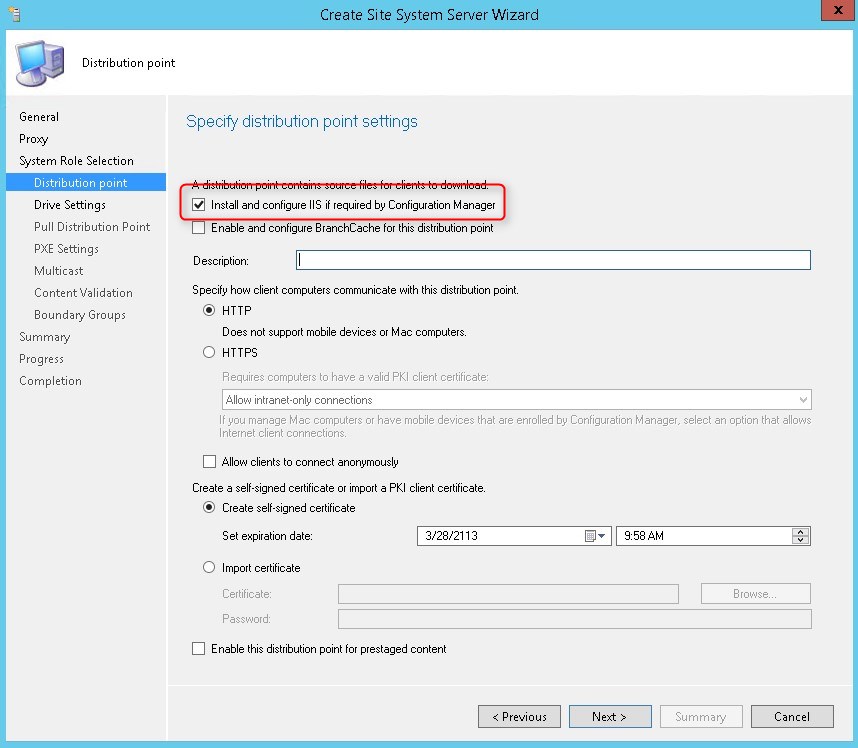
- Select Distribution point in the role selection screen, click Next
- Check Install and configure IIS if required by CM
- Add a description if needed
- Select HTTP
- Select Create self-signed certificate, click Next
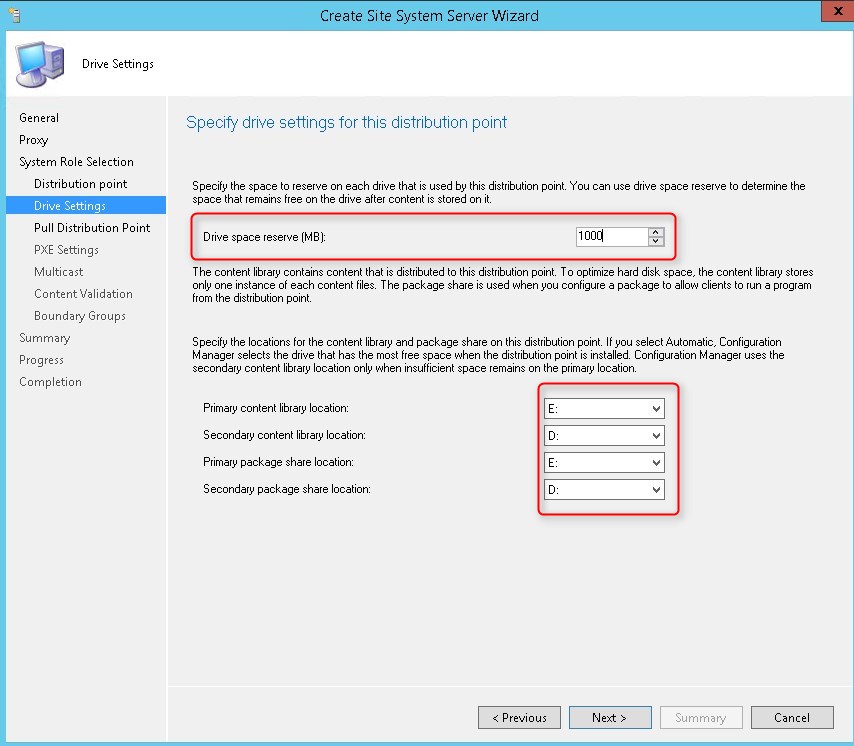
- Set drive configuration to your needs. This is where the SCCMContentLib will be created so select a drive with enough storage space, click Next
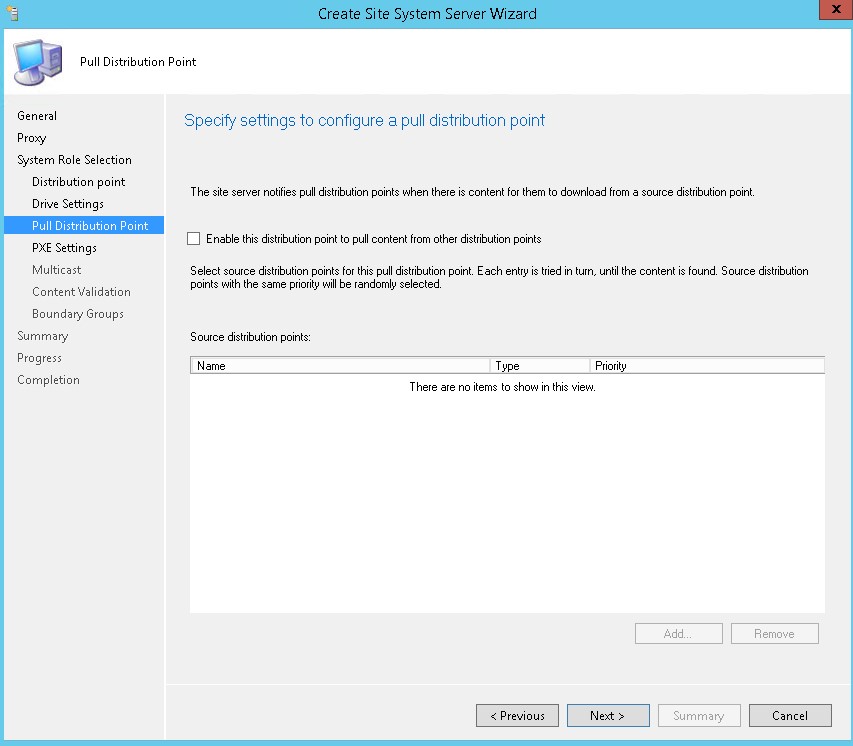
- Do not configure a pull distribution point, click Next
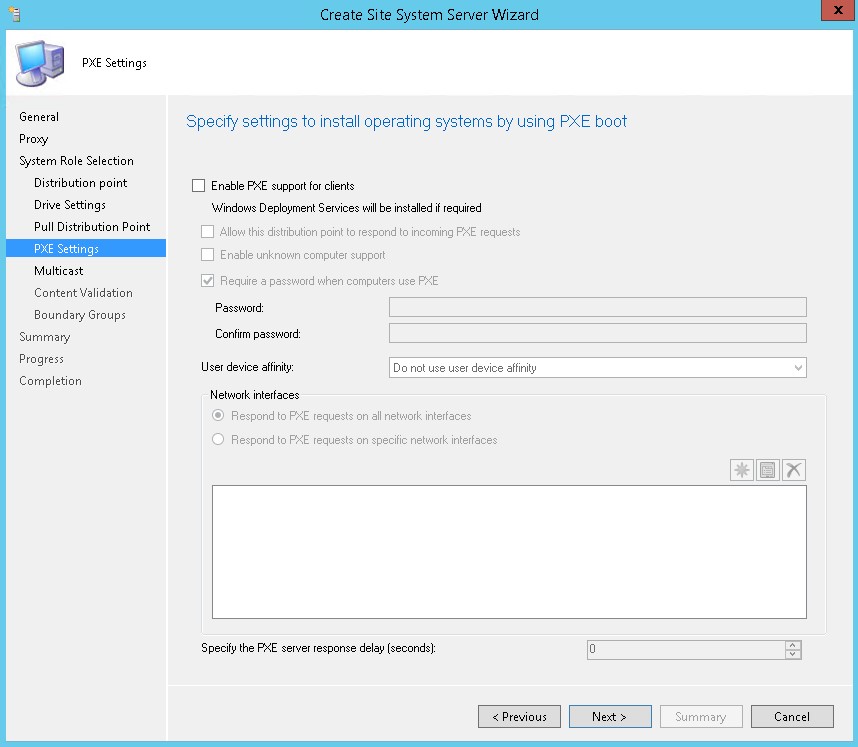
- Do not configure PXE for now, click Next
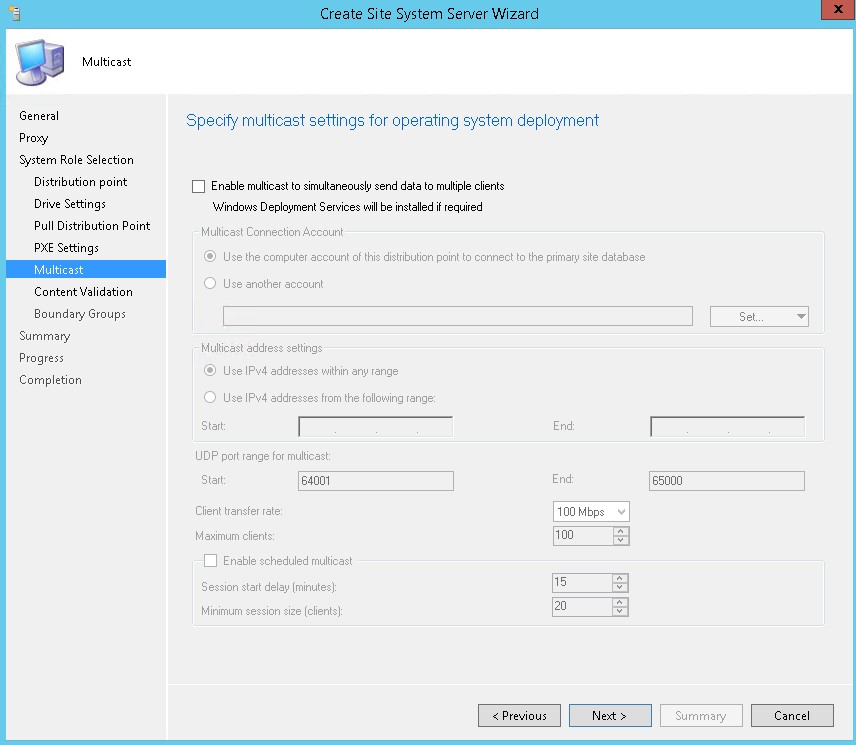
- Do not enable multicast for now, click Next
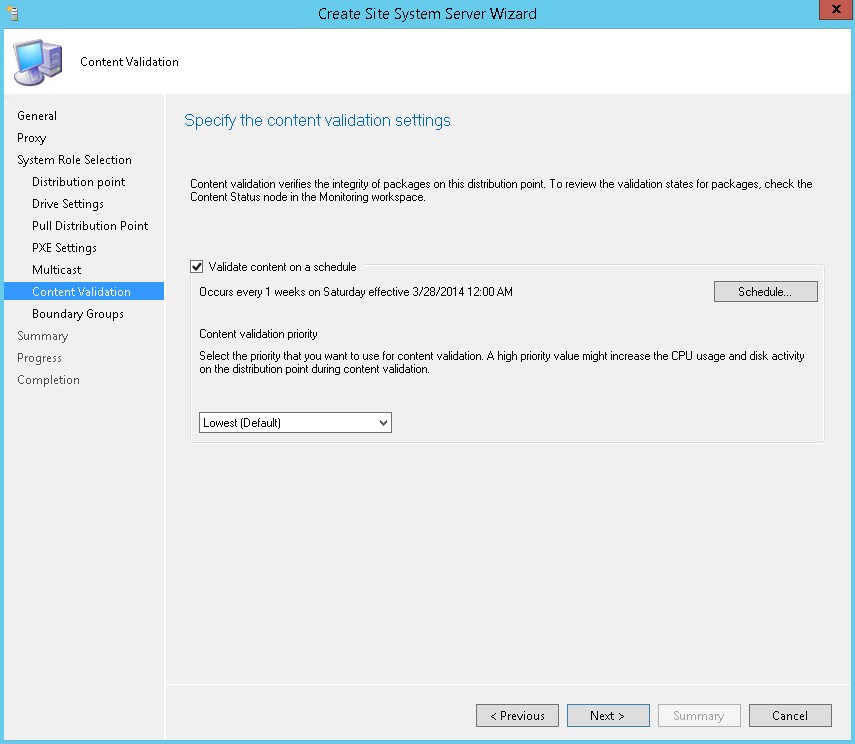
- Enable content validation to occur where it fits your environment, click Next
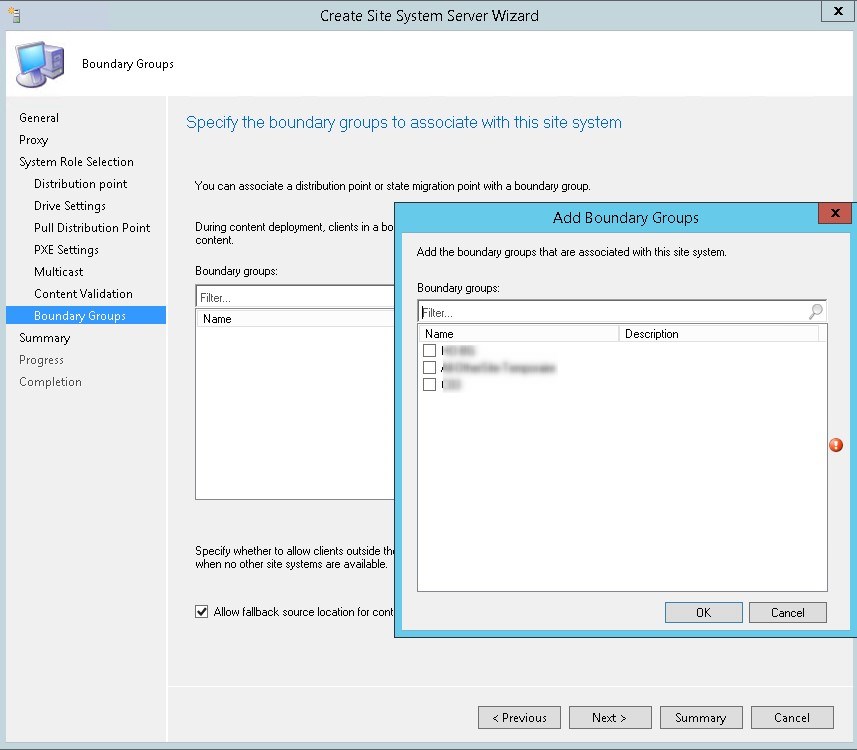
- Add the boundary group that needs to be associated with this DP and Uncheck the Allow fallback source location for content, click Next
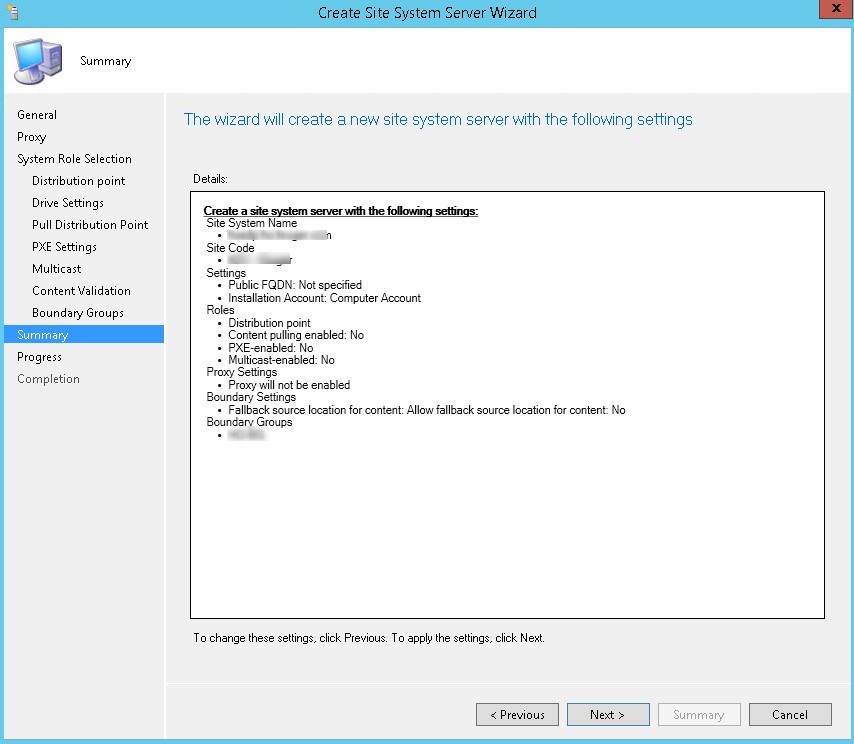
- Review the summary page and complete the installation, click Next
WARNING Your remote server may reboot if there’s a missing requirement
At this point, the major part of installation a distribution point server is completed.
Verification
Logs
You can track the installation progress in 2 logs:
- Distmgr.log on the site server
- Smsdpprov.log on the distribution point. (InstallationDrive\SMS_DP$\SMS\Logs)
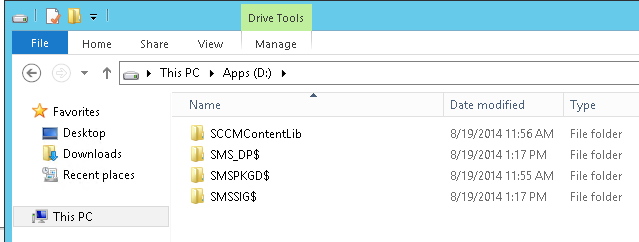
Windows Explorer
At this point, you will the SCCM file structure created on the site server.
Console
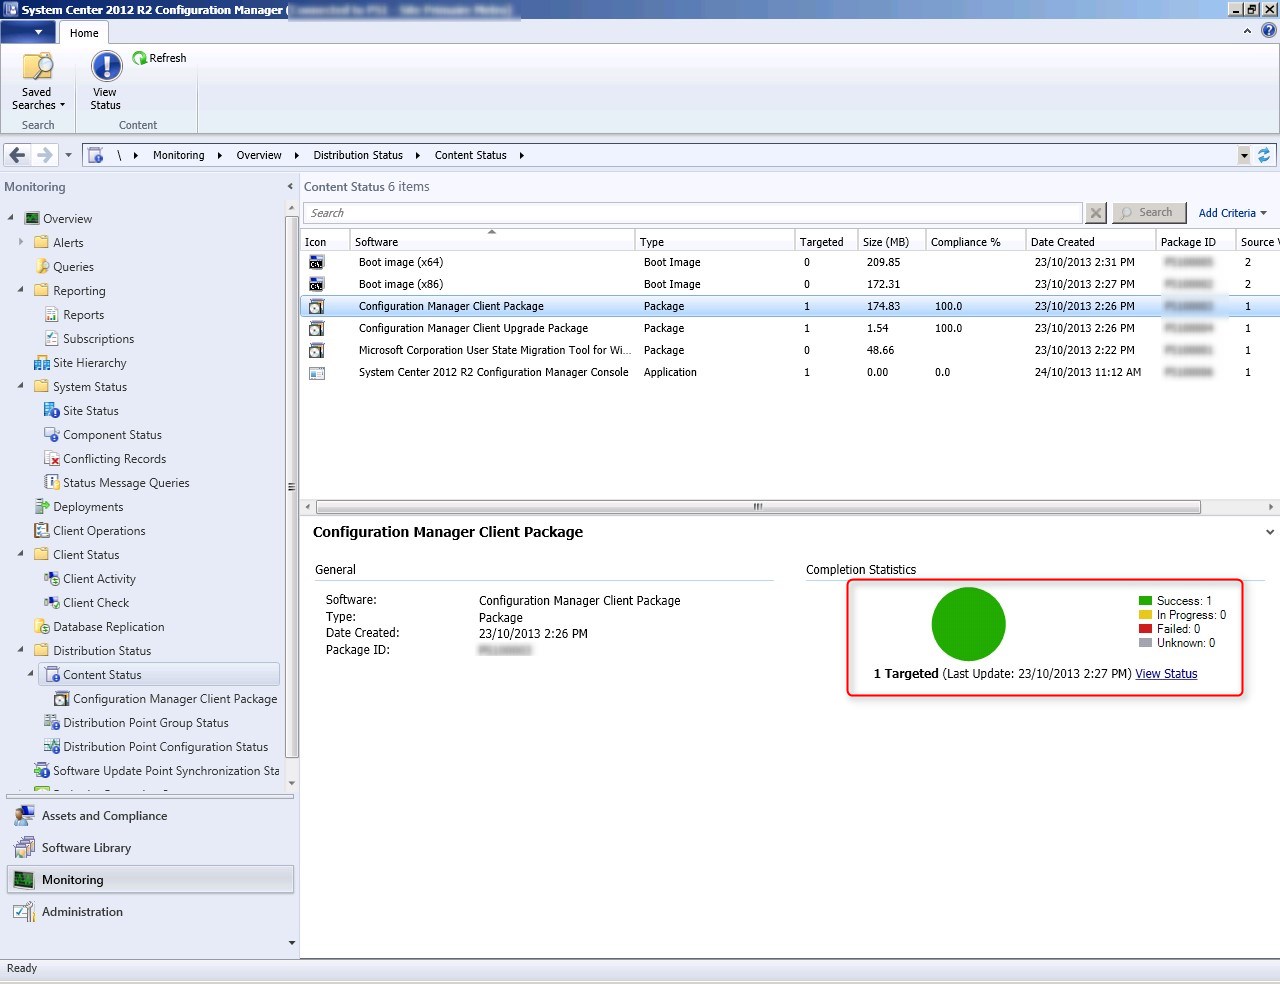
You can also track the installation progress in the SCCM console under Monitoring / Distribution Status / Distribution Point Configuration Status
- Click on your DP
- Click the detail tab on the bottom
- Check for green check mark on all components
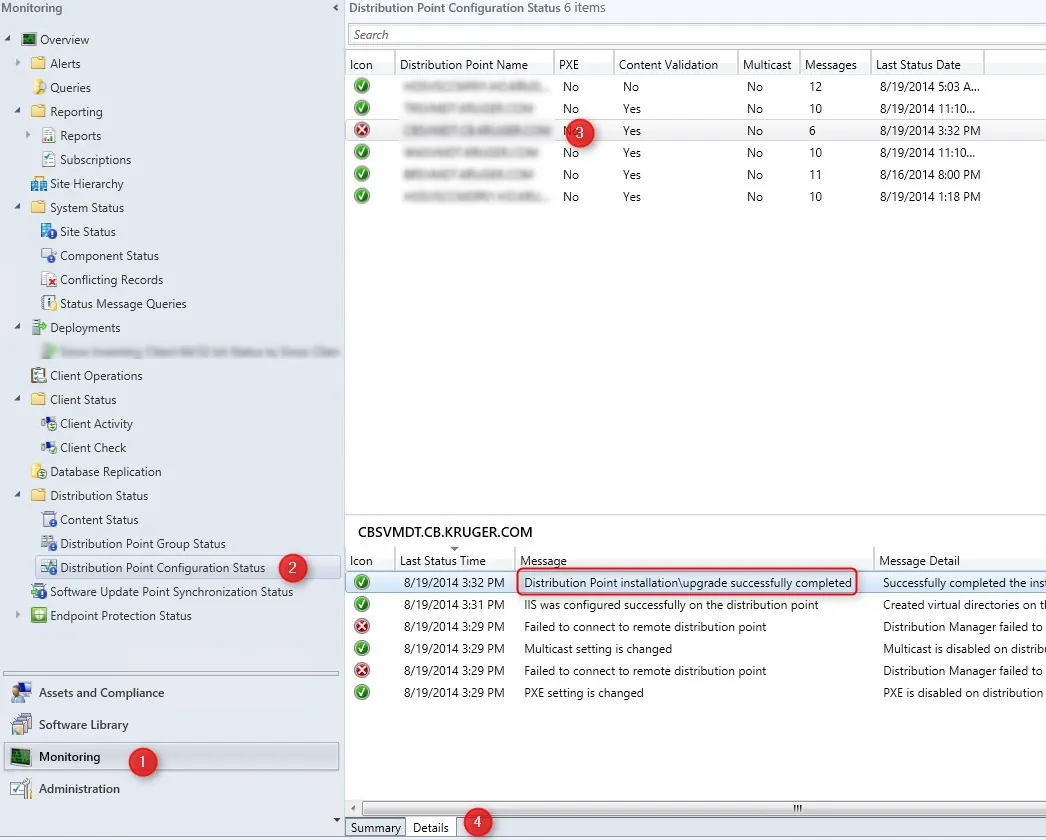
Note: Error on the IIS Virtual directory is normal at the start of the process. SCCM is making a check as if IIS is installed at the start of the process even if you tell SCCM to enable you IIS for you. That results in errors but be patient and the installation should succeed anyway
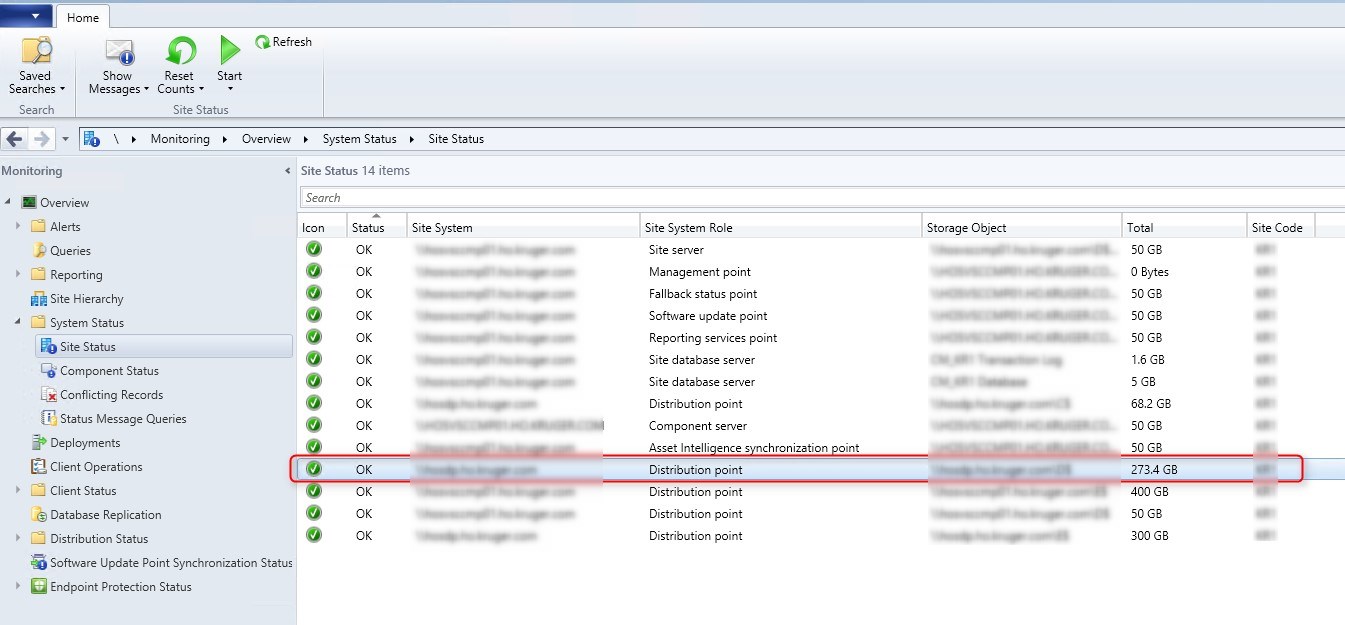
- Verify the status of your new DP in Administration / System Status / Site Status
Replicate content
You can now replicate your content to your newly created DP. Replicate manually all your content or add your DP in an existing DP group.
Replicate a package or Application to your newly created site system
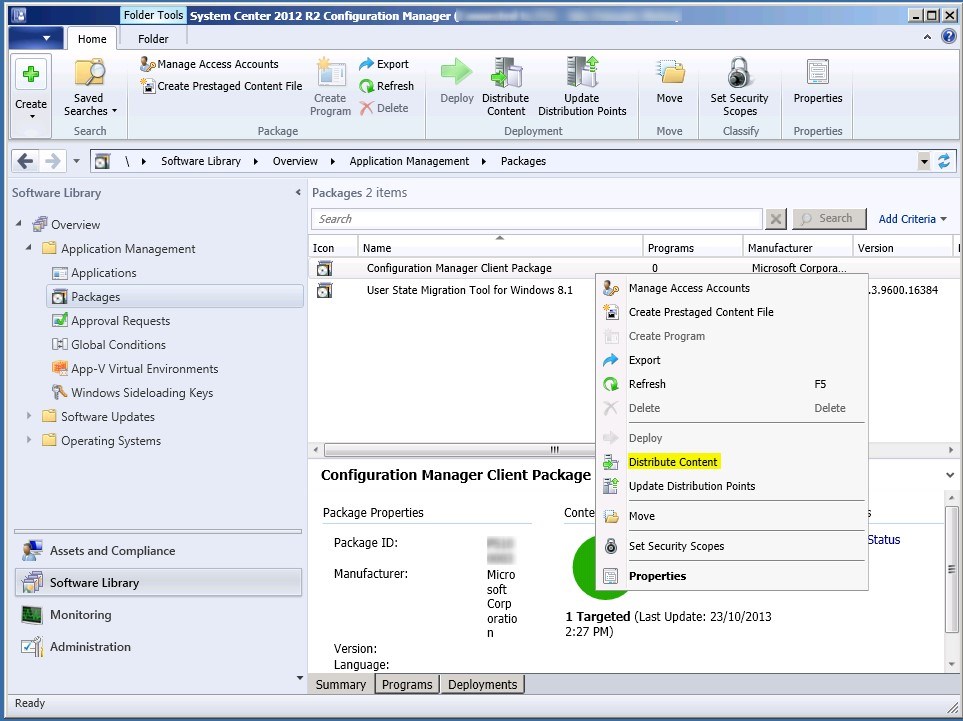
Verify that the content is well replicated in the SCCM Console. (or check distmgr.log)
That’s it ! You’re done creating your DP.
Distribution Point Monitoring
If you have multiple Distribution Points, I suggest you read our post on 8 ways to monitor your distribution points. This post explains in detail the various options to make sure that your DP is healthy.
You can also check our custom report about Distribution Point Monitoring to display all your DP status using a single click.

SCCM Installation Guide Part 9 – Endpoint protection point
In this part, we will describe how to install SCCM Endpoint Protection Point (EPP).
Role Description
The Endpoint Protection Point provides the default settings for all antimalware policies and installs the Endpoint Protection client on the Site System server to provide a data source from which the SCCM database resolves malware IDs to names. When you install this Site System Role, you must accept the license terms for System Center 2012 R2 Endpoint Protection.
This is not a mandatory Site System but you need to install a EPP if you’re planning to use SCCM as your anti-virus management solution (using Endpoint Protection).
Site System Role Placement in Hierarchy
This Site System is a hierarchy-wide option. SCCM supports a single instance of this site system role in a hierarchy and only at the top-level site in the hierarchy. It’s supported to install this role on a Central Administration Site or stand-alone Primary Site.
Requirements
Before installing the EP role, you must have a Software Update Point installed and configured.
EPP Installation
- Open the SCCM console
- Navigate to Administration / Site Configuration / Servers and Site System Roles
- Right-click your Site System and click Add Site System Roles
- On the General tab, click Next

- On the Proxy tab, click Next

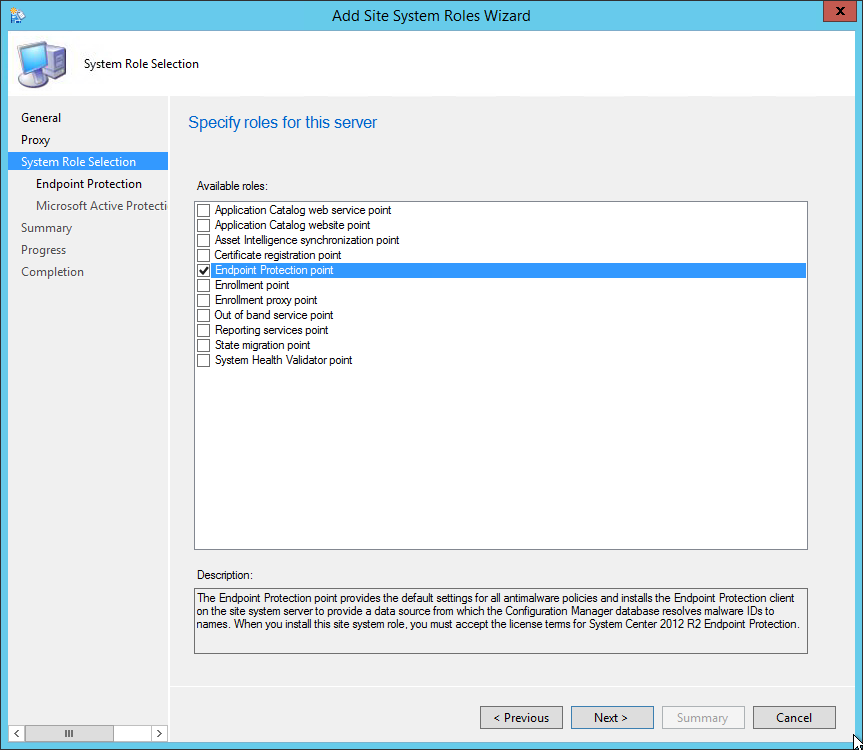
- On the Site System Role tab, select Endpoint Protection Point, click Next
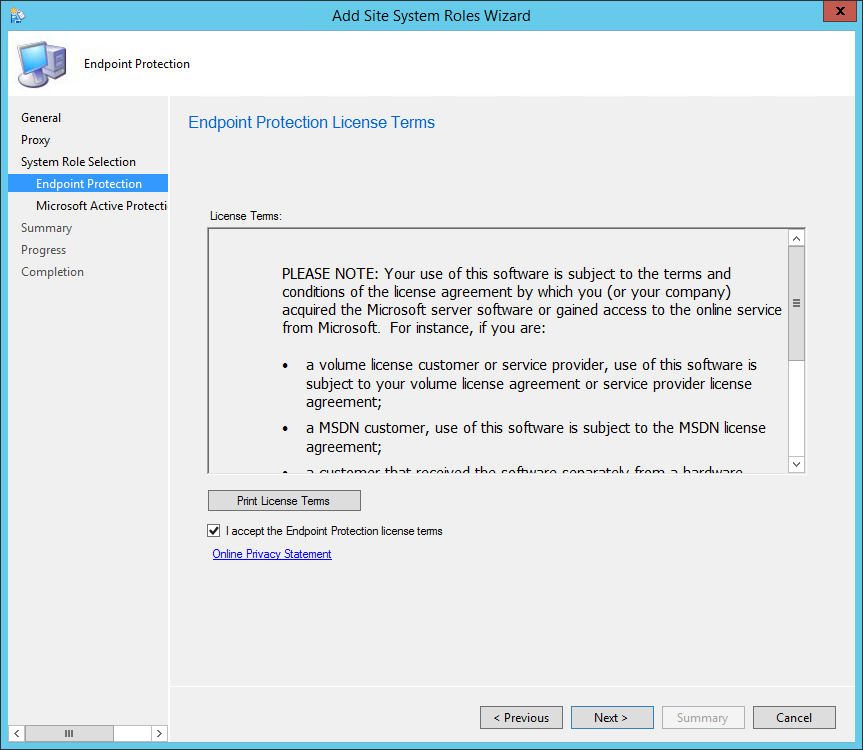
- Accept the License Terms and click Next
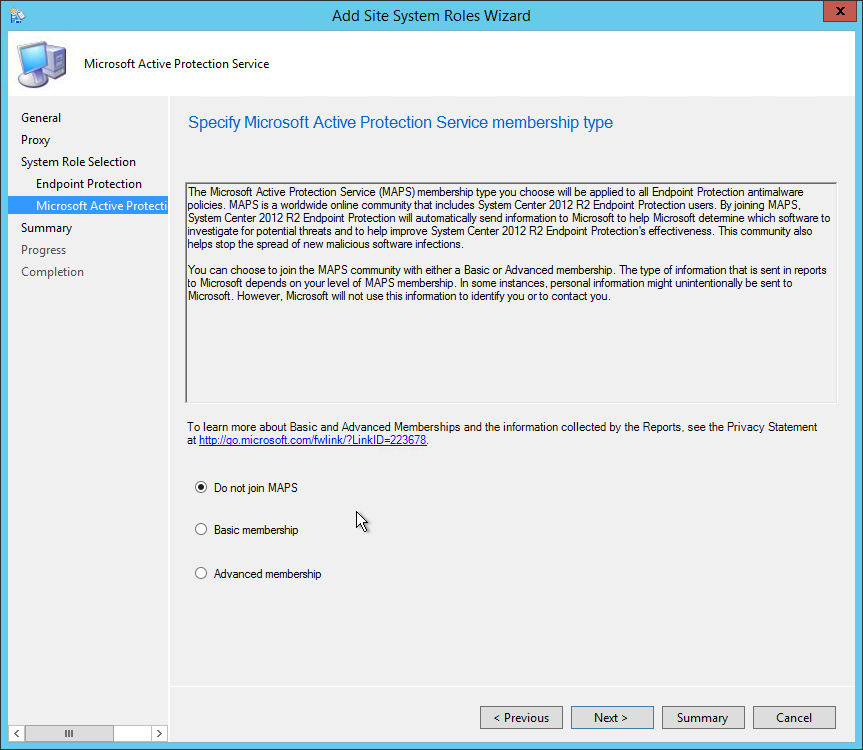
- Select Do not join MAPS, click NEXT
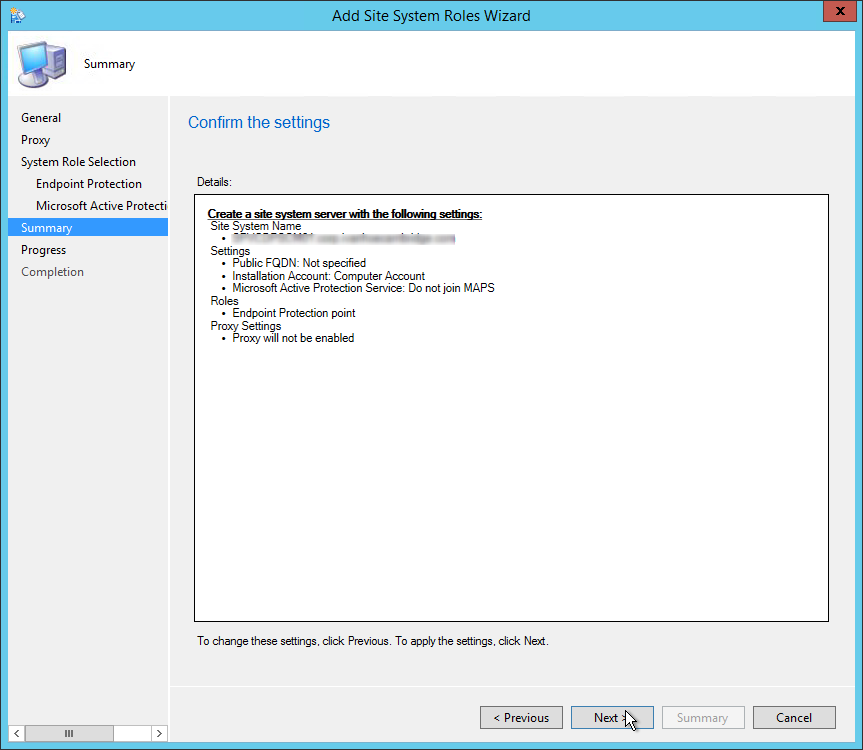
• On the Summary tab, review your settings and click Next
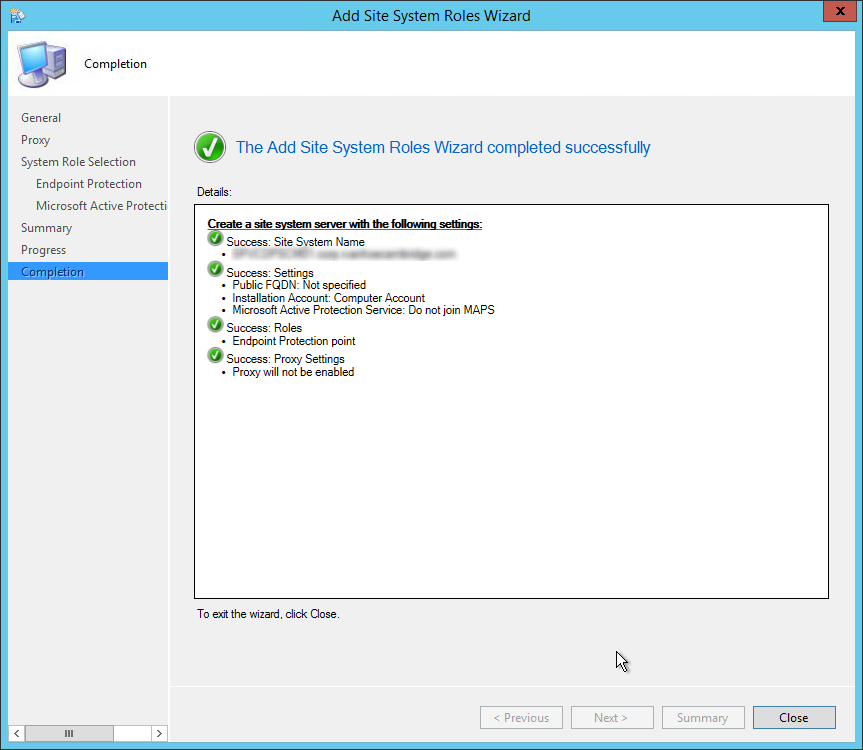
- Wait for the setup to complete and click Close
Software Upate Point Configuration
After the SCCM Installation, you must add Endpoint Protection definition files in your Software Update Point.
- Open the SCCM console
- Navigate to Administration / Site Configuration / Servers and Site System Roles
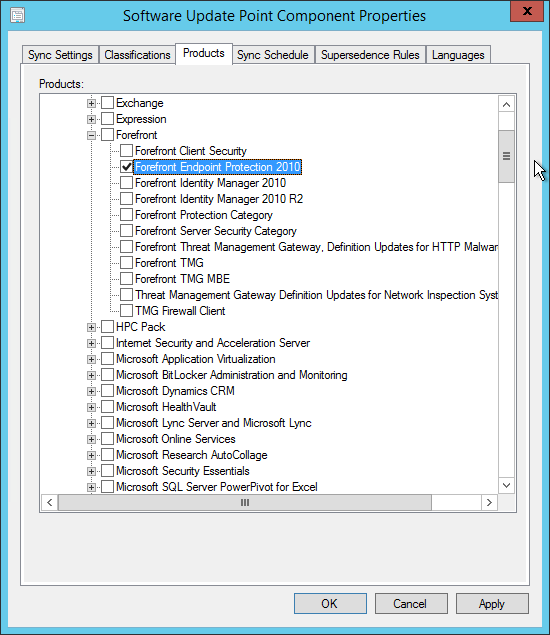
- Click the Configure Site Components button and select Software Update Point
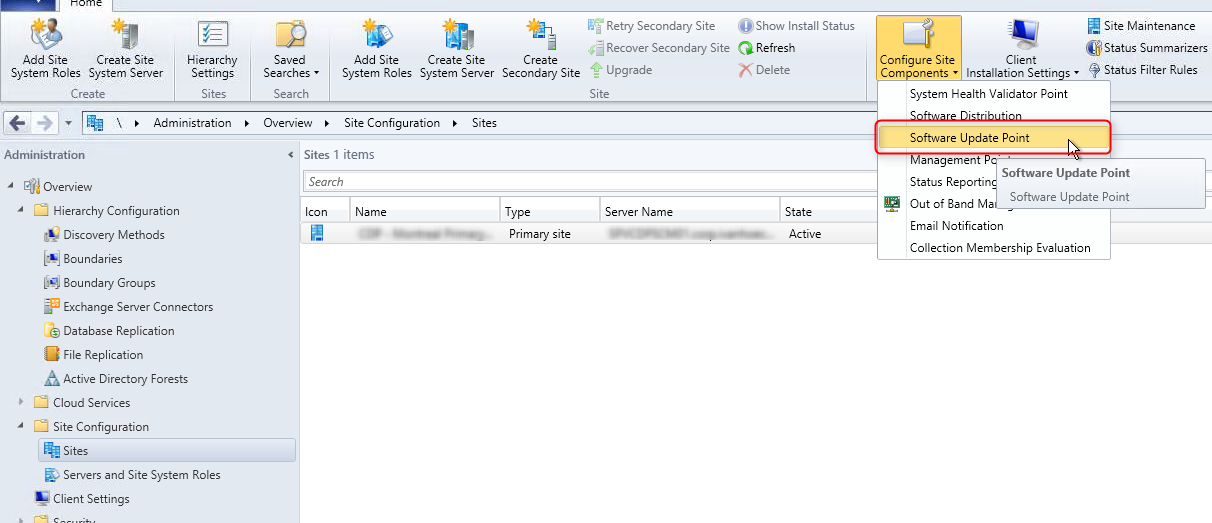
- On the Product tabs, check Forefront Endpoint Protection 2010 and click Ok
Verification
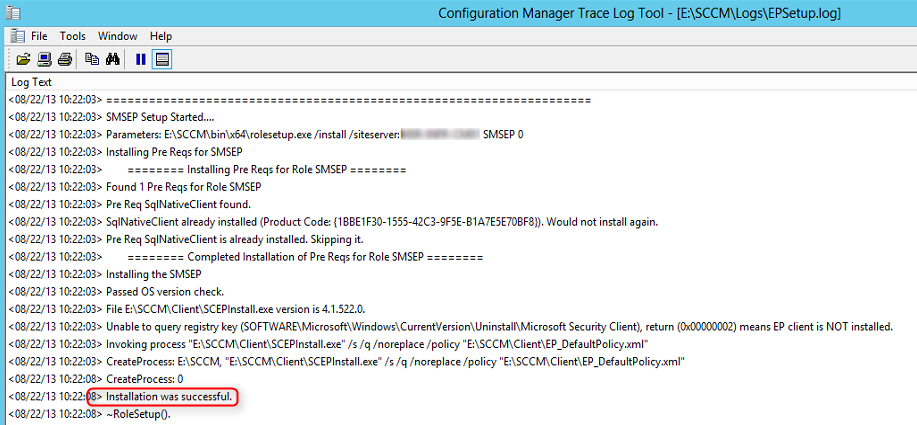
- ConfigMgrInstallationPath\Logs\EPSetup.log – Detailed EP Installation status
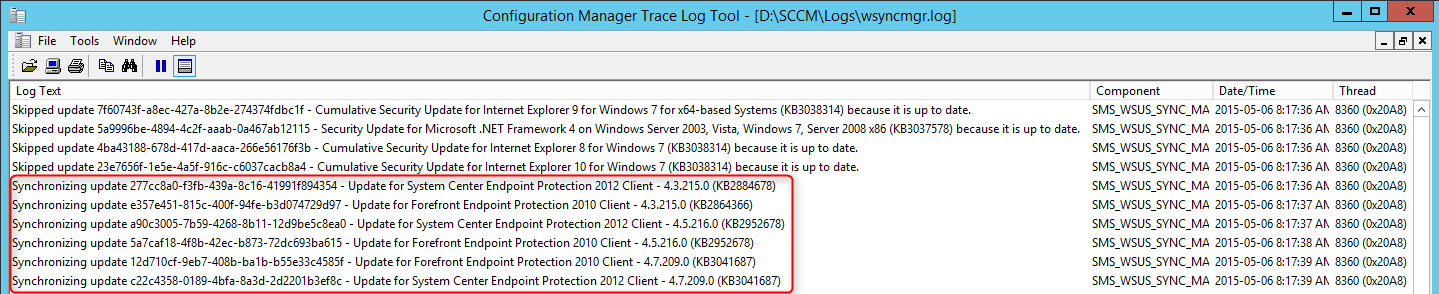
- ConfigMgrInstallationPath\Logs\Wsyncmgr.log – SUP Synchronization status
You are now ready to manage EndPoint Protection using SCCM. We have a complete guide to managing endpoint protection. You can download it from our product page.
SCCM Installation Guide Part 10 – Enrollment Point Installation
We will describe how to install SCCM Current Branch Enrollment Point and Enrollment Proxy Point site system roles.
Role Description
The Enrollment Point uses PKI certificates for Configuration Manager to enroll mobile devices, Mac computers and to provision Intel AMT-based computers.
The Enrollment Proxy Point manages Configuration Manager enrollment requests from mobile devices and Mac computers.
This is not a mandatory site system but you need both Enrollment Point and Enrollment Proxy Point if you want to enroll legacy mobile devices, Mac computers and to provision Intel AMT-based computers. Since modern mobile devices are mostly managed using Windows Intune, this post will focus mainly on Mac computer enrollment.
Site System Role Placement in Hierarchy
The SCCM Enrollment Point and Enrollment Proxy Point are site-wide options. It’s supported to install those roles on a stand-alone or child Primary site. It’s not supported to install it on a Central Administration site or Secondary site.
You must install an SCCM Enrollment Point in the user’s forest so that the user can be authenticated if a user enrolls mobile devices by using SCCM and their Active Directory account is in a forest that is untrusted by the site server’s forest.
When you support mobile devices on the Internet, as a security best practice, install the Enrollment Proxy Point in a perimeter network and the Enrollment Point on the intranet.
Prerequisites
Beginning with System Center 2012 Configuration Manager SP2, the computer that hosts the SCCM Enrollment Point or Enrollment Proxy Point site system role must have a minimum of 5% of the computers available memory free to enable the site system role to process requests. When those site system role are co-located with another site system role that has this same requirement, this memory requirement for the computer does not increase, but remains at a minimum of 5%.
Using Windows Server 2012, the following features must be installed before the role installation:
Enrollment Point
Features:
- .NET Framework 3.5
- .NET Framework 4.5
- HTTP Activation (and automatically selected options)
- ASP.NET 4.5
- Common HTTP Features
- Default Document
- Application Development
- ASP.NET 3.5 (and automatically selected options)
- .NET Extensibility 3.5
- ASP.NET 4.5 (and automatically selected options)
- .NET Extensibility 4.5
- IIS 6 Management Compatibility
- IIS 6 Metabase Compatibility
Enrollment Proxy Point
Features:
- .NET Framework 3.5
- .NET Framework 4.5
- HTTP Activation (and automatically selected options)
- ASP.NET 4.5
IIS Configuration:
- Common HTTP Features
- Default Document
- Static Content
- Application Development
- ASP.NET 3.5 (and automatically selected options)
- ASP.NET 4.5 (and automatically selected options)
- .NET Extensibility 3.5
- .NET Extensibility 4.5
- Security
- Windows Authentication
- IIS 6 Management Compatibility
- IIS 6 Metabase Compatibility
SCCM Enrollment Point Installation
For this post we will be installing both roles on a stand-alone Primary site using HTTPS connections. If you split the roles between different machine, do the installation section twice, once for the first site system (selecting Enrollment Point during role selection)and a second time on the other site system (selecting Enrollment Proxy Point during role selection).
- Open the SCCM console
- Navigate to Administration / Site Configuration / Servers and Site System Roles
- Right click your Site System and click Add Site System Roles
- On the General tab, click Next
- On the Proxy tab, click Next
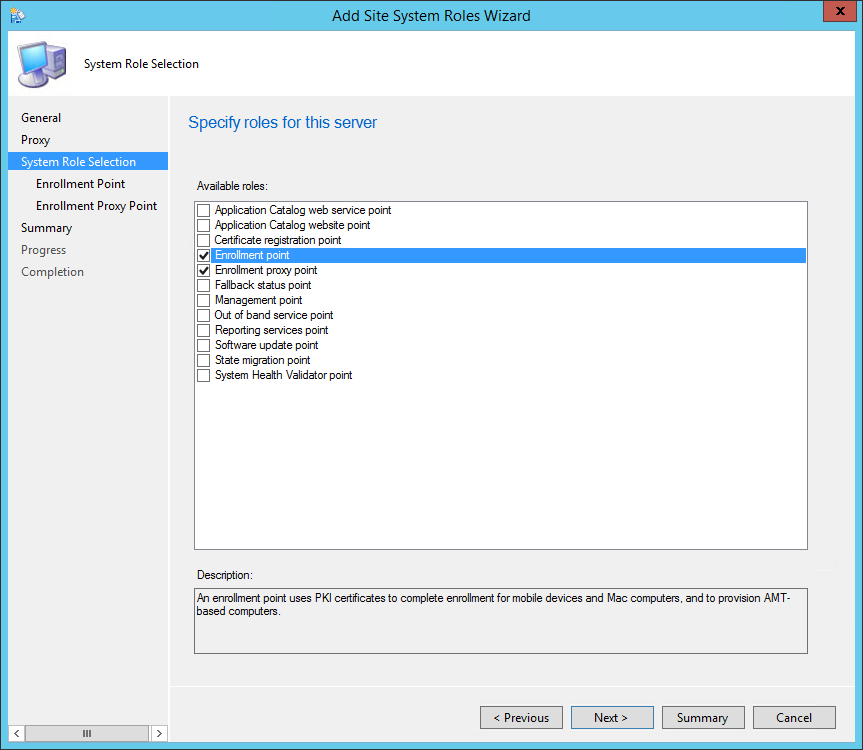
- On the Site System Role tab, select Enrollment Point and Enrollment Proxy Point, click Next
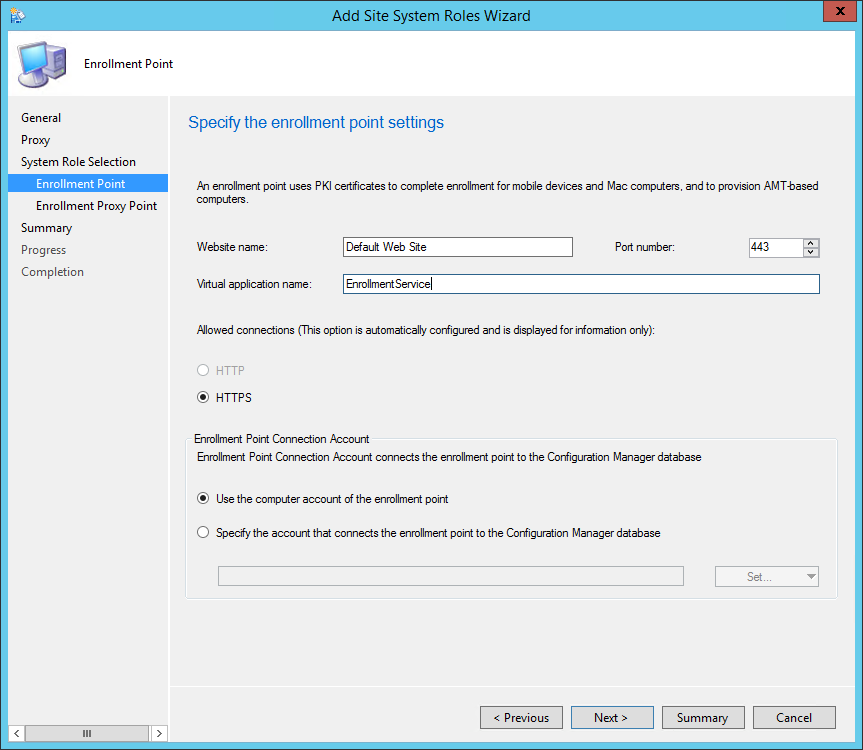
- On the Enrollment Point tab
- In the IIS Website and Virtualapplication name fields,leave both to the default values
- This is the names that you’ll see in IIS after the installation
- Enter the port number you want to use. The HTTPS setting is automatically selected and requires a PKI certificate on the server for server authentication to the Enrollment Proxy Point and for encryption of data over SSL. For more information about the certificate requirements, see PKI Certificate Requirements for Configuration Manager.
- In the IIS Website and Virtualapplication name fields,leave both to the default values
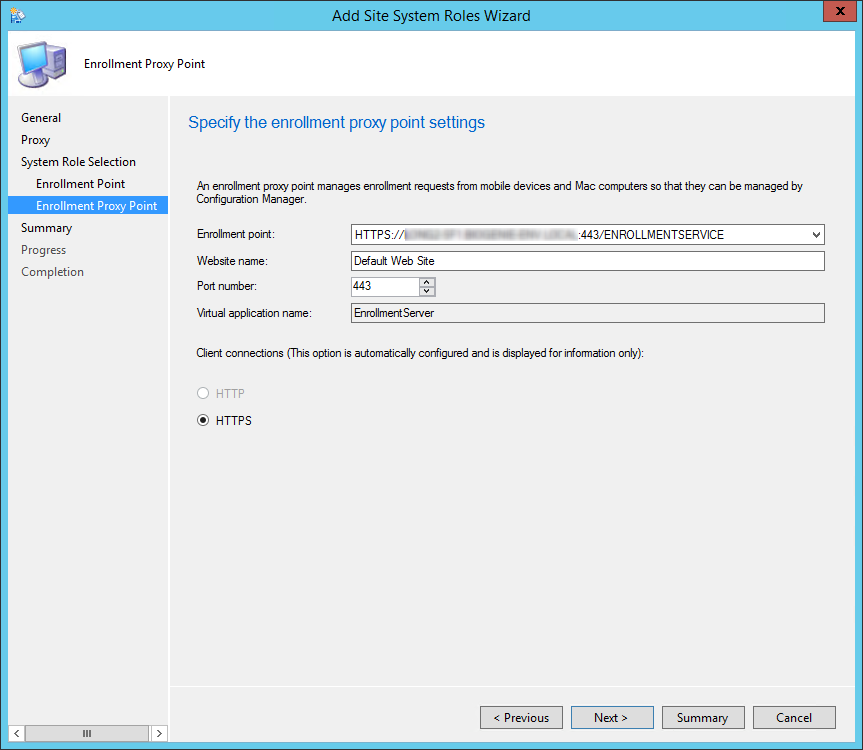
- On the Enrollment Proxy Point tab,
- The Enrollment point will be populated by default and can’t be changed
- Keep the Website name to it’s default value
- Enter the port and protocol that you want to use
- The Virtual application name can’t be changed. This will be used for client installation (https://servername/EnrollmentServer)
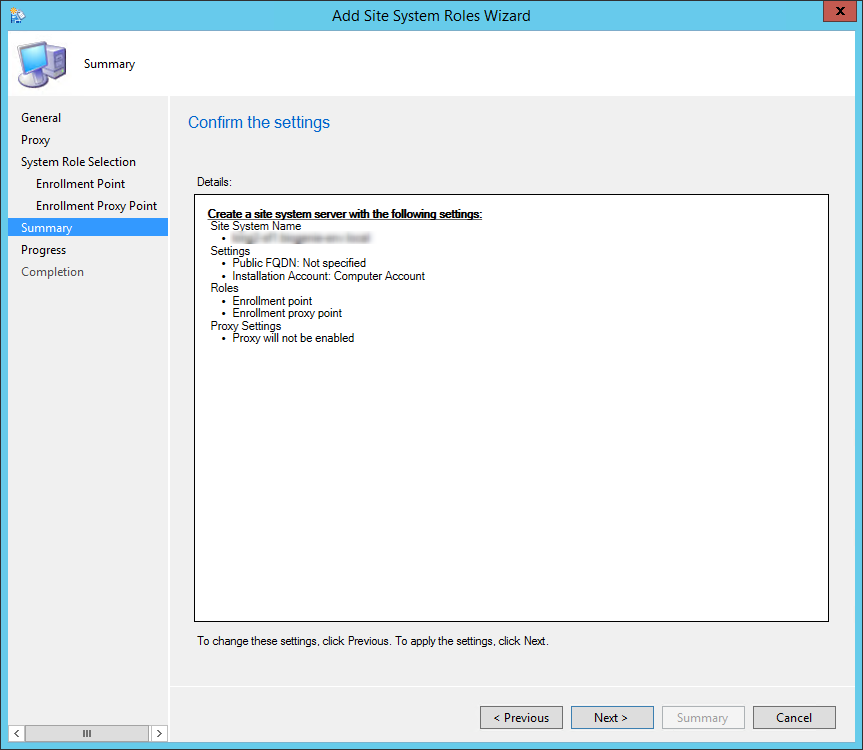
- On the Summary tab, review your settings, click Next and complete the wizard
Verification and Logs files
Logs
You can verify the role installation in the following logs:
- ConfigMgrInstallationPath\Logs\enrollsrvMSI.log and enrollmentservice.log – Records details of about the Enrollment Point installation
- ConfigMgrInstallationPath\Logs\enrollwebMSI.log – Records details of about the Enrollment Proxy Point installation
- ConfigMgrInstallationPath\Logs\enrollmentweb.log – Records communication between mobile devices and the Enrollment Proxy Point
That’s it, you’ve installed your SCCM Enrollment Point, follow this Technet Guide if you want to proceed to next steps for Mac computers enrollment
SCCM Installation Guide Part 12 – Fallback Status Point
We will describe how to install SCCM Fallback Status Point (FSP).
Role Description
The FSP helps monitor client installation and identify unmanaged clients that cannot communicate with their management point.
This is not a mandatory Site System but we recommend to install a FSP for better client management and monitoring. This is the Site System that receive State Message related to client installation, client site assignment, and clients unable to communicate with their HTTPS Management Point.
If the FSP is not configured properly you’ll end up having A fallback status point has not been specified errors in your logs.

Site System Role Placement in Hierarchy
This Site System is a hierarchy-wide option. It’s supported to install this role on a child Primary Site or stand-alone Primary Site but it’s not supported on a Central Administration site nor Secondary Site.
FSP Installation
- Open the SCCM console
- Navigate to Administration / Site Configuration / Servers and Site System Roles
- Right click your Site System and click Add Site System Roles
- On the General tab, click Next
- On the Proxy tab, click Next
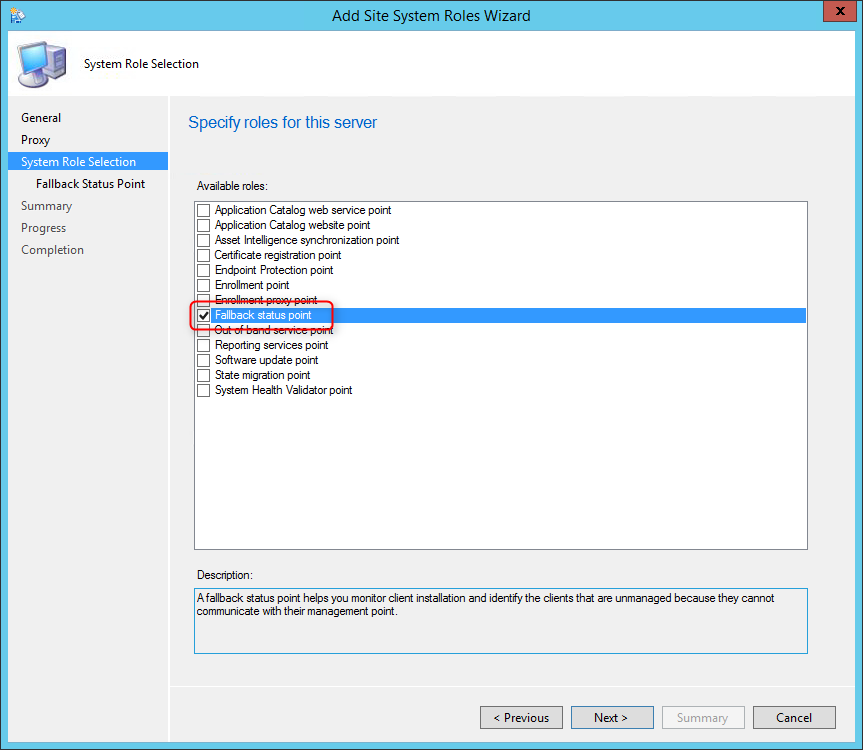
- On the Site System Role tab, select Fallback Status Point, click Next
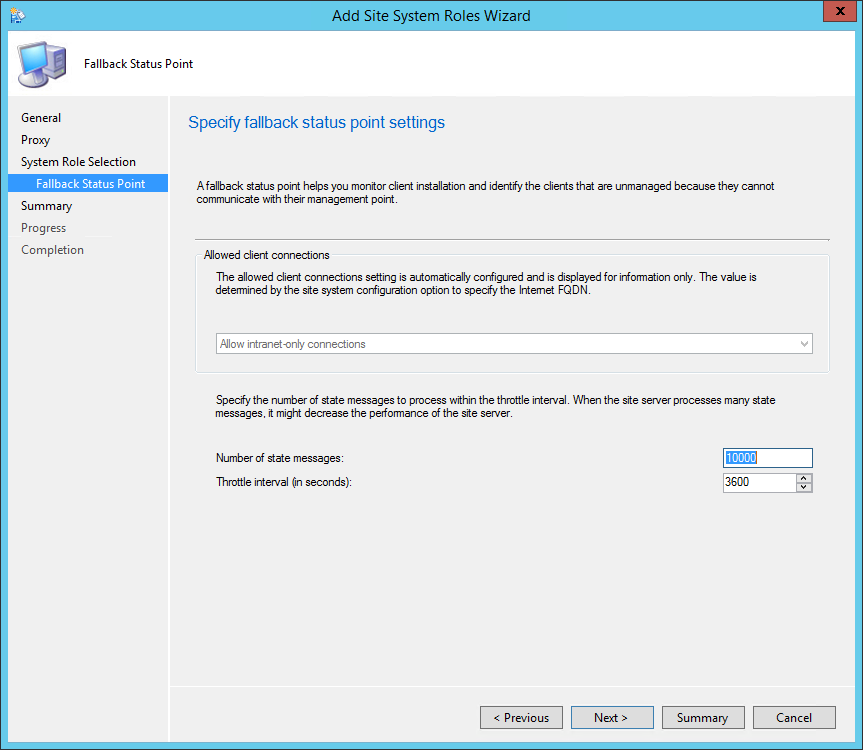
- On the Fallback Status Point tab, specify the number of state messages to process. We recommend to leave the default value, click Next
- On the Summary tab, review your setting and click Next
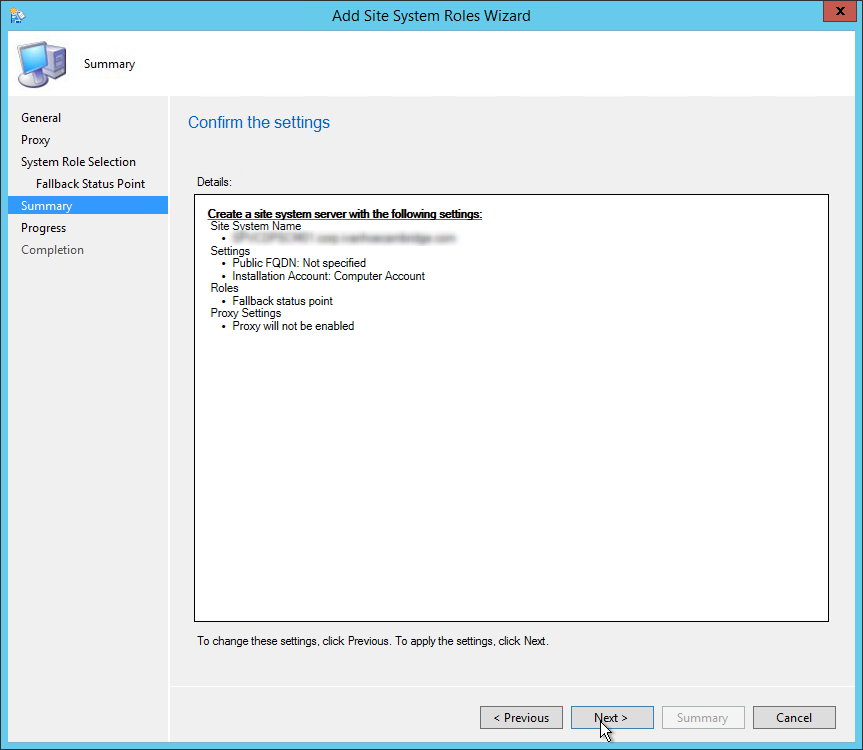
- Wait for the setup to complete and close the wizard
Verification and Logs files
- Smsfspsetup.log – DetailedFSP Installation status

- Fspmgr.log – Verify whether clients are successfully sending state messages to the FSP
You can also check if reports that depend on the FSP are populated with data. See the full list of reports that rely on the FSP here.
Configure clients
Use the FSP client properties to point your clients to your newly created FSP
- Navigate to Administration / Site Configuration / Site
- Click the Client Installation Setting icon on the ribbon
- Select Client Push Installation
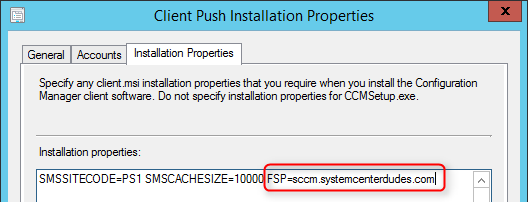
- On the Installation Properties tab
- Enter your server FQDN in the FSP properties
SCCM Installation Guide Part 13 – Management Point Installation
In this part of SCCM Installation Guide, we will describe how to install an SCCM Management Point (MP).
Role Description
Every SCCM hierarchy must have a Management Point to enable client communication. The Management Point is the primary point of contact between Configuration Manager clients and the site server. Management Points can provide clients with installation prerequisites, configuration details, advertisements and software distribution package source file locations. Additionally, Management Points receive inventory data, software metering information and state messages from clients.
Multiple Management Points are used for load-balancing traffic and for clients to continue receiving their policy after Management Point failure. Read about SCCM High-Availability options in this Technet article.
Prior to SCCM 2012 R2 SP1, it was not possible to assign client directly to a specific Management Point. It’s now possible using the new Preferred Management Point feature. Read about how clients choose their Management Point in this Technet article.
Site System Role Placement in Hierarchy
The Management Point is a site-wide option. It’s supported to install this role on a stand-alone Primary site, child Primary site or Seconday site. It’s not supported to install a Management Point on a Central Administration site.
Each primary site can support up to 10 Management Points.
By default, when you install a Secondary site, a Management Point is installed on the Secondary site server. Secondary sites do not support more than one Management Point and this Management Point cannot support mobile devices that are enrolled by Configuration Manager.
See the full Supported Configuration in the following Technet article.
Prerequisites
On Windows 2012, the following features must be installed before the Management Point Installation:
Features:
- .NET Framework 4.5
- BITS Server Extensions or Background Intelligent Transfer Services (BITS)
IIS Configuration:
- Application Development
- ISAPI Extensions
- Security
- Windows Authentication
- IIS 6 Management Compatibility
- IIS 6 Metabase Compatibility
- IIS 6 WMI Compatibility
SCCM Management Point Installation
- Open the SCCM console
- Navigate to Administration / Site Configuration / Servers and Site System Roles
- Right click your Site System and click Add Site System Roles
- On the General tab, click Next
- On the Proxy tab, click Next
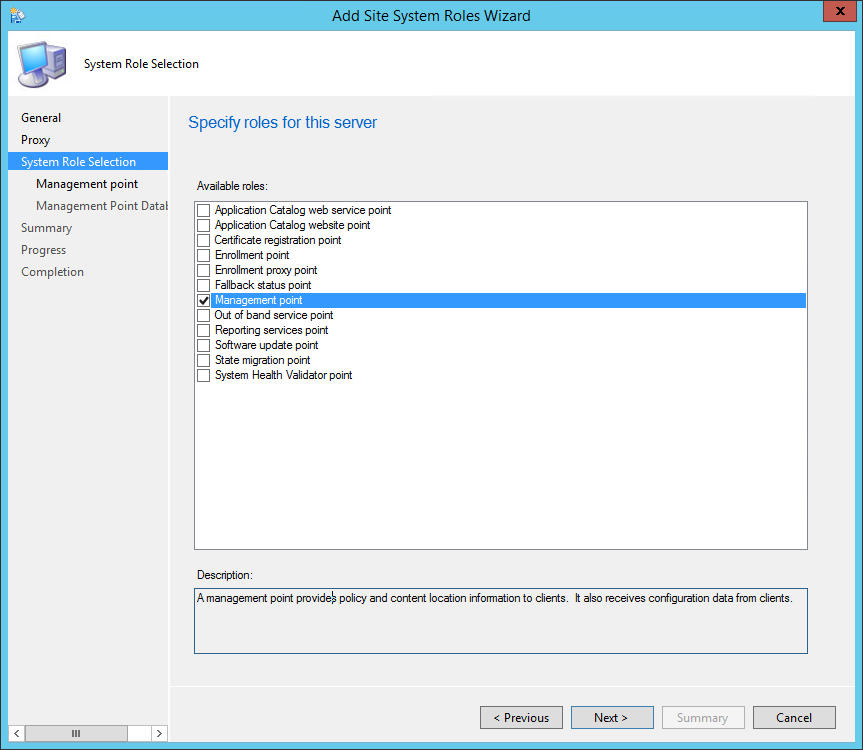
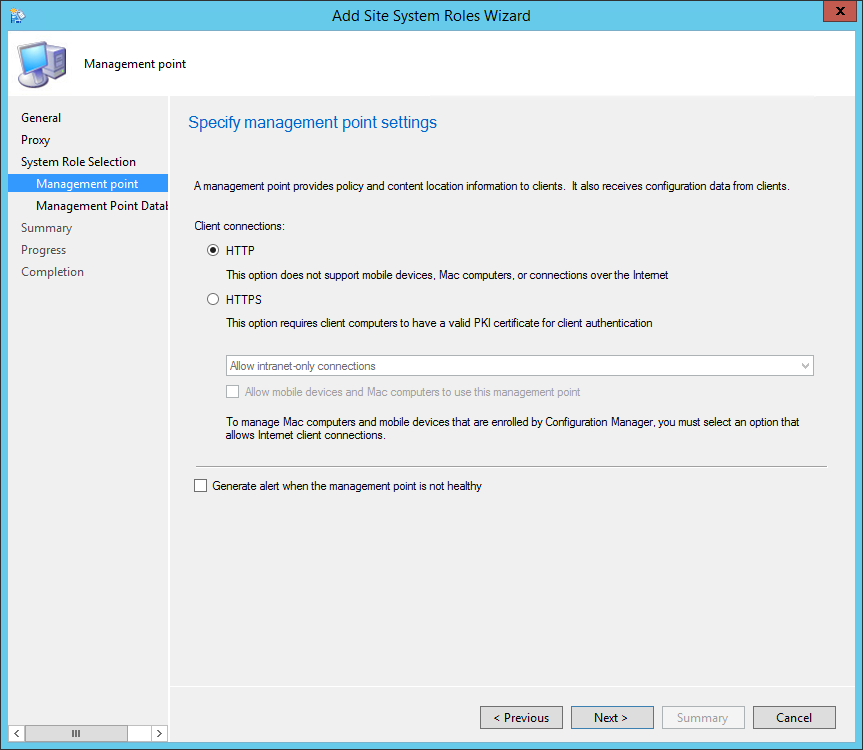
- On the Site System Role tab, select Management Point, click Next
- On the Management Point tab
- Select the desired client connections methods. HTTPS required to have a valid PKI certificate for client authentication
- Click Next
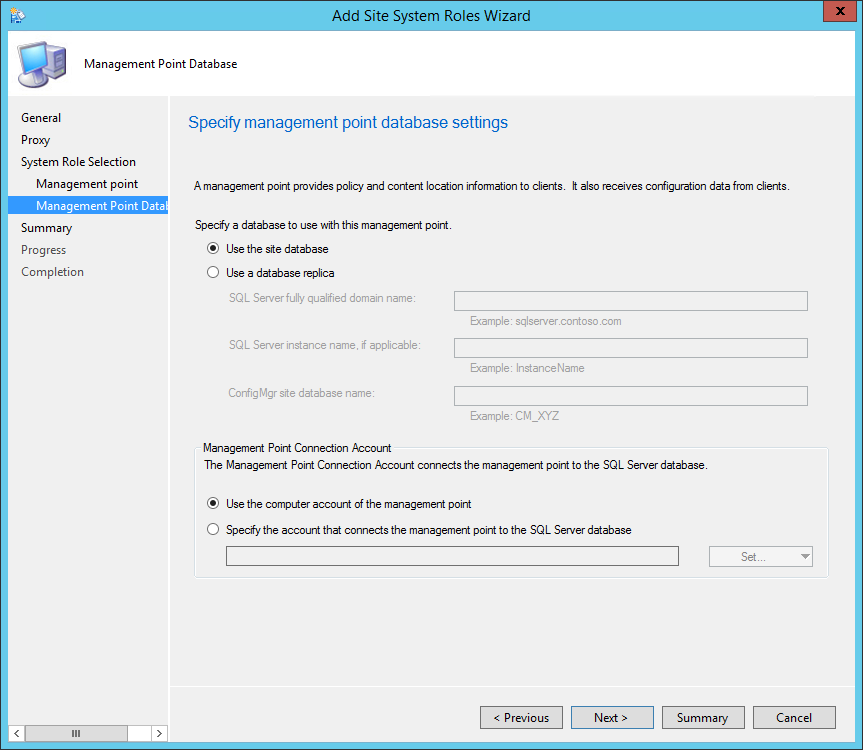
- On the Management Point Database tab, specify if you want to use the site database or a database replica. Read about database replica here
- Specify if you want to use the computer account of the Management Point to connect to the database or a specified account
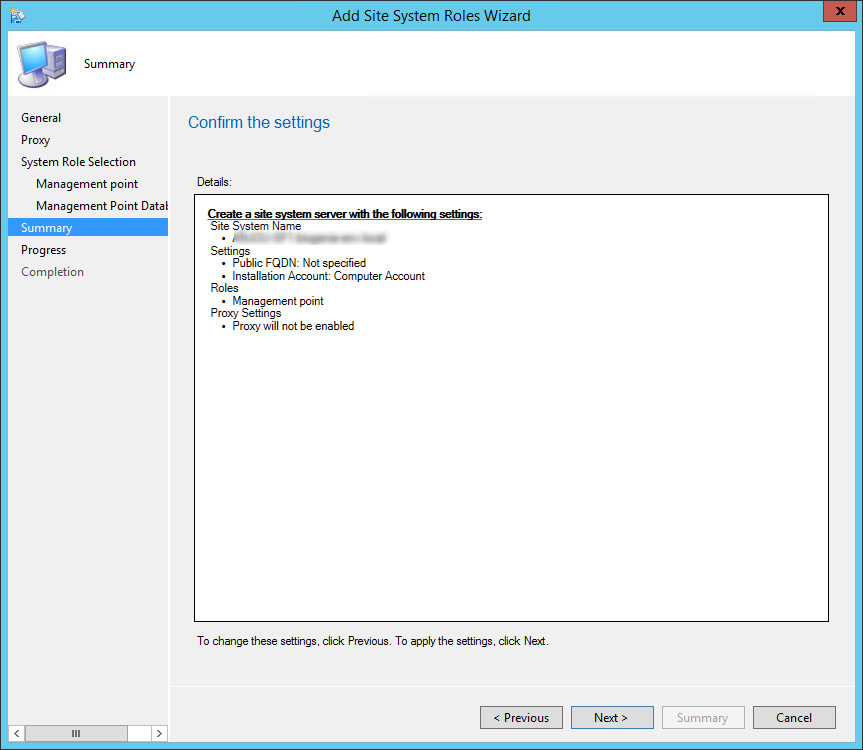
- On the Summary tab, review your settings, click Next and complete the wizard
Verification and Logs files
You can verify the installation in the following logs:
- ConfigMgrInstallationPath\Logs\mpMSI.log – Records details of about the management point installation
- ConfigMgrInstallationPath\Logs\MPSetup.log.log – Records the management point installation wrapper process
SCCM Installation Guide Part 14 – Reporting Point Installation
We will describe how to install a SCCM Current Branch reporting services point.
This role can be installed on a remote machine, the process is the same but the location of the logs is different.
Requirements
Before you can install the reporting services point role you must configure SQL correctly.
We’ll be using SQL 2012 on this post. We are assuming that SQL is already installed and that your SCCM site is up and healthy.
During the initial SQL installation, you must select Reporting Services.
If you have installed SQL Server, but have not installed Reporting Services follow the following steps. If Reporting Services is already installed, skip to the “Configure Reporting Services” section.
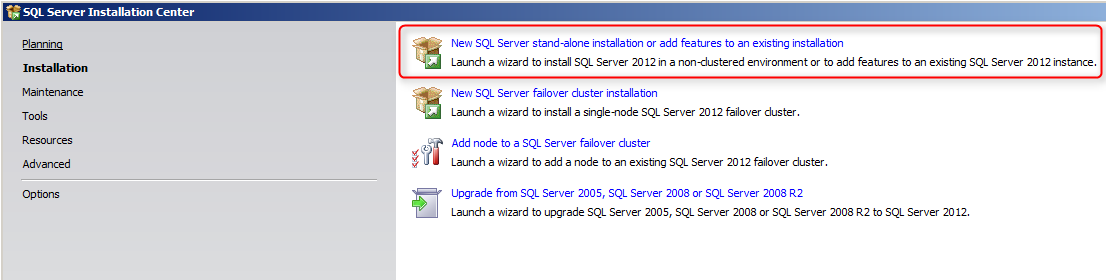
- Launch the SQL Server 2012 installation from the media.
- Click the Installation link on the left to view the Installation options.
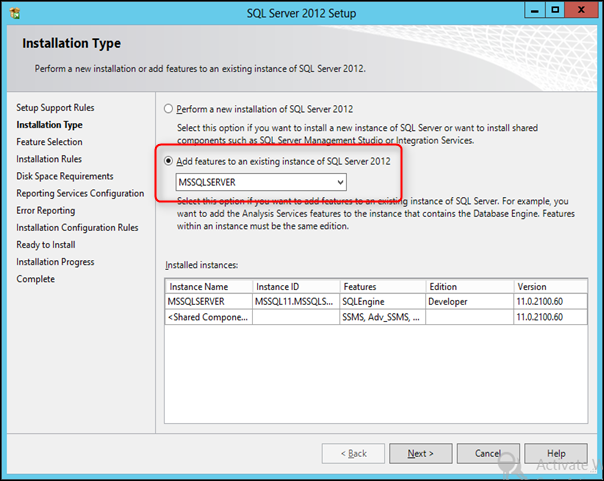
- Click the top link, New SQL Server stand-alone installation or add features to an existing installation.
- Follow the SQL Server Setup wizard until you get to the Installation Type screen.
- Select Add features to an existing instance of SQL Server 2012.
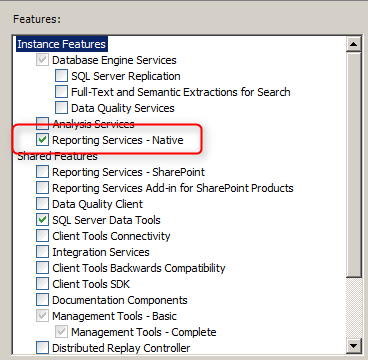
- Click Next to move to the Feature Selection page.
- Select Reporting Services – Native
- At the Reporting Services Configuration page
- Select Install Only
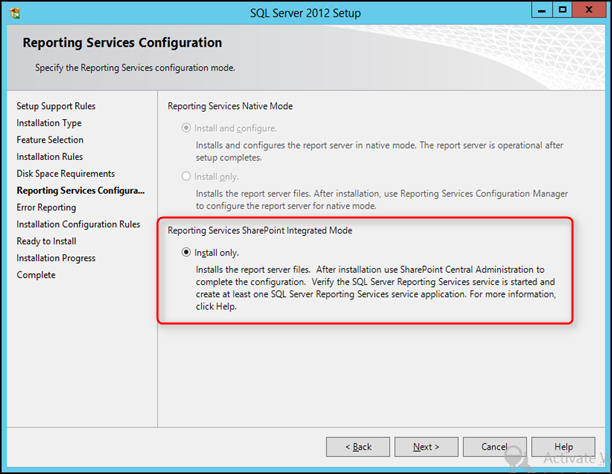
Continue through the wizard and reboot the computer at the end of the installation if instructed to do so.
Configure Reporting Services
Before configuring the reporting point, some configuration needs to be made on the SQL side. The virtual instance needs to be created for SCCM to connect and store its reports.
If you installed Reporting Services during the installation of the SQL Server instance, SSRS will be configured automatically for you. If you install SSRS later, then you will have to go back and configure it as a subsequent step.
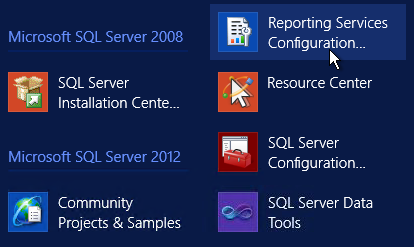
To configure, Open Reporting Services Configuration Manager
- Click Start > All Programs > Microsoft SQL Server > Configuration Tools > Reporting Services Configuration Manager
- Click Connect to connect to the SQL instance

- On the left-hand side of the Reporting Services Configuration Manager, click Database.
- Click the Change Database button
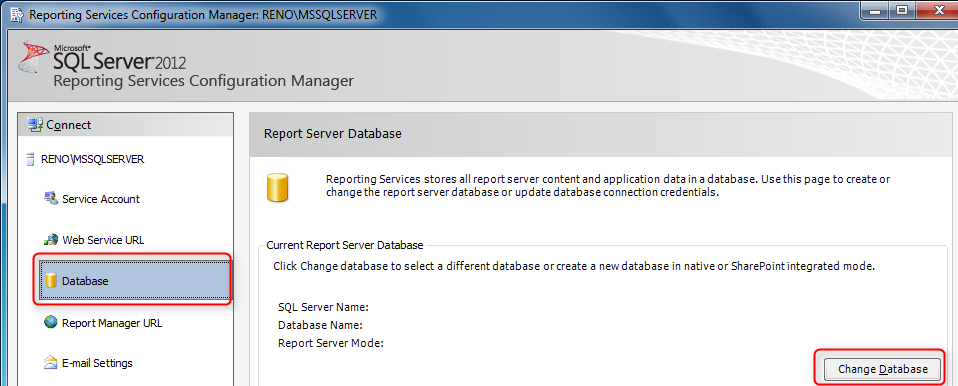
- Select Create a new report server database and click Next
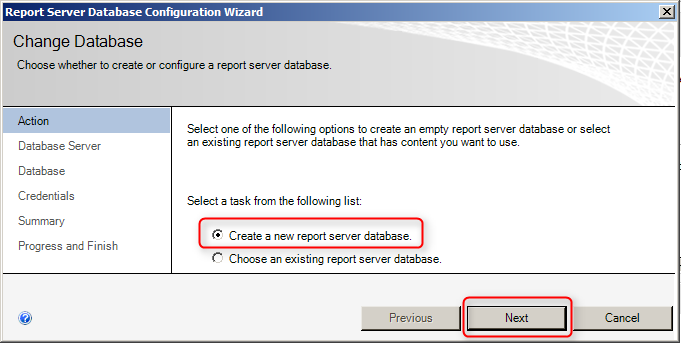
This wizard creates two databases: ReportServer, used to store report definitions and security, and ReportServerTempDB which is used as scratch space when preparing reports.
- Click the Web Service URL tab
- Click Apply
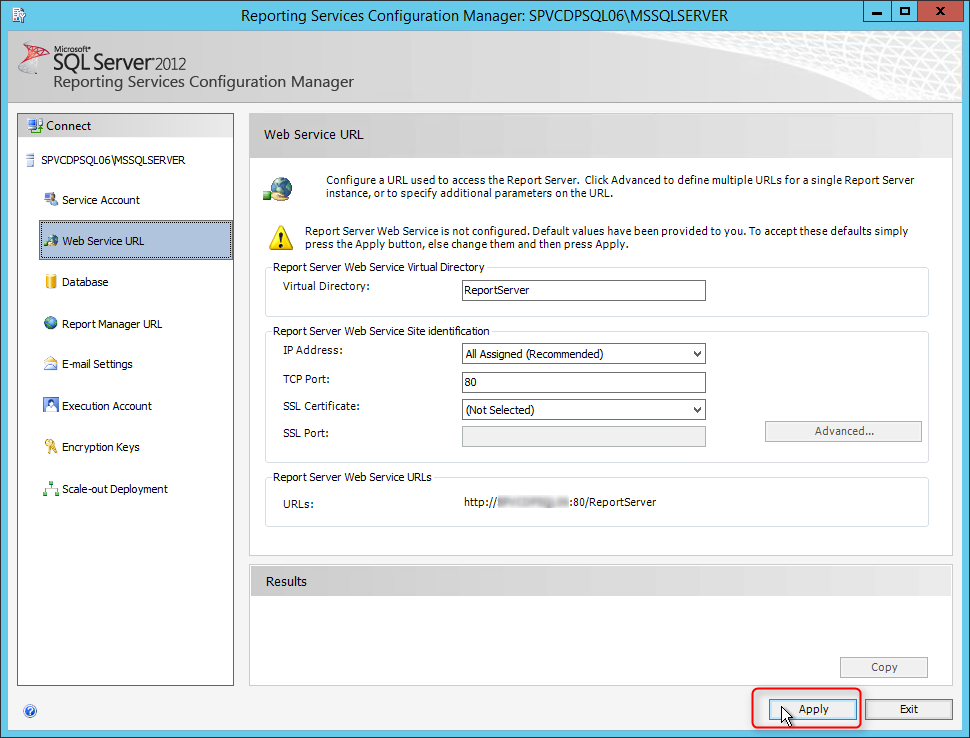
This step sets up the SSRS web service. The web service is the program that runs in the background that communicates between the web page, which you will set up next, and the databases.
- Select the Report Manager URL
- Accept the default settings and click Apply.

If the Apply button was already grayed out, this means the SSRS was already configured. This step sets up the Report Manager web site where you will publish reports
Exit Reporting Service Configuration Manager.
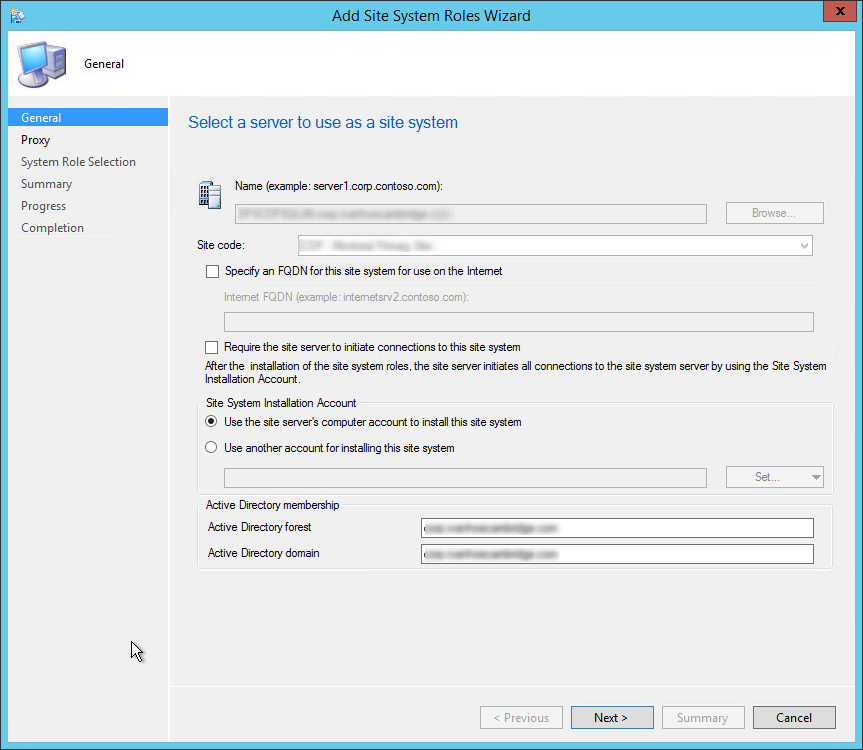
Add Reporting Services Point role in SCCM
- Open the SCCM console
- Navigate to Administration/Site/Configuration/Servers and Site System Roles
- Right-click on your Site Server and click Add system Roles
- On the General tab, click Next
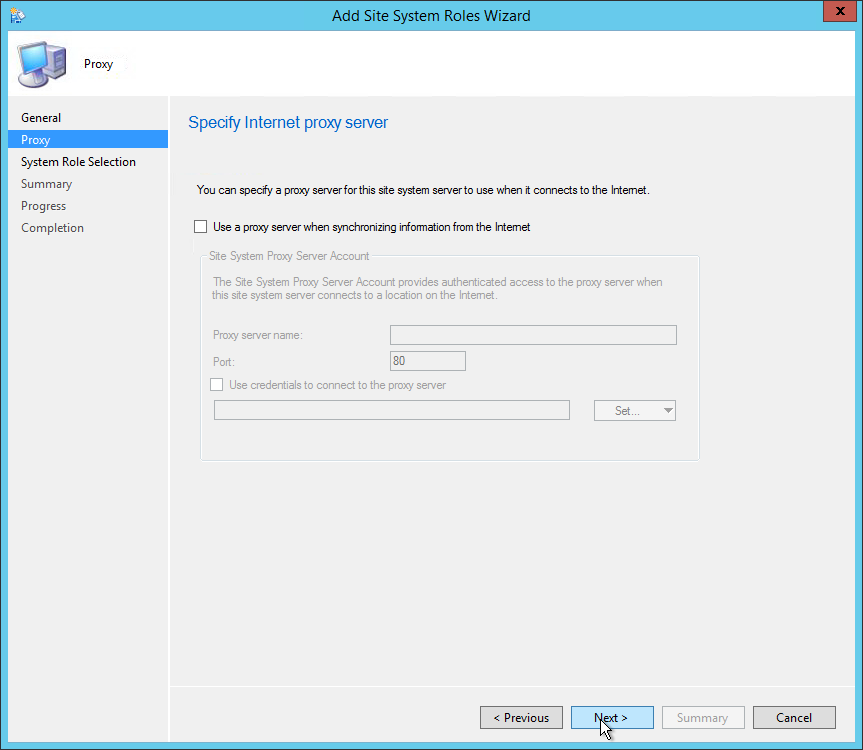
- On the Proxy tab, Click Next
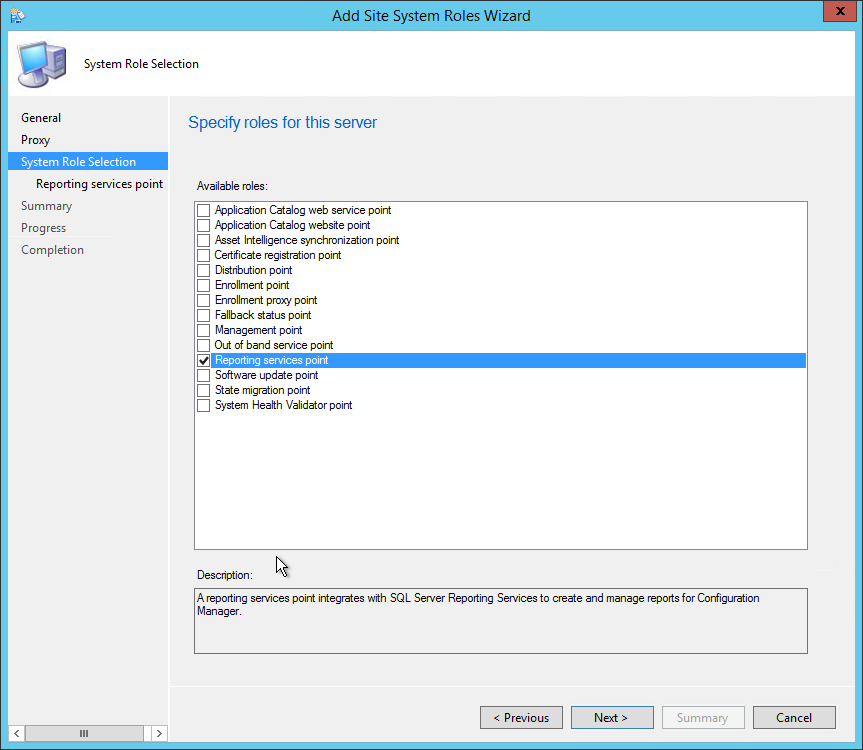
- On the Site System Role, select Reporting Services Point, Click Next
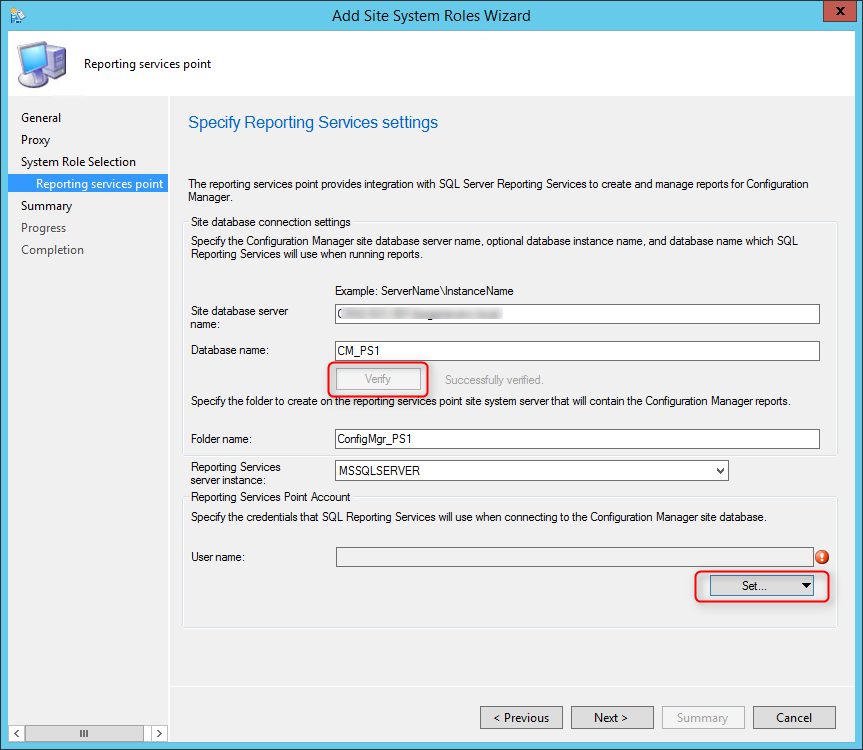
- On Rethe porting Services setting tab
- Click Verify
- At the bottom, Add an account to use for the reporting point. This account needs to have access to the SCCM DB
- Click Next
- Wait for the process to complete and close the wizard
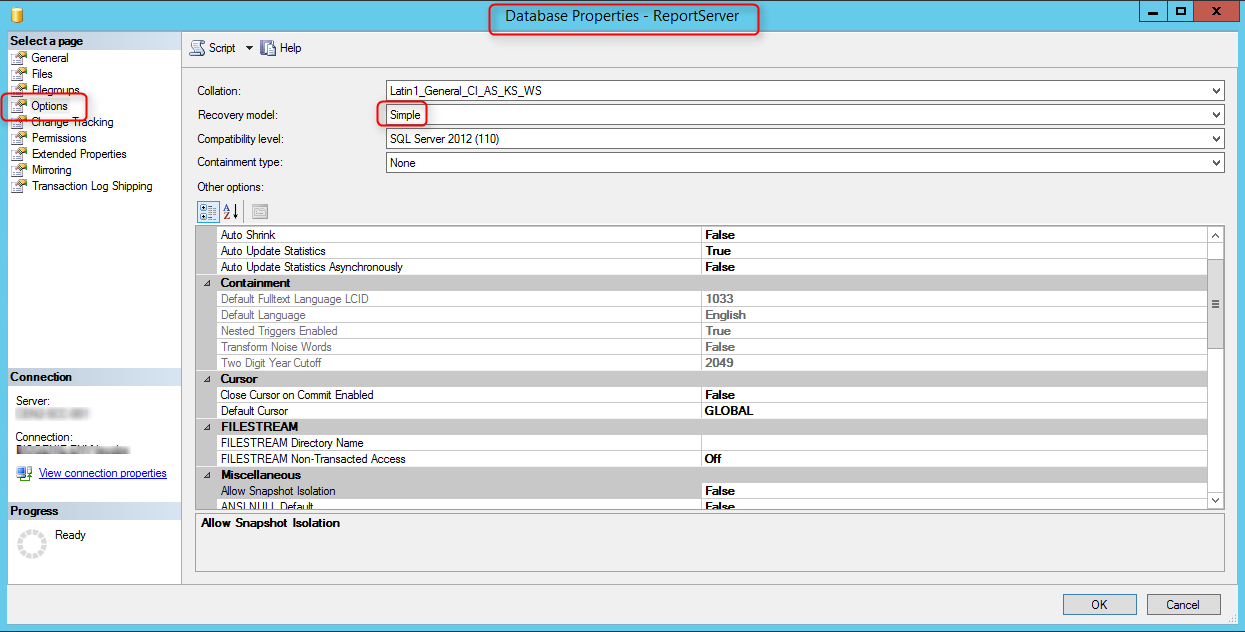
Recovery Model
Using the simple recovery model improves performance and saves your server hard drive and possibly a large transaction log file.
To change the Recovery Model of the ReportingDB to Simple
- Open SQL Management Studio
- Right-click on the ReportServer database and select Properties
- Go to the Options page
- Under Recovery model select Simple
- Click OK
Verification
Logs
Check for the following logs for reporting point installation status. Both logs are under the SCCM logs file locations.
- Srspsetup.log
- Srsrpmsi.log
If your reporting point is installed on a remote server look for the logs in :
Drive:\SMS\Logs\
Console
Open Monitor/Reporting/Reports node. Verify that your reports are listed
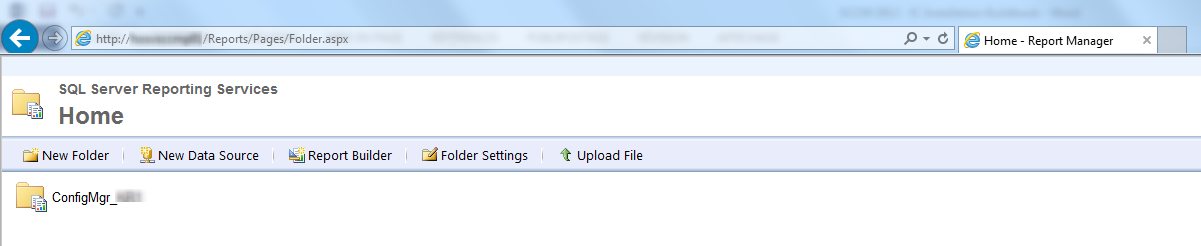
Web Browser
Open Internet Explorer, navigate to http://yourservername/Reports
If everything went well, you’ll have a folder Config_SiteCode containing your reports
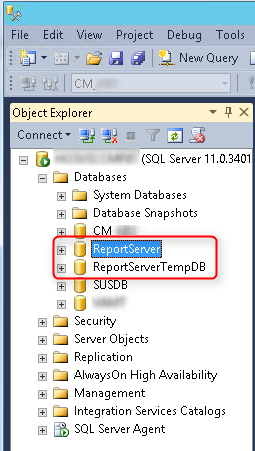
SQL
If you check your SQL instance, you’ll see the 2 new database which were created by the installation.
- Open SQL Management Studio
- Locate ReportServer and ReportServerTempDB
Happy reporting! 🙂
SCCM Installation Guide Part 15 – Software Update Point Installation
We will describe how to install SCCM Current Branch Software Update Point (SUP).
Role Description
The SUP integrates with Windows Server Update Services (WSUS) to provide software updates to Configuration Manager clients.
This is not a mandatory Site System but your need to install a SUP if you’re planning to use SCCM as your patch management platform.
Site System Role Placement in Hierarchy
This Site System is a site-wide option. It’s supported to install this role on a Central Administration Site, child Primary Site, stand-alone Primary Site and Secondary Site.
When your hierarchy contains a Central Administration Site, install a Software Update Point and synchronizes with Windows Server Update Services (WSUS) before you install a SUP at any child’s Primary Site.
When you install a Software Update Point at a child Primary Site, configure it to synchronize with the SUP at the Central Administration Site.
Consider installing a SUP in Secondary Site when data transfer across the network is slow.
The WSUS Administration Console is required on the Configuration Manager site server when the software update point is on a remote site system server and WSUS is not already installed on the site server. The WSUS version on the site server must be the same as the WSUS version running on the software update points.
When using WSUS 3.0 (on server 2008, it was possible to install the console only). This has changed with 2012 and 2016. One way to do it is to add the Windows Software Update Services role and deselecting Database and WID Database. The problem is that will still cause some trouble with the post-install task.
The recommended way to do it :
- Start PowerShell Console (as Administrator)
- Run : Install-WindowsFeature -Name UpdateServices-Ui
This will install the console only and not run a post-install task.
WSUS Installation
Perform the following on the server that will host the SUP role.
- Open Server Manager / Add Roles and Features
- Select the Windows Server Update Services Role, click Next
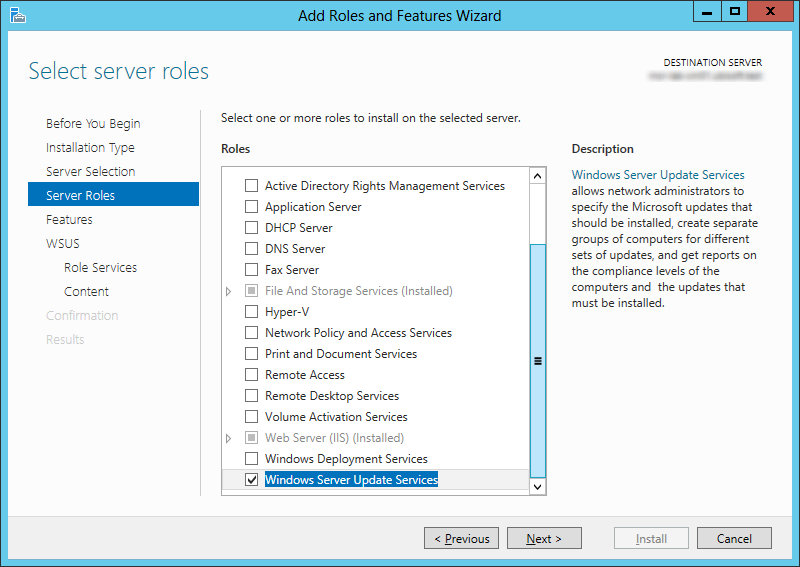
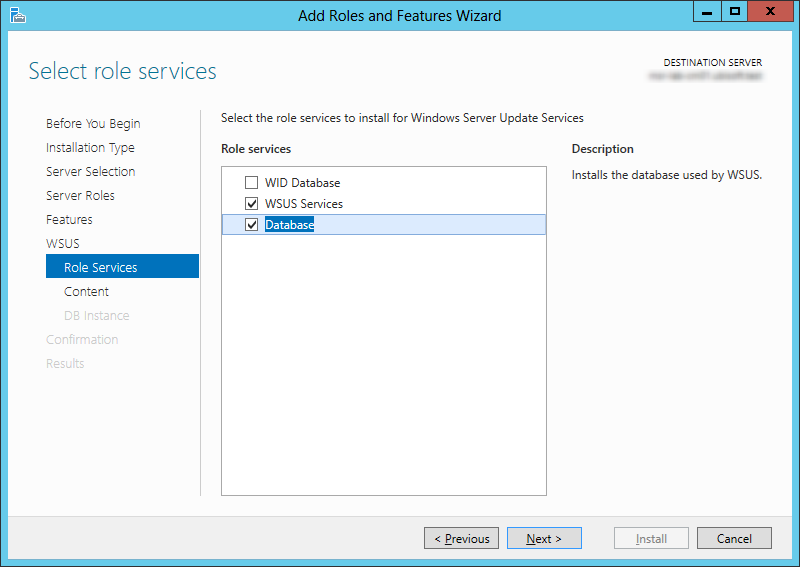
- Select WSUS Services and Database, click Next
- Launch Windows Server Update Services from the Start Menu. You will be prompt with the following window :
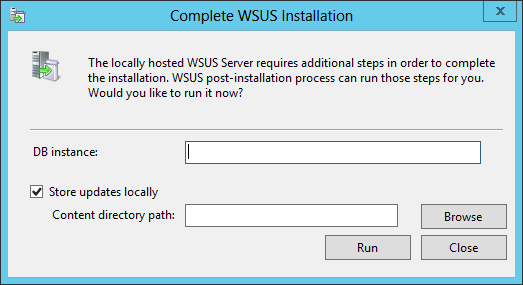
- On the DB instance, enter your server name
- On Content directory path, use a drive with enough drive space. This is where your WSUS will store updates

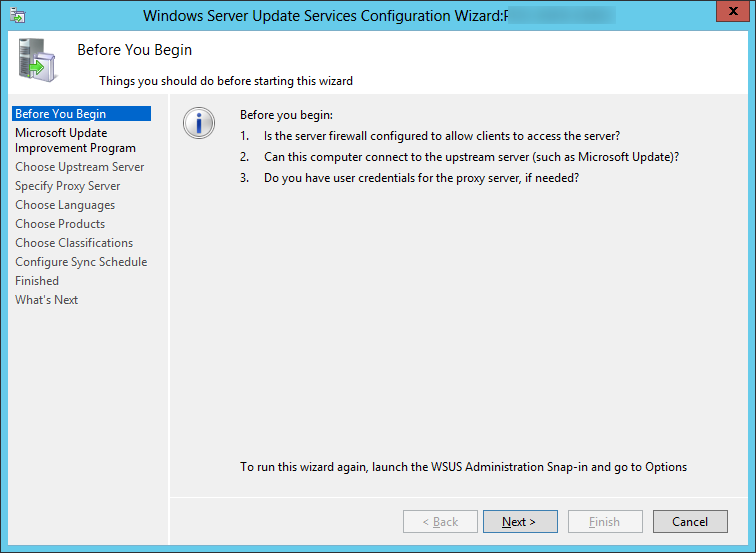
- When the WSUS Configuration Wizard starts, click Cancel
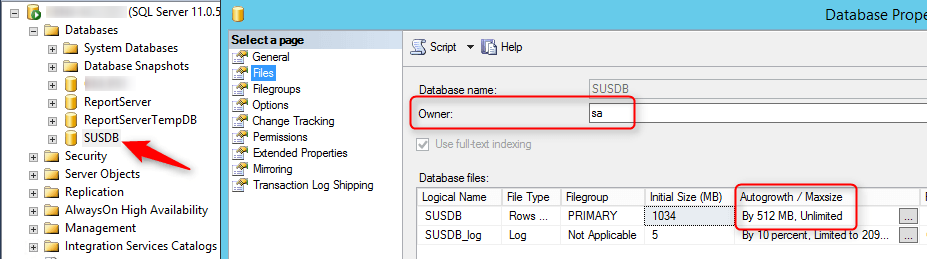
- Open SQL Management Studio
- Under Databases, Right-click SUSDB, select Properties and click Files
- Change Owner to SA
- Change the Autogrowth value to 512MB, click Ok and close SQL MS
Software Update Point Installation
- Open the SCCM console
- Navigate to Administration / Site Configuration / Servers and Site System Roles
- Right-click your Site System and click Add Site System Roles
- On the General tab, click Next
- On the Proxy tab, click Next
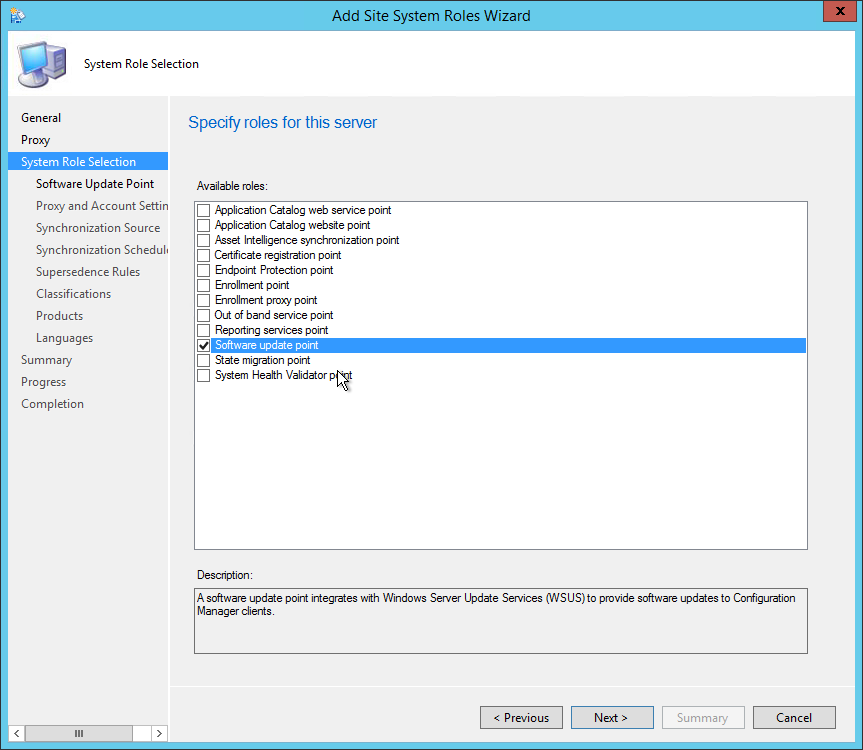
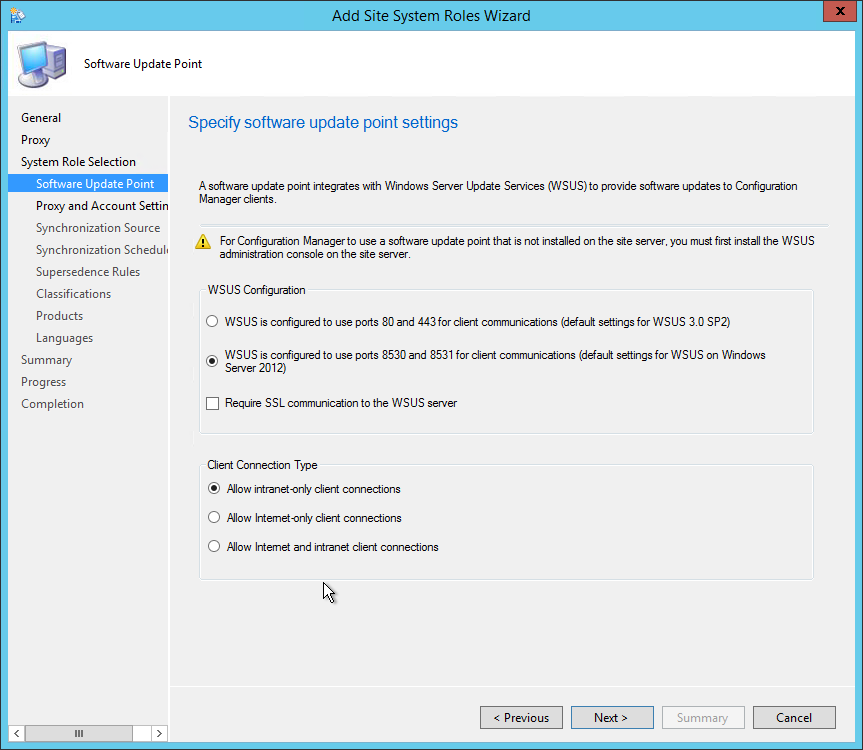
- On the Site System Role tab, select Software Update Point, click Next
- On the Software Update Point tab, select WSUS is configured to use ports 8530 and 8531, click Next
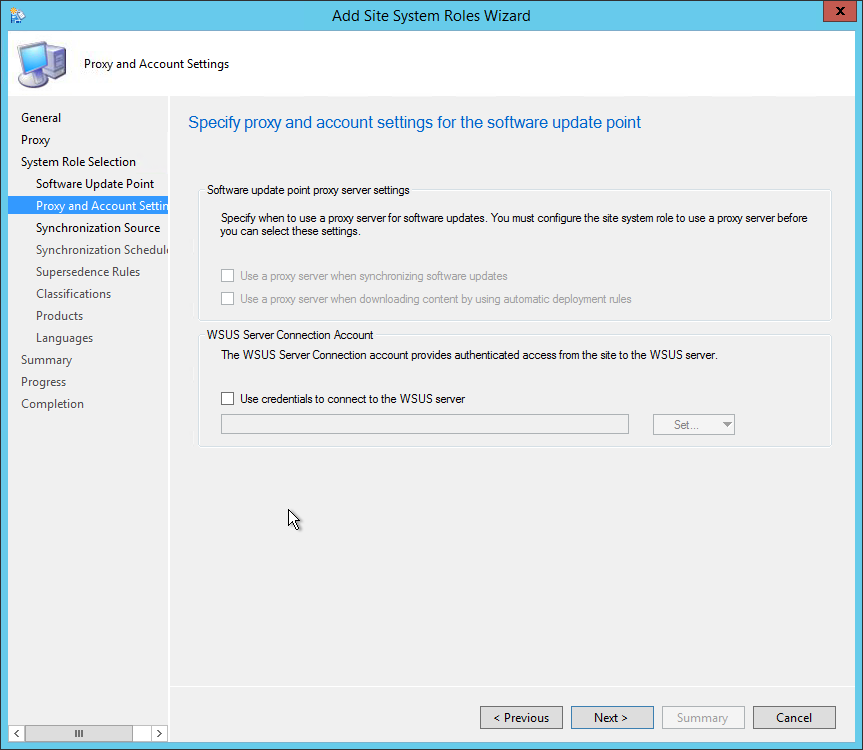
- On the Proxy and Account Settings tab, specify your credentials if necessary, click Next
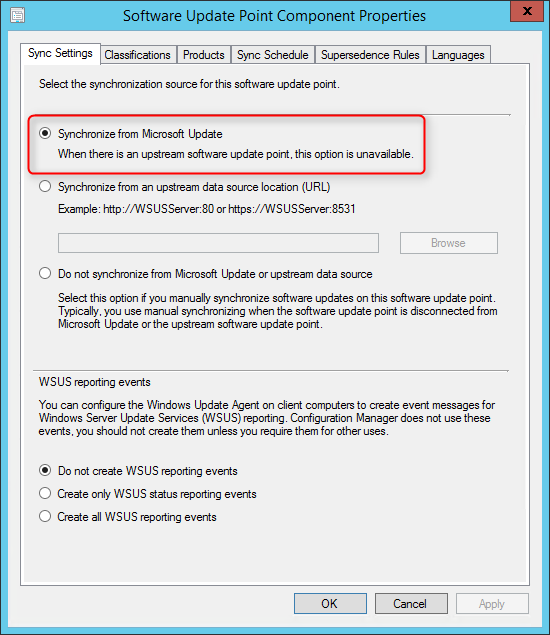
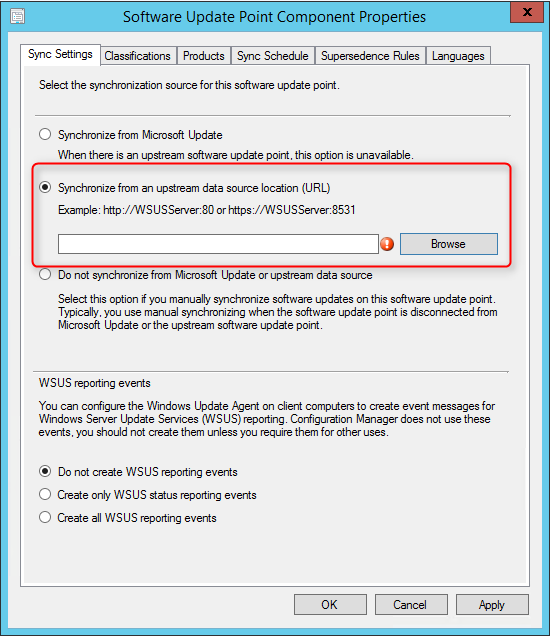
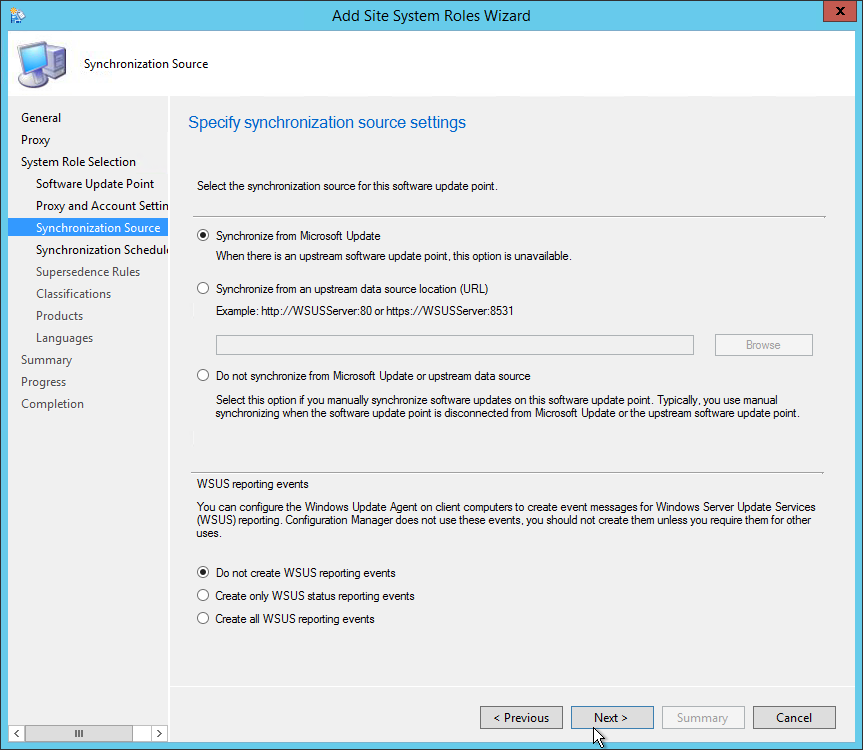
- On the Synchronization Source tab, specify if you want to synchronize from Microsoft Update or an upstream source. Refer to the Site System Placement section if you’re unsure. For a stand-alone Primary Site, select Synchronize from Microsoft Update, click Next
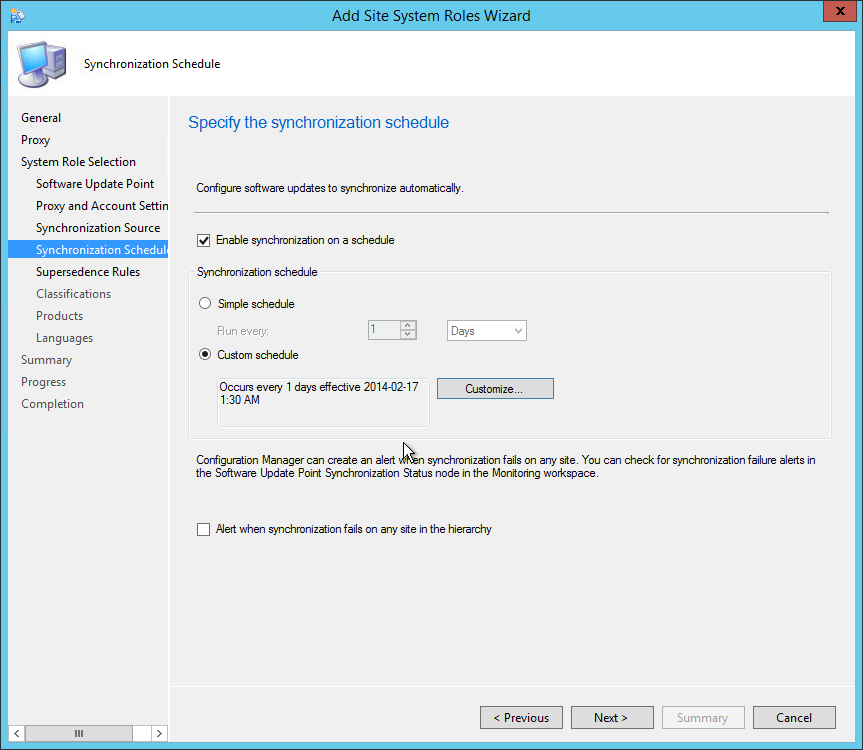
- On the Synchronization Schedule tab, check the Enable synchronization on a schedule checkbox and select your desired schedule. 1 day is usually enough but it can be lowered if you’re synchronizing Endpoint Protection definition files, click Next
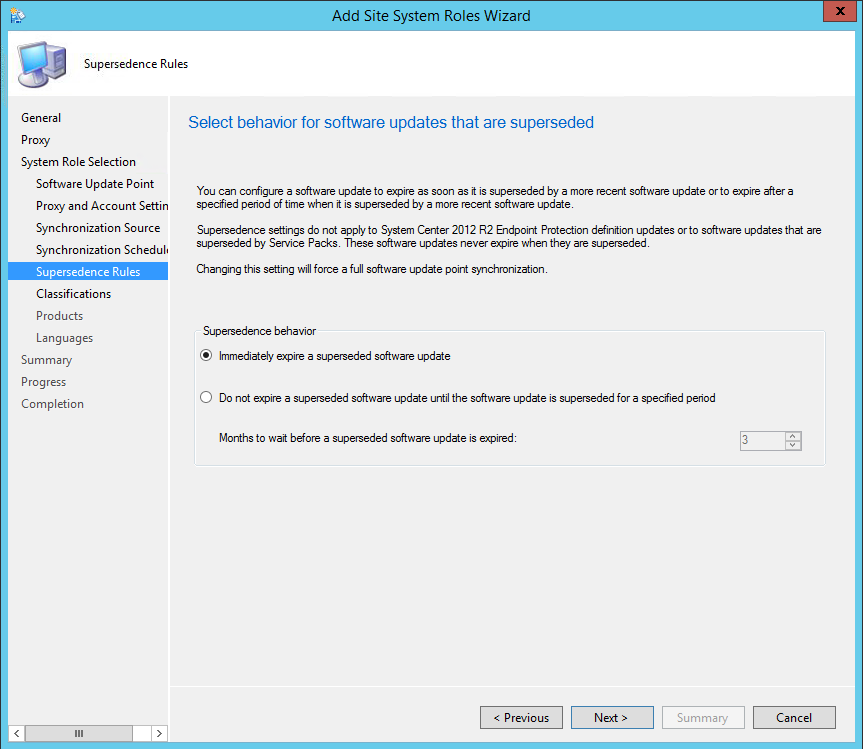
- On the Supersedence Rules tab, select Immediately expire a superseded software update, click Next
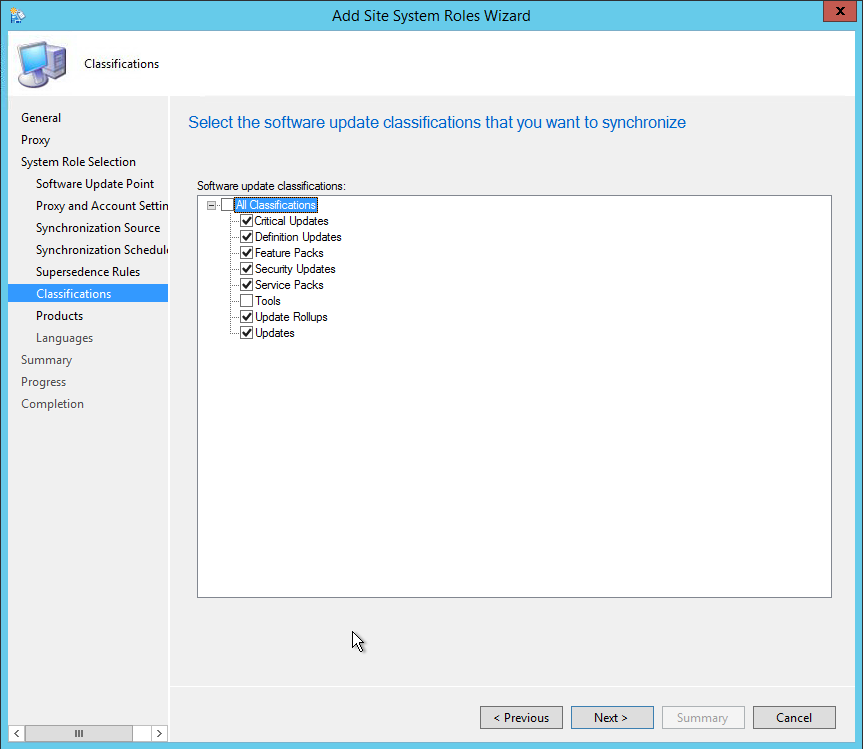
- On the Classifications tab, select your organization needs, click Next
- Full description on this Microsoft Support Article
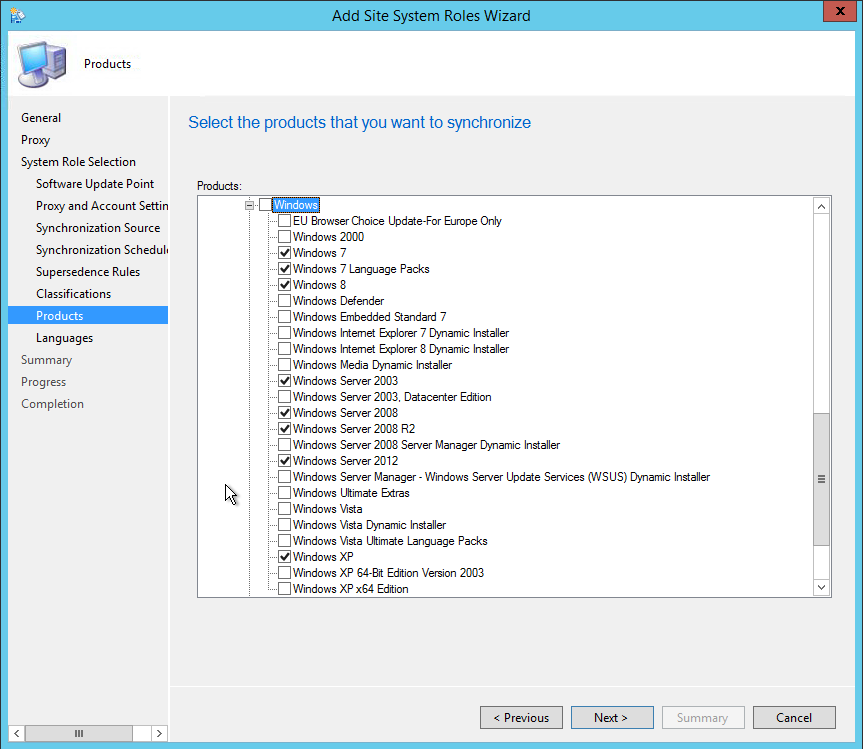
- On the Products tabs, select the products that you want to manage using SCCM, click Next
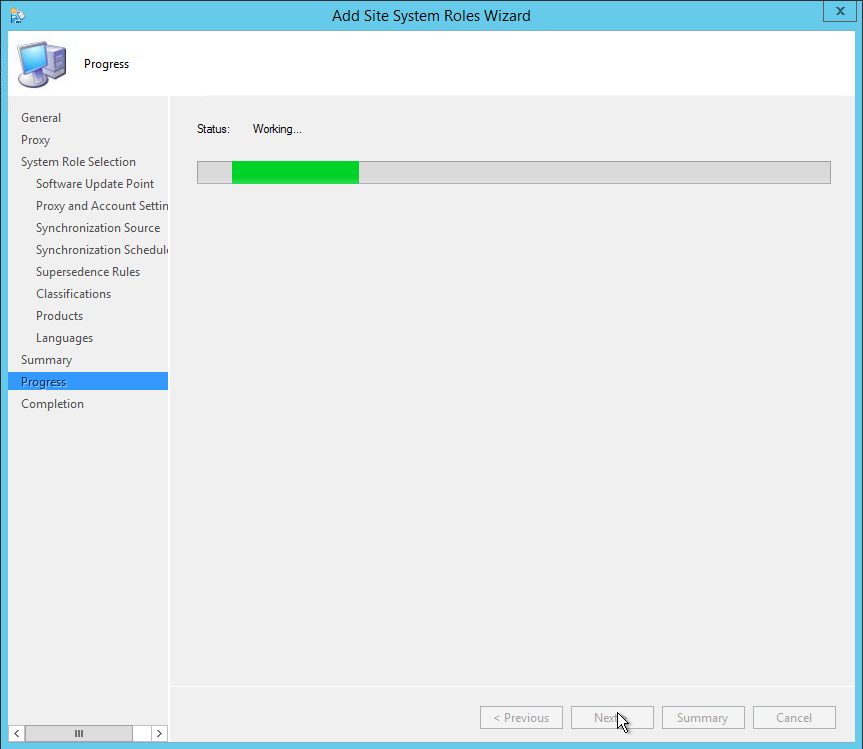
- On the Languages tab, select the desired language, click Next

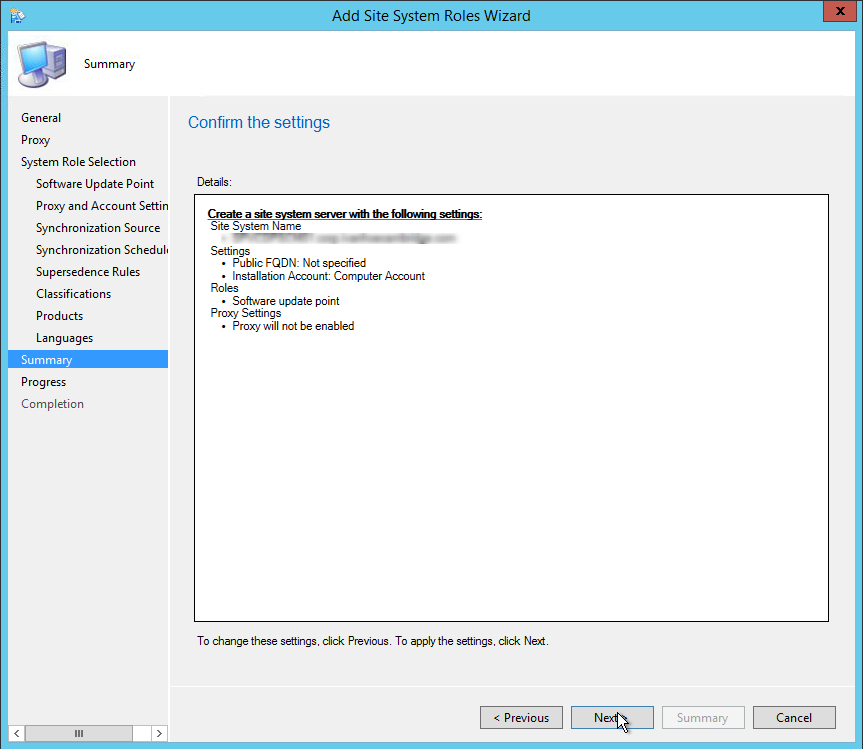
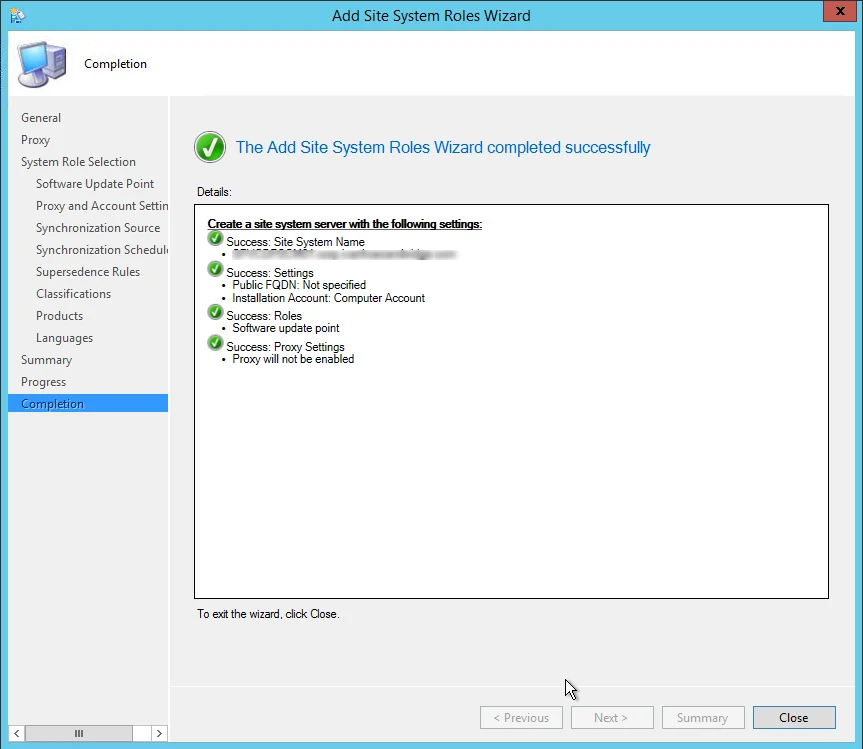
- On the Summary tab, review your settings, click Next, wait for the setup to complete and click Close
Verification
- ConfigMgrSetup\Logs\SUPSetup.log -Provides information about the software update point installation. When the software update point installation completes, Installation was successful is written to this log file
- ConfigMgrSetup\Logs\WCM.log – Provides information about the software update point configuration and connecting to the WSUS server for subscribed update categories, classifications, and languages
- ConfigMgrSetup\Logs\WSUSCtrl.log – Provides information about the configuration, database connectivity, and health of the WSUS server for the site
- ConfigMgrSetup\Logs\Wsyncmgr.log – Provides information about the software updates synchronization process
Bonus link : I suggest that you read the excellent article written by Kent Agerlund on how to avoid what he calls the House of Cards
SCCM Installation Guide Part 16 – State Migration Point Installation
We will describe how to install SCCM Current Branch State Migration Point (SMP).
Role Description
The State Migration Point stores user state data when a computer is migrated to a new operating system.
This is not a mandatory Site System but you need a State Migration Point if you plan to use the User State steps in your Task Sequence. These steps integrate with User State Migration Tools (USMT) to backup your user data before applying a new operating system to a computer.
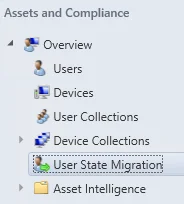
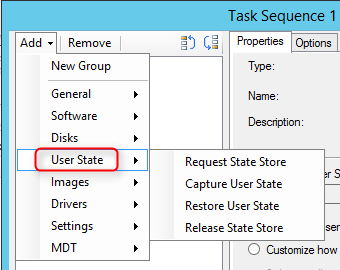
Site System Role Placement in Hierarchy
The State Migration Point is a site-wide option. It’s supported to install this role on a child Primary Site, stand-alone Primary Site or Seconday Site. It’s not supported to install it on a Central Administration site.
The State Migration Point can be installed on the site server computer or on a remote computer. It can be co-located on a server that has the distribution point role.
SCCM State Migration Point Installation
- Open the SCCM console
- Navigate to Administration / Site Configuration / Servers and Site System Roles
- Right-click your Site System and click Add Site System Roles
- On the General tab, click Next
- On the Proxy tab, click Next
- On the Site System Role tab, select State Migration Point, click Next
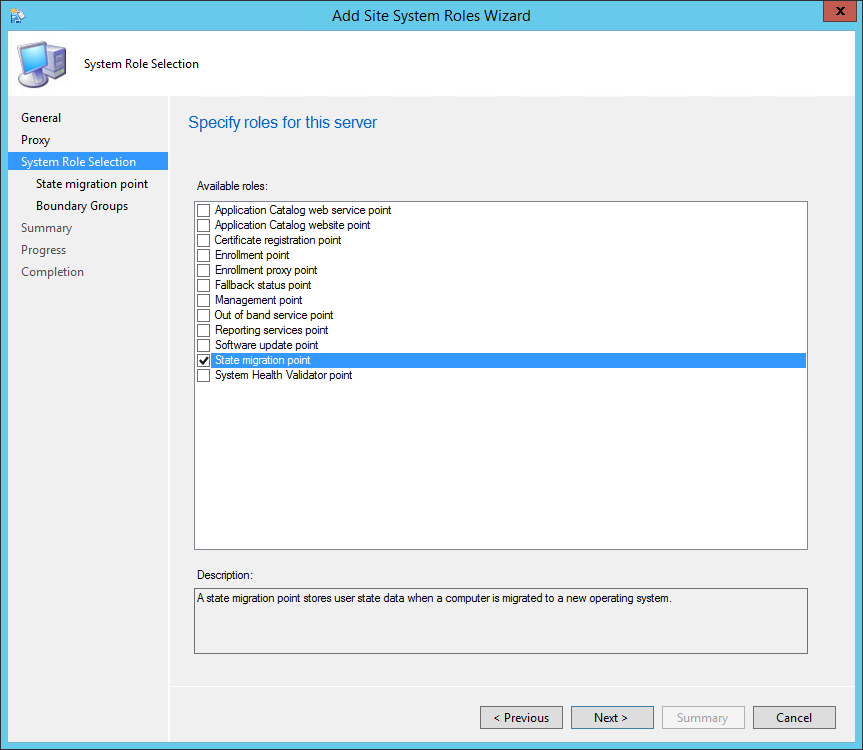
- On the State Migration Point tab
- Click the star icon, specify the folder where you want the data to be stored and how much space must be reserved on the drive
- Specify the Deletion Policy. This is the delay to keep the data after a successful restore.
- Enable Restore-Only mode if needed. Use this setting if you want your SMP to be in read-only mode. This is useful if you replace or decommission an existing SMP
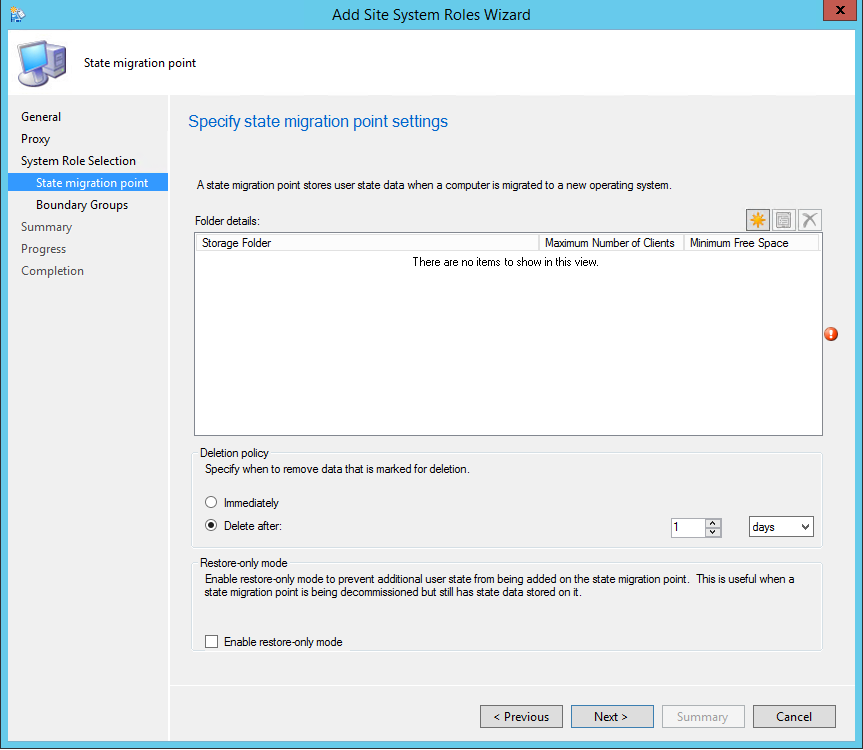
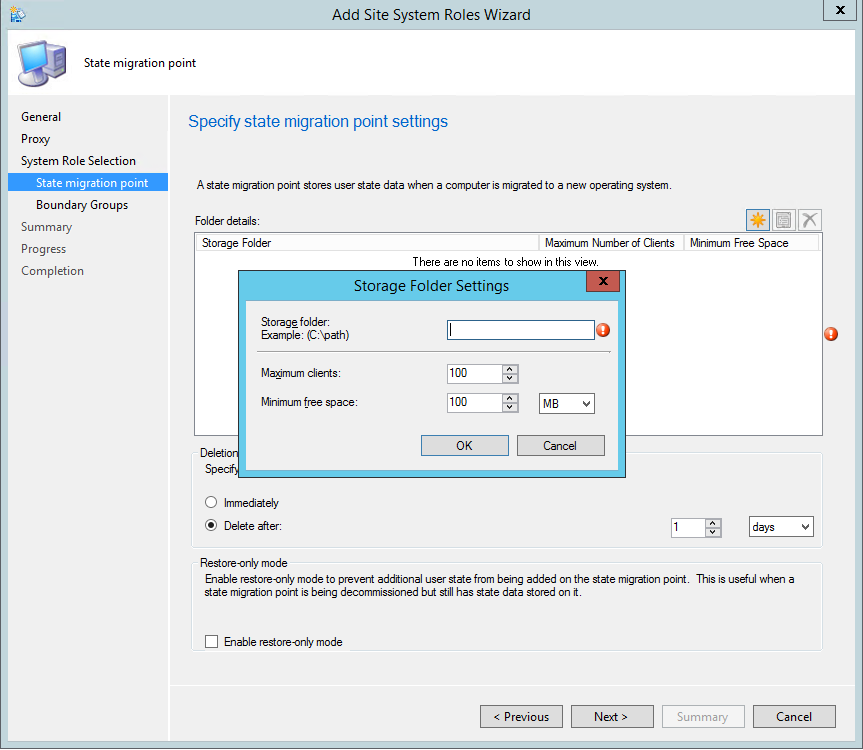
- On the Boundary Groups tab, add the boundary group that can access the State migration Point. If you add the role on a site system that already has the Distribution Point role, the boundary group of this DP will already be listed
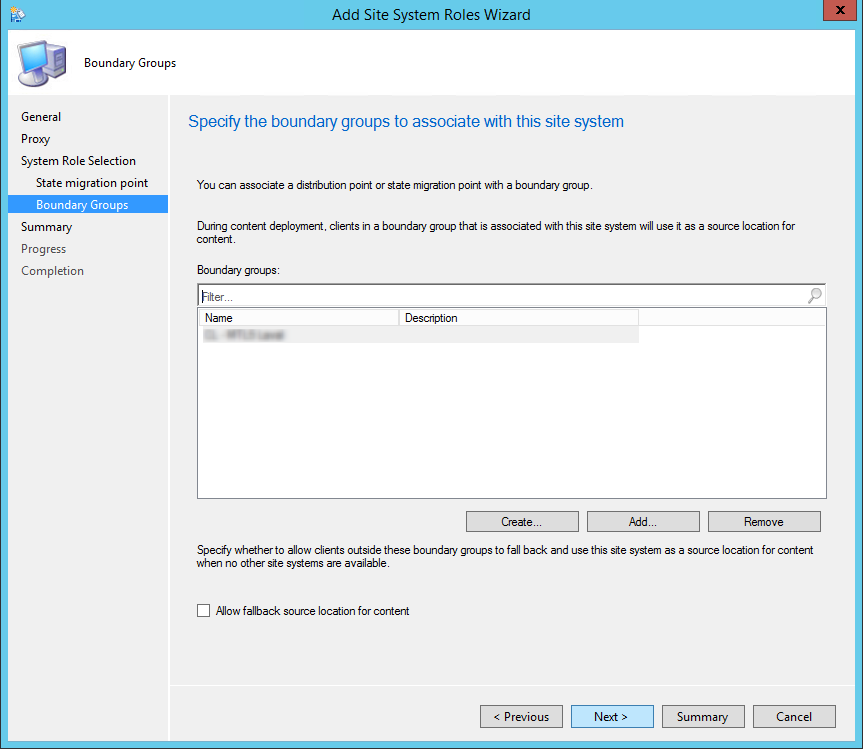
- On the Summary tab, review your settings, click Next and complete the wizard
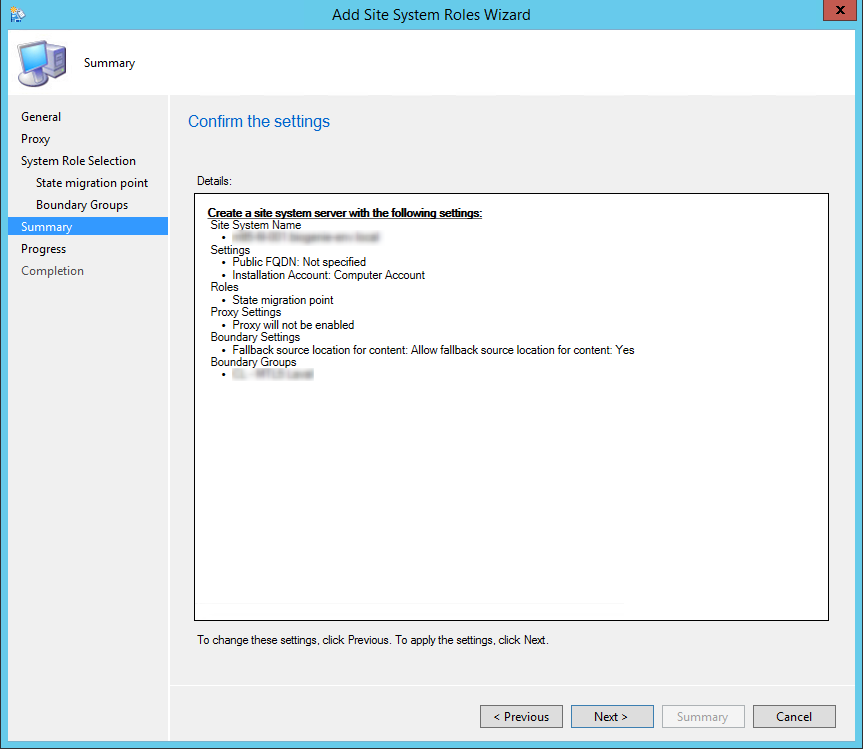
Verification and Logs files
You can verify the installation in the following logs:
- ConfigMgrInstallationPath\Logs\Smssmpsetup.log – Detailed State Migration Point Installation status
- ConfigMgrInstallationPath\Logs\Smpmsi.log – Provides information about the State Migration Point
If you have any error in the installation process refer to this post that explains the permission needed for the SMP to install correctly.
Create the USMT Package
To store the user state data on a State Migration Point, you must create a package that contains the USMT source files. This package is specified when you add the Capture User State step to your task sequence.
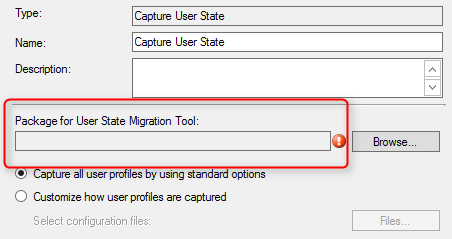
- On your SCCM Server where you installed Windows Deployment Toolkit, browse to : C:\Program Files (x86)\Windows Kits\8.1\Assessment and Deployment Kit\User State Migration Tool
- If you don’t have this folder, it’s because you haven’t installed the USMT (included in Windows ADK) during your SCCM Installation
- Copy the folder content in your Content Library (In my example D:\Sources\OSD\USMT)

- Open the SCCM Console
- Go to Software Library / Application Management / Packages
- Right-click Packages and select Create a new package
- Enter the Name, Manufacturer, Language
- Check the This package contains source files check-box and specify your source folder (D:\Sources\OSD\USMT)
- Click Next
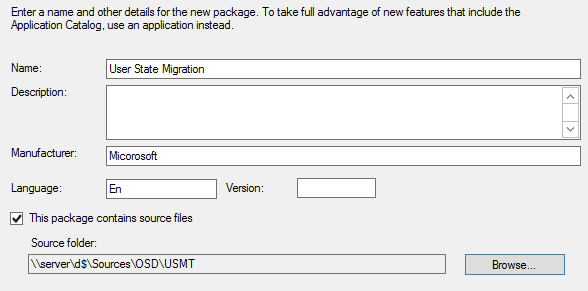
- On the Program Type tab, select Do not create a program and click Next
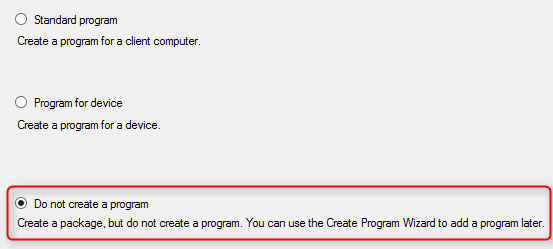
- Complete the Create Package wizard
The State Migration Point and the USMT package are now ready for use in an OSD Task Sequence using the Capture User State and Restore User State steps.
SCCM Installation Guide Part 17 – System Health Validator Point
We will describe how to install SCCM Current Branch System Health Validator Point (SHVP).
Role Description
The System Health Validator Point validates Configuration Manager Network Access Protection (NAP) policies.
This is not a mandatory site system but you need a System Health Validator Point if you plan to use NAP evaluation in your software update deployments. This site system integrates with an existing NAP server in your infrastructure.
Site System Role Placement in Hierarchy
The System Health Validator Point is a hierarchy-wide option. It’s supported to install this role on a Central Administration site, stand-alone Primary site, child Primary site. It’s not supported to install it on a Seconday site. The System Health Validator Point must be installed on a NAP health policy server.
SCCM System Health Validator Point Installation
- Open the SCCM console
- Navigate to Administration / Site Configuration / Servers and Site System Roles
- Right click your Site System and click Add Site System Roles
- On the General tab, click Next
- On the Proxy tab, click Next
- On the Site System Role tab, select System Health Validator Point, click Next
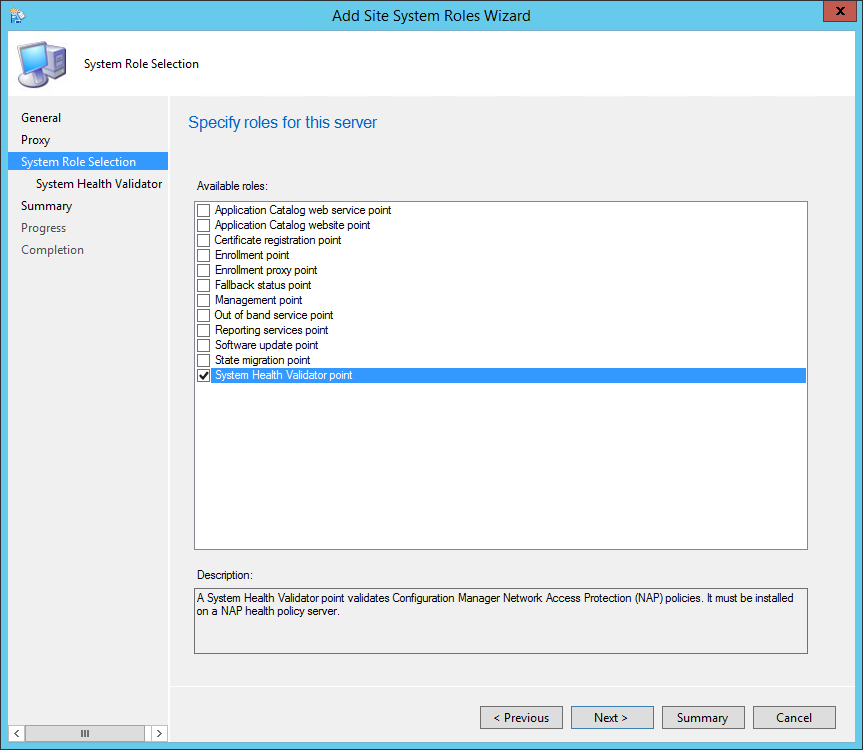
- On the System Health Validator tab, click Next
- There are no properties to configure for this site system role
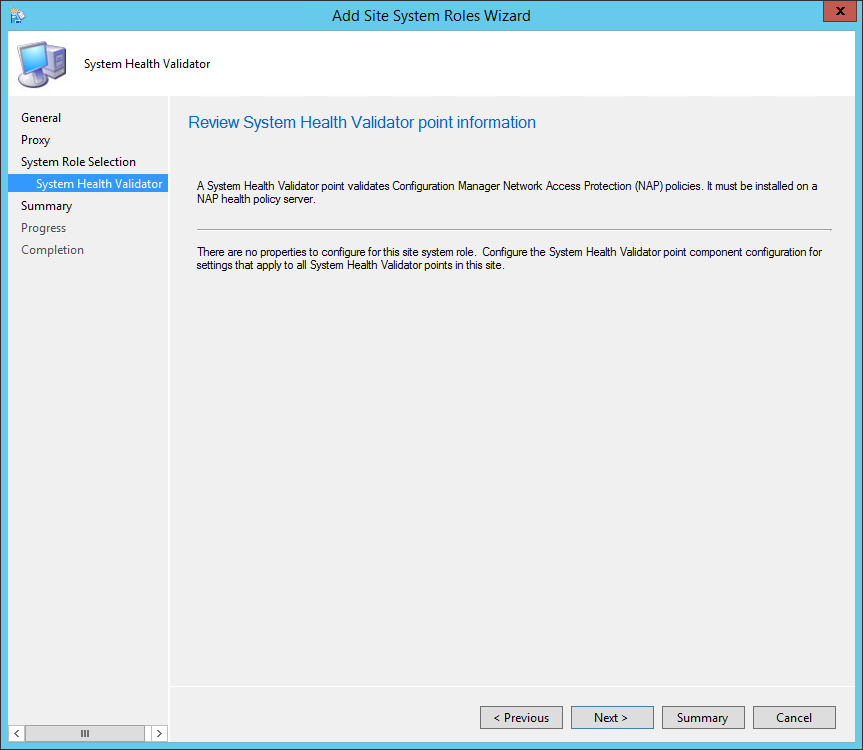
- On the Summary tab, review your settings, click Next and complete the wizard
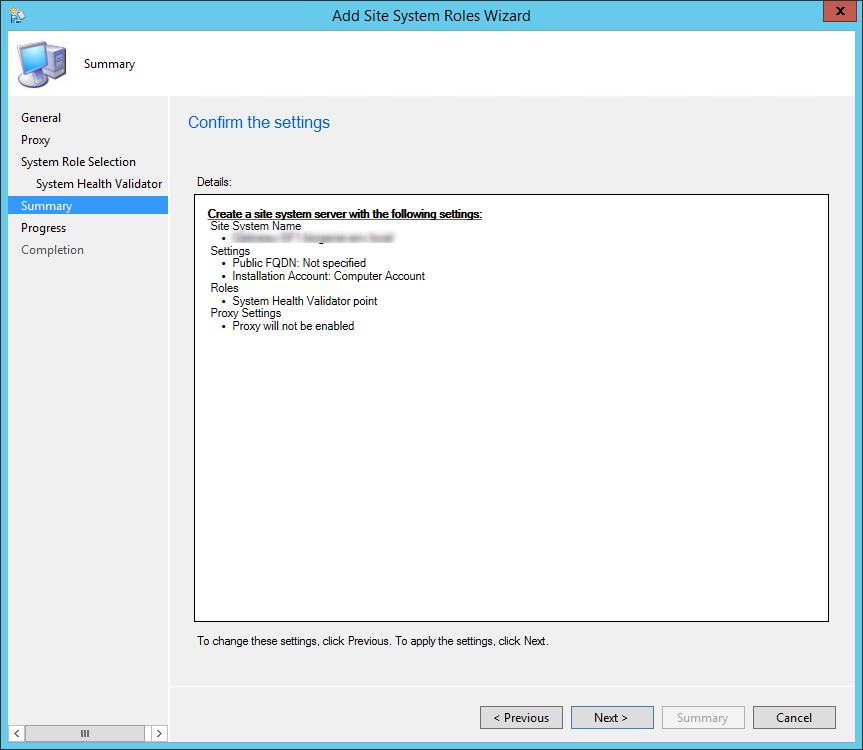
Verification and Logs files
You can verify the installation in the following logs:
- ConfigMgrInstallationPath\Logs\SMSSHVSetup.log – Detailed System Health Validator Point installation status
Configure Client Settings
In order to enable Network Access Protection on your clients, you must configure your client settings :
- Open the SCCM console
- Browse to Administration / Client Settings
- Create a new client settings, select Network Access Protection on the left and choose Yes under Enable Network Access Protection on clients
- Select the desired NAP re-evaluation schedule and click Ok
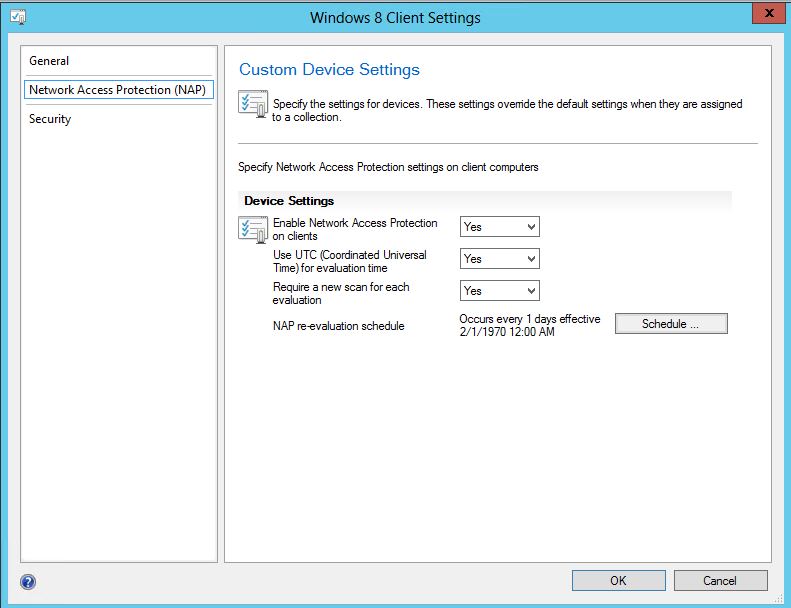
In case you’re used to NAP in SCCM 2007 and looking for a Network Access Protection node in the console, the 2012 version of NAP is slightly different.
From Technet:
The New Policies Wizard is no longer available to create a NAP policy for software updates: The Network Access Protection node in the Configuration Manager console and the New Policies Wizard are no longer available in System Center 2012 Configuration Manager. To create a NAP policy for software updates, you must select Enable NAP evaluation on the NAP Evaluation tab in software update properties.
SCCM Installation Guide Part 18 – Service Connection Point Installation
We will describe how to perform an SCCM Service Connection Point Installation. The Service Connection Point is a new site system role that serves several important functions for the SCCM hierarchy.
It might affect how you configure this site system role:
- Manage mobile devices with Microsoft Intune– This role replaces the Windows Intune connector used by previous versions of SCCM, and can be configured with your Intune subscription details
- Manage mobile devices with on-premises MDM– This role provides support for on-premises devices you manage that do not connect to the Internet
- Upload usage data from your Configuration Manager infrastructure– You can control the level or amount of detail you upload
- Download updates that apply to your Configuration Manager infrastructure – Only relevant updates for your infrastructure are made available, based on usage data you upload
Site System Role Placement in Hierarchy
Each hierarchy supports a single instance of this role. The site system role can only be installed at the top-tier site of your hierarchy (On a Central Administration Site or a stand-alone Primary Site).
SCCM Service Connection Point Installation
The SCCM 1511 installation or upgrade wizard will ask to install the Service Connection Point. If you select to skip the role installation, you can manually add it to SCCM using the following steps.
- Go to Administration / Site Configuration / Servers and Site System Roles
- Right-click the Site System you wish to add the role
- Click Add Site System Role in the Ribbon
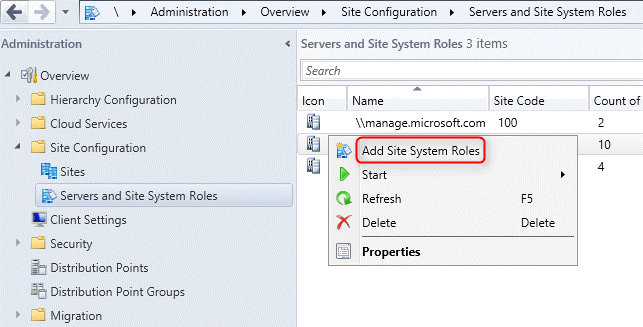
- On the General tab, click Next
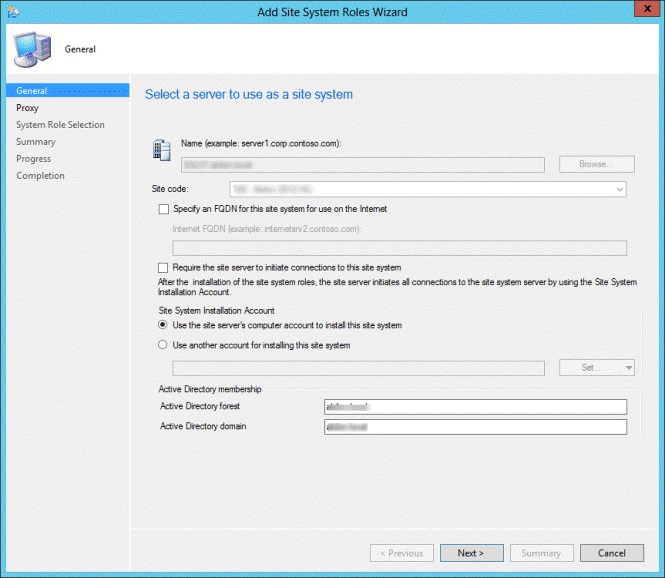
- On the Proxy tab, click Next
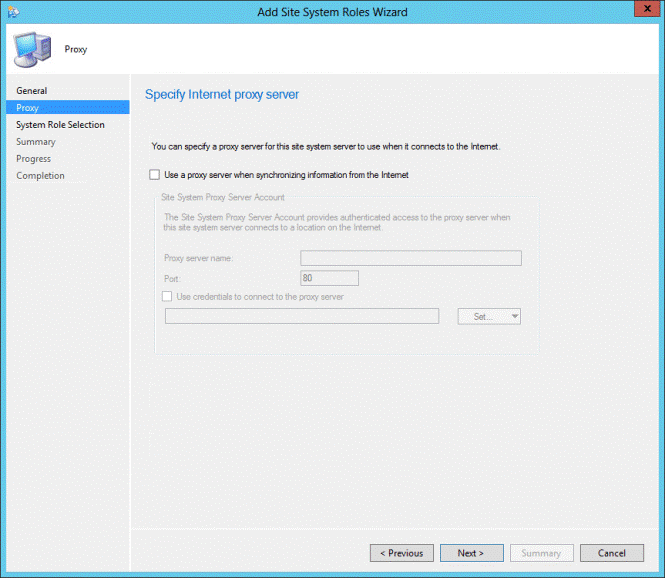
- On the Site System Role tab, select Service Connection Point and click Next

- On the Service Connection Mode, select the desired option :
- In Online mode, the Service Connection Point automatically downloads updates that are available for your current infrastructure and product version, making them available in the SCCM console
- In Offline mode, the Service Connection Point does not connect to the Microsoft cloud service and you must manually use the service connection tool when your Service Connection Point is in Offline mode to import available updates
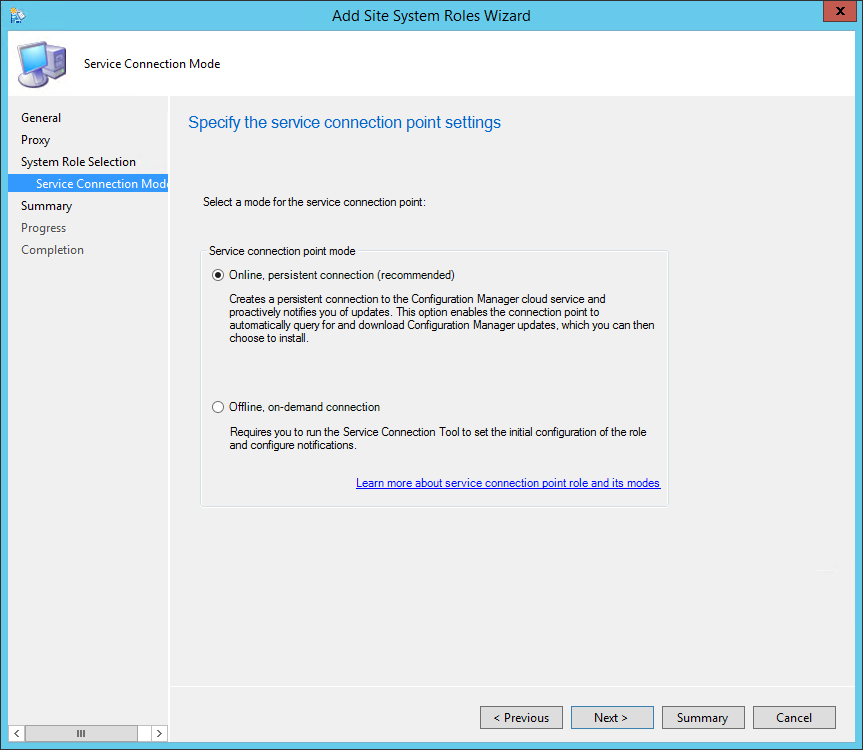
- On the Summary screen, wait for the setup to complete and close the wizard

Verification and Logs files
- ConnectorSetup.log –Information about role installation and that the Service Connection Point was created successfully
Now that all our site servers are installed, we are now ready to configure the various aspect of SCCM.
SCCM Installation Guide Part 19 – Plan and Configure Boundaries
We will start our configuration with the SCCM boundaries. First, let’s define what a boundary in SCCM is :
From Technet :
In MEMCM/SCCM, a boundary is a network location on the intranet that can contain one or more devices that you want to manage. Boundaries can be an IP subnet, Active Directory site name, IPv6 Prefix, or an IP address range, and the hierarchy can include any combination of these boundary types. To use a boundary, you must add the boundary to one or more boundary groups. Boundary groups are collections of boundaries. By using boundary groups, clients on the intranet can find an assigned site and locate content when they have to install software, such as applications, software updates, and operating system images.
A boundary does not enable clients to be managed at the network location. To manage a client, the boundary must be a member of a boundary group. Simple Boundaries on do nothing, they must be added to one or more boundary groups in order to work.
A boundary group is self-explanatory, it’s a group of boundaries used for site assignment and for content location. Beginning with SCCM 2012 R2 SP1, a boundary group can direct your clients to their Distribution Points for content, State Migration Point, Preferred Management Point and Software Update Point. Prior to R2 SP1, Content location is used by client to identify available Distribution Points or State Migration Point based on the client network location.
To resume :
- Site Assignment boundary group associates a resource to a site
- Content Location boundary group is used to retrieve its deployment content (applications, packages, images, etc)
SCCM Installation Guide – Planning for SCCM Boundaries and Boundary Groups
Before designing your strategy, choose wisely on which boundary type to use.
If you’re unsure which boundary type to use, you can read Jason Sandys’s excellent post about why you shouldn’t use IP Subnet boundaries.
Microsoft recommends the following :
- When designing your boundary strategy, we recommend using boundaries based on Active Directory sites before using other boundary types. If boundaries based on Active Directory sites are not an option, use IP subnet or IPv6 boundaries. If none of these options are available to you, then leverage IP address range boundaries. This is because the site evaluates boundary members periodically, and the query required to assess members of an IP address range requires a substantially larger use of SQL Server resources than queries that assess members of other boundary types.
- It’s also recommended to split your Site Assignment and Content location group.
Overlapping Boundaries
SCCM Current Branch supports overlapping boundary configurations for content location.
When a client requests content, and the client network location belongs to multiple boundary groups, Configuration Manager sends the client a list of all Distribution Points with the content.
This behaviour enables the client to select the nearest server from which to transfer the content or state migration information.
Real World Scenario
In our various SCCM installations, our clients are often confused about this topic. Let’s make an example to help you understand :
- Contoso has 1000 clients
- 1 Primary Site (Montreal)
- 3 remote offices with their local Distribution Point (New York, Chicago, Los Angeles)
- Active Directory Sites are based on their site subnets (MTL,NY,CHI,LA)
In that scenario, we need to create 4 Boundary, 1 for each office :
| Boundary | Type |
|---|---|
| MTL | Active Directory Site |
| NY | Active Directory Site |
| CHI | Active Directory Site |
| LA | Active Directory Site |
- Open the SCCM Console
- Go to Administration / Hierarchy Configuration / Boundary
- Right-click Boundaries and select Create Boundary
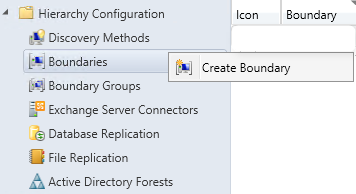
- Create the boundary. In our example, we’ll create 4 different boundaries for my 4 locations using their Active Directory Sites.
- Tip: If you have multiple Active Directory Sites, IP Ranges or Subnets, you can enable Active Directory Forest Discovery which can create them automatically
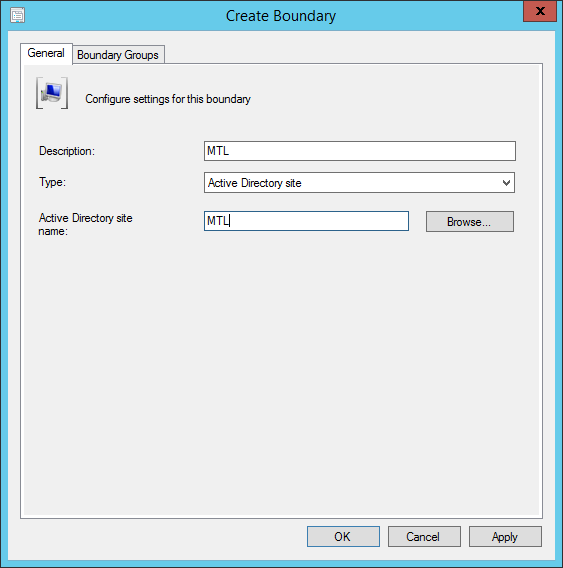
Create Boundary Group
Now, we’ll create a Site Assignment Boundary Group and add all those AD Site. That way, all my clients for my 4 locations will be assigned to my Montreal Primary Site.
For Content Location, we want clients to get their content locally at their respective location. We will create 4 Content Boundary groups, add only their AD Site Boundary and assign their local Distribution Point.
| Name | Boundary | Site System |
|---|---|---|
| MTL - Content Location | MTL | DPMTL01 |
| NY - Content Location | NY | DPNY01 |
| CHI - Content Location | CHI | DPCHI01 |
| LA - Content Location | LA | DPLA01 |
Here’s how to make this happen in SCCM :
- Open the SCCM Console
- Go to Administration / Hierarchy Configuration / Boundary Groups
- Right-click Boundary Groups and select Create Boundary Groups
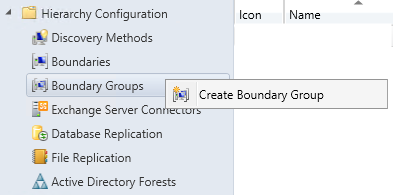
Create Site Assignment Boundary Group
- We’ll start by creating a group for Site Assignment : SA – MTL
- Click the Add bouton on the bottom
- On the Add Boundaries screen, select all boundaries. This will direct all my clients to the Primary Site located in Montreal for Site Assignment
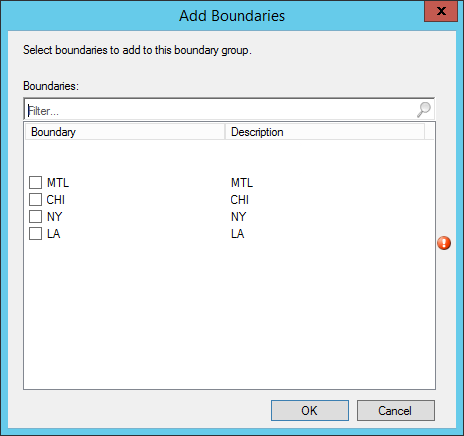
- On the References tab, check the Use this boundary group for site assignment box
- Select your assigned site. In my case : MTL
- Click Ok
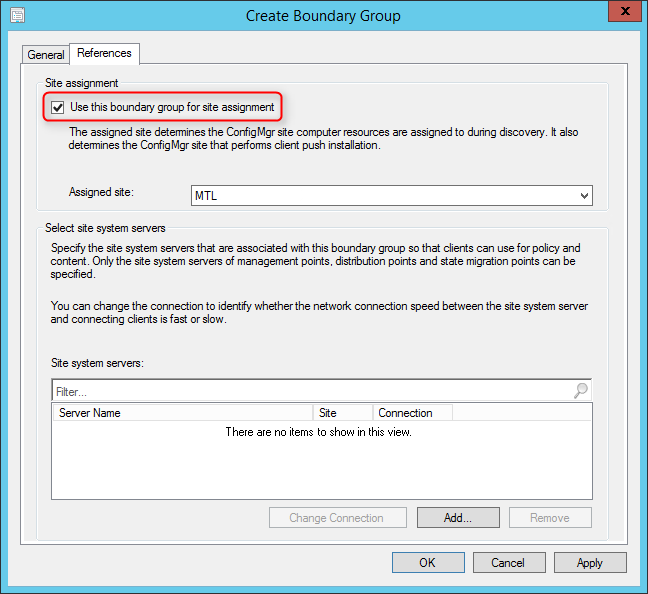
Create Content Location Boundary Group
- Right-click Boundary Groups and select Create Boundary Groups
- We’ll name our group Content Location – MTL
- Click on Add
- Select only the MTL boundary
- The MTL boundary will be listed
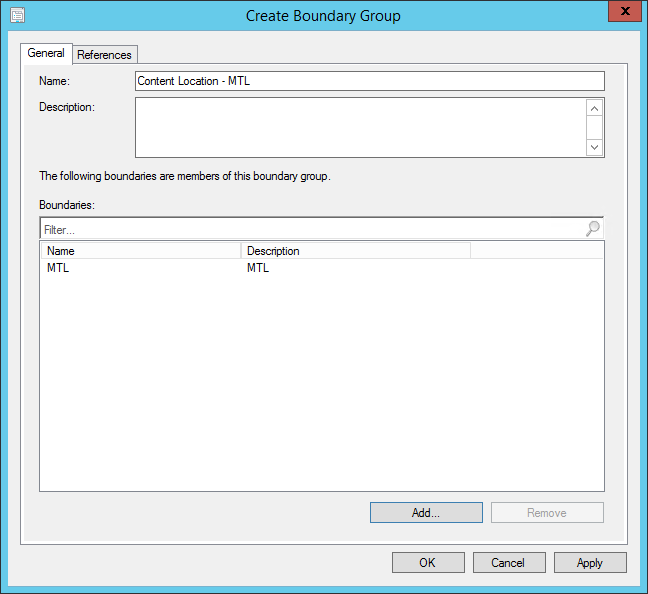
- On the References tab, uncheck the Use this boundary group for site assignment box
- Click on Add at the bottom
- Select the Site System that host the Distribution Point role for the Montreal site. For our example DPMTL01
- Click Ok
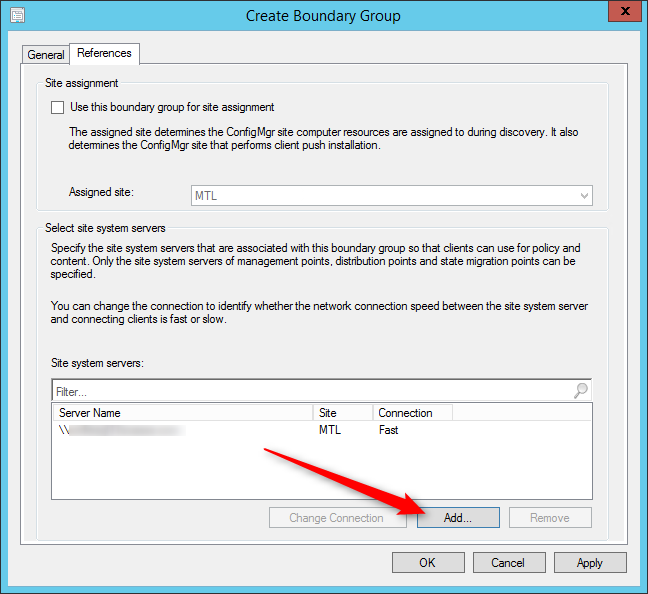
- Repeat the steps for the other sites (New York, Chicago, Los Angeles)
- Once completed our clients are assigned to their local respective Site Systems
This is a simple but typical scenario. You can have multiples boundaries and Site System in your Boundary Groups if needed.
SCCM Installation Guide Part 20 – Configure Client Settings
This part will explain how to create a custom SCCM client settings and how to deploy it.
Client settings are used to configure your deployed agents. This is where you decide any configuration like :
- Enabling hardware inventory agent
- Enabling power settings options
- Enable cloud services
- Set scan schedules
- BITS throttling
- Ect..
In previous versions of SCCM, client settings were specific to the site. You had 1 client settings that applied to all your hierarchy. In SCCM you can specify clients setting at the collection level. You can have different settings for specific collections, overlapping settings are set using a priority setting.
When you modify the Default Client Settings, the settings are applied to all clients in the hierarchy automatically. You do not need to deploy the Default Client Settings to apply it. By default, it has a 10000 priority value (This is the lower priority). All other custom client settings can have a priority value of 1 to 9999 which will always override the Default Client Settings. (The higher Priority is 1).
We won’t explain each client’s settings and their descriptions. The Technet documentation is pretty clear and many of the client settings are self-explanatory. We cannot make any recommendations either as each environment has its own needs and limitations. If you have any questions concerning a specific setting, use the comment section and we’ll try to help you so you can make the right decision for your organization.
How to Create Custom Client Device Settings
When you deploy a custom client settings, they override the Default Client Settings.
Before you begin, ensure that you created a collection that contains the devices that require these custom client settings.
For our blog post, we will set the Client Policy polling interval to 15 minutes.
- Open the SCCM console
- Go to Administration / Client Settings
- On the top ribbon, click Create Custom Client Device Settings
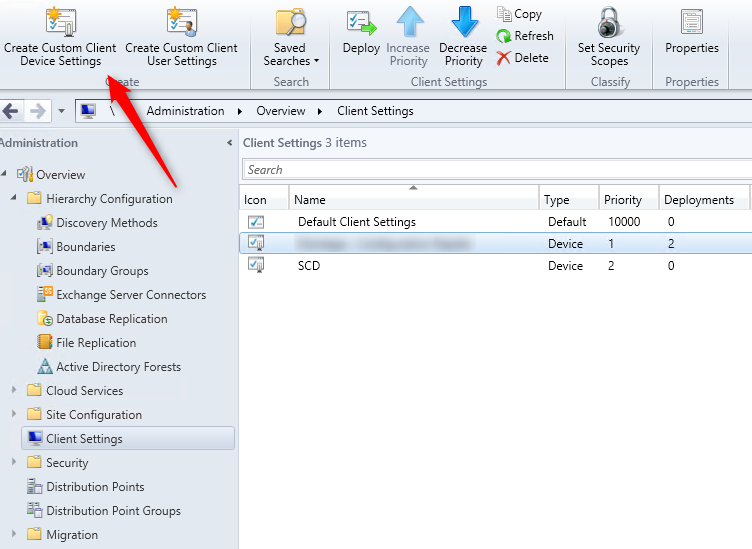
- In the Create Custom Device Settings page, specify a name for the custom settings and description
- Select one or more of the available settings. We will select Client Policy
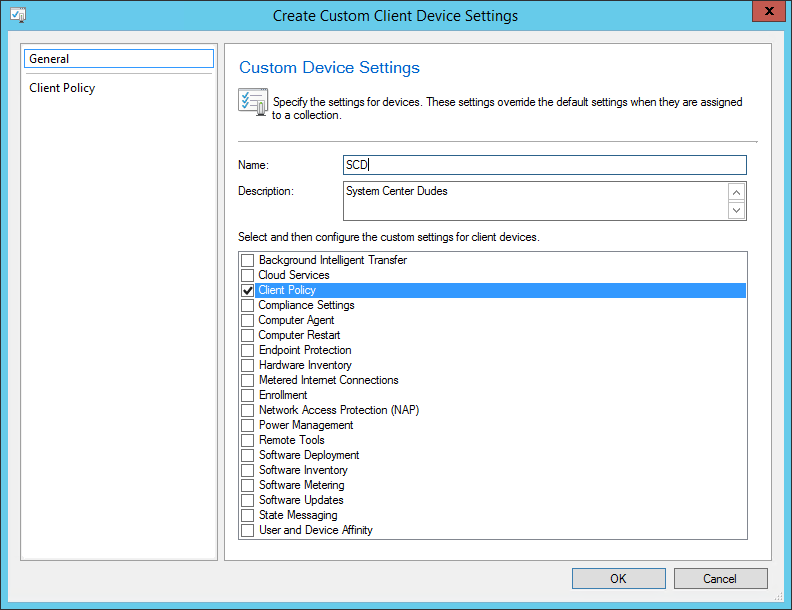
- On the left pane, Client Policy will be displayed, click on it
- We will set the Client Policy polling interval to 15 minutes
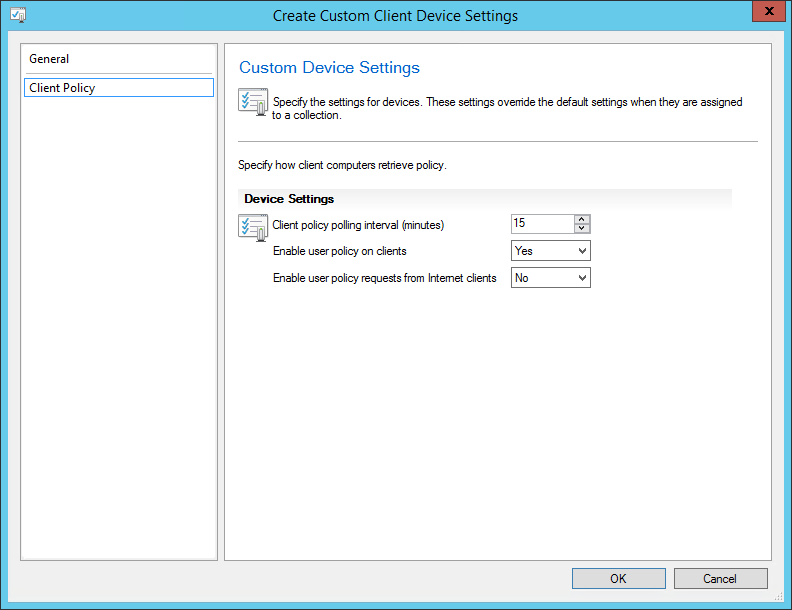
- Click Ok
- Your newly created setting will be displayed in the console
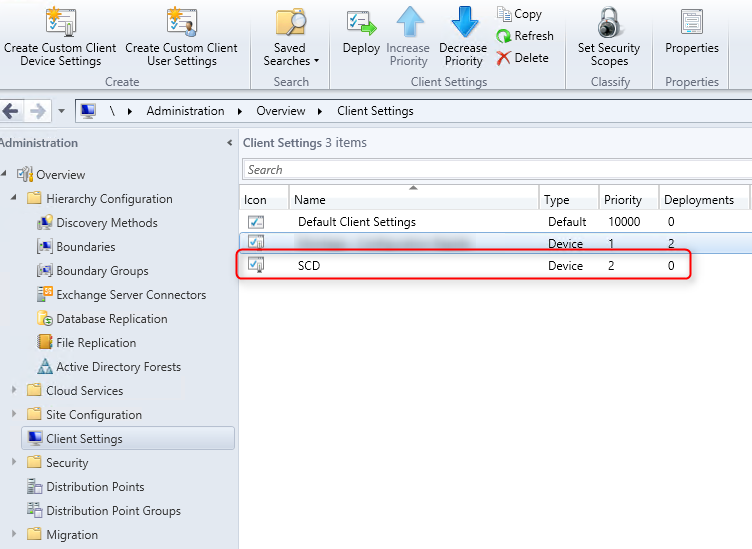
Set the Client Settings priority
When you create a new client setting, it automatically takes the next available priority. (Beginning with 1) Before deploying it, ensure that your priority is well set for your needs. A higher priority (1) will override any settings with a lower priority. (9999). Don’t get confused 1 is higher!
To change the priority number :
- On the top ribbon, select your client settings and click Increase Priority or Decrease Priority
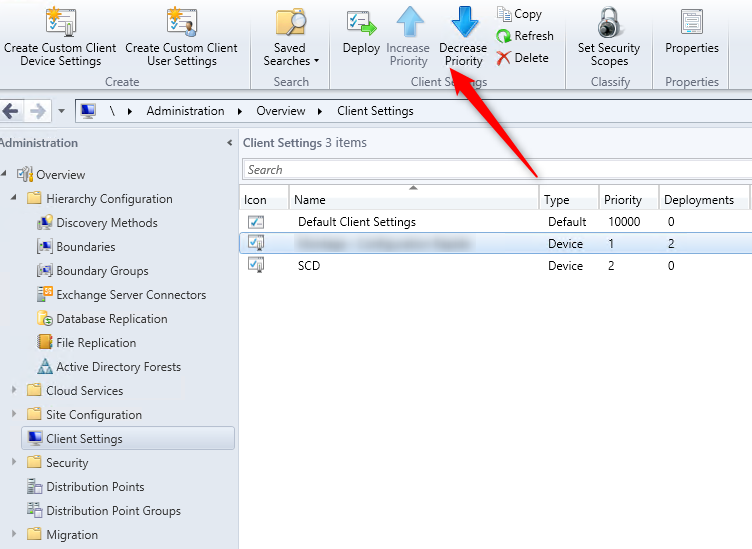
- You can see each client settings priority and if they are deployed in the same section

How to deploy a client settings
Now that your client settings are created, you need to deploy it to a collection. This new client settings will apply to only this collection and depending on the priority, will override the settings.
- Select the custom client settings that you have just created
- On the top ribbon, click Deploy
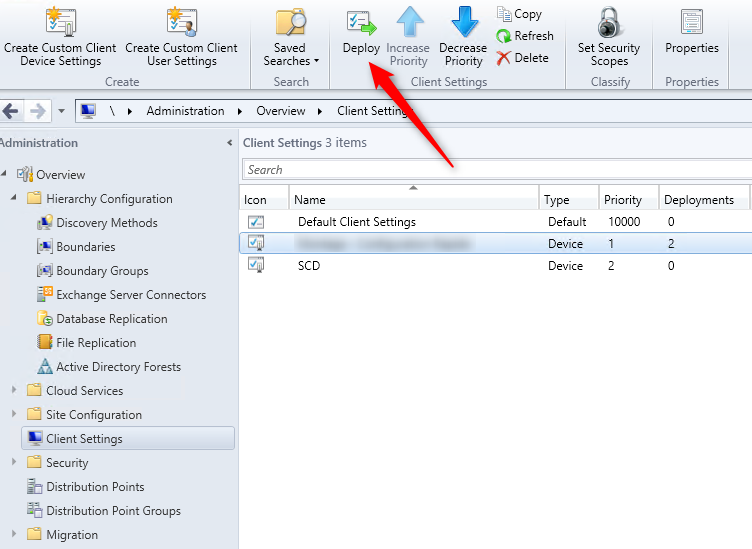
- In the Select Collection dialog box, select the collection that contains the devices to be configured with the custom settings, and then click Ok
- You can verify the selected collection if you click the Deployments tab on the bottom of the console
How to apply you client setting – SCCM Installation Guide
Client computers will apply your custom settings when they download their next client policy. You can trigger it manually to speed up the process.
Manually on the client
- In Control Panel, click on the Configuration Manager icon
- In the Action tab, select Machine Policy Retrieval & Evaluation Cycle
- Click Run now
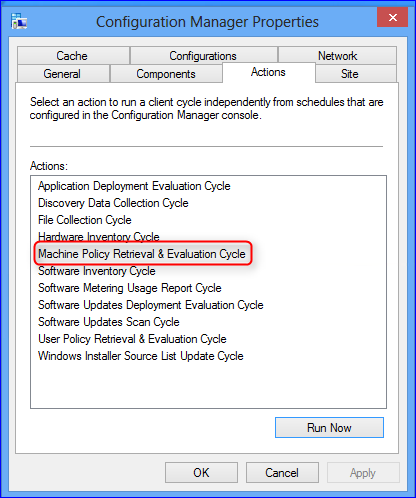
Using the SCCM Console
To initiate client policy retrieval by using client notification (Configuration Manager SP1+ only)
- In the SCCM console
- Go to Assets and Compliance / Device Collections
- Select the device collection containing the computers that you want to download policy
- Right-click a single device or the whole collection and select Client Notification and then Download Computer Policy
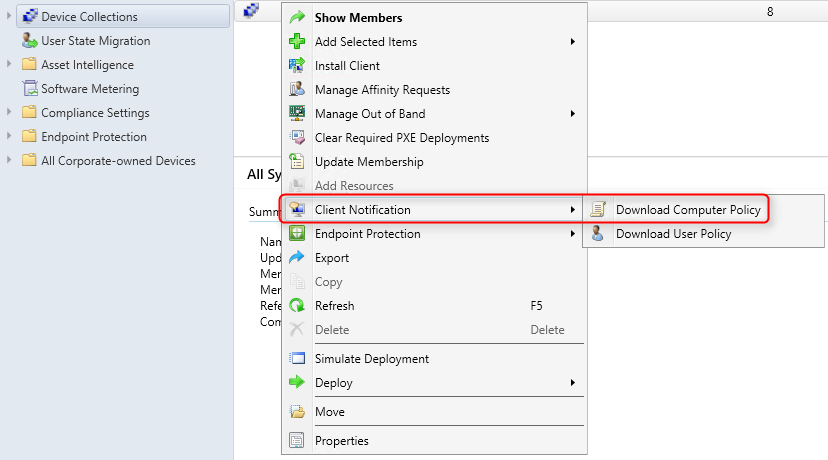
How to verify your Client Settings
It’s possible to see which client settings are applied to a specific client. You must use the Resultant Client Settings function in the SCCM console.
We already cover this in a previous article.
SCCM Installation Guide Part 21 – Configure Discovery Methods
After you completed your SCCM installation, you certainly want to start managing some systems. The effective way to add them in SCCM is to configure SCCM discovery methods. This blog article will explain the various discovery methods and will describe how to configure it.
What is SCCM Discovery Methods
Here’s the official discovery methods definition from Technet :
SCCM discovery methods identifies computer and user resources that you can manage by using Configuration Manager. It can also discover the network infrastructure in your environment. Discovery creates a discovery data record (DDR) for each discovered object and stores this information in the Configuration Manager database.
When discovery of a resource is successful, discovery puts information about the resource in a file that is referred to as a discovery data record (DDR). DDRs are in turn processed by site servers and entered into the Configuration Manager database where they are then replicated by database-replication with all sites. The replication makes discovery data available at each site in the hierarchy, regardless of where it was discovered or processed. You can use discovery information to create custom queries and collections that logically group resources for management tasks such as the assignment of custom client settings and software deployments. Computers must be discovered before you can use client push installation to install the Configuration Manager client on devices.
In simple words, it means that SCCM needs to discover a device before it can manage them. It’s not mandatory to discover computers, if you manually install the client, it will appear in the console and it can be managed. The problem is that if you have a thousand computers, it can be a fastidious process. By using Active Directory System Discovery, all your computers will be shown on the console, from there you can choose to install the client using various SCCM methods. Of course, if you need information about your users and groups, you need to configure User and Group discovery, it’s the only way to bring this information in SCCM.
There are 5 Types of Discovery Methods that can be configured. Each one targets a specific object type (Computers, Users, Groups, Active Directory) :
Active Directory System Discovery
Discovers computers in your organization from specified locations in Active Directory. In order to push the SCCM client to the computers, the resources must be discovered first. You can specify to discover only computers that have logged on to the domain in a given period of time. This option is useful to exclude obsolete computer accounts from Active Directory. You also have the option to fetch custom Active Directory Attributes. This is useful if your organization store custom information in AD. You can read our blog post concerning this topic.
- Open the SCCM Console
- Go to Administration / Hierarchy Configuration / Discovery Methods
- Right-Click Active Directory System Discovery and select Properties
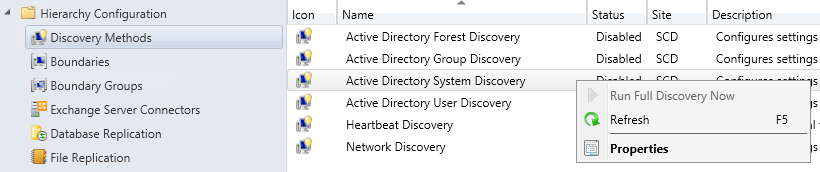
- On the General tab, you can enable the method by checking Enable Active Directory System Discovery
- Click on the Star icon and select the Active Directory container that you want to include in the discovery process
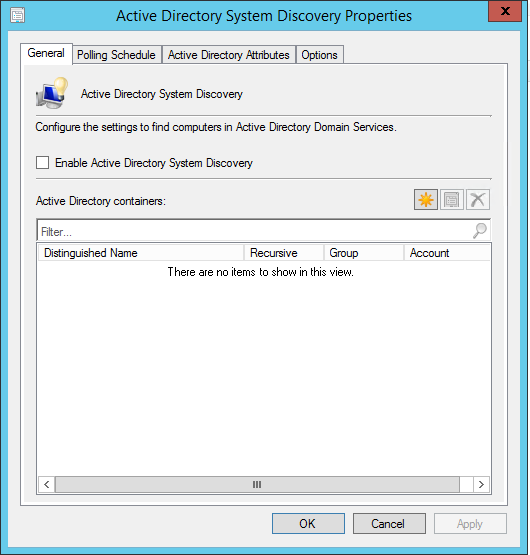
- On the Polling Schedule tab, select the frequency on which you want the discovery to happen
- A 7-day cycle with a 5 minutes delta interval is usually fine in most environment

- On the Active Directory Attribute tab, you can select custom attributes to include during discovery
- This is useful if you have custom data in Active Directory that you want to use in SCCM
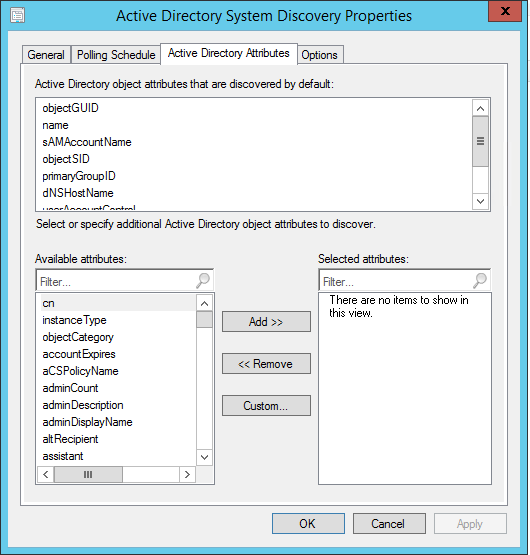
- On the Options tab, you can select to discover only accounts that have logged or updated their passwords since a specific number of days
- This is useful if your Active Directory isn’t clean. Use this to discover only good records
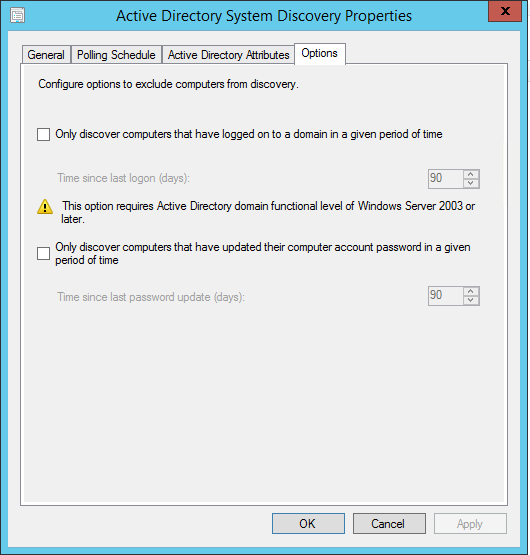
SCCM Installation Guide – Active Directory Group Discovery
Discovers groups from specified locations in Active Directory. The discovery process discovers local, global or universal security groups. When you configure the Group discovery you have the option to discover the membership of distribution groups. With the Active Directory Group Discovery, you can also discover the computers that have logged in to the domain in a given period of time. Once discovered, you can use group information for example to create deployment based on Active Directory groups.
Be careful when configuring this method: If you discover a group that contains a computer object that is NOT discovered in Active Directory System Discovery, the computer will be discovered. If the automatic client push is enabled, this could lead to unwanted clients’ computers.
To discover resources using this method:
- Open the SCCM Console
- Go to Administration / Hierarchy Configuration / Discovery Methods
- Right-Click Active Directory Group Discovery and select Properties
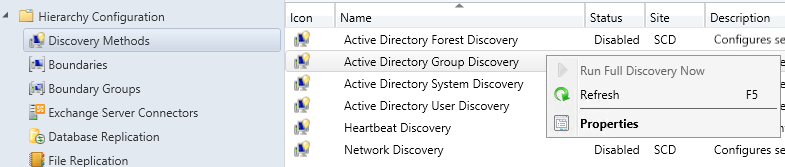
- On the General tab, you can enable the method by checking Enable Active Directory Group Discovery
- Click on the Add button on the bottom to add a certain location or a specific group.
- Remember : If you discover a group that contains a computer object that is NOT discovered in Active Directory System Discovery, the computer will be discovered.
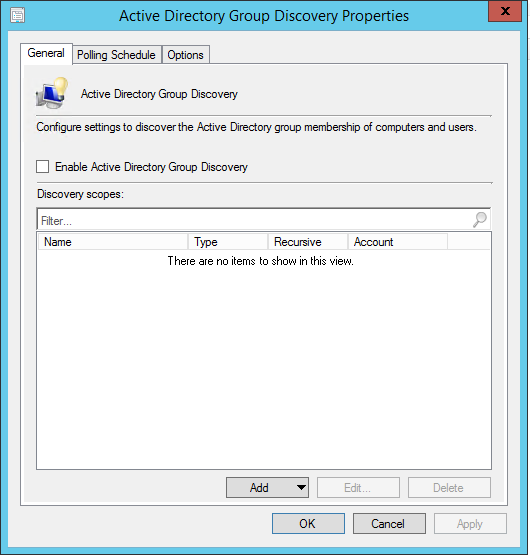
- On the Polling Schedule tab, select the frequency on which you want the discovery to happen
- A 7-day cycle with a 5 minutes delta interval is usually fine in most environment
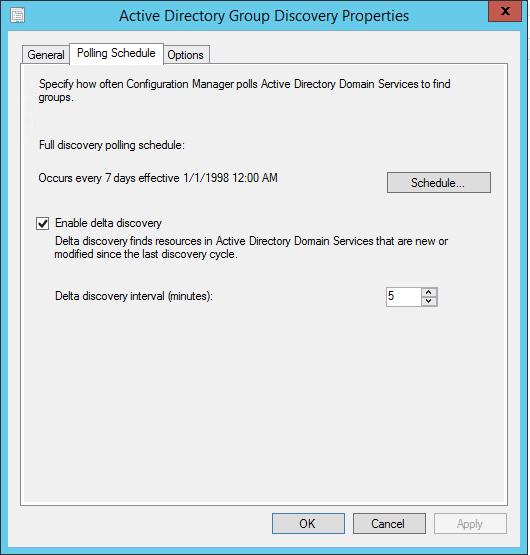
- On the Options tab, you can select to discover only accounts that have logged or updated their passwords since a specific number of days
- This is useful if your Active Directory isn’t clean. Use this to discover only good records
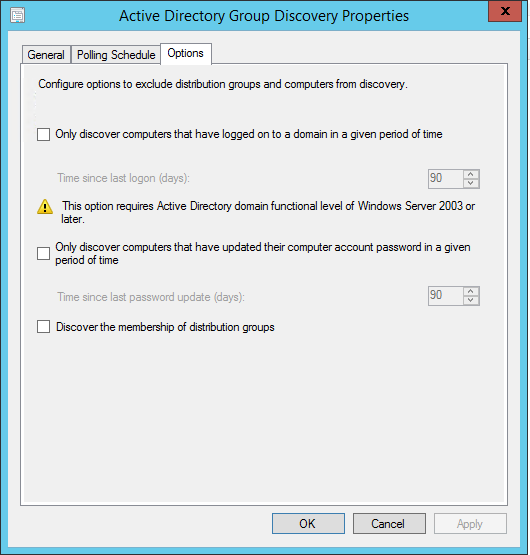
Active Directory User Discovery
The discovery process discovers user accounts from specified locations in Active Directory. You also have the option to fetch custom Active Directory Attributes. This is useful if your organization store custom information in AD about your users. Once discovered, you can use group information for example to create user-based deployment.
To discover resources using this method:
- Open the SCCM Console
- Go to Administration / Hierarchy Configuration / Discovery Methods
- Right-Click Active Directory User Discovery and select Properties
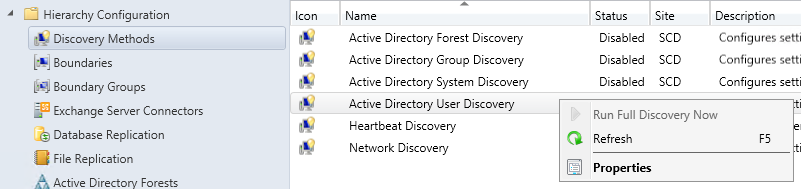
- On the General tab, you can enable the method by checking Enable Active Directory User Discovery
- Click on the Star icon and select the Active Directory container that you want to include in the discovery process
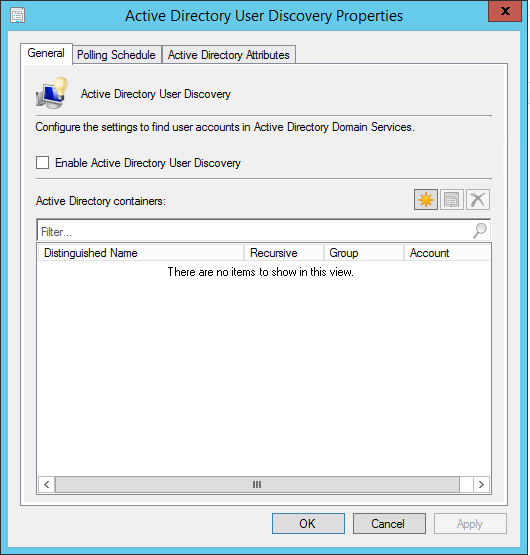
- On the Polling Schedule tab, select the frequency on which you want the discovery to happen
- A 7-day cycle with a 5 minutes delta interval is usually fine in most environment.
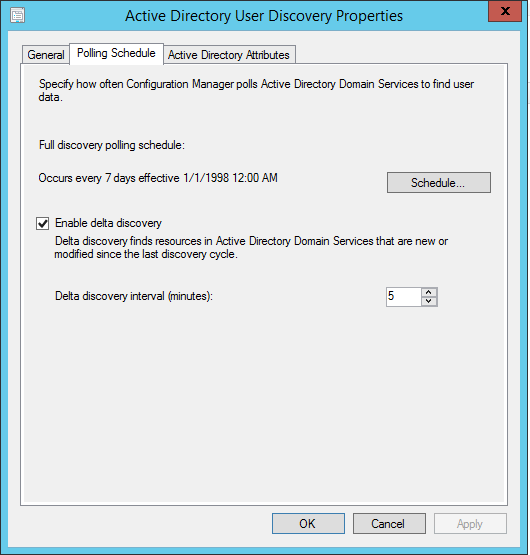
- On the Active Directory Attribute tab, you can select custom attributes to include during discovery
- This is useful if you have custom data in Active Directory that you want to use in SCCM
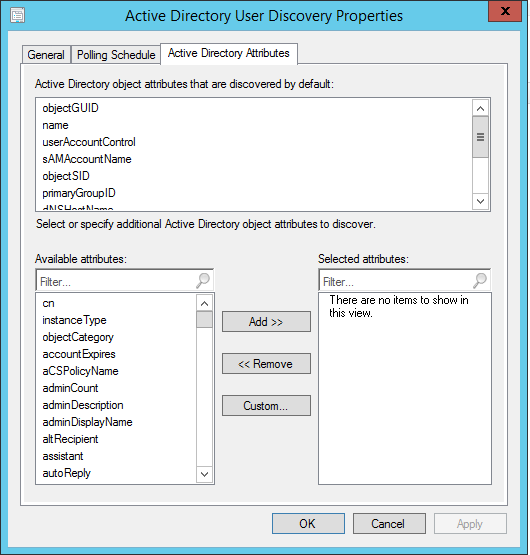
SCCM Installation Guide – Active Directory Forest Discovery
Discovers Active Directory sites and subnets, and creates Configuration Manager boundaries for each site and subnet from the forests which have been configured for discovery. Using this discovery method you can automatically create the Active Directory or IP subnet boundaries that are within the discovered Active Directory Forests. This is very useful if you have multiple AD Site and Subnet, instead of creating them manually, use this method to do the job for you.
To discover resources using this method:
- Open the SCCM Console
- Go to Administration / Hierarchy Configuration / Discovery Methods
- Right-Click Active Directory Forest Discovery and select Properties
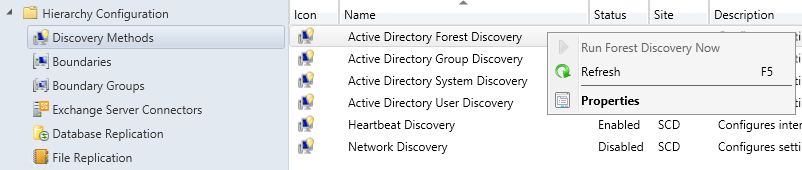
- On the General tab, you can enable the method by checking Enable Active Directory Forest Discovery
- Select the desired options
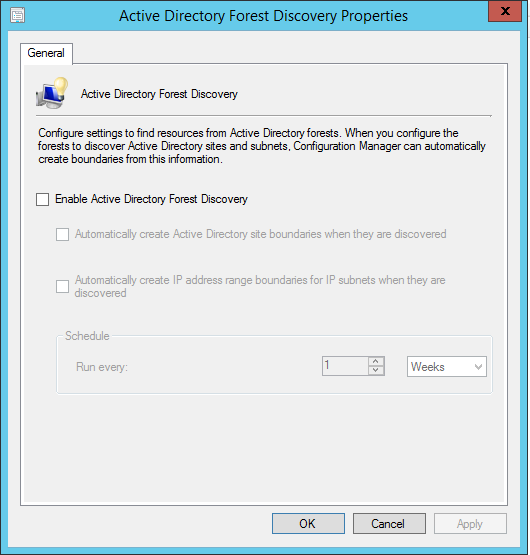
HeartBeat Discovery
Heartbeat Discovery runs on every client and to update their discovery records in the database. The records (Discovery Data Records) are sent to the Management Point in a specified duration of time. Heartbeat Discovery can force the discovery of a computer as a new resource record, or can repopulate the database record of a computer that was deleted from the database.
HeartBeat Discovery is enabled by default and is scheduled to run every 7 days.
To discover resources using this method:
- Open the SCCM Console
- Go to Administration / Hierarchy Configuration / Discovery Methods
- Right-Click Heartbeat Discovery and select Properties
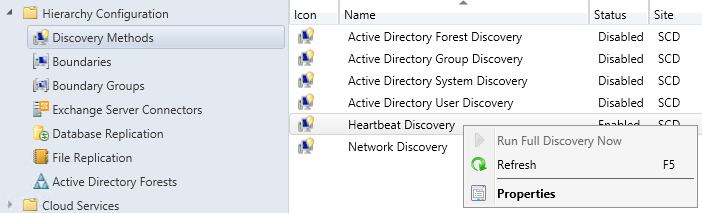
- On the General tab, you can enable the method by checking Enable Heartbeat Discovery
- Make sure that this setting is enabled and that the schedule run less frequently than the Clear Install Flag maintenance task.
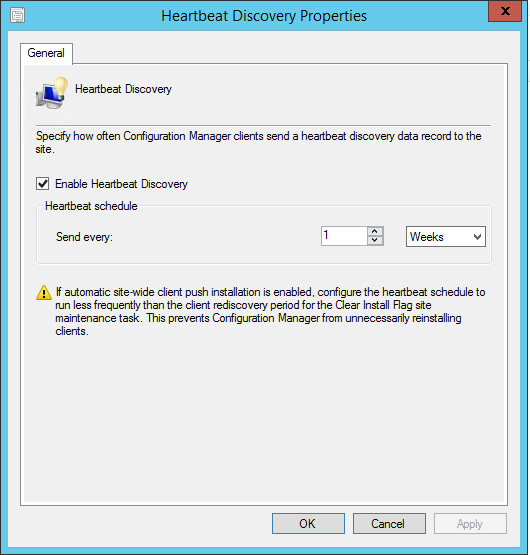
Network Discovery
The Network Discovery searches your network infrastructure for network devices that have an IP address. It can search the domains, SNMP devices and DHCP servers to find the resources. It also discovers devices that might not be found by other discovery methods. This includes printers, routers, and bridges.
We won’t go into detail of this discovery method as it’s old and depreciated methods. We never saw any customers using this method in production.
SCCM Installation Guide Part 22 – Configure Maintenance Tasks
Each Configuration Manager site supports maintenance tasks that help maintain the operational efficiency of the site database. By default, several maintenance tasks are enabled in each site, and all tasks support independent schedules. Maintenance tasks are set up individually for each site and apply to the database at that site. However, some tasks, like Delete Aged Discovery Data, affect information that is available in all sites in a hierarchy.
To set up maintenance tasks for Configuration Manager :
- Go to Administration / Site Configuration / Sites
- On the Home tab, in the Settings group, choose Site Maintenance
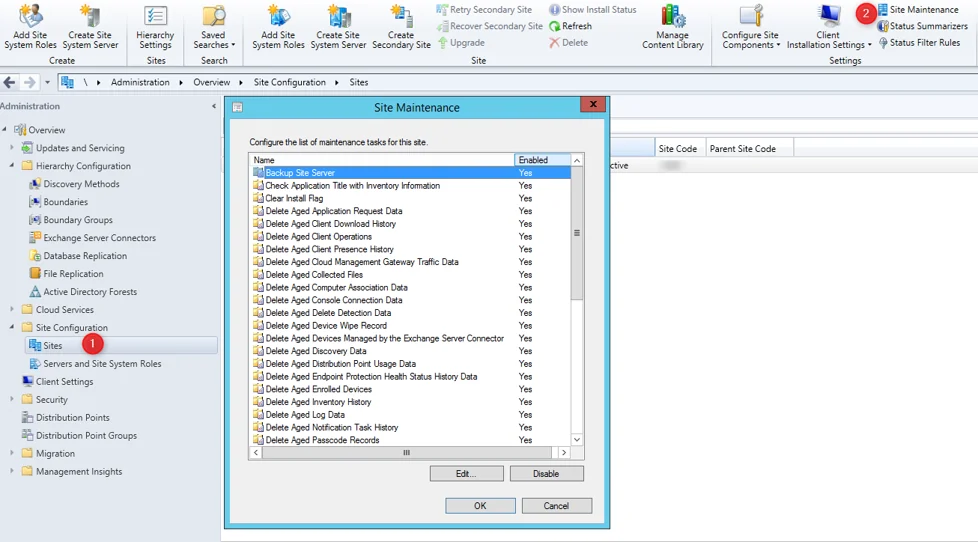
- To set up the task, choose Edit, ensure the Enable this task checkbox is checked and set up a schedule for when the task runs.
To enable or disable the task without editing the task properties, choose the Enable or Disable button. The button label changes depending on the current configuration of the task.
When you are finished configuring the maintenance tasks, choose OK to finish the procedure.
This topic lists details for each of the SCCM site maintenance tasks :
Backup Site Server: Use this task to prepare for the recovery of critical data. You can create a backup of your critical information to restore a site and the Configuration Manager database. For more information, see our next section that covers it.
Check Application Title with Inventory Information: Use this task to maintain consistency between software titles that are reported in the software inventory and software titles in the Asset Intelligence catalog. Central administration site: Enabled
Clear Install Flag: Use this task to remove the installed flag for clients that don’t submit a Heartbeat Discovery record during the Client Rediscovery period. The installed flag prevents automatic client push installation to a computer that might have an active Configuration Manager client.
Delete Aged Application Request Data: Use this task to delete aged application requests from the database.
Delete Aged Client Download History: Use this task to delete historical data about the download source used by clients.
Delete Aged Client Operations: Use this task to delete all aged data for client operations from the site database. For example, this includes data for aged or expired client notifications (like download requests for machine or user policy), and for Endpoint Protection (like requests by an administrative user for clients to run a scan or download updated definitions).
Delete Aged Client Presence History: Use this task to delete history information about the online status of clients (recorded by client notification) that is older than the specified time.
Delete Aged Cloud Management Gateway Traffic Data: Use this task to delete all aged data about the traffic that passes through the cloud management gateway from the site database. For example, this includes data about the number of requests, total request bytes, total response bytes, number of failed requests, and a maximum number of concurrent requests.
Delete Aged Collected Files: Use this task to delete aged information about collected files from the database. This task also deletes the collected files from the site server folder structure at the selected site. By default, the five most recent copies of collected files are stored on the site server in the Inboxes\sinv.box\FileCol directory.
Delete Aged Computer Association Data: Use this task to delete aged Operating System Deployment computer association data from the database. This information is used as part of completing user state restores.
Delete Aged Delete Detection Data: Use this task to delete aged data from the database that has been created by Extraction Views. By default, Extraction Views are disabled. You only enable them by using the Configuration Manager SDK. Unless Extraction Views are enabled, there is no data for this task to delete.
Delete Aged Device Wipe Record: Use this task to delete aged data about mobile device wipe actions from the database.
Delete Aged Devices Managed by the Exchange Server Connector: Use this task to delete aged data about mobile devices that are managed by using the Exchange Server connector. This data is deleted according to the interval that is configured for the Ignore mobile devices that are inactive for more than (days) option on the Discovery tab of the Exchange Server connector properties.
Delete Aged Discovery Data: Use this task to delete aged discovery data from the database. This data can include records that result from heartbeat discovery, network discovery, and Active Directory Domain Services discovery methods (System, User, and Group). This task will also remove aged devices marked as decommissioned. When this task runs at a site, data associated with that site is deleted, and those changes replicate to other sites.
Delete Aged Distribution Point Usage Data: Use this task to delete from the database aged data for distribution points that has been stored longer than a specified time.
Delete Aged Endpoint Protection Health Status History Data: Use this task to delete aged status information for Endpoint Protection from the database.
Delete Aged Enrolled Devices: Beginning with the update for 1602, this task is disabled by default. You can use this task to delete from the site database the aged data about mobile devices that haven’t reported any information to the site for a specified time.
Delete Aged Inventory History: Use this task to delete inventory data that has been stored longer than a specified time from the database.
Delete Aged Log Data: Use this task to delete aged log data that is used for troubleshooting from the database. This data isn’t related to Configuration Manager component operations.
Delete Aged Notification Task History: Use this task to delete information about client notification tasks from the site database when it hasn’t been updated for a specified time.
Delete Aged Replication Summary Data: Use this task to delete aged replication summary data from the site database when it hasn’t been updated for a specified time.
Delete Aged Passcode Records: Use this task at the top-level site of your hierarchy to delete aged Passcode Reset data for Android and Windows Phone devices. Passcode Reset data is encrypted, but does include the PIN for devices. By default, this task is enabled and deletes data that is older than one day.
Delete Aged Replication Tracking Data: Use this task to delete aged data about database replication between Configuration Manager sites from the database. When you change the configuration of this maintenance task, the configuration applies to each applicable site in the hierarchy.
Delete Aged Software Metering Data: Use this task to delete aged data for software metering that has been stored longer than a specified time from the database.
Delete Aged Software Metering Summary Data: Use this task to delete aged summary data for software metering that has been stored longer than a specified time from the database.
Delete Aged Status Messages: Use this task to delete aged status message data as configured in status filter rules from the database.
Delete Aged Threat Data: Use this task to delete aged Endpoint Protection threat data that has been stored longer than a specified time from the database.
Delete Aged Unknown Computers: Use this task to delete information about unknown computers from the site database when it hasn’t been updated for a specified time.
Delete Aged User Device Affinity Data: Use this task to delete aged User Device Affinity data from the database.
Delete Aged CMPivot Results: Use this task to delete from the site database aged information from clients in CMPivot queries.
Delete Aged Cloud Management Gateway Traffic Data : Use this task to delete from the site database all aged data about the traffic that passes through the cloud management gateway. This data includes:
- The number of requests
- Total request bytes
- Total response bytes
- Number of failed requests
- Maximum number of concurrent requests
Delete Expired MDM Bulk Enroll Package Records: Use this task to delete old Bulk Enrollment certificates and corresponding profiles after the enrollment certificate has expired.
Delete Inactive Client Discovery Data: Use this task to delete discovery data for inactive clients from the database. Clients are marked as inactive when the client is flagged as obsolete and by configurations that are made for client status.
This task operates only on resources that are Configuration Manager clients. It’s different than the Delete Aged Discovery Data task, which deletes any aged discovery data record. When this task runs at a site, it removes the data from the database at all sites in a hierarchy.
When it’s enabled, configure this task to run at an interval greater than the Heartbeat Discovery schedule. This enables active clients to send a Heartbeat Discovery record to mark their client record as active so this task doesn’t delete them.
Delete Obsolete Alerts: Use this task to delete expired alerts that have been stored longer than a specified time from the database.
Delete Obsolete Client Discovery Data: Use this task to delete obsolete client records from the database. A record that is marked as obsolete has usually been replaced by a newer record for the same client. The newer record becomes the client’s current record.
Delete Obsolete Forest Discovery Sites and Subnets: Use this task to delete data about Active Directory sites, subnets, and domains that haven’t been discovered by the Active Directory Forest Discovery method in the last 30 days. This removes the discovery data, but doesn’t affect boundaries that are created from this discovery data
Delete Orphaned Client Deployment State Records: Use this task to periodically purge the table that contains client deployment state information. This task will clean up records associated with obsolete or decommissioned devices.
Delete Unused Application Revisions: Use this task to delete application revisions that are no longer referenced.
Evaluate Collection Members: You configure the Collection Membership Evaluation as a site component.
Monitor Keys: Use this task to monitor the integrity of the Configuration Manager database primary keys. A primary key is a column (or a combination of columns) that uniquely identifies one row and distinguishes it from any other row in a Microsoft SQL Server database table.
Rebuild Indexes: Use this task to rebuild the Configuration Manager database indexes. An index is a database structure that is created on a database table to speed up data retrieval. For example, searching an indexed column is often much faster than searching a column that isn’t indexed.
Summarize Installed Software Data: Use this task to summarize the data for installed software from multiple records into one general record. Data summarization can compress the amount of data that is stored in the Configuration Manager database.
Summarize Software Metering File Usage Data: Use this task to summarize the data from multiple records for software metering file usage into one general record. Data summarization can compress the amount of data that is stored in the Configuration Manager database.
Summarize Software Metering Monthly Usage Data: Use this task to summarize the data from multiple records for software metering monthly usage into one general record. Data summarization can compress the amount of data that is stored in the Configuration Manager database.
Update Application Available Targeting: Use this task to have Configuration Manager recalculate the mapping of policy and application deployments to resources in collections. When you deploy policy or applications to a collection, Configuration Manager creates an initial mapping between the objects that you deploy and the collection members.
These mappings are stored in a table for quick reference. When a collections membership changes, these stored mappings are updated to reflect those changes. However, it’s possible for these mappings to fall out of sync. For example, if the site fails to properly process a notification file, that change might not be reflected in a change to the mappings. This task refreshes that mapping based on the current collection membership.
Update Application Catalog Tables: Use this task to synchronize the Application Catalog website database cache with the latest application information. When you change the configuration of this maintenance task, the configuration applies to all primary sites in the hierarchy.
SCCM Installation Guide Part 23 – Backup your Server after SCCM Installation
In the last part of this SCCM Installation Guide, we will setup automation backup for Configuration Manager sites by scheduling the predefined Backup Site Server maintenance task. This task has the following features:
- Runs on a schedule
- Backs up the site database
- Backs up specific registry keys
- Backs up specific folders and files
- Backs up the CD.Latest folder
Plan to run the default site backup task at a minimum of every five days. This schedule is because Configuration Manager uses a SQL Server change tracking retention period of five days.
To simplify the backup process, you can create an AfterBackup.bat file. This script automatically runs post-backup actions after the backup task is completed successfully. Use the AfterBackup.bat file to archive the backup snapshot to a secure location. You can also use the AfterBackup.bat file to copy files to your backup folder, or to start other backup tasks.
Site backup status information is written to the Smsbkup.log file. This file is created in the destination folder that you specify in the properties of the Backup Site Server maintenance task.
To enable the site backup maintenance task
- Go to the Administration workspace, expand Site Configuration
- Click Site Maintenance Tasks in the ribbon.
- Select the Backup Site Server task, and click Edit.
- Select the option to Enable this task. Click Set Paths to specify the backup destination. You have the following options:
- Local drive on site server for site data and database: Specifies that the task stores the backup files for the site and site database in the specified path on the local disk drive of the site server. Create the local folder before the backup task runs. The Local System account on the site server must have Write NTFS file permissions to the local folder for the site server backup. The Local System account on the computer that’s running SQL Server must have Write NTFS permissions to the folder for the site database backup.
- Network path (UNC name) for site data and database: Specifies that the task stores the backup files for the site and site database in the specified network path. Create the share before the backup task runs. The computer account of the site server must have Write NTFS and share permissions to the shared network folder. If SQL Server is installed on another computer, the computer account of the SQL Server must have the same permissions.
- Local drives on site server and SQL Server: Specifies that the task stores the backup files for the site in the specified path on the local drive of the site server. The task stores the backup files for the site database in the specified path on the local drive of the site database server. Create the local folders before the backup task runs. The computer account of the site server must have Write NTFS permissions to the folder that you create on the site server. The computer account of the SQL Server must have Write NTFS permissions to the folder that you create on the site database server. This option is available only when the site database isn’t installed on the site server.
Verify that the Backup Site Server maintenance task is running
- Check the timestamp on the files
in the backup destination folder that the task created. Verify that the
timestamp updates to the time when the task was last scheduled to run.
- Go to the Component
Status node of the Monitoring workspace. Review the status messages for SMS_SITE_BACKUP. When the site backup completes successfully, you see message ID 5035. This message indicates that the site backup was completed without any errors. - When you configure the backup task to create an alert when it fails, look for backup failure alerts in the Alerts node of the Monitoring workspace.
- Open Windows Explorer on the site server and browse to
<ConfigMgrInstallationFolder>\Logs. Review Smsbkup.log for warnings and errors. When site backup completes successfully, the log showsBackup completedwith message IDSTATMSG: ID=5035.
- Go to the Component
SQL Backup
It’s also possible to backup your SCCM server using SQL Maintenance task. The biggest advantage of this method is that it offers compression. Please read this blog post if you prefer this method. Be aware that this backup method doesn’t backup the CD.Latest folder which is important. You could also have both backup methods enabled if needed.
More SCCM Ressources
System Center Dudes offers numerous configuration guides and custom reports to ease your Configuration Manager day-to-day operations.
Consult our product page to see the complete list.
That conclude this SCCM Installation Guide, we hope that it was hepful. Feel free to leave your comment in the section below.
Share
Get the latest insights and exclusive content delivered to your inbox


Fiernaq
10.08.2021 AT 08:28 AMChongmun
07.16.2021 AT 02:27 AMAnnaei
05.31.2021 AT 04:26 AMhaverland389
05.27.2021 AT 07:37 AMAlan_Peery
05.19.2021 AT 07:44 AMJonathan Lefebvre
05.26.2021 AT 02:32 PMsaad9837
04.22.2021 AT 02:29 AMmitchawkes
01.26.2021 AT 12:14 PMmaelstrm
12.02.2020 AT 04:26 PMJonathan Lefebvre
12.02.2020 AT 05:11 PMsir_timbit
10.16.2020 AT 10:42 AMJonathan Lefebvre
11.02.2020 AT 09:05 AMDaniel Schindler
10.02.2020 AT 04:09 PMJonathan Lefebvre
11.02.2020 AT 08:59 AMsir_timbit
09.22.2020 AT 05:44 PMrhytepadar
09.02.2020 AT 07:06 AMJonathan Lefebvre
09.15.2020 AT 04:59 PMrishibp
07.11.2020 AT 11:08 AMBo
07.02.2020 AT 04:41 AMJonathan Lefebvre
11.02.2020 AT 08:49 AMjorgesbatista
05.10.2020 AT 10:05 AMsituationistapp
04.25.2020 AT 11:34 AM