
SCCM Remove Computer from Collection after OSD
Founder of System Center Dudes. Based in Montreal, Canada, Senior Microsoft SCCM Consultant, 8 times Enterprise Mobility MVP. Working in the industry since 1999. His specialization is designing, deploying and configuring SCCM, mass deployment of Windows operating systems, Office 365 and Intune deployments.

Benoit Lecours
PresidentTable of Content


Get the latest insights and exclusive content delivered to your inbox
Share


This post is a step-by-step guide on how to remove computers from the collection after OSD.
If you’re using specific collections for your OSD deployments you certainly know that the collections are not emptied automatically. After a couple of weeks, you’ll end up with a collection full of systems. The bad news is that there’s nothing built-in in the product, the good news is that our friend PowerShell can do this dirty job. To run the script :
- The imported module needs to be trusted
- The script must run in x86 mode
- The computer account must have proper permission (SCCM and DCOM)
SCCM Remove Collection OSD – Permission
- You need to add your primary site computer account as a “Full Administrator” in SCCM
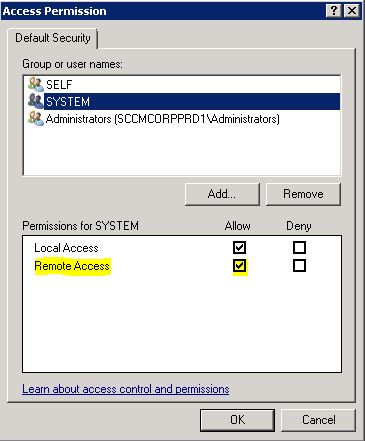
- You need to add the “System” account “Remote Access” right in DCOM permission
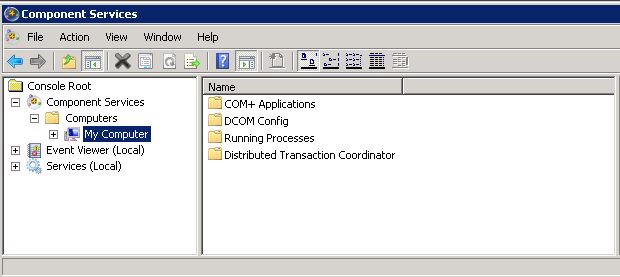
- Launch “dcomcnfg.exe”
- Navigate to Component Services / Computer / My Computers (Right-Click) / Properties
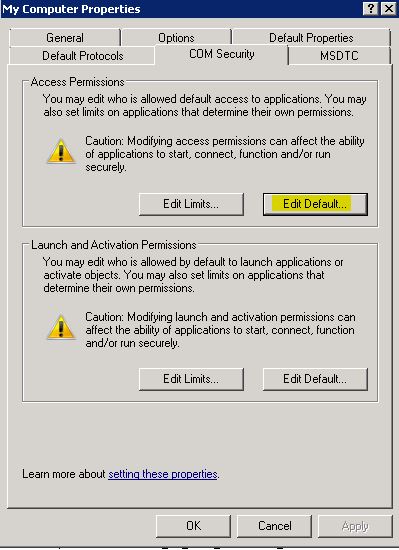
- Edit Default in the Access Permission section
- Select “SYSTEM” and give “Allow” rights for “Remote Access”
Save the following script locally on your server. (Thanks to http://sccmfaq.wordpress.com/ for the script)
#Call example:
#C:\Windows\SysWOW64\WindowsPowerShell\v1.0\powershell.exe -ExecutionPolicy ByPass RemoveFromCollection_1.0.ps1 %msgsc %msgsys
#%msgsc = Site-Code
#%msgsys = ComputerName

#Set required Input Parameters
Param(
[string]$SiteCode,
[string]$ComputerName
)

#--------------------
#User defined variables here

$CollectionIDs = "S0100025;S010002C;S010001E"
$bEventlogEntry = "1"
$bClearPXE = "0"

#End user defined variables
#--------------------

If($SiteCode -and $ComputerName){}
else{
Write-Host "Required Input is missing! Omit SiteCode and Computername."
exit
}

#$SiteCode = "S01"
#$ComputerName = "rudolph"

#Check for 32-bit execution
If ($env:Processor_Architecture -ne "x86") {
write-host "Script has to be executed in x86 mode!"
exit
}

#Import SCCM Module
$ModuleName = (get-item $env:SMS_ADMIN_UI_PATH).parent.FullName + "ConfigurationManager.psd1"
Import-Module $ModuleName
CD $SiteCode":"

#Remove Client from collections
#Get collection id array
$aCollections = ($CollectionIDs).Split(";")

#check for each collection if a directmember chip exist, and remove it
foreach($Collection in $aCollections){
If((Get-CMDeviceCollectionDirectMembershipRule -CollectionId $Collection -ResourceName $ComputerName).count -eq 1) {

#Write Eventlog entry
If($bEventlogEntry -eq 1){
write-eventlog -logname Application -source "SMS Client" -eventID 3001 -entrytype Information -message "Computer $ComputerName will be removed from Collection $Collection" -category 1 -rawdata 10,20
}

#Remove Client from collection
Remove-CMDeviceCollectionDirectMembershipRule -CollectionId $Collection -ResourceName $ComputerName -Force

#Clear PXE Flag
If($bClearPXE -eq 1){
Clear-CMPxeDeployment -DeviceName $ComputerName
}
}
}
Now, Create the Status Filter Rule:
- Open the SCCM Console
- Go to Administration \ Site \ Status Filter Rules (Top ribbon)
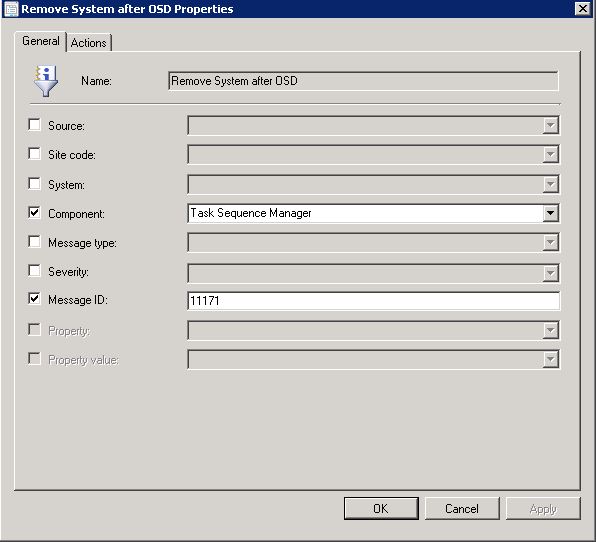
- Enter the following values in “Status Filter Rules”
- Name: Remove Client after OSD
- Component: Task Sequence Manager
- Message ID: 11171
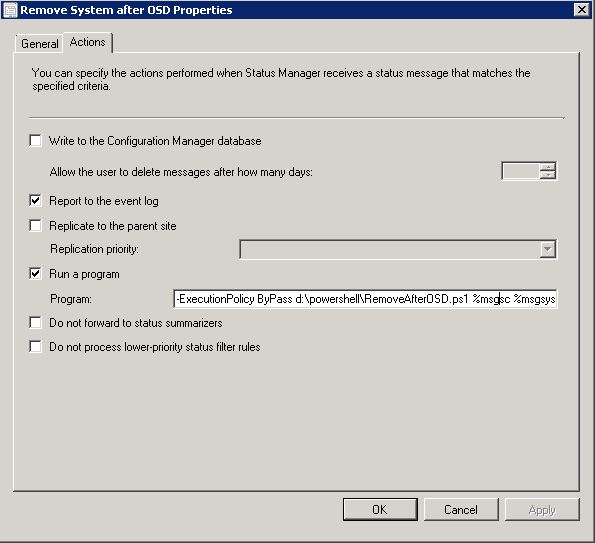
In the action tab :
- Check Report to the event log – This will be helpful for troubleshooting.
- Check the Run a program option as follow: C:Windows\SysWOW64\WindowsPowerShellv1.0\powershell.exe -ExecutionPolicy ByPass “<path to your script>NameOfTheScript.ps1 %msgsc %msgsys
** See update at the end of the post if running Windows 2012 R2 and SCCM 2012 R2 ** It’s now time to launch a task sequence and test the rule.
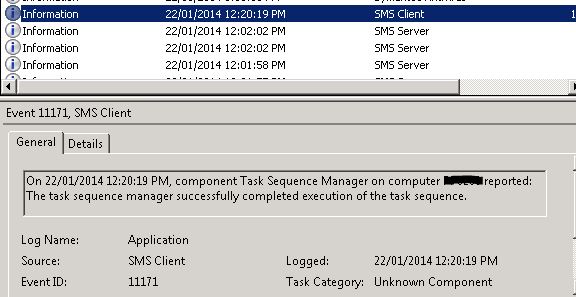
If done right you will see an event log when the SCCM OSD deployment is completed.
- Extra hint: Be sure to trust the SCCM PowerShell Module. Start Powershell from the console and answer “A” to trust the module

Extra hint #2 :
If the script doesn’t run, you can troubleshoot by launching powershell with SYSTEM rights from the console. To do so you must use psexec : psexec -i -s D:\SCCM\AdminConsole\bin\Microsoft.ConfigurationManagement.exe
Once the console opens, launch Powershell. This shell will have the SYSTEM rights. Try launching your script from there and monitor if your computer gets removed from the collection.
Update SCCM R2 (2014/03/21): If you are running Windows 2012 R2 and SCCM R2, a slight modifications must be made to the script in order to work. The script must run in x64. SCCM PowerShell cmdlet now supports it : http://technet.microsoft.com/library/dn236347.aspx
- Delete the “Check for 32bits execution” section of the script
- Call the 64 bits Powershell in your filter rule (in System32 instead of SYSWOW64)
- Add the “-file” parameter to the command
C:Windows\System32\WindowsPowerShellv1.0\powershell.exe -ExecutionPolicy ByPass -file YourScriptPathRemoveFromCollection_1.0.ps1 %msgsc %msgsys
Share
Get the latest insights and exclusive content delivered to your inbox


Hasan Ördek
10.02.2019 AT 04:03 AM